DIY Stacked Kitchen Cabinets
After 2 years of living in our new home, I can finally say my dream kitchen is complete! I’ve been dreaming of adding DIY stacked kitchen cabinets since the day we decided to build this house and I’m so happy to finally be sharing the finished product with you guys! (All the sources, products, and tools I used are linked at the bottom of this post!)

Make sure you check out my DIY Stacked Kitchen Cabinets post on the Home Depot Blog HERE!

When we built our home we were overwhelmed with the amount of design choices that needed to be made and not to mention the price tags associated with the upgrades we were looking for. I knew my dream kitchen consisted of having stacked cabinets throughout, however our budget didn’t agree with that dream. But when I learned that our builder supplied Timberlake cabinets (which is sold through the Home Depot as American Woodmark) I knew I could purchase them at a later date to save money!
The BEFORE

This is our house the day we closed and it became ours. I was head over heels in love, but knew there was so much more I wanted to add to reflect my style. All I saw was a blank canvas with tons of potential! Shortly after we moved in I added pendant lights, a backsplash, decorative cabinet panels, and hardware which you can read all about here. I also recently wrote a post here where I went into more detail about the plans for my DIY stacked kitchen cabinets if you need to get caught up before I dive right into how I actually completed them.
Step 1: Remove Crown Molding

I removed the crown molding from my cabinets as carefully as possible since I wanted to reuse it on the new stacked cabinets at the end. I scored the caulk the builder placed behind the crown with a razor blade and gently pried the crown away from the cabinets using only my hands. Fortunately there were only a few small pin nail holes in the fronts of the cabinets that I patched with white wood filler and the smallest dab of white paint I had in the garage.

The filler pieces you see above the cabinet in the photo actually had to be removed, and trimmed down with my table saw. I needed an even surface to set the new cabinets on and that particular filler was about an inch too tall (the crown was covering it previously).
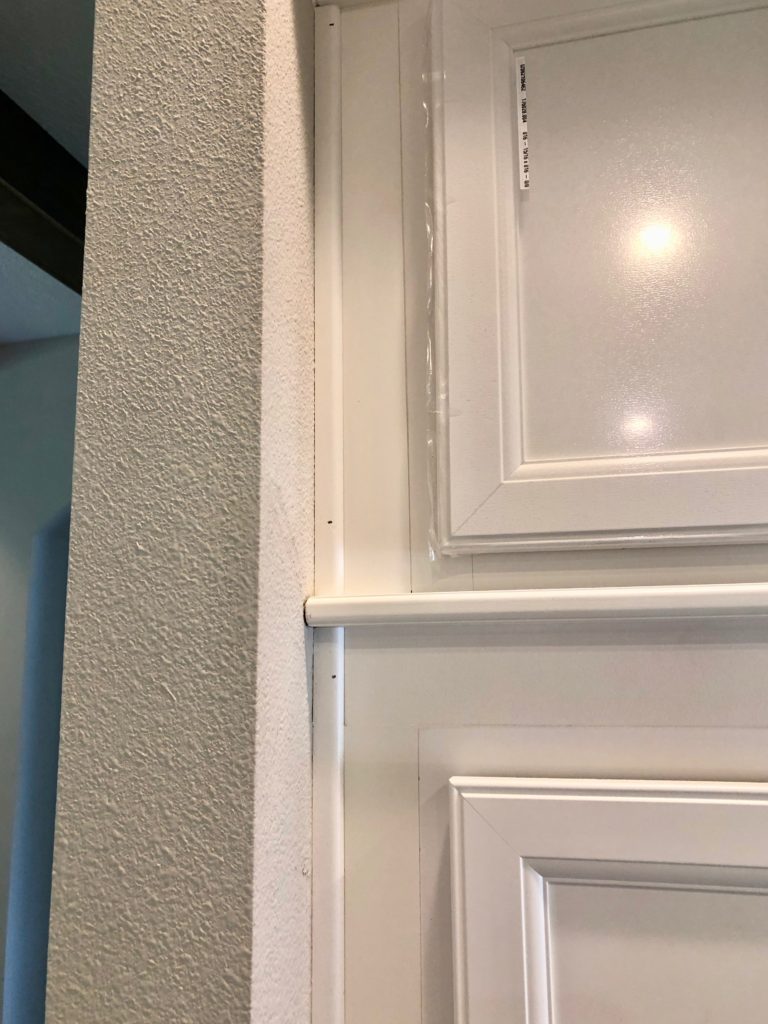
Step 2: Add Trim

Since I am copying the 2 stacked cabinets that our builder installed in the center of my kitchen, I needed to use the same trim that went between the lower and upper stacked cabinets. I’m not sure if this is standard or protocol for adding stacked cabinets but I actually don’t mind the look at all! I’ve seen it both ways so I’m sure it’s a matter of preference. I let the trim overhang the front about an inch and only slightly on the sides. You can also see from this photo that I built up the backside of the cabinets against the wall. If I hadn’t added this height back there, the new stacked cabinets would not have had an even surface to sit on.

I glued the trim on the underneath side to the top of the cabinets and secured with a couple small brad nails. I clamped the corners while the glue dried as I wanted them to be as tight as possible.
Step 3: Set New Cabinets
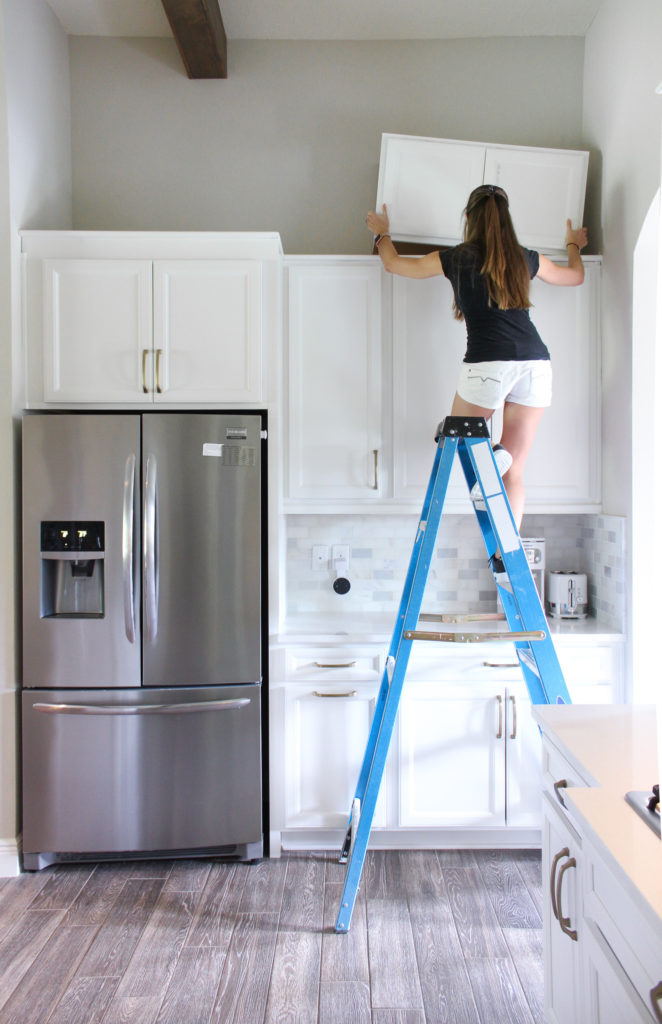
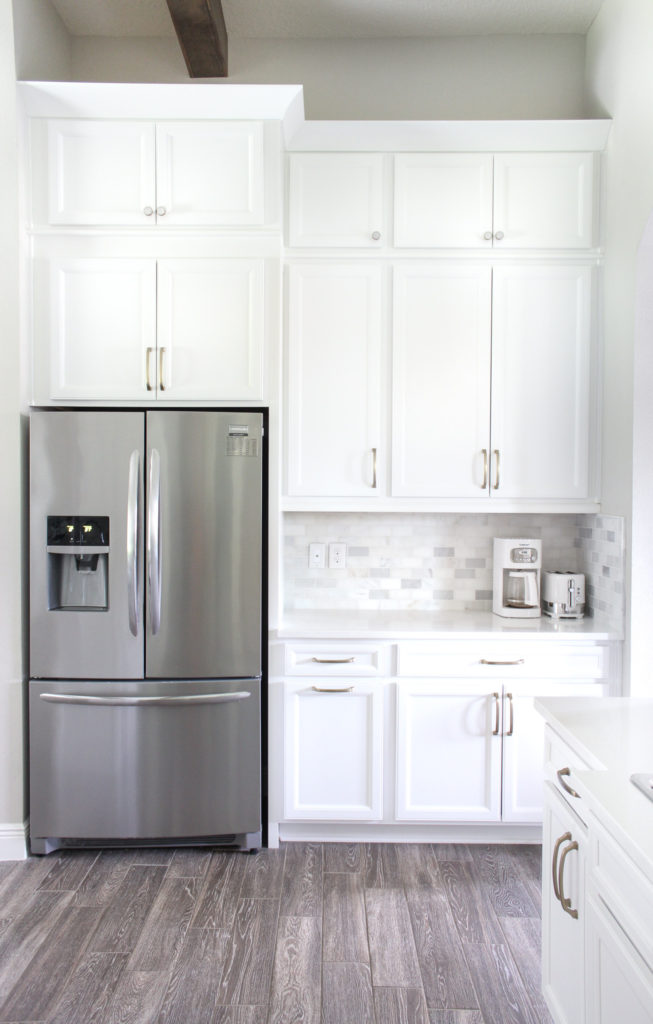
Once the trim was complete the next step was to set all the cabinets in place. I had 6 cabinets in total for both sides of the kitchen. 5 double door cabinets and one single door. Surprisingly they weren’t that heavy!

But the two deeper cabinets over the appliances definitely required an extra set of hands due to their size! I rarely ever ask for help (and honestly hate to) but there was no way I was doing this alone.

I did not secure the cabinets in any way until after the fillers were completed in the next step below.
Step 4: Add Fillers

Cabinets almost never fill your space perfectly from wall to wall and therefore require fillers. In my case, I had to add fillers along the wall sides and in the gap between the cabinets seen above.
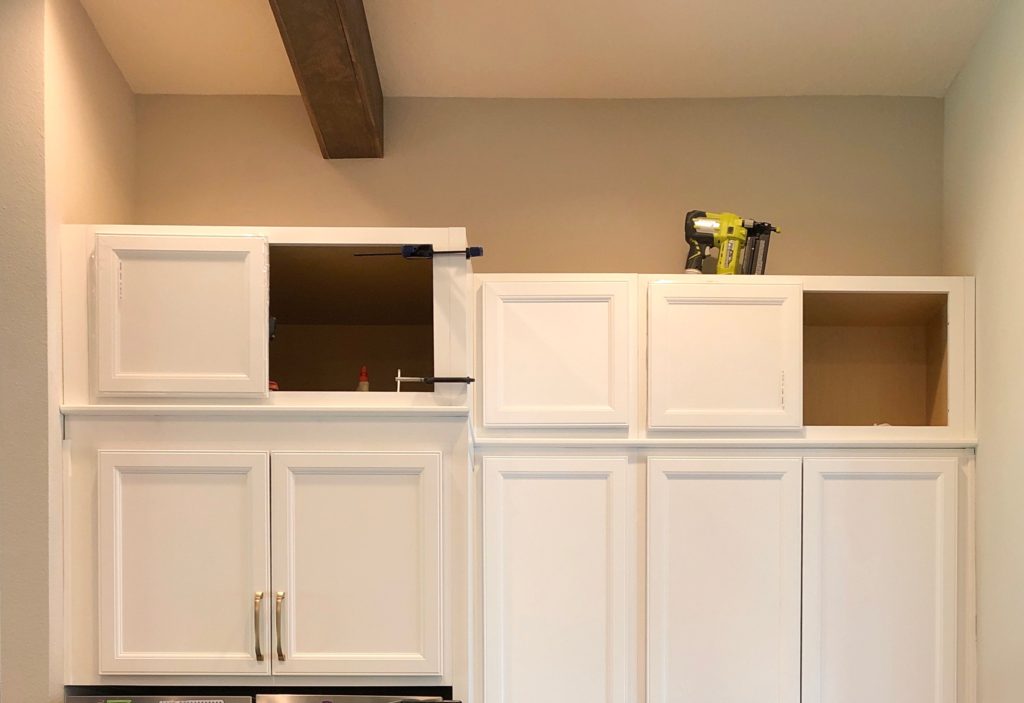
Fillers come in 3-4″ strips that you cut down to fit the space you need. In the photo above you can see a filler on the left and right side against the walls, and the one in the middle being clamped on. I clamped the fillers in place while I drove screws through the inside of the face frames into them. To get the fillers against the walls in, I had to pull the cabinet away from the wall and angle it to fit a clamp in there. This is why I hadn’t anchored the cabinet boxes to the wall yet.

This is when I finally attached the cabinets to the wall using 2.5″ screws into the studs from the tops of the cabinets.
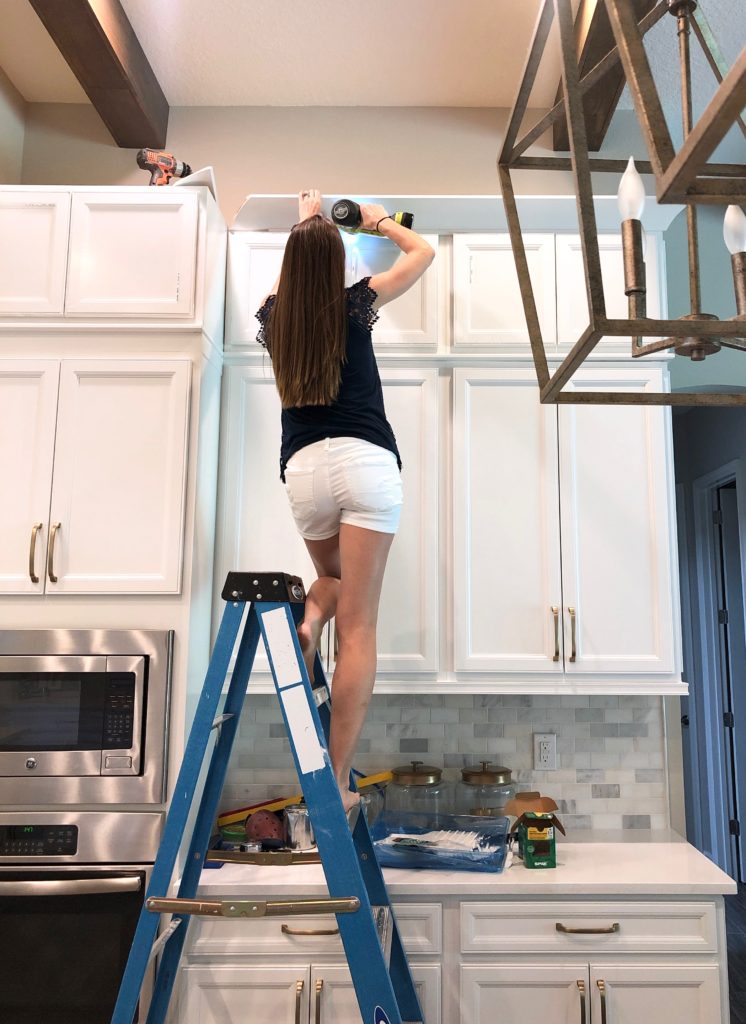
Step 5: Install Crown Molding & Scribe Molding

After all the fillers were in place, I starting putting back up the crown that I removed in step 1. The trick to doing this alone was creating a guide. Since the crown needed to sit 5/8″ above the doors, I cut a scrap piece of wood to 5/8″ thick and placed it above the doors for the crown to rest on. You can see me holding it in the photo above.
I made sure to dry fit all of the pieces of crown before I nailed them in with my nailer. (1.25″ 18 gauge) A couple pieces were a hair too long which I trimmed on my miter saw and one that met a wall was too short so more caulked solved that!
The scribe molding covers any small gaps between the wall and cabinets and just gives an overall finished look. My kitchen had this initially so I ordered more to finish off the sides of the new uppers as well to match everything. I used my nailer of course and filled the holes with wood filler.
Step 6: Add Hardware & Enjoy!

I was terrified to drill holes into my brand new cabinet doors if I’m being honest. Thankfully I remembered I had the Kreg hardware jig in my garage which makes things MUCH less scary and way more accurate! I clamp it in place with this clamp and this is the drill I have used for years.

I chose knobs from wayfair that match the pulls I have in the rest of my kitchen. I love how they coordinate and I now have a variation of knobs and pulls – which I always felt I was lacking before!
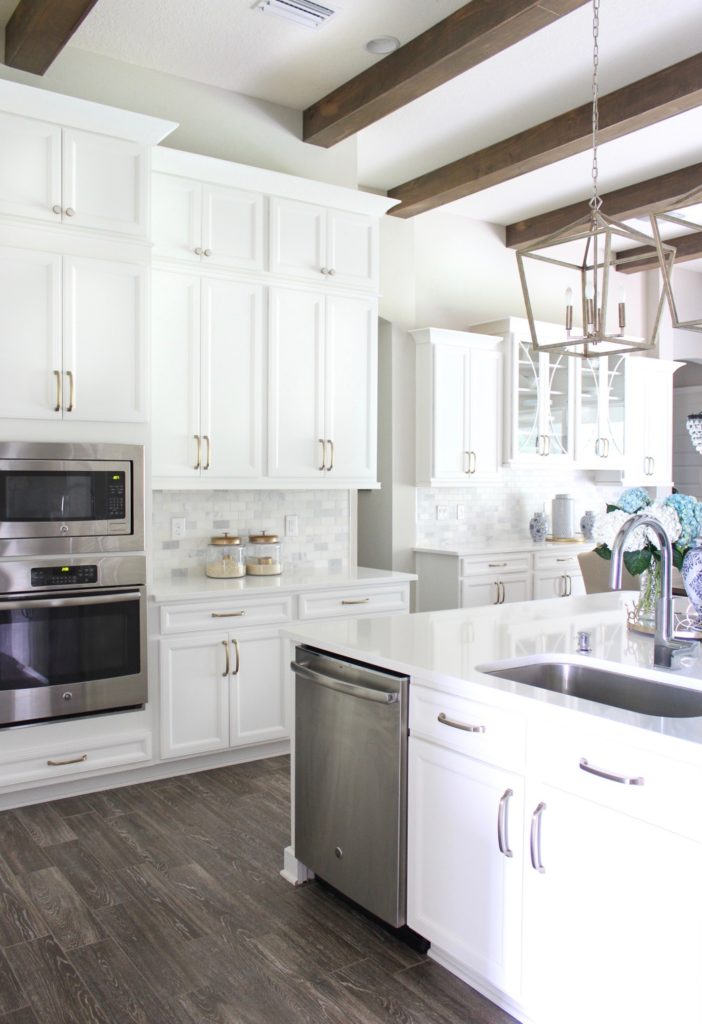
The AFTER


Source Links
Island Pendants (medium, vintage gold)
Barstools (dark gray wash)
Glass cabinet overlay design: myoverlays.com custom order
Cabinet Pulls (6-5/16″ golden champagne)
Cabinet Knobs (golden champagne/frosted)
Ginger jars and gold tray: HomeGoods
Backsplash: 2×4 Honed marble subway Floor & Decor
Cabinet door style: Glen Ellen American Woodmark (linen)
Rice/Oatmeal jars: spray painted the lids
Gold scoops inside the jars
Ceiling Beams: DIY tutorial here
Wall color: Accessible beige by Sherwin Williams
Floors: Porcelain wood look tile – discontinued
Countertops: Cloud white quartz from builder
FAQ:
Q: Why didn’t I add glass to any of the stacked cabinet doors?
A: I already have 2 glass doors flanking the hood and 4 in the adjacent breakfast nook. I didn’t want any more to distract or take away from the others and preferred all solid doors.
Q: How much did this project cost?
A: The new cabinets, trim, and fillers from Home Depot cost right around $1,700.
Q: What paint color are your cabinets?
A: My cabinets are actually not made of wood and are not painted. They are made of a newer material called Duraform and come in a white, cream, and gray.
Q: Are you going to add stacked cabinets to the adjacent breakfast room cabinets?
A: No. They are staggered which already provides interest and I think it looks good as is.
Q: What do you plan on storing in the cabinets?
A: At the moment, nothing. I honestly don’t need the extra storage I just think they look beautiful. Down the road I could see myself hiding Christmas gifts in them or storing seasonal decor.
Q: How tall are your ceilings?
A: They are 12′ throughout our kitchen and main areas. All of the bedrooms are 10′.
Q: Did you use paint to touch up the nail holes?
A: Yes. This was tricky since my cabinets are not a painted color, so I found something as close as I could. I had a standard bright white paint in the garage and also some Dover White by Sherwin Williams. I mixed the two together, used a tiny dot on the nail hole and it was so close you can’t tell.

Flawless!! I love the extra storage and added height. The dusk look is my favorite. Thank you for sharing the details…they will be super handy for future projects =]