DIY Kids Closet Overhaul
By popular demand, I am sharing my kids closet makeovers as quickly as possible. The picture quality isn’t fabulous, but I know you guys won’t mind 😉 If you follow me on Instagram, you saw me document the process of these closets over the past couple weeks in my stories. After posting about them, I received so many inquiries as to where the pieces were from, what sizes I chose, and how I configured them. So I’m here to share all the details and hopefully inspire you to overhaul your closets! I am LOVING the amount of storage and organization they now provide! I was previously dealign with this:
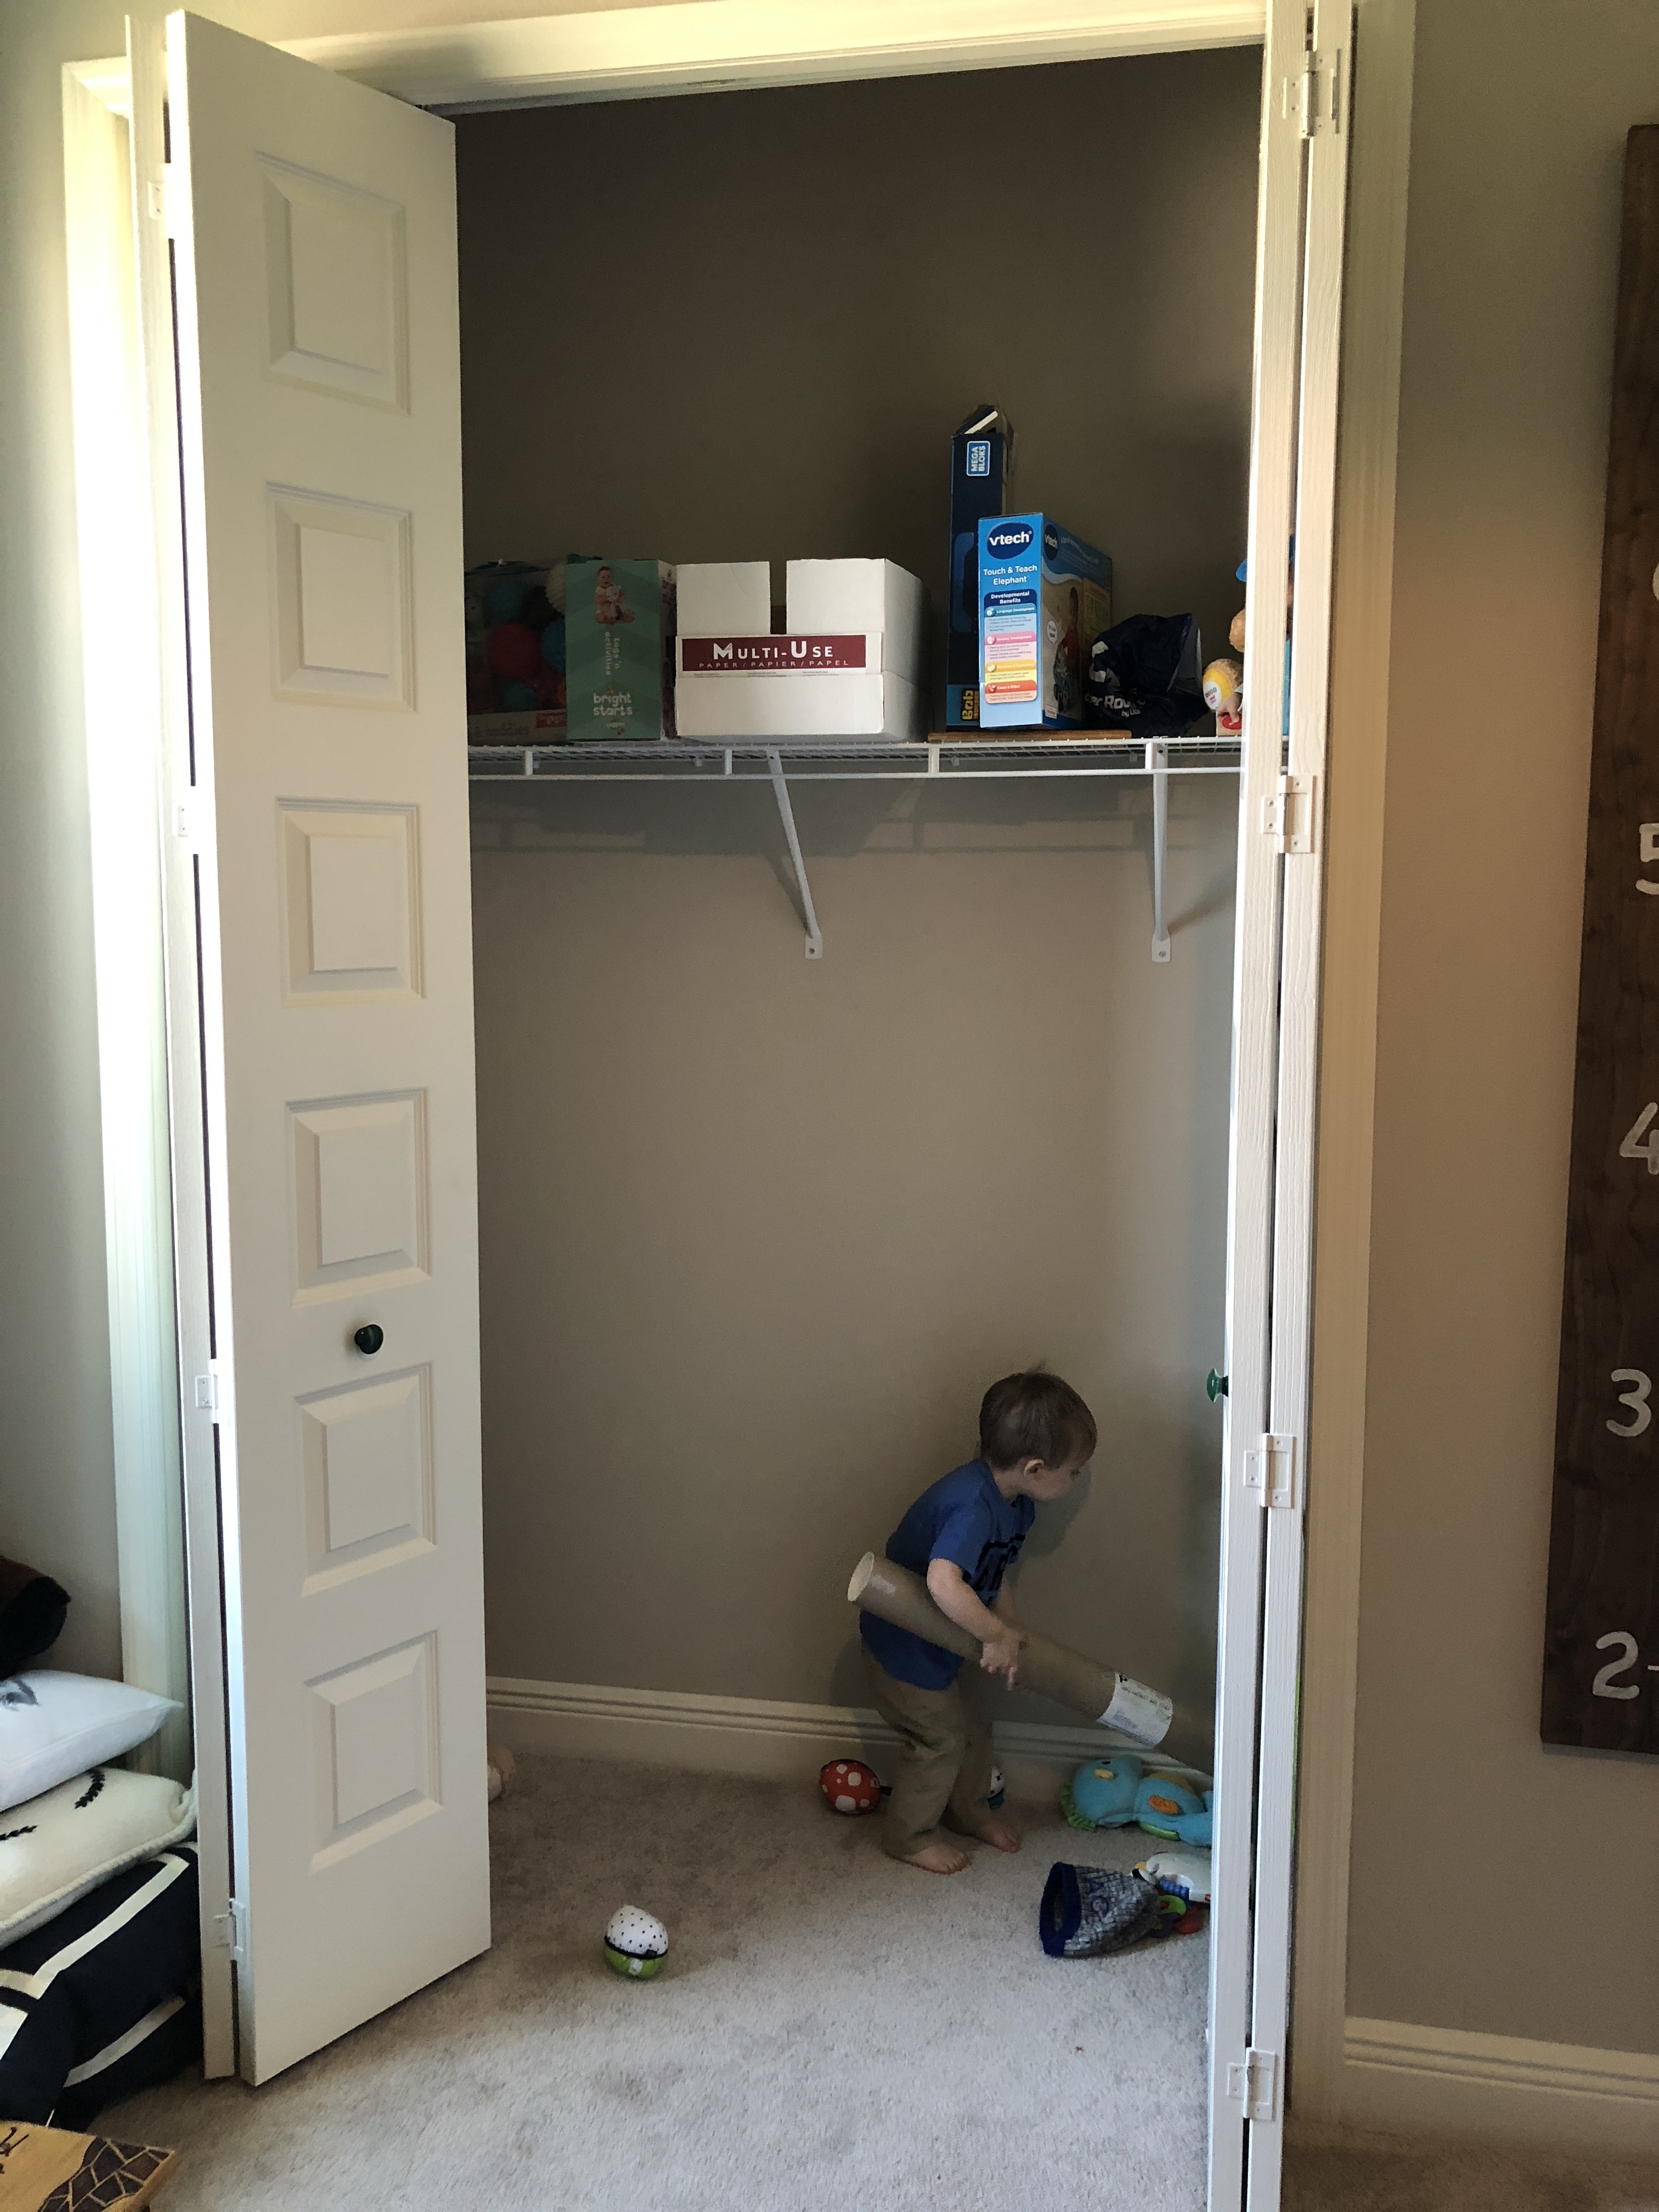
And I mean, what good is that wire rack doing for me or my kids things? It’s gotta go!
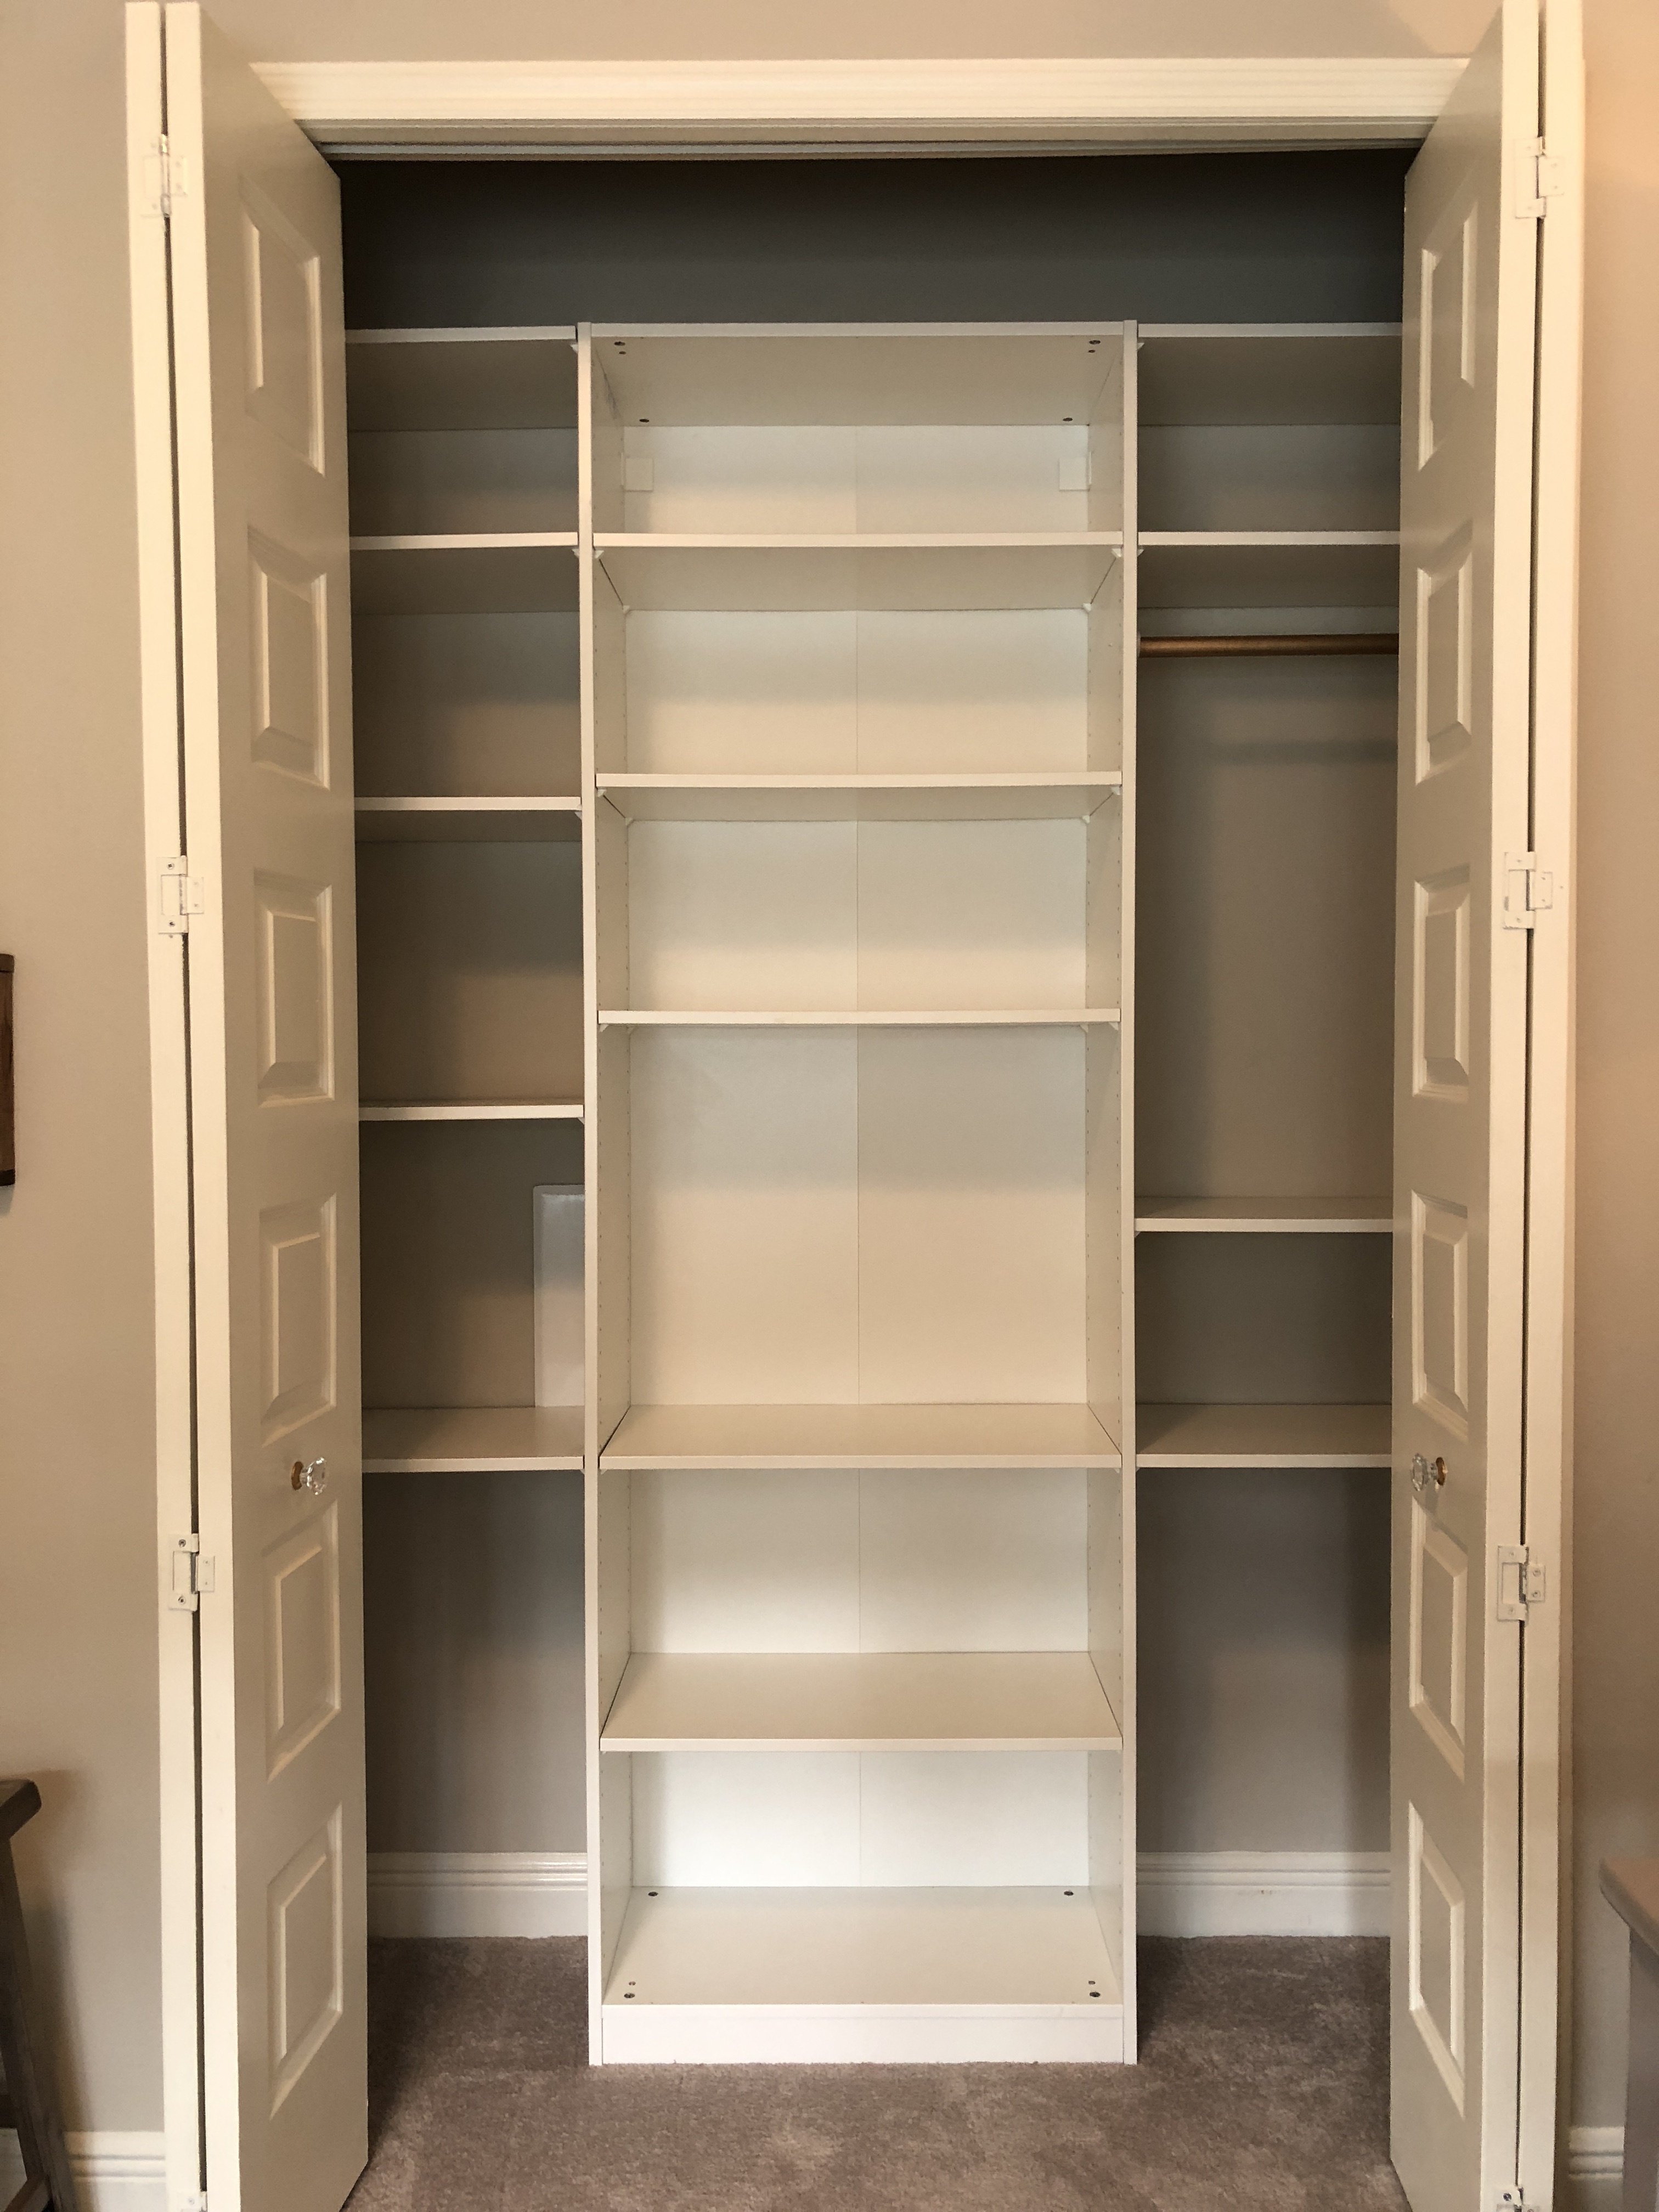
My boys’ closets in our new house are back to back mirror images of each other. They are the same dimensions (24″ deep X 101″ long). A standard bifold door closet is usually around 24″x96″ so these are just slightly longer. If you have been following along for a while, you may remember my nursery closet makeover at my old house. While I loved how it turned out, it wasn’t the most functional thing. I am going to blame that on #firsttimemom problems. There was wayyyy too much hanging space for a little boy, much less a newborn baby! Hanging all the outfits was fun….for the first 5 minutes. Then I realized I needed a LOT more shelving space. For toys. And crap. And things. NOT hanging outfits LOL!
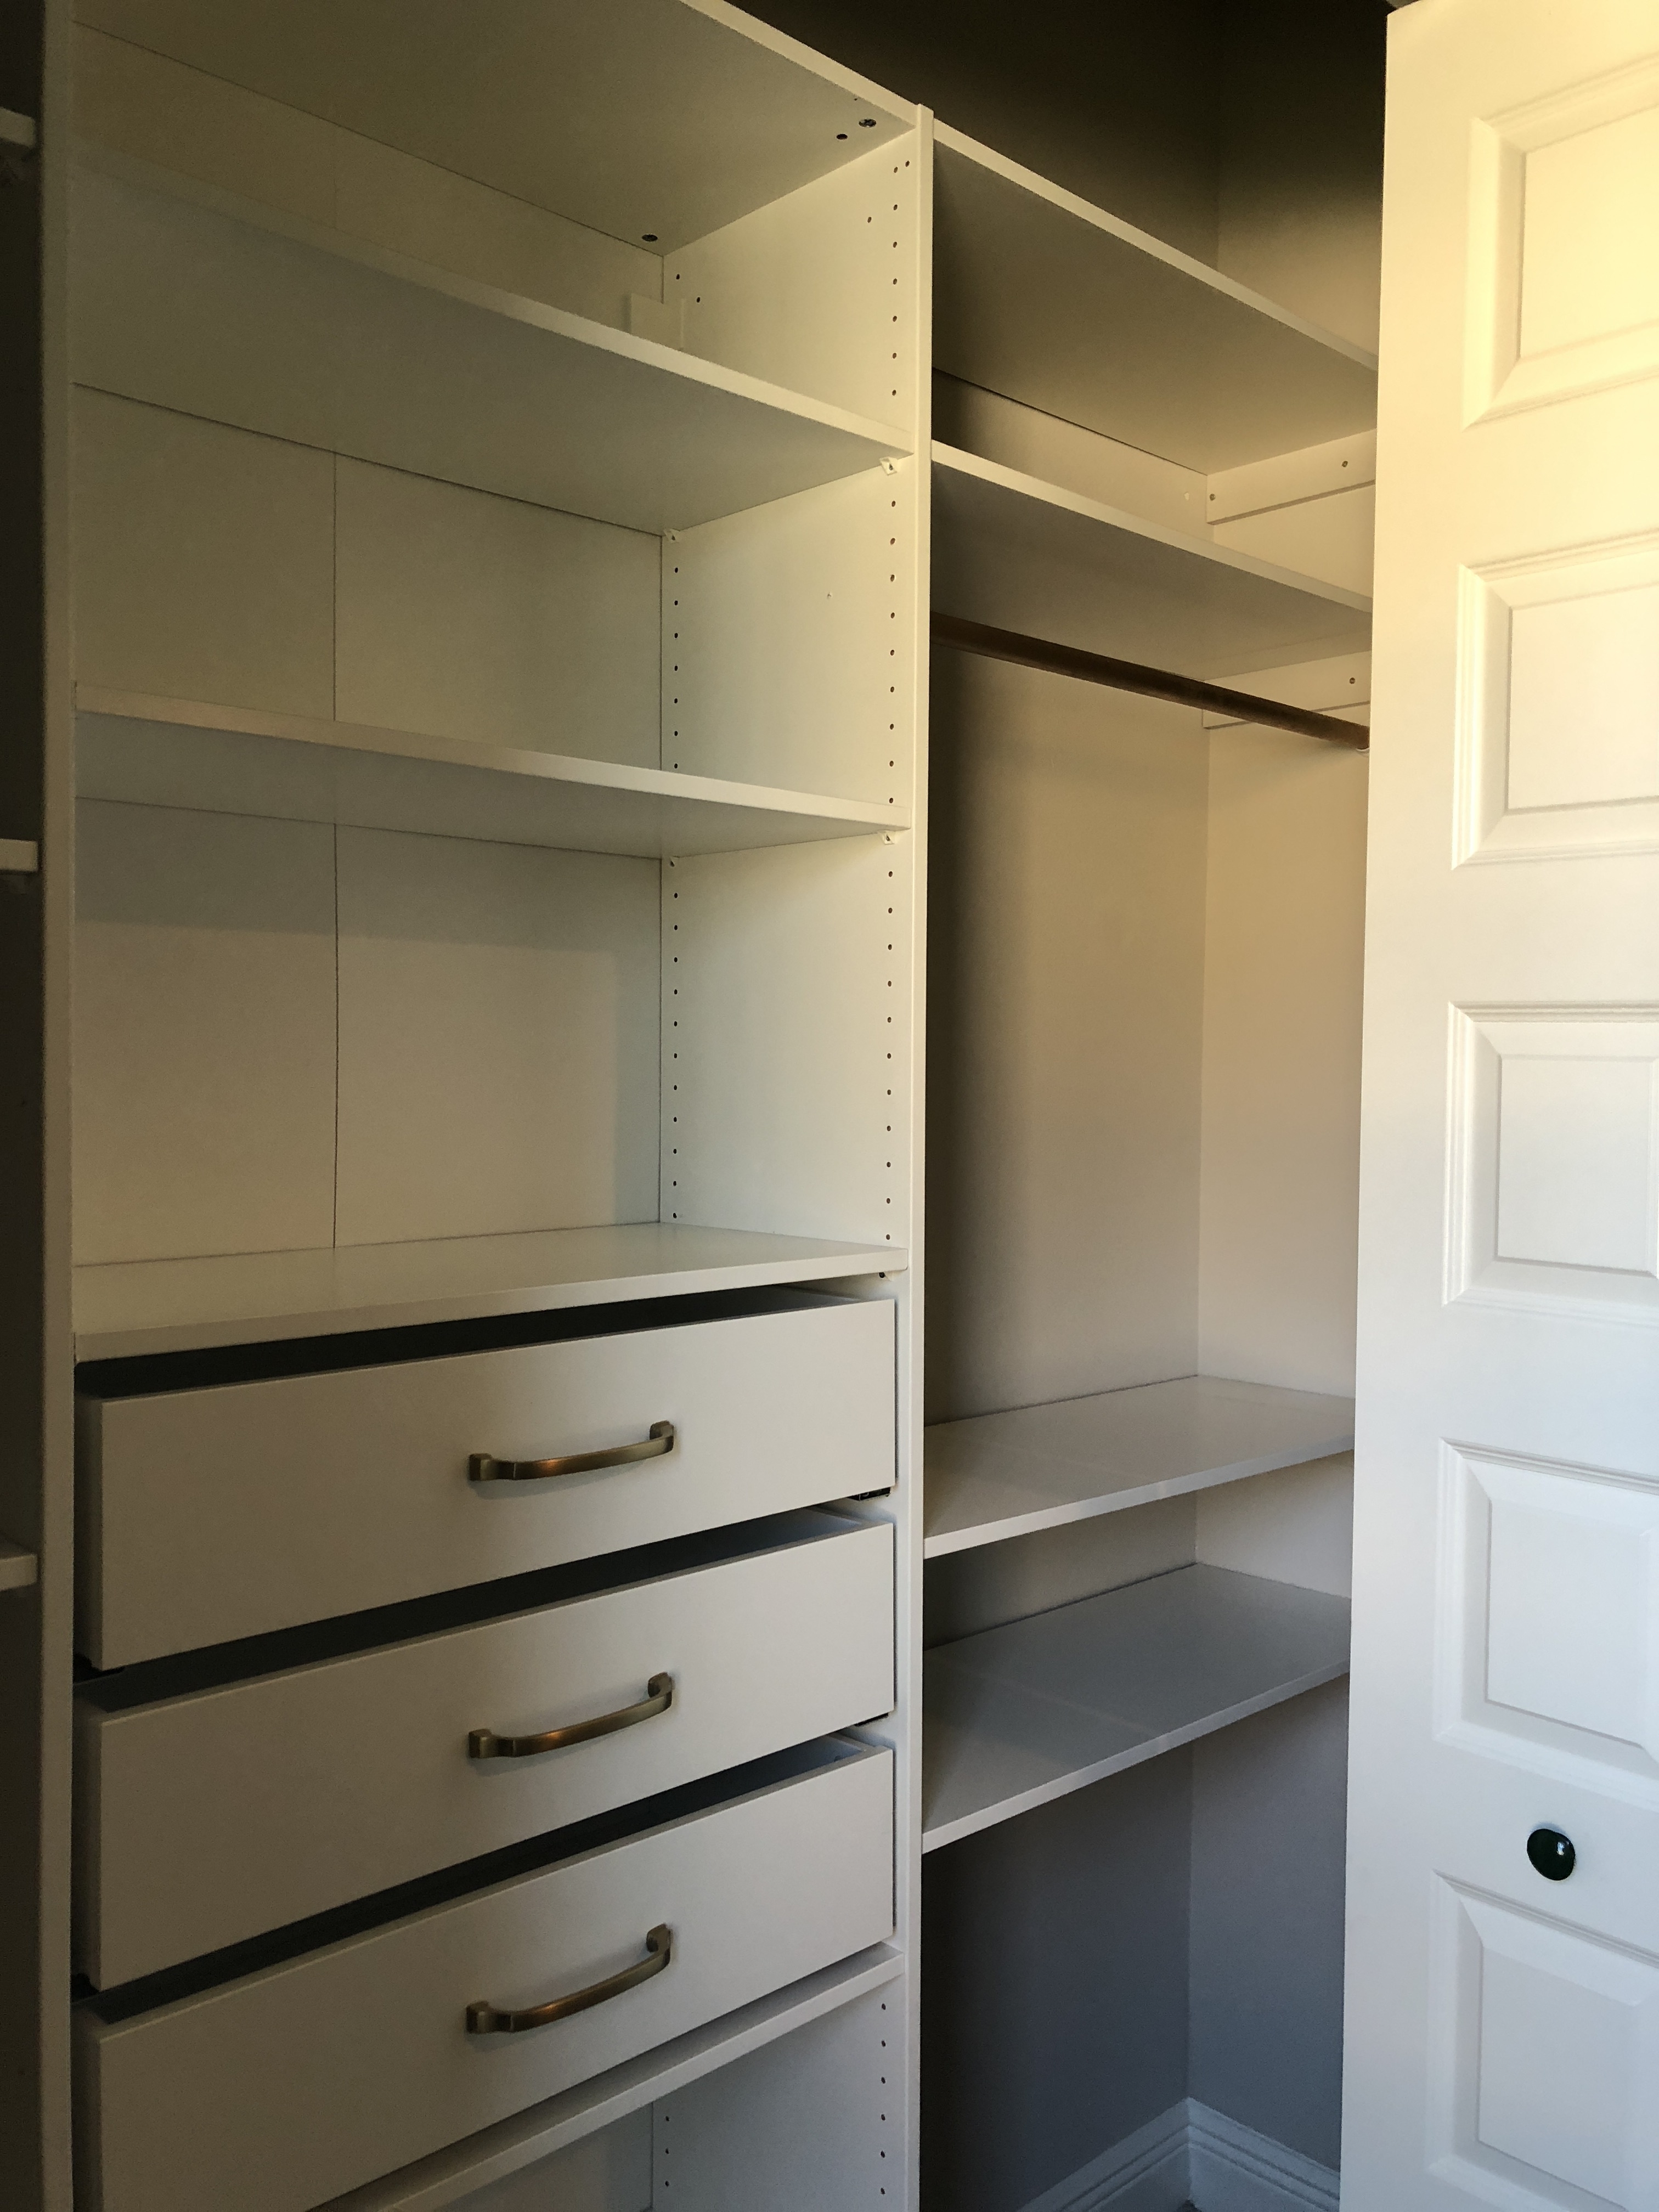
First thing was removing the builder grade wire racks, of course. Then I used the same principle as my old nursery closet and started with the 29″ IKEA PAX unit in the middle of the closet. These PAX units come in 2 different heights, 3 different widths, and 2 different depths. You can add shelves, drawers, and all sorts of other interior organizers to suit your needs. There is usually SOME combination of them to fit almost any closet. For 101″ closet, I technically could have fit one large unit in the middle (39″) and two medium units (29″) on each side for a total of 97″ and used almost all of the space. However, having such a wide unit in the middle, makes it VERY difficult to reach the side units due to the door opening being smaller than the 101″ closet itself. I may or may not know this from trial and error…
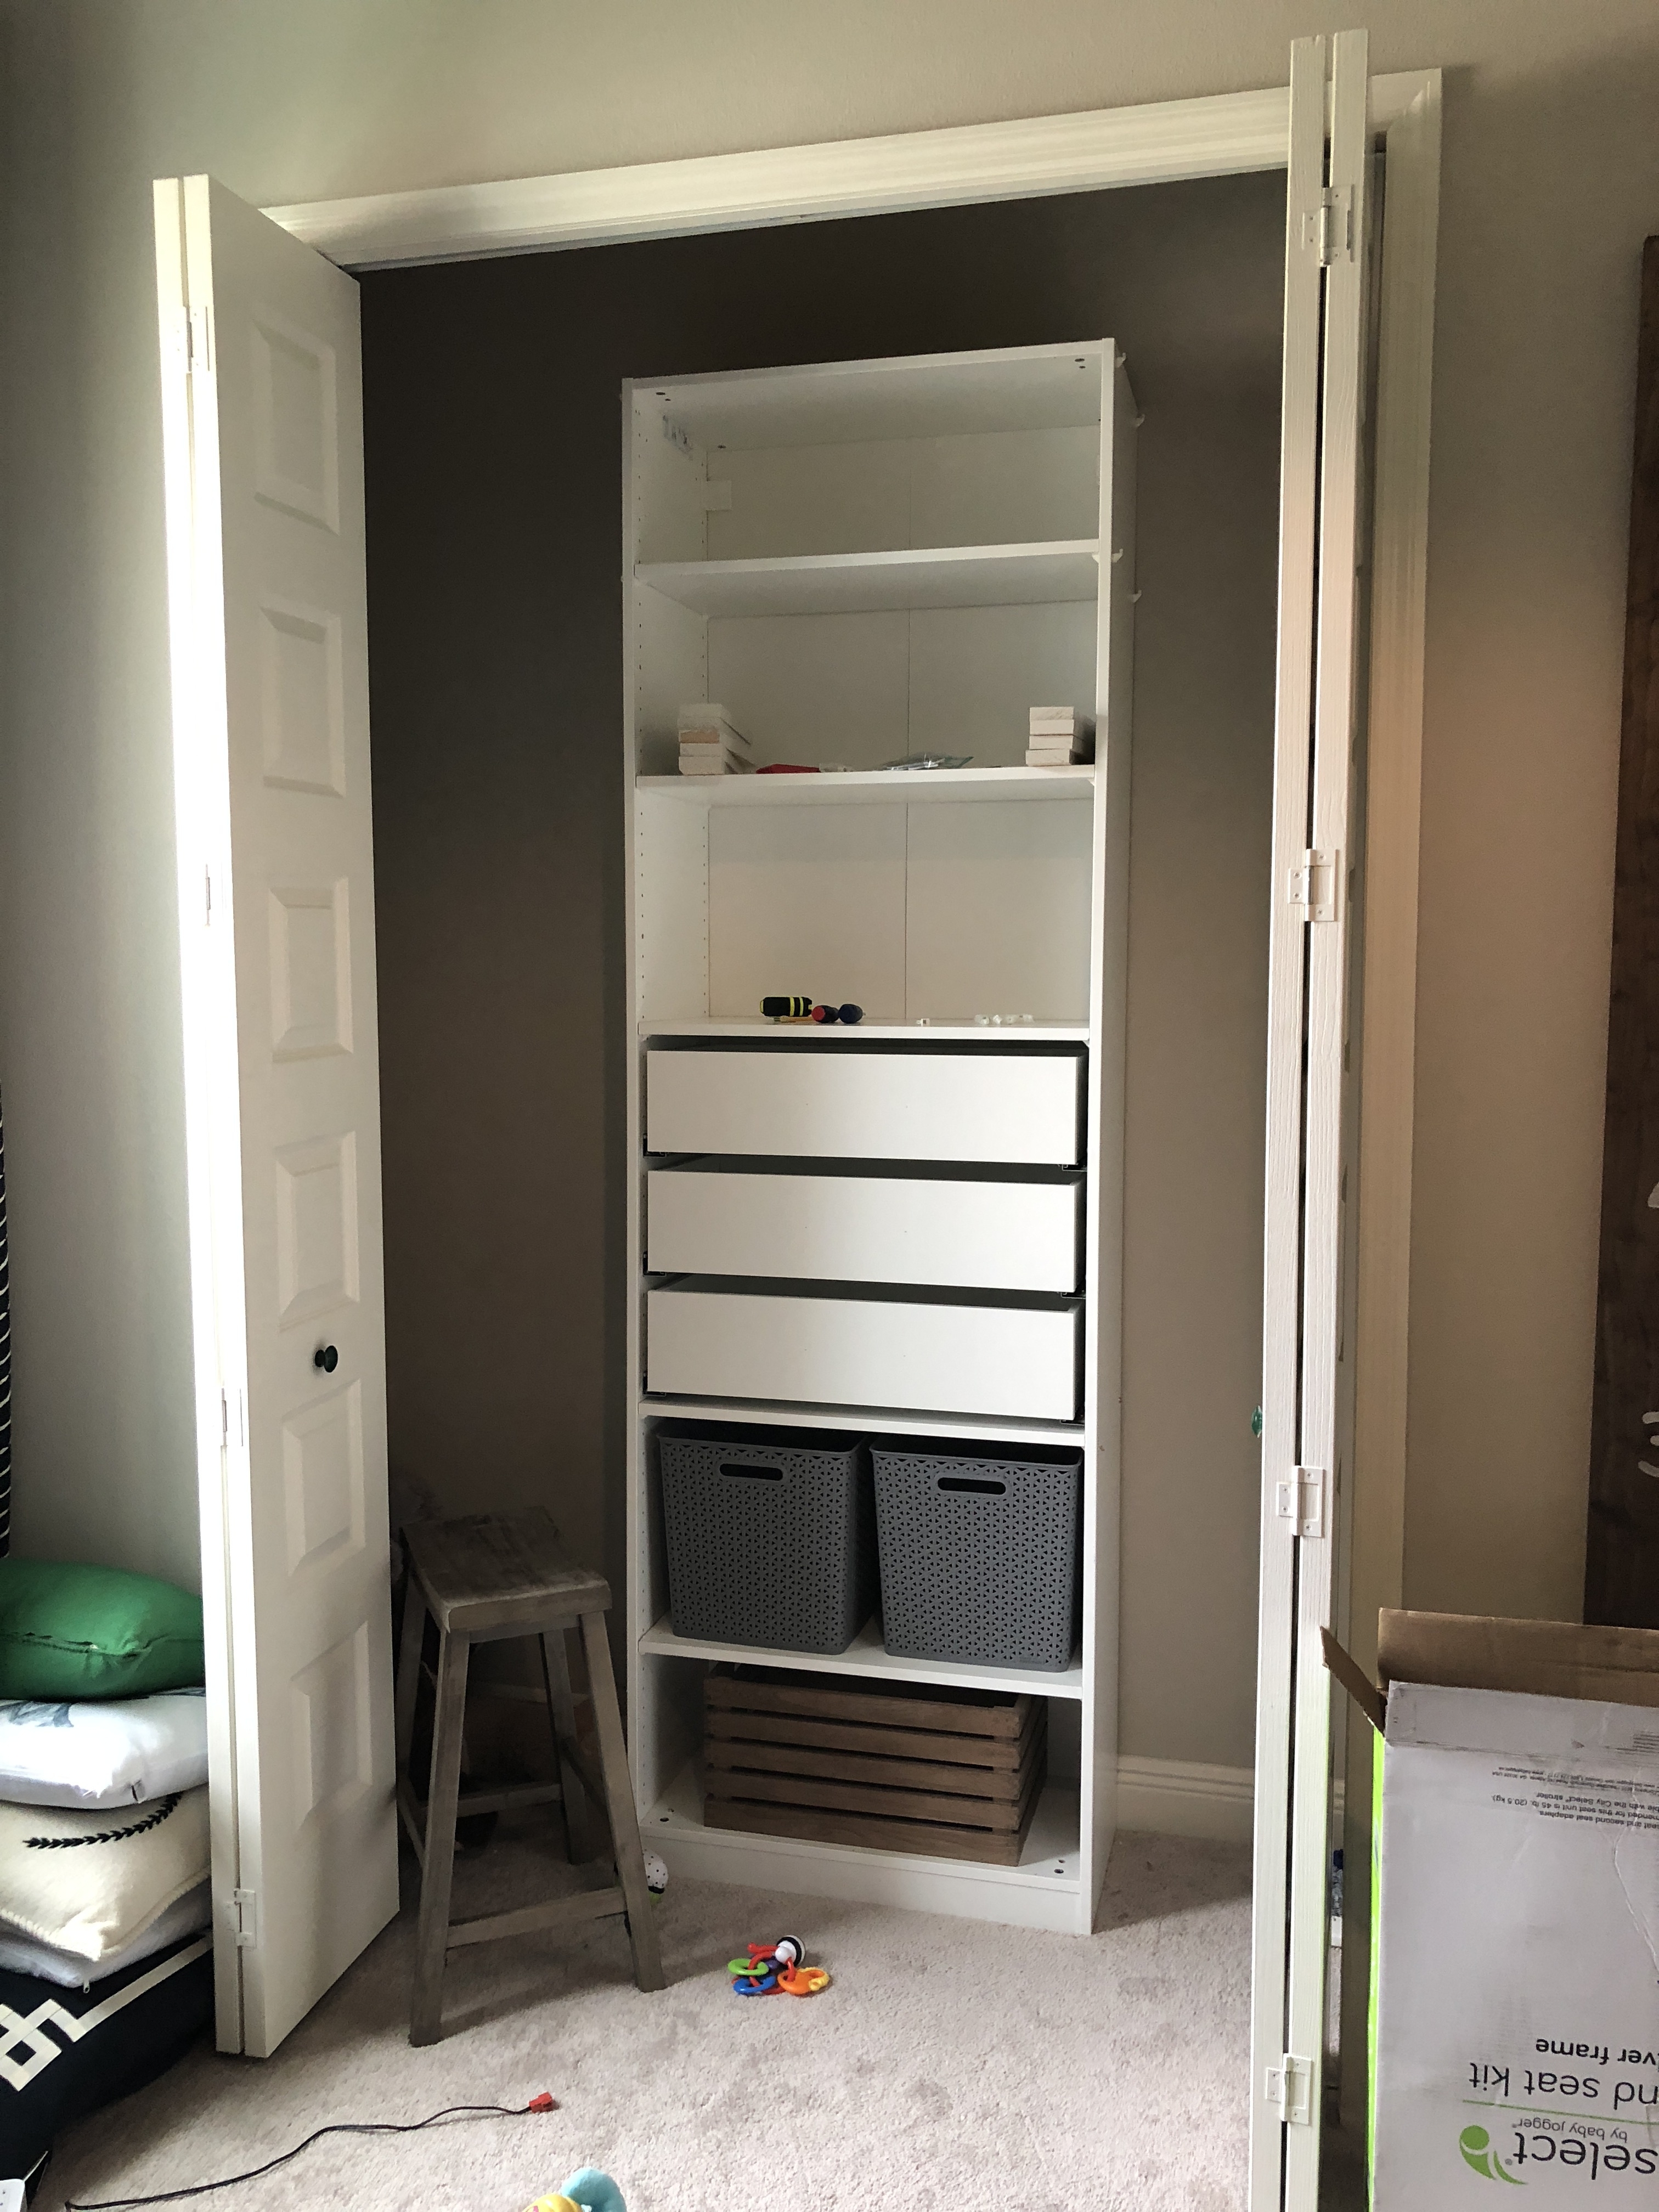
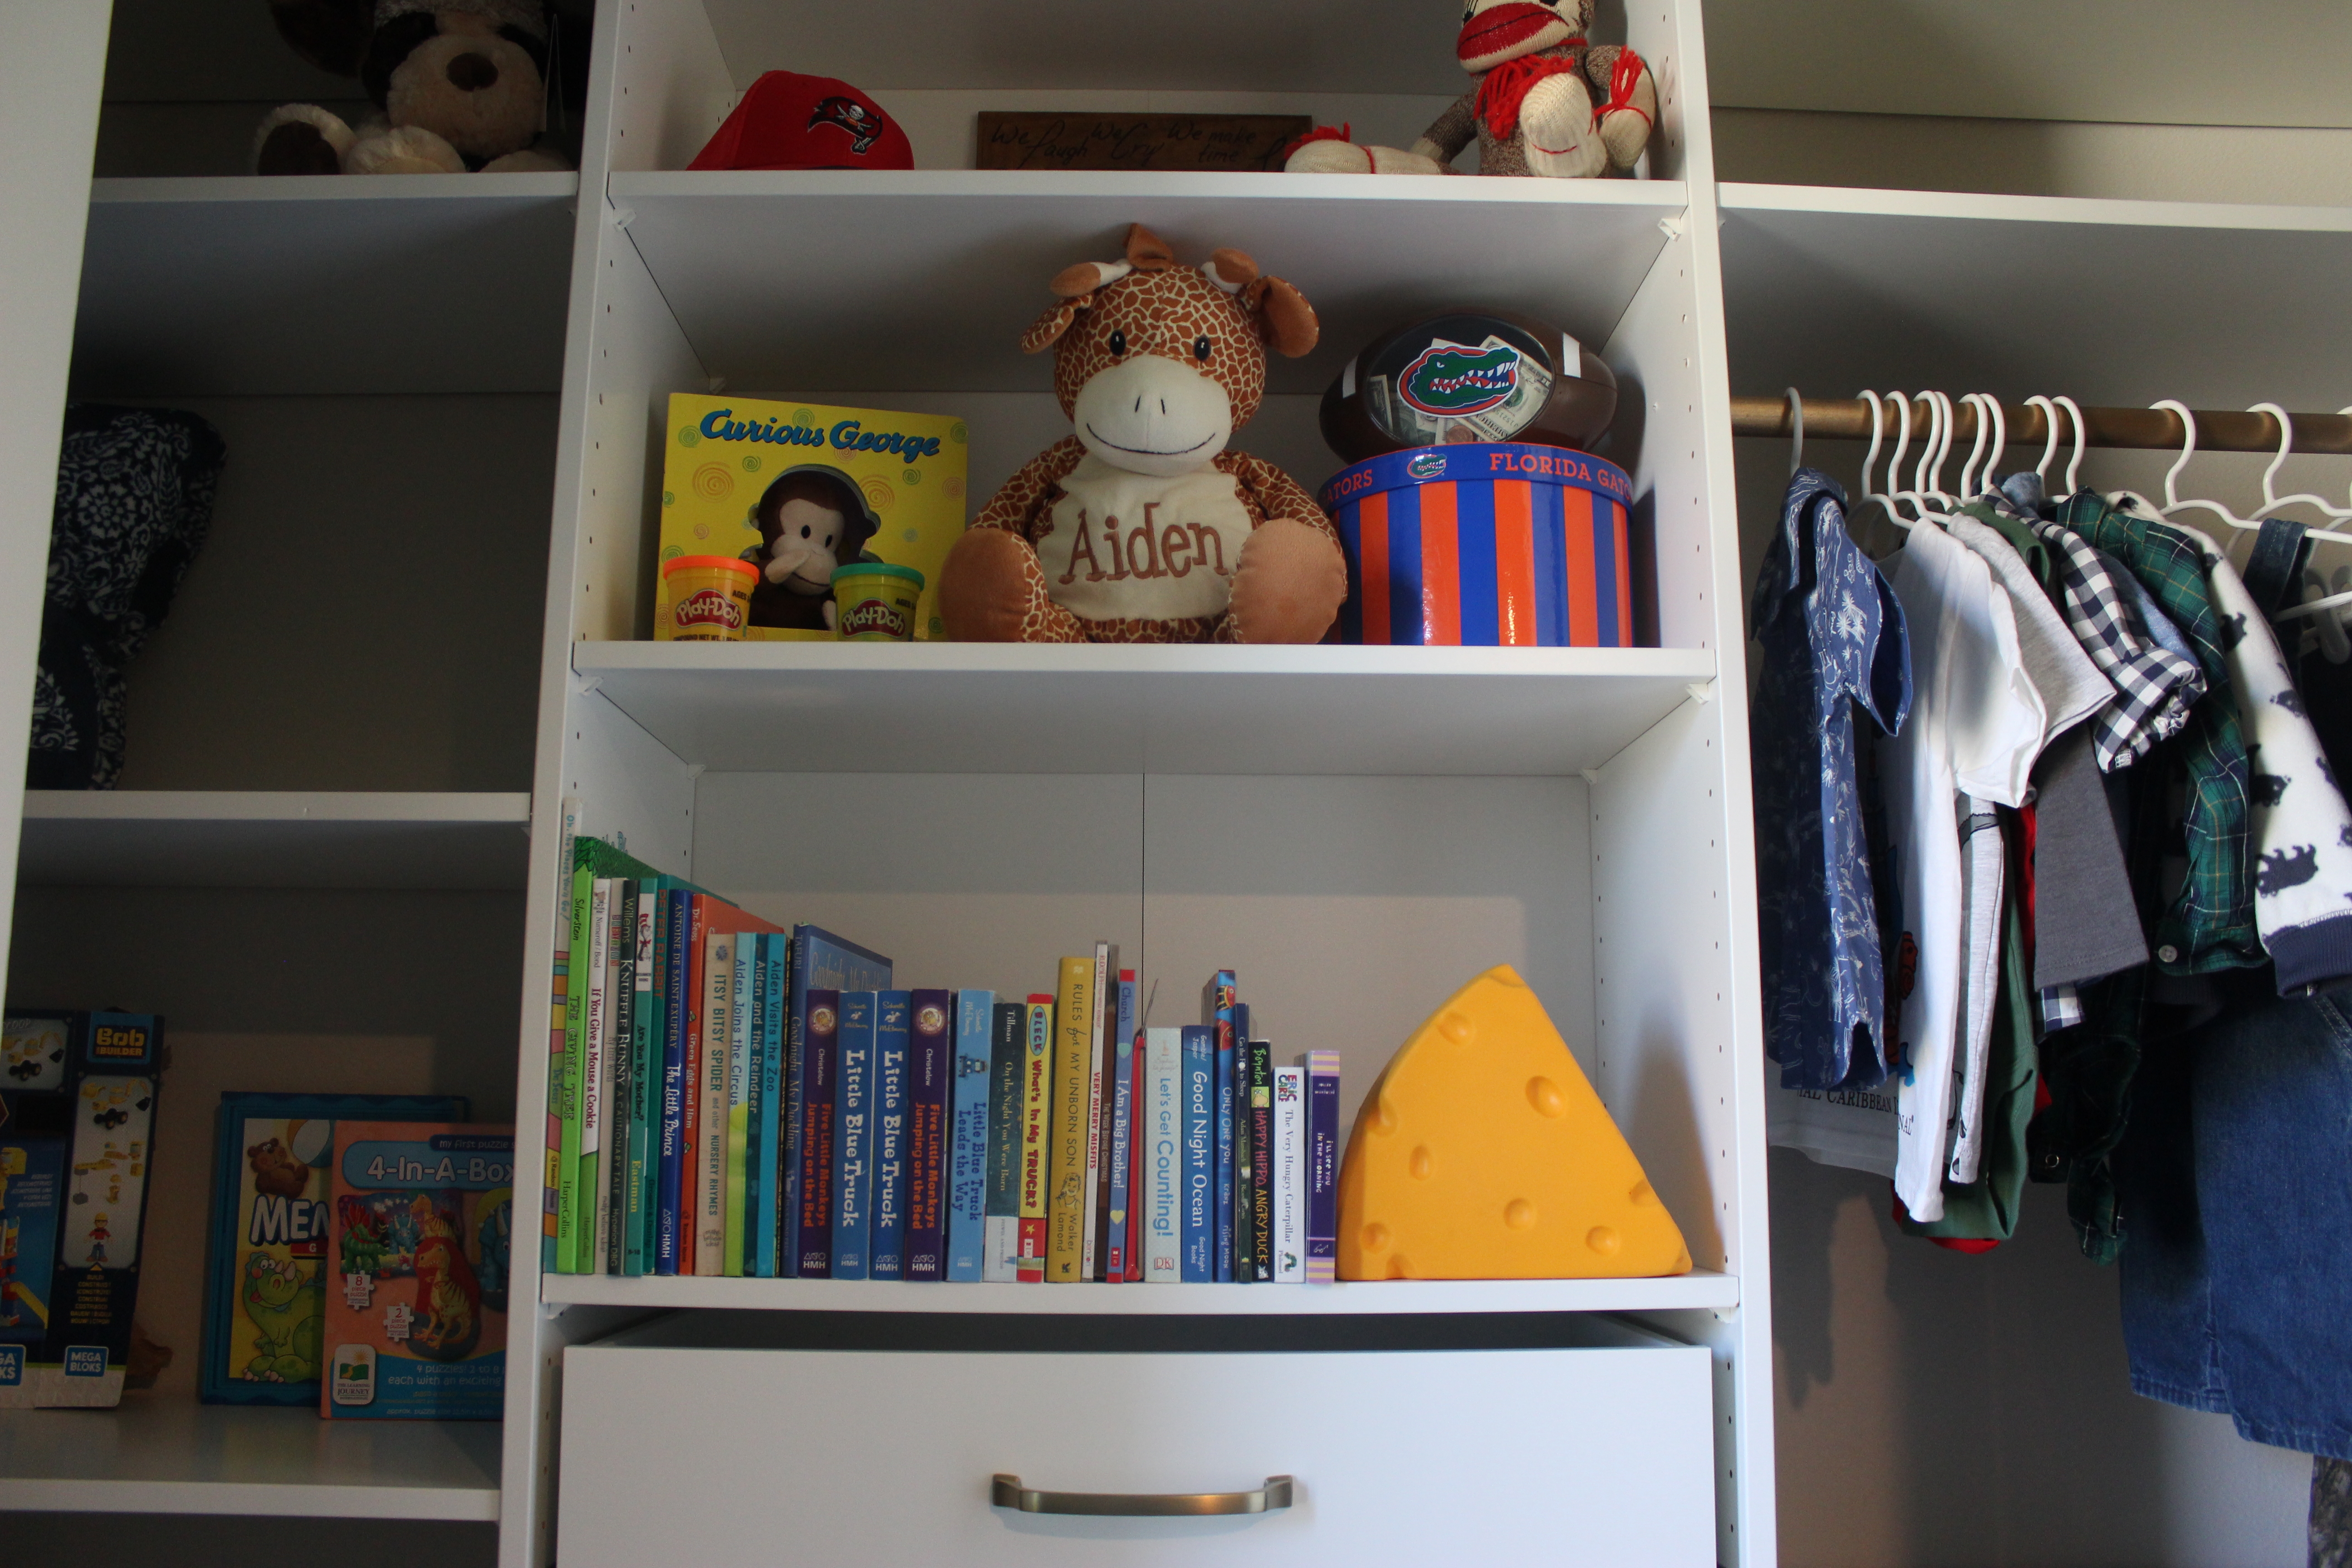
SO. Like I said, I decided on just one medium (29″) unit in the middle and then chose to make my own shelves for the sides. That way I could reach the sides easily and use all of the space as efficiently as possible. 101″ minus 29″ left me 72″ divided in half was 36″ on each side.
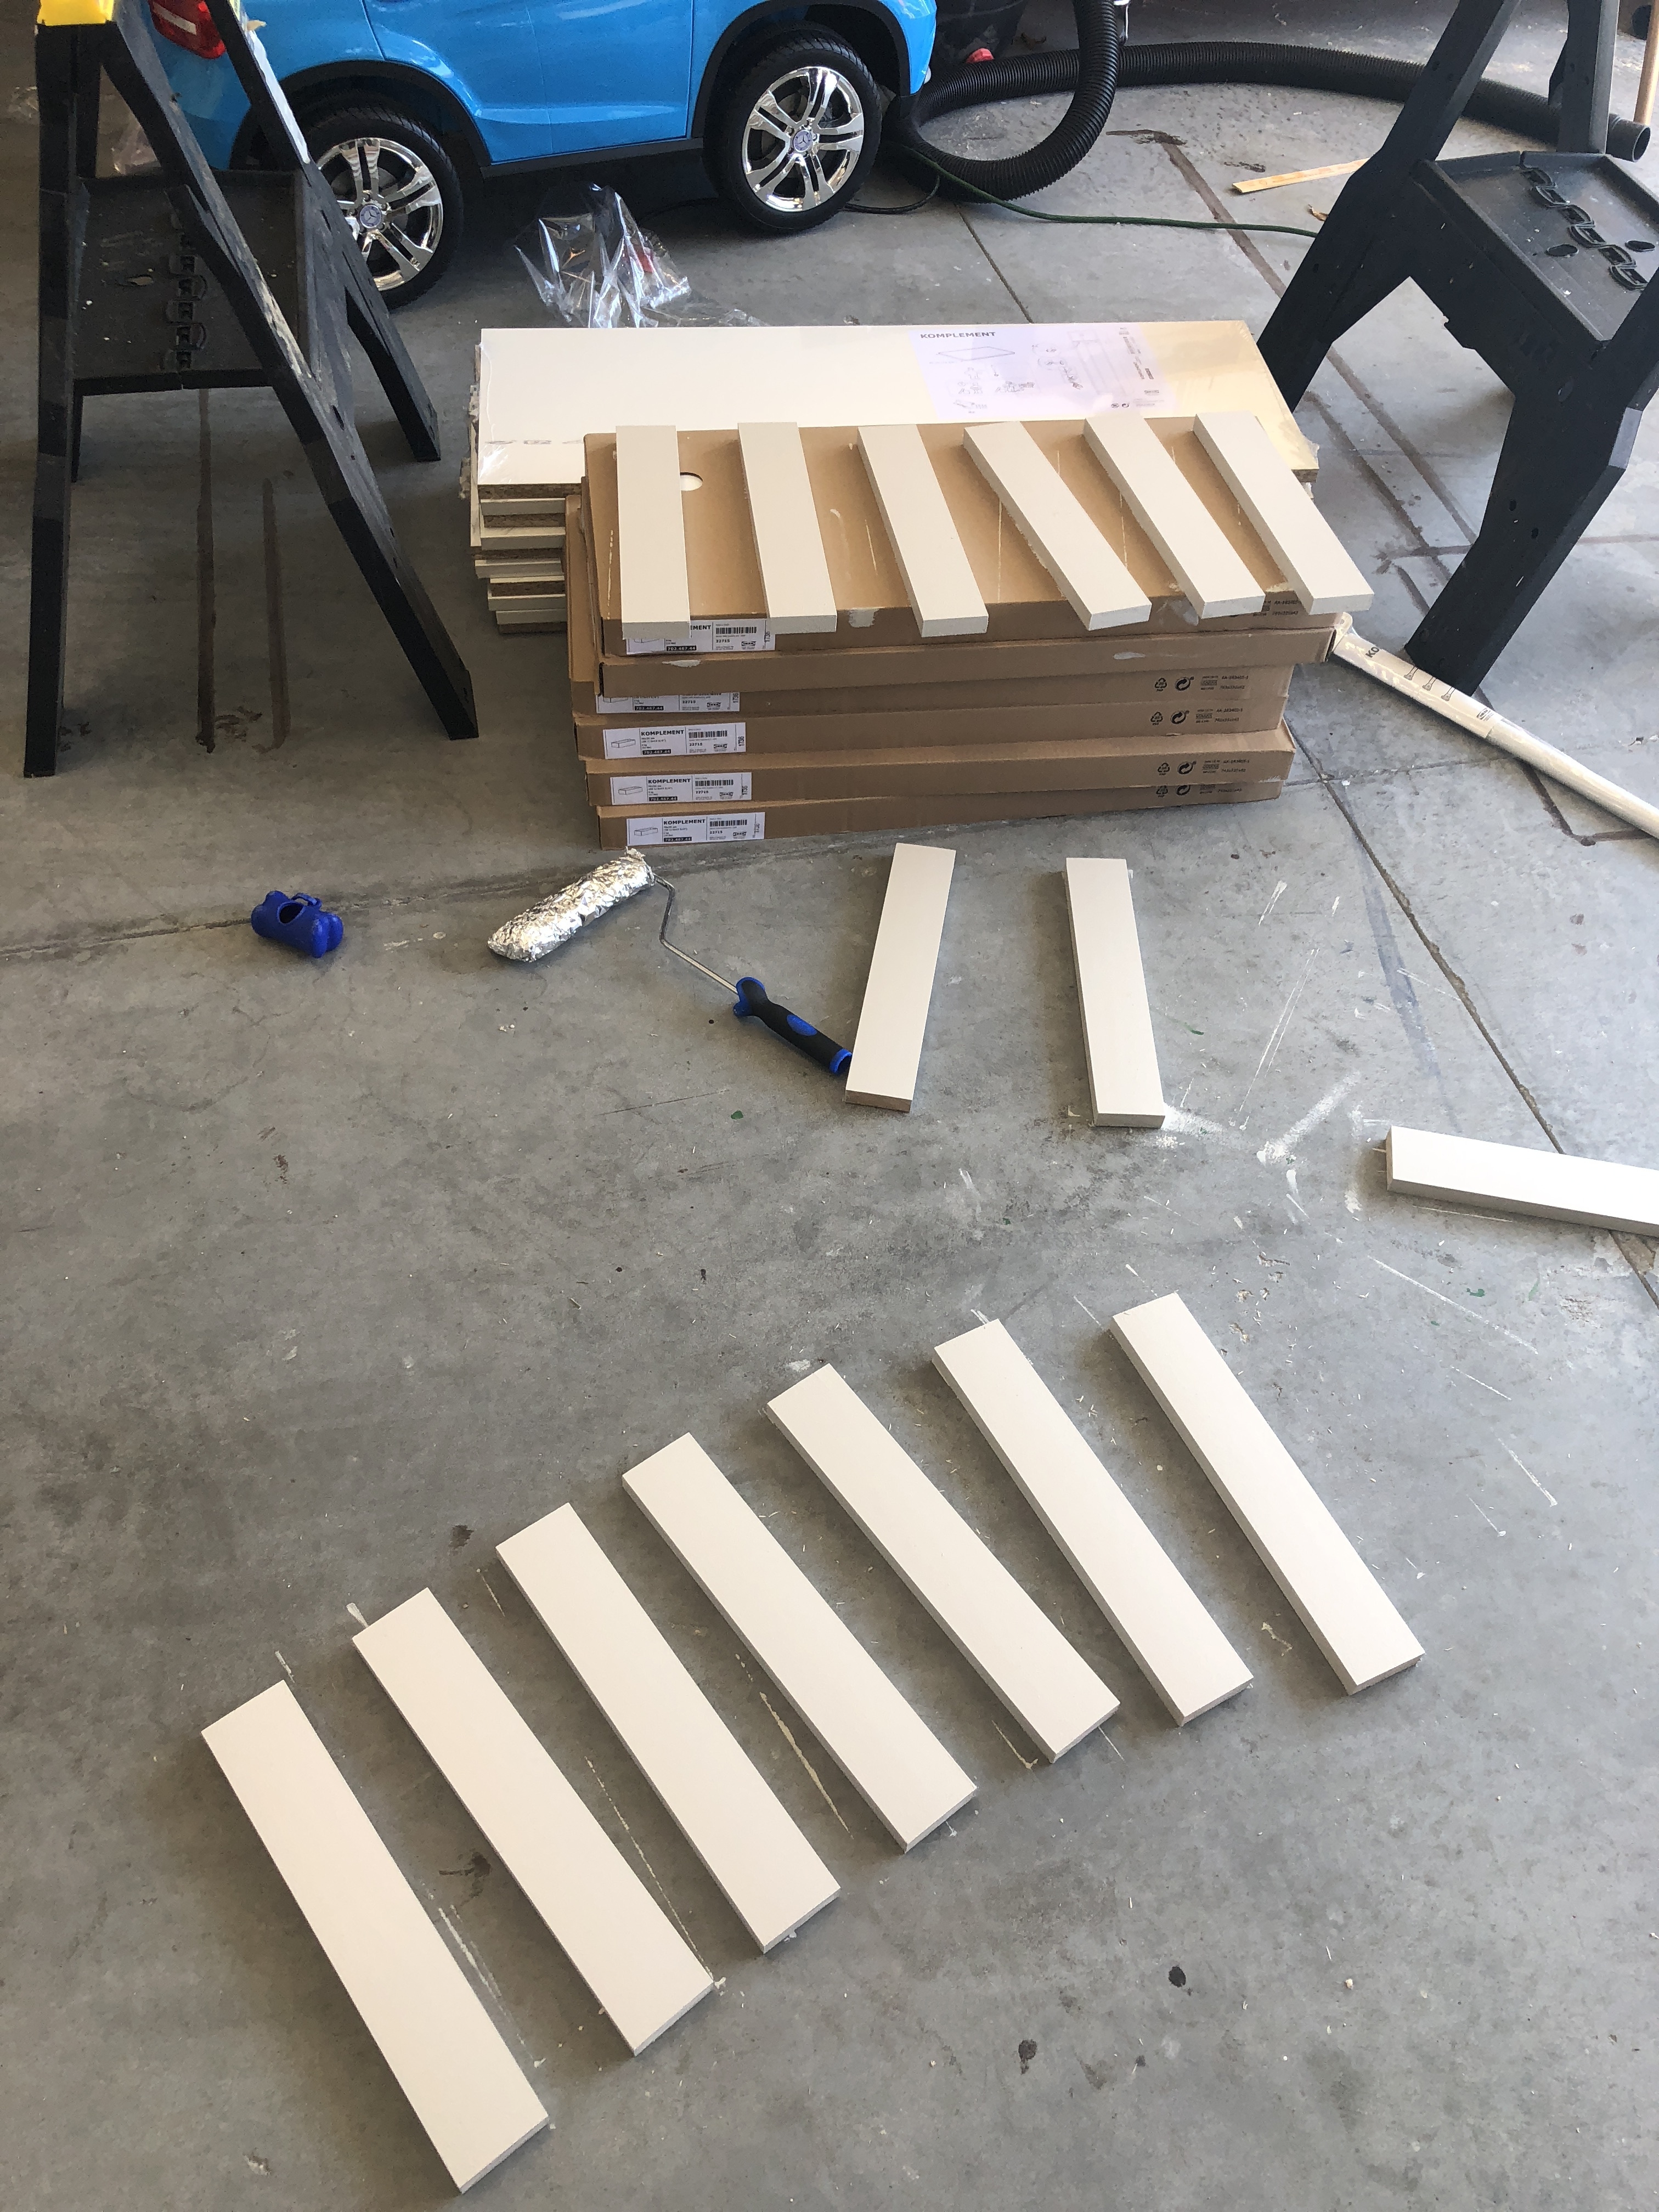
I bought the large IKEA PAX shelves (the ones that are meant to fit the 39″ units) and cut these down to 36″ to use on the sides of my closets. Then I used 1×3 pine boards for the brackets to hold up the shelves as shown below.

I screwed the 1×3’s into the wall studs and cut them the same width as the shelves (13.75″). The other end of the shelves are held up using the plastic shelf pins that the shelves came with. I drilled through the existing holes from the middle unit to poke through the sides to know where to place my shelf pins.
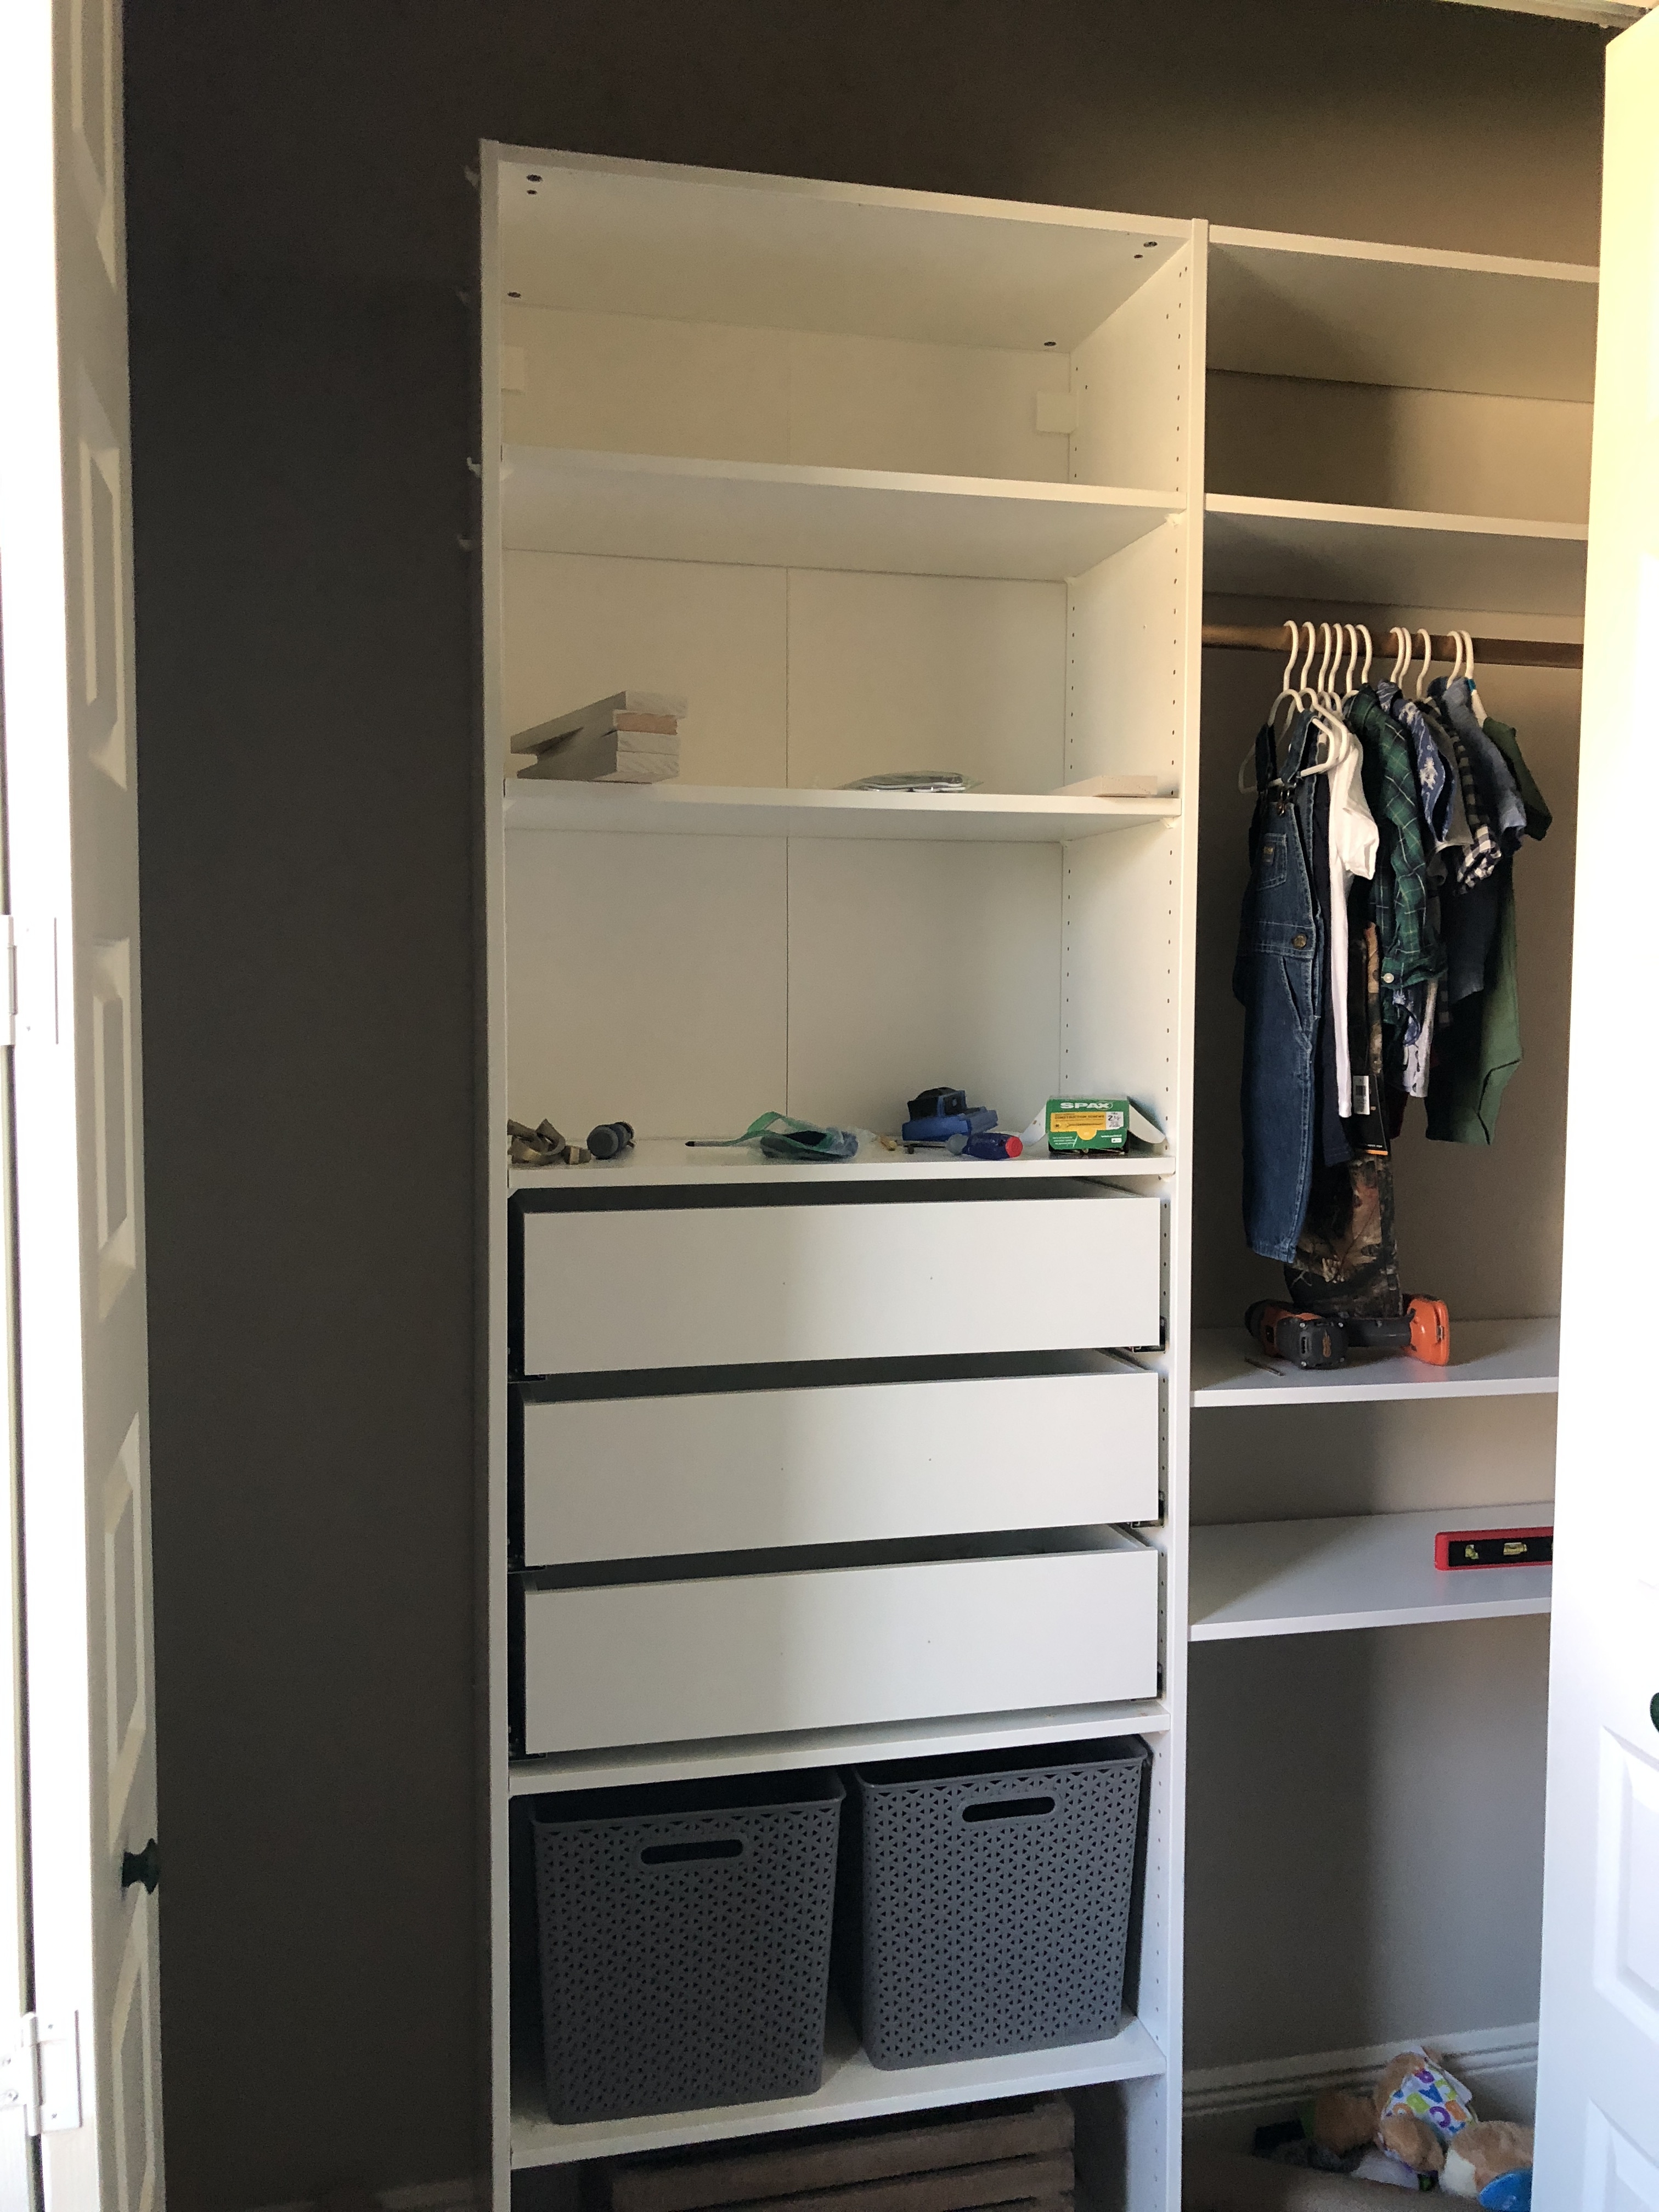
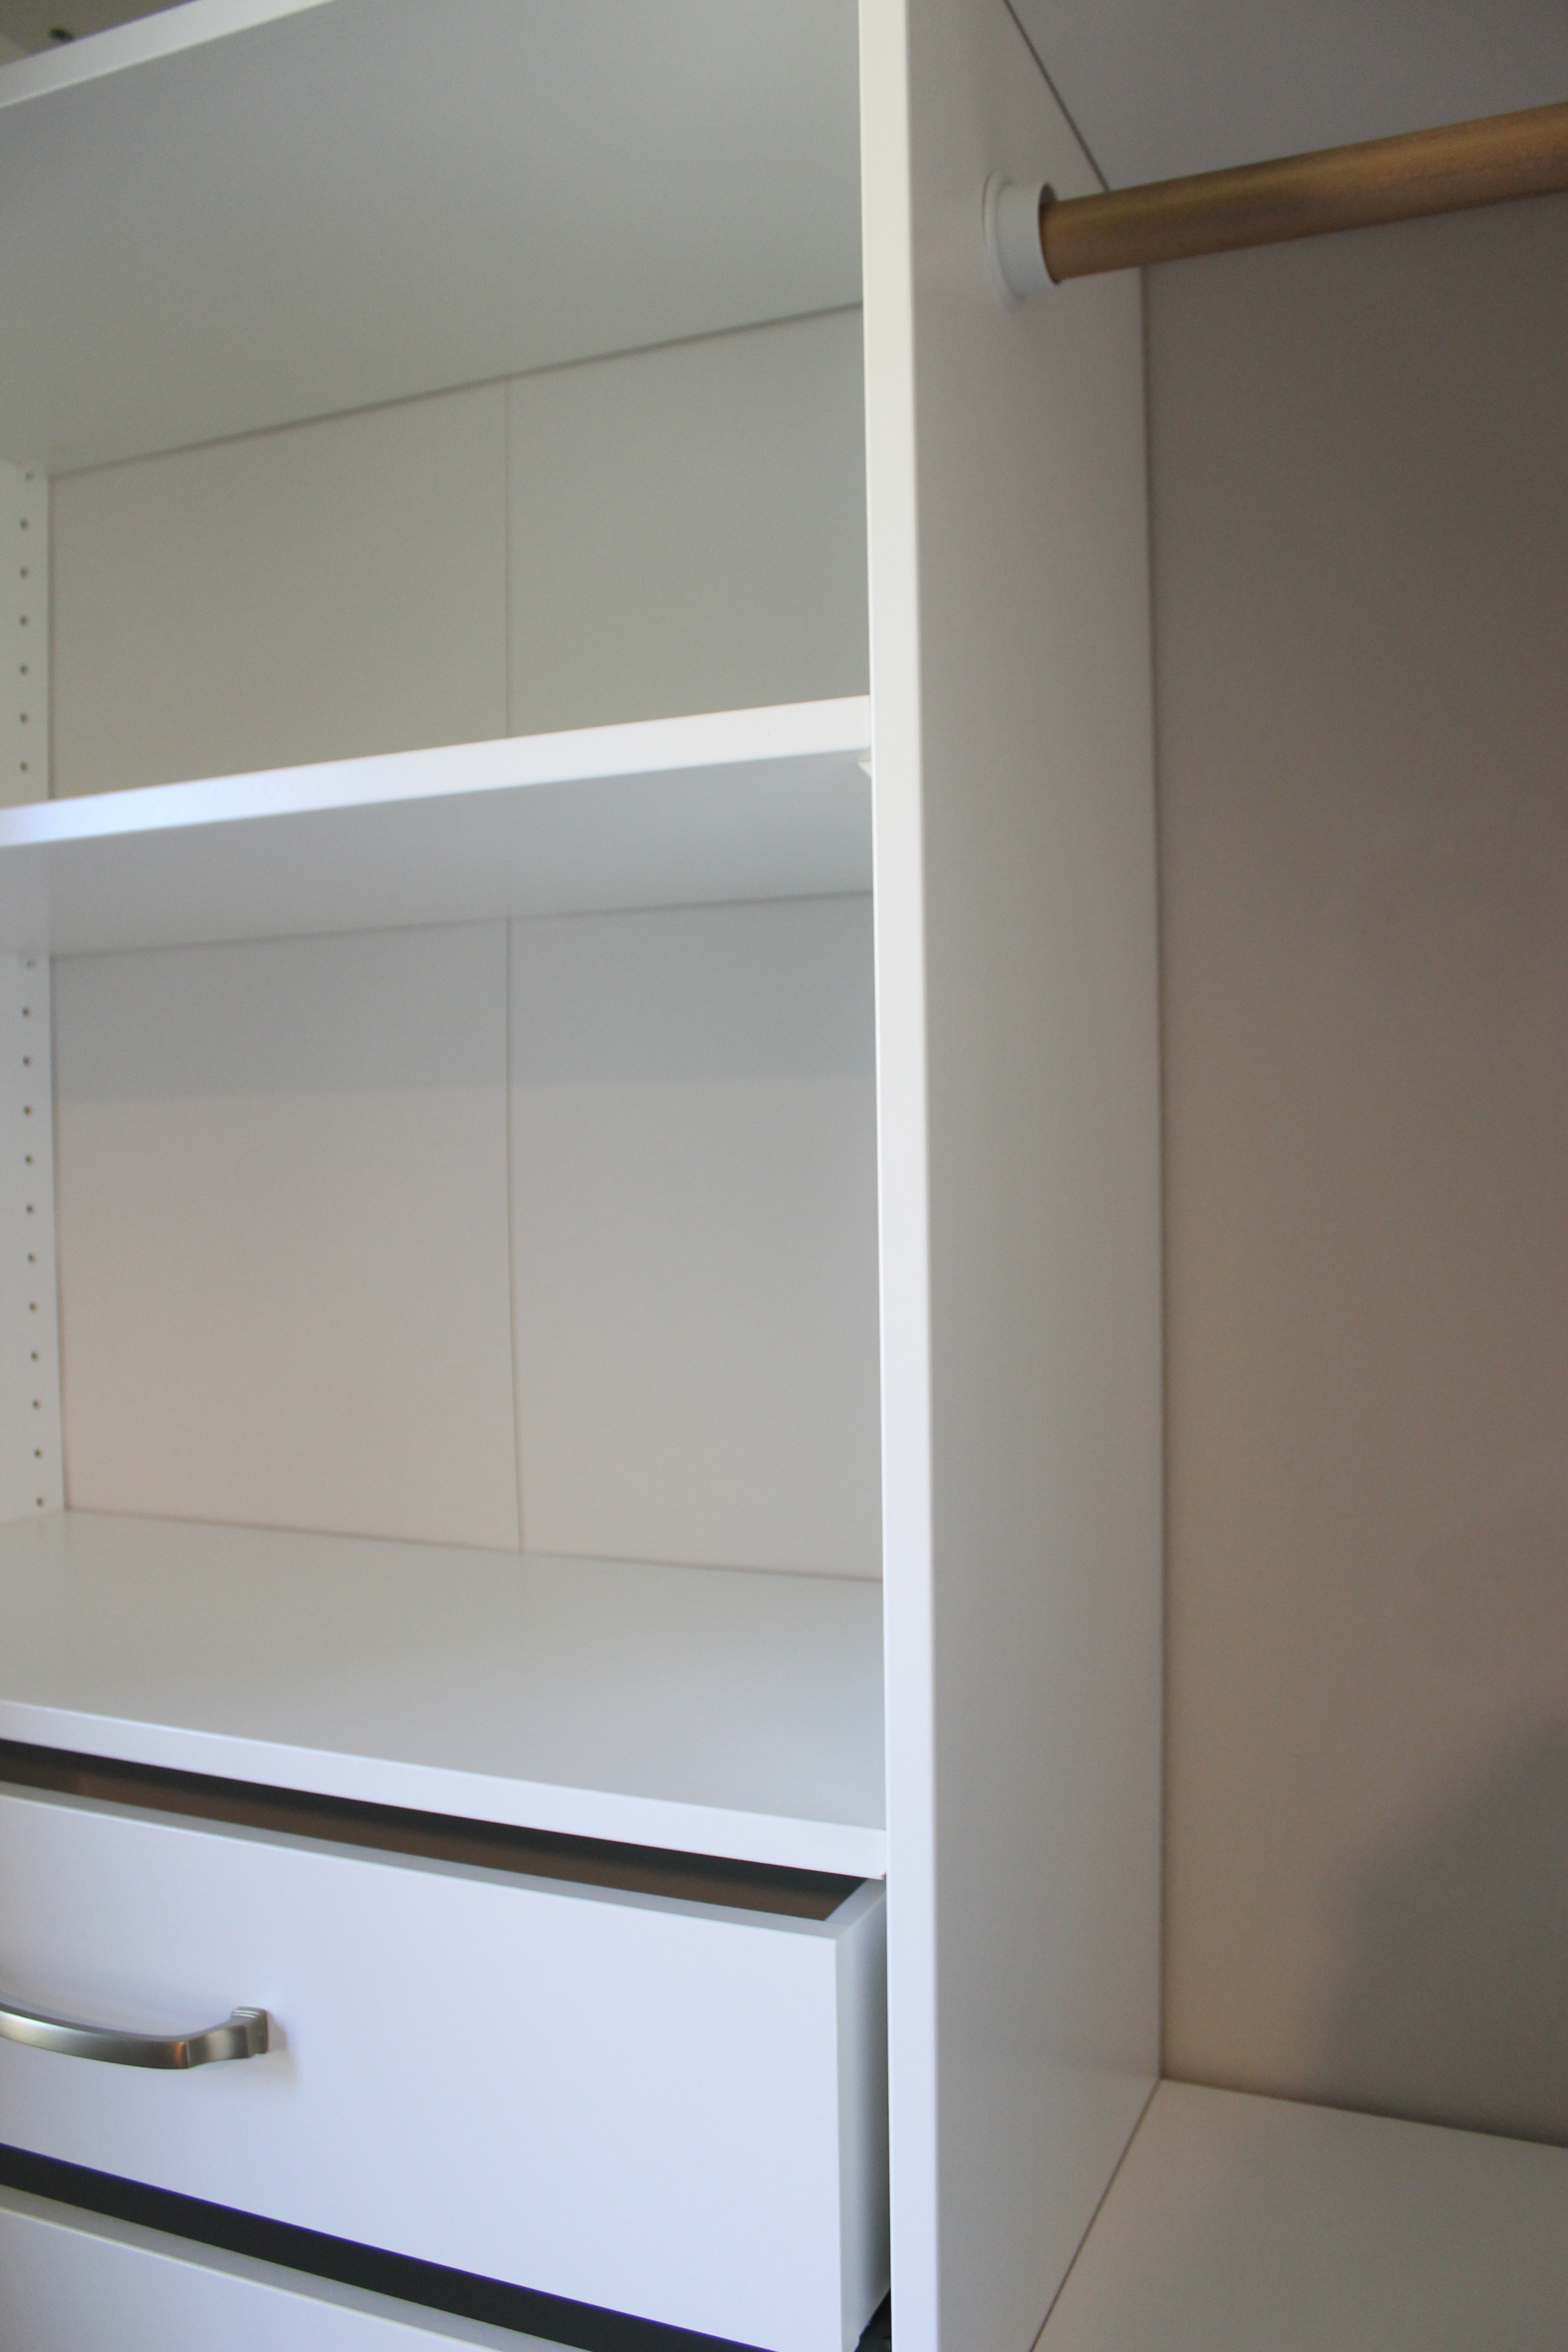
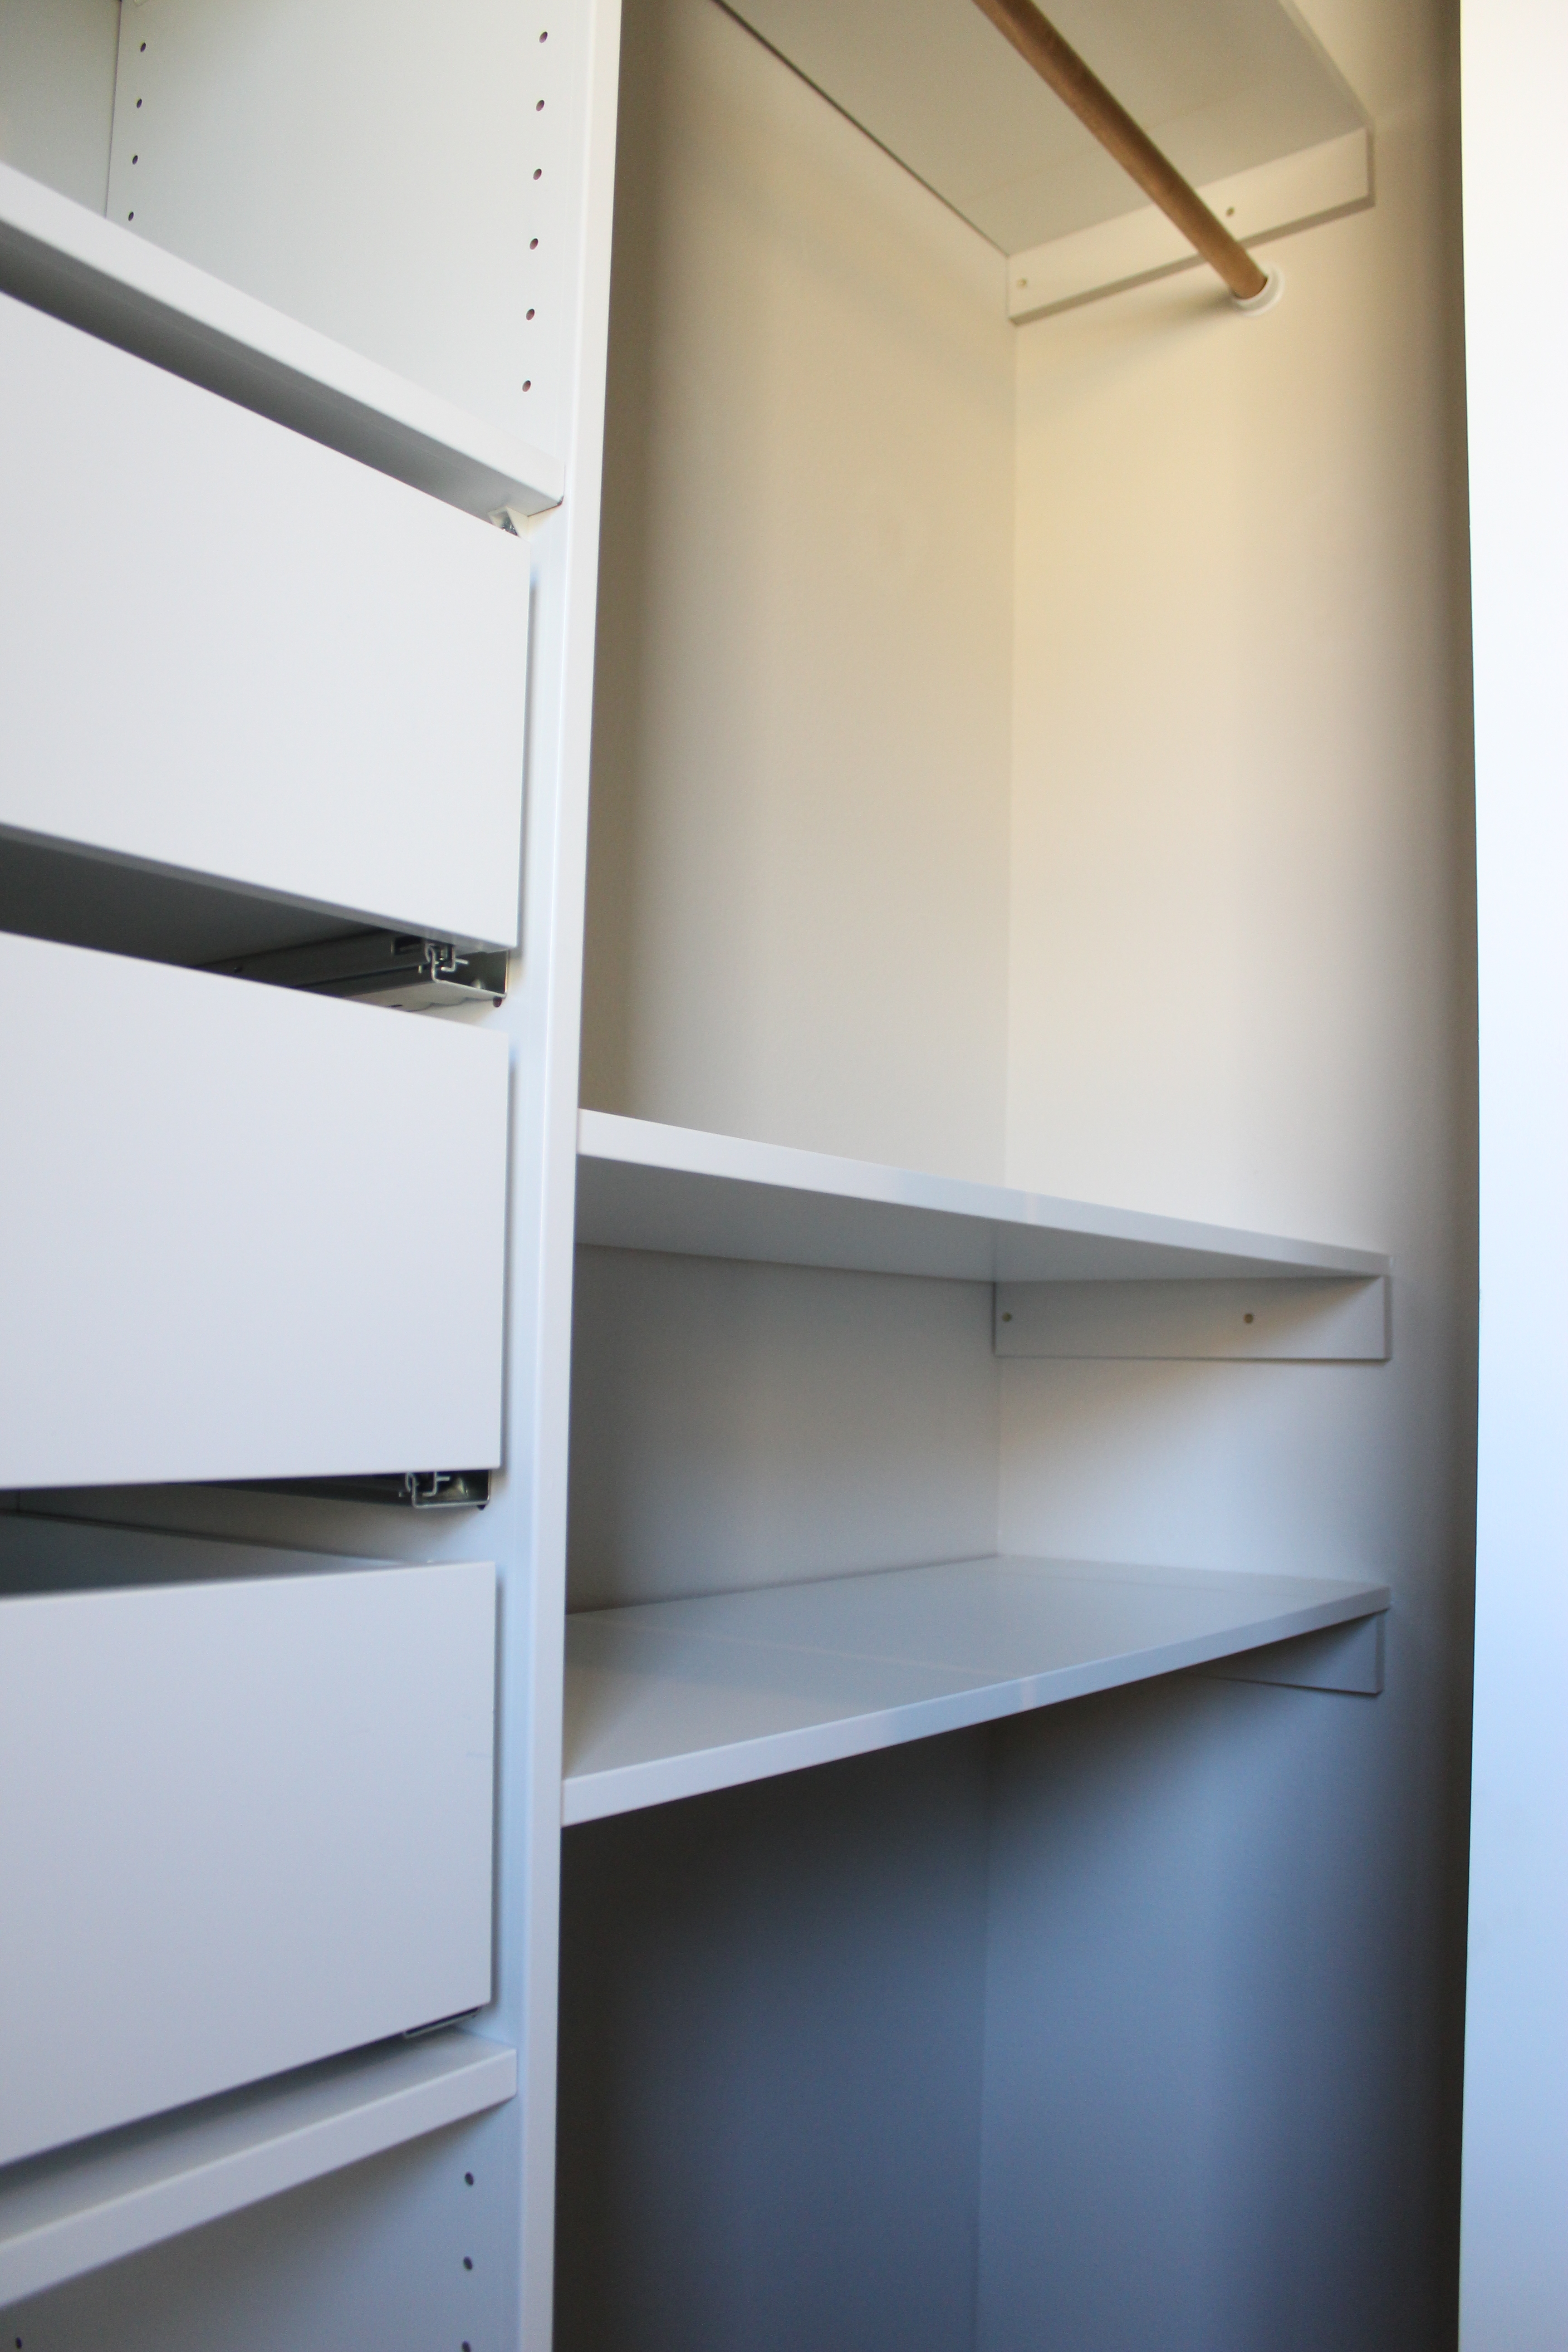
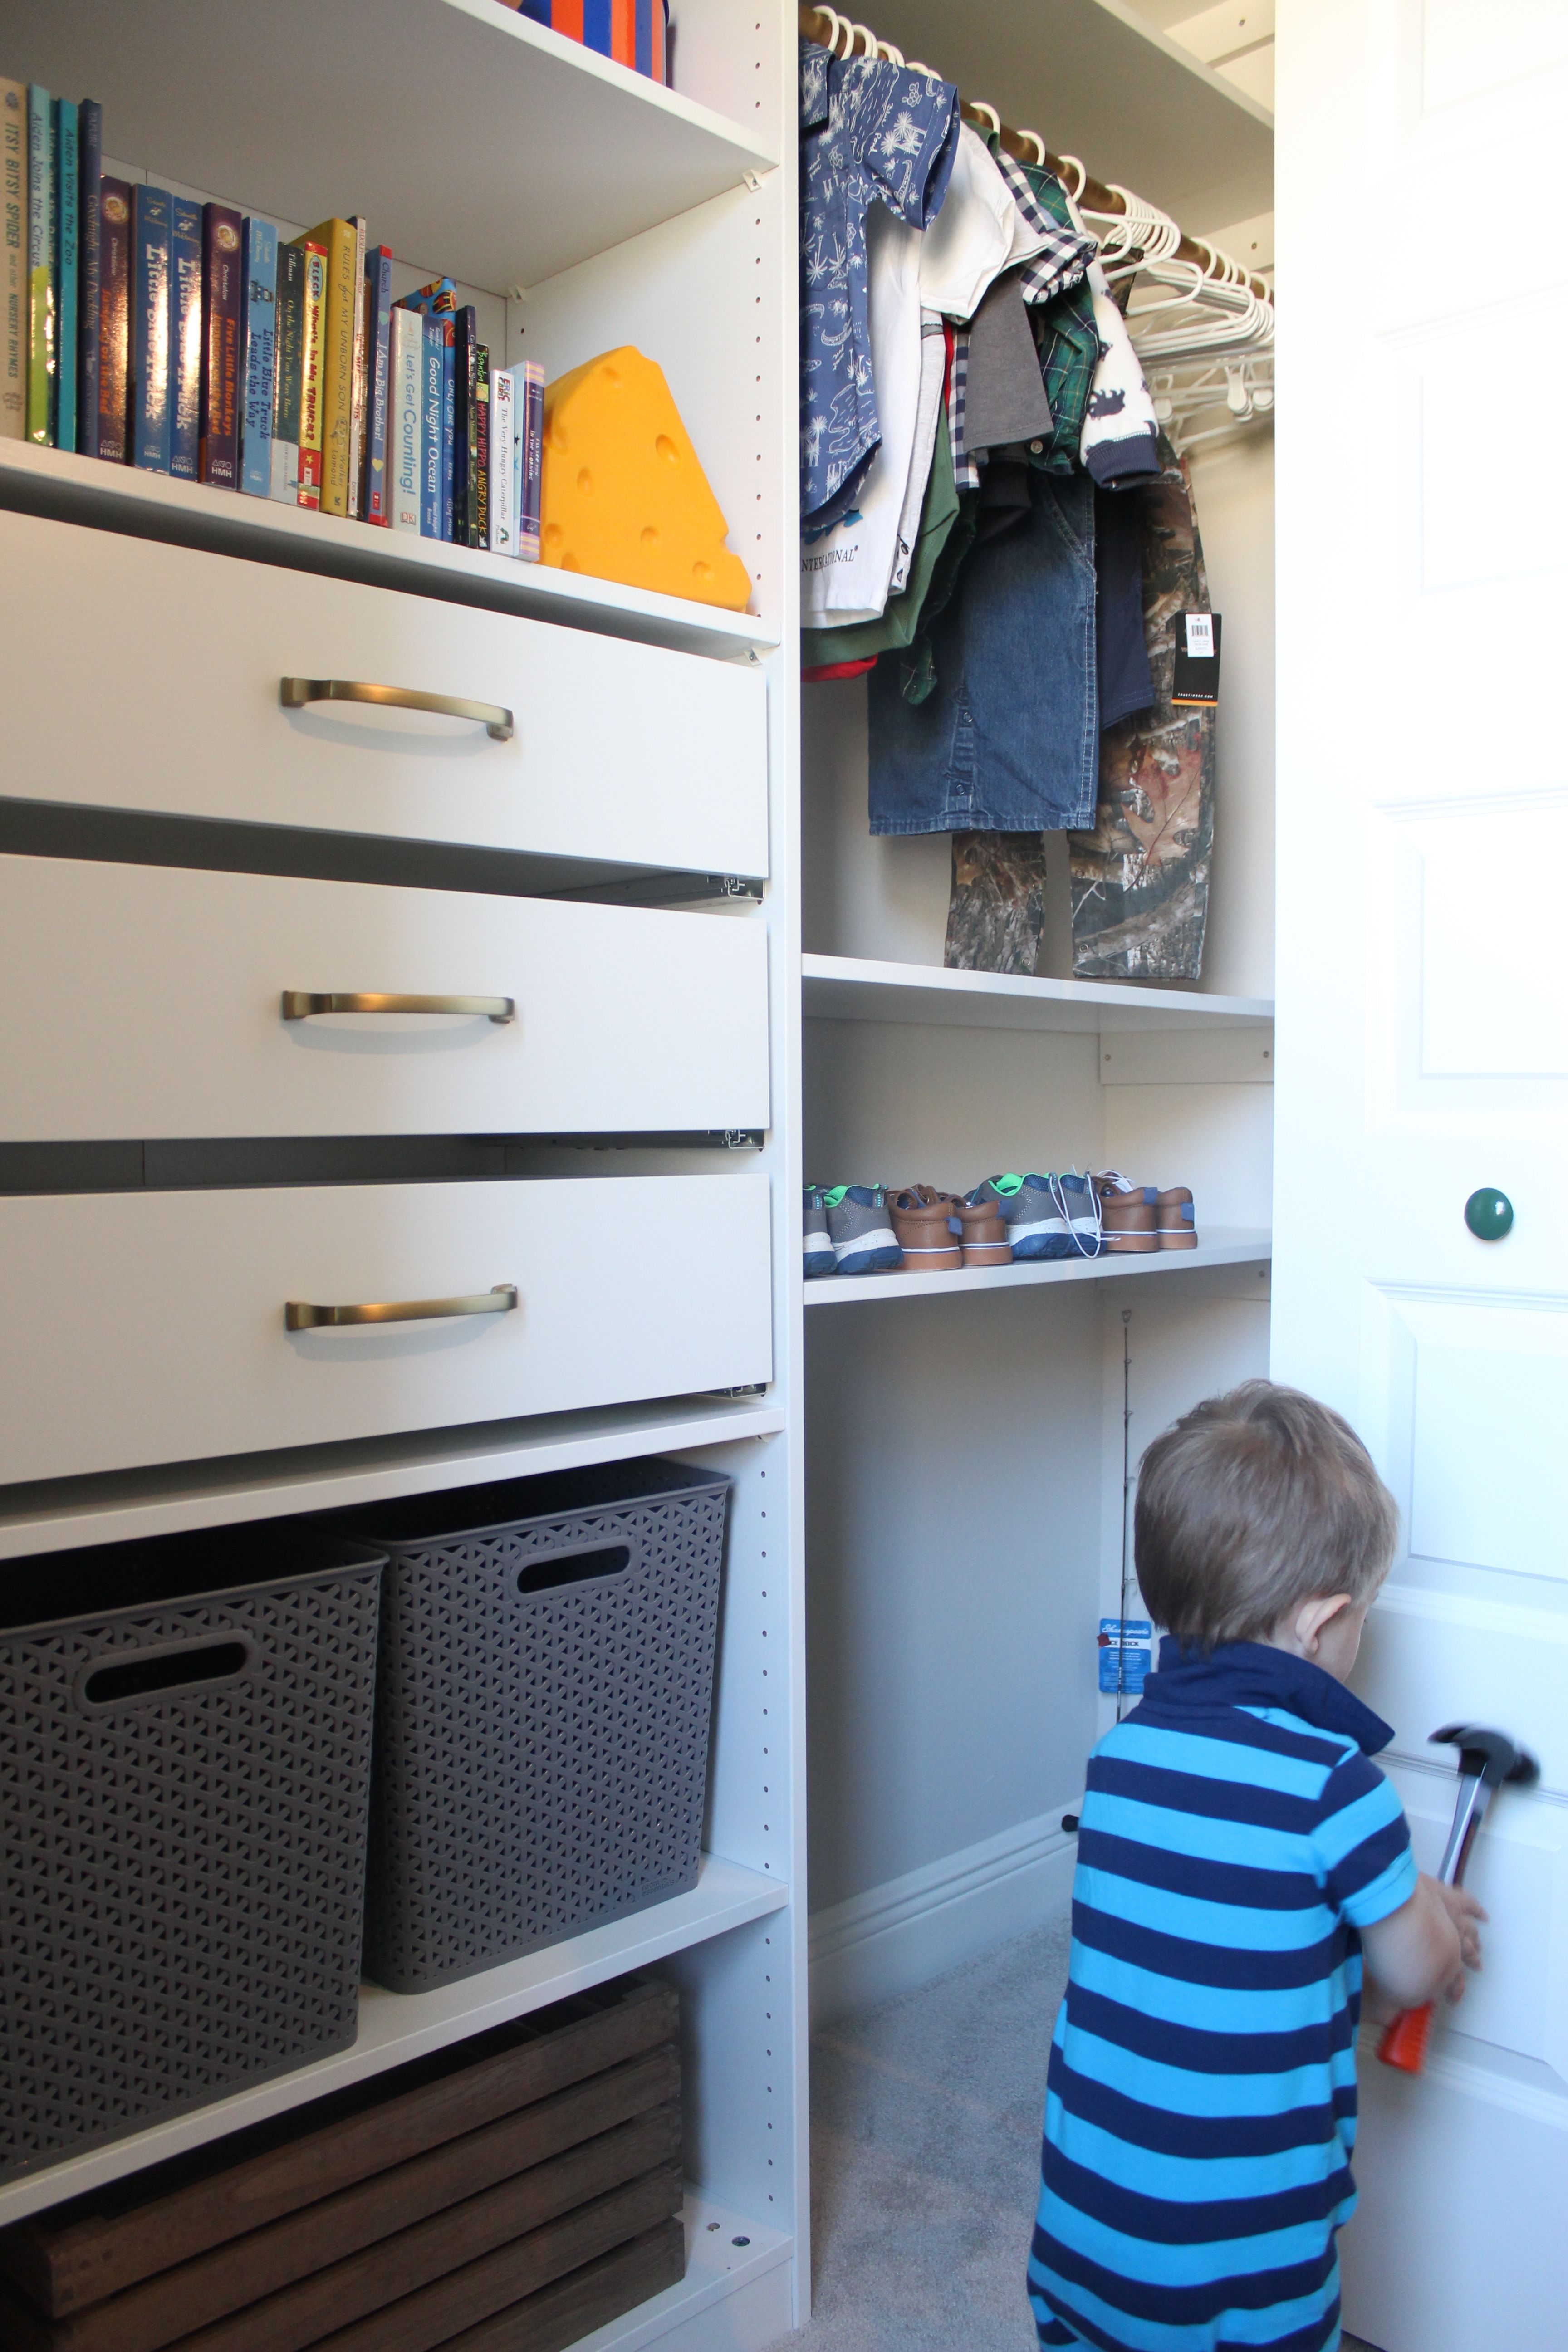
I randomly placed shelves down both sides as needed to store all of their things. I made only one section of hanging this time in each boys’ closet, as opposed to the four sections I had in my old house. For the hanging section, I bought a wooden dowel from Lowe’s and cut it to size.
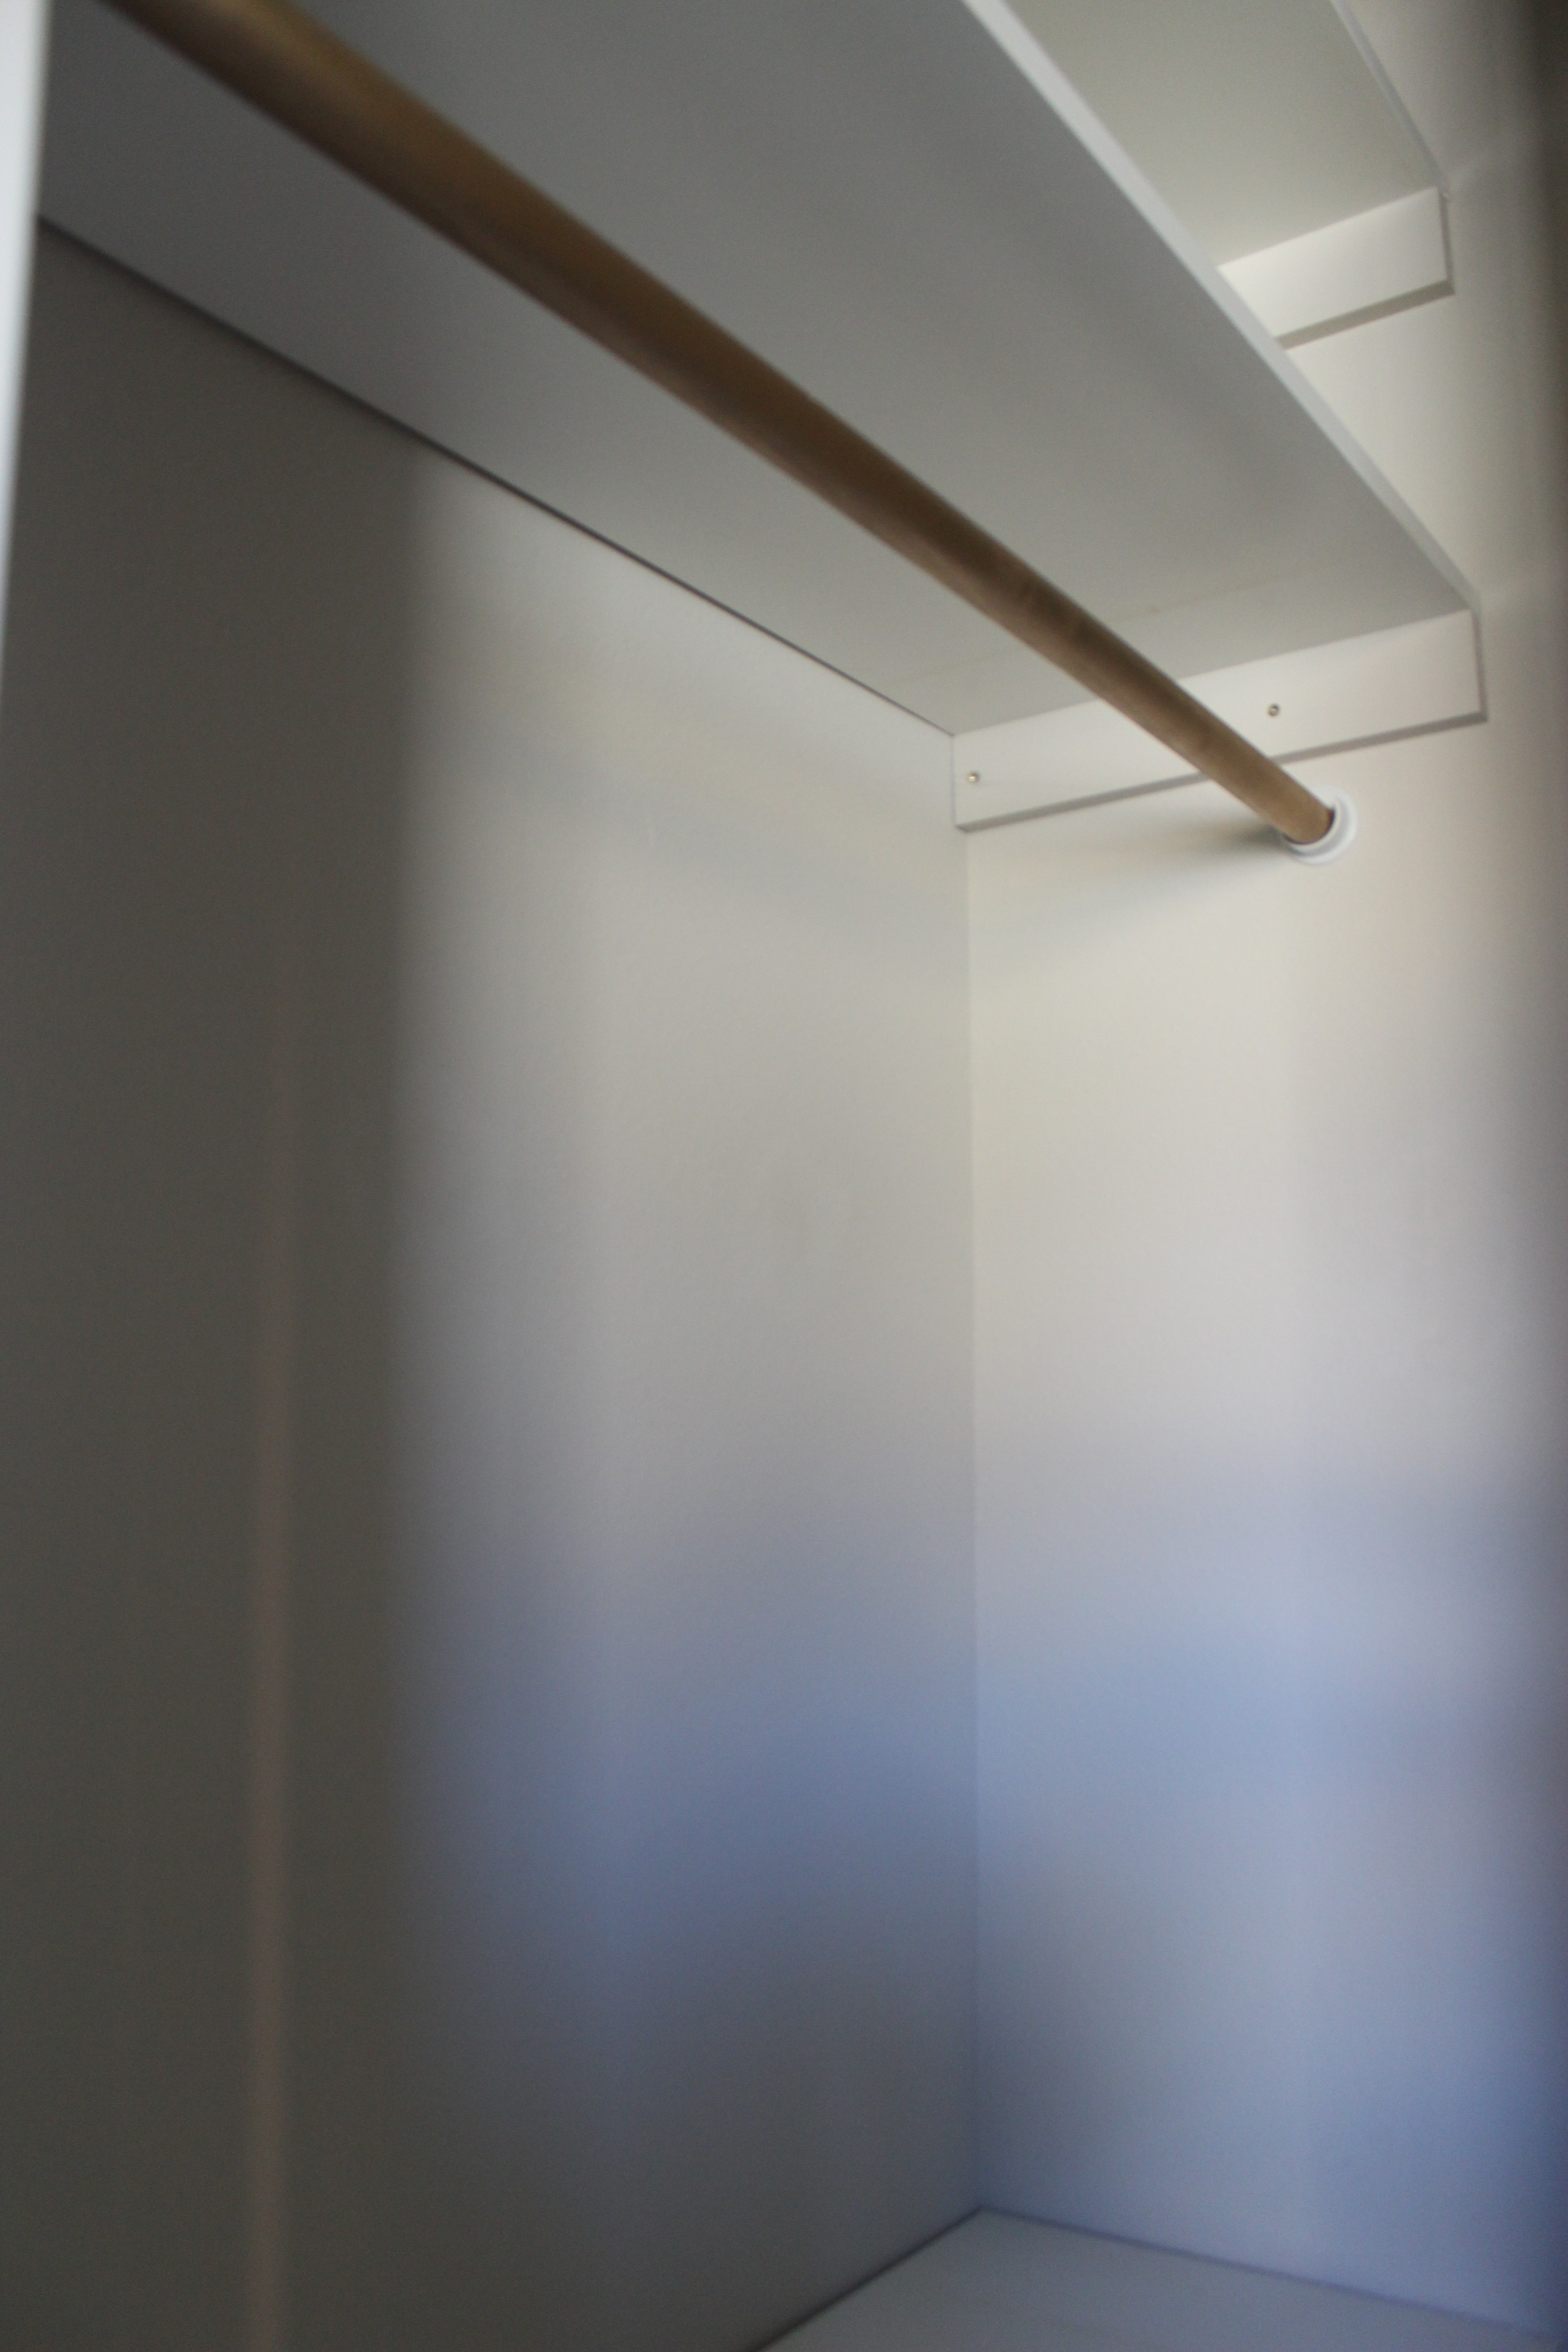
They sell these closet rod brackets for under $2 which attach the rod to the sides of the wall and PAX unit. I spray painted the rod gold for funsies.
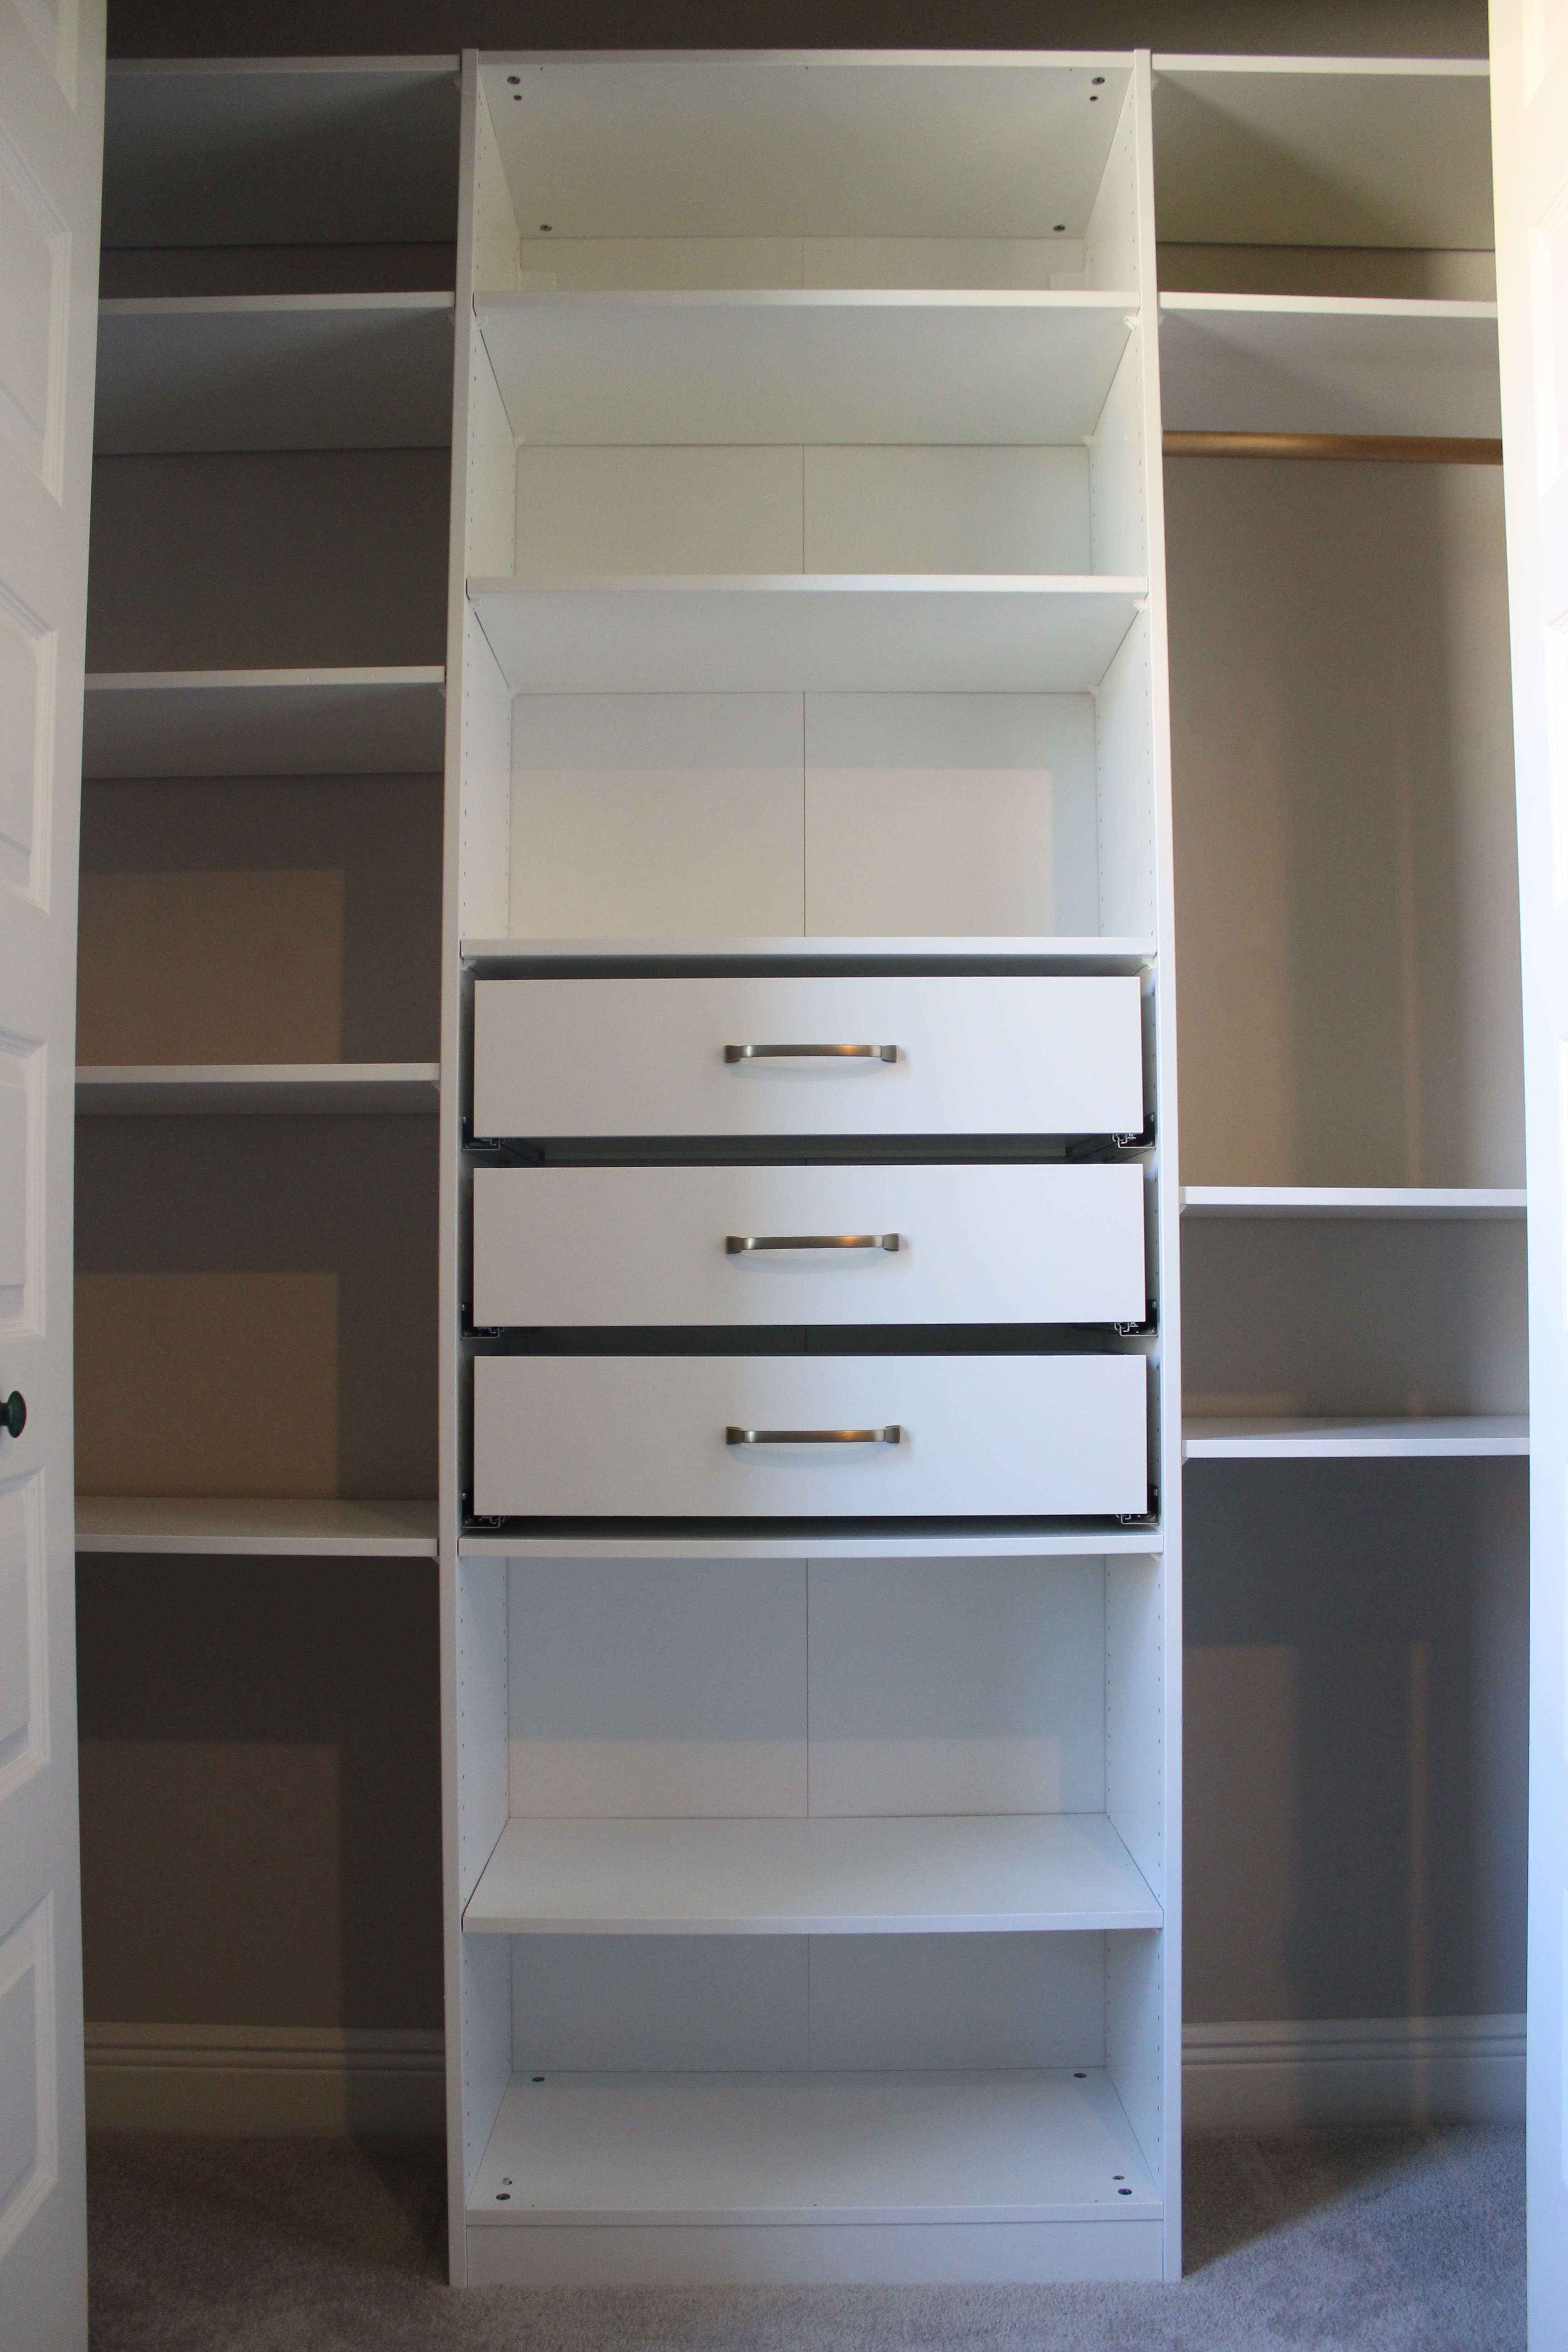
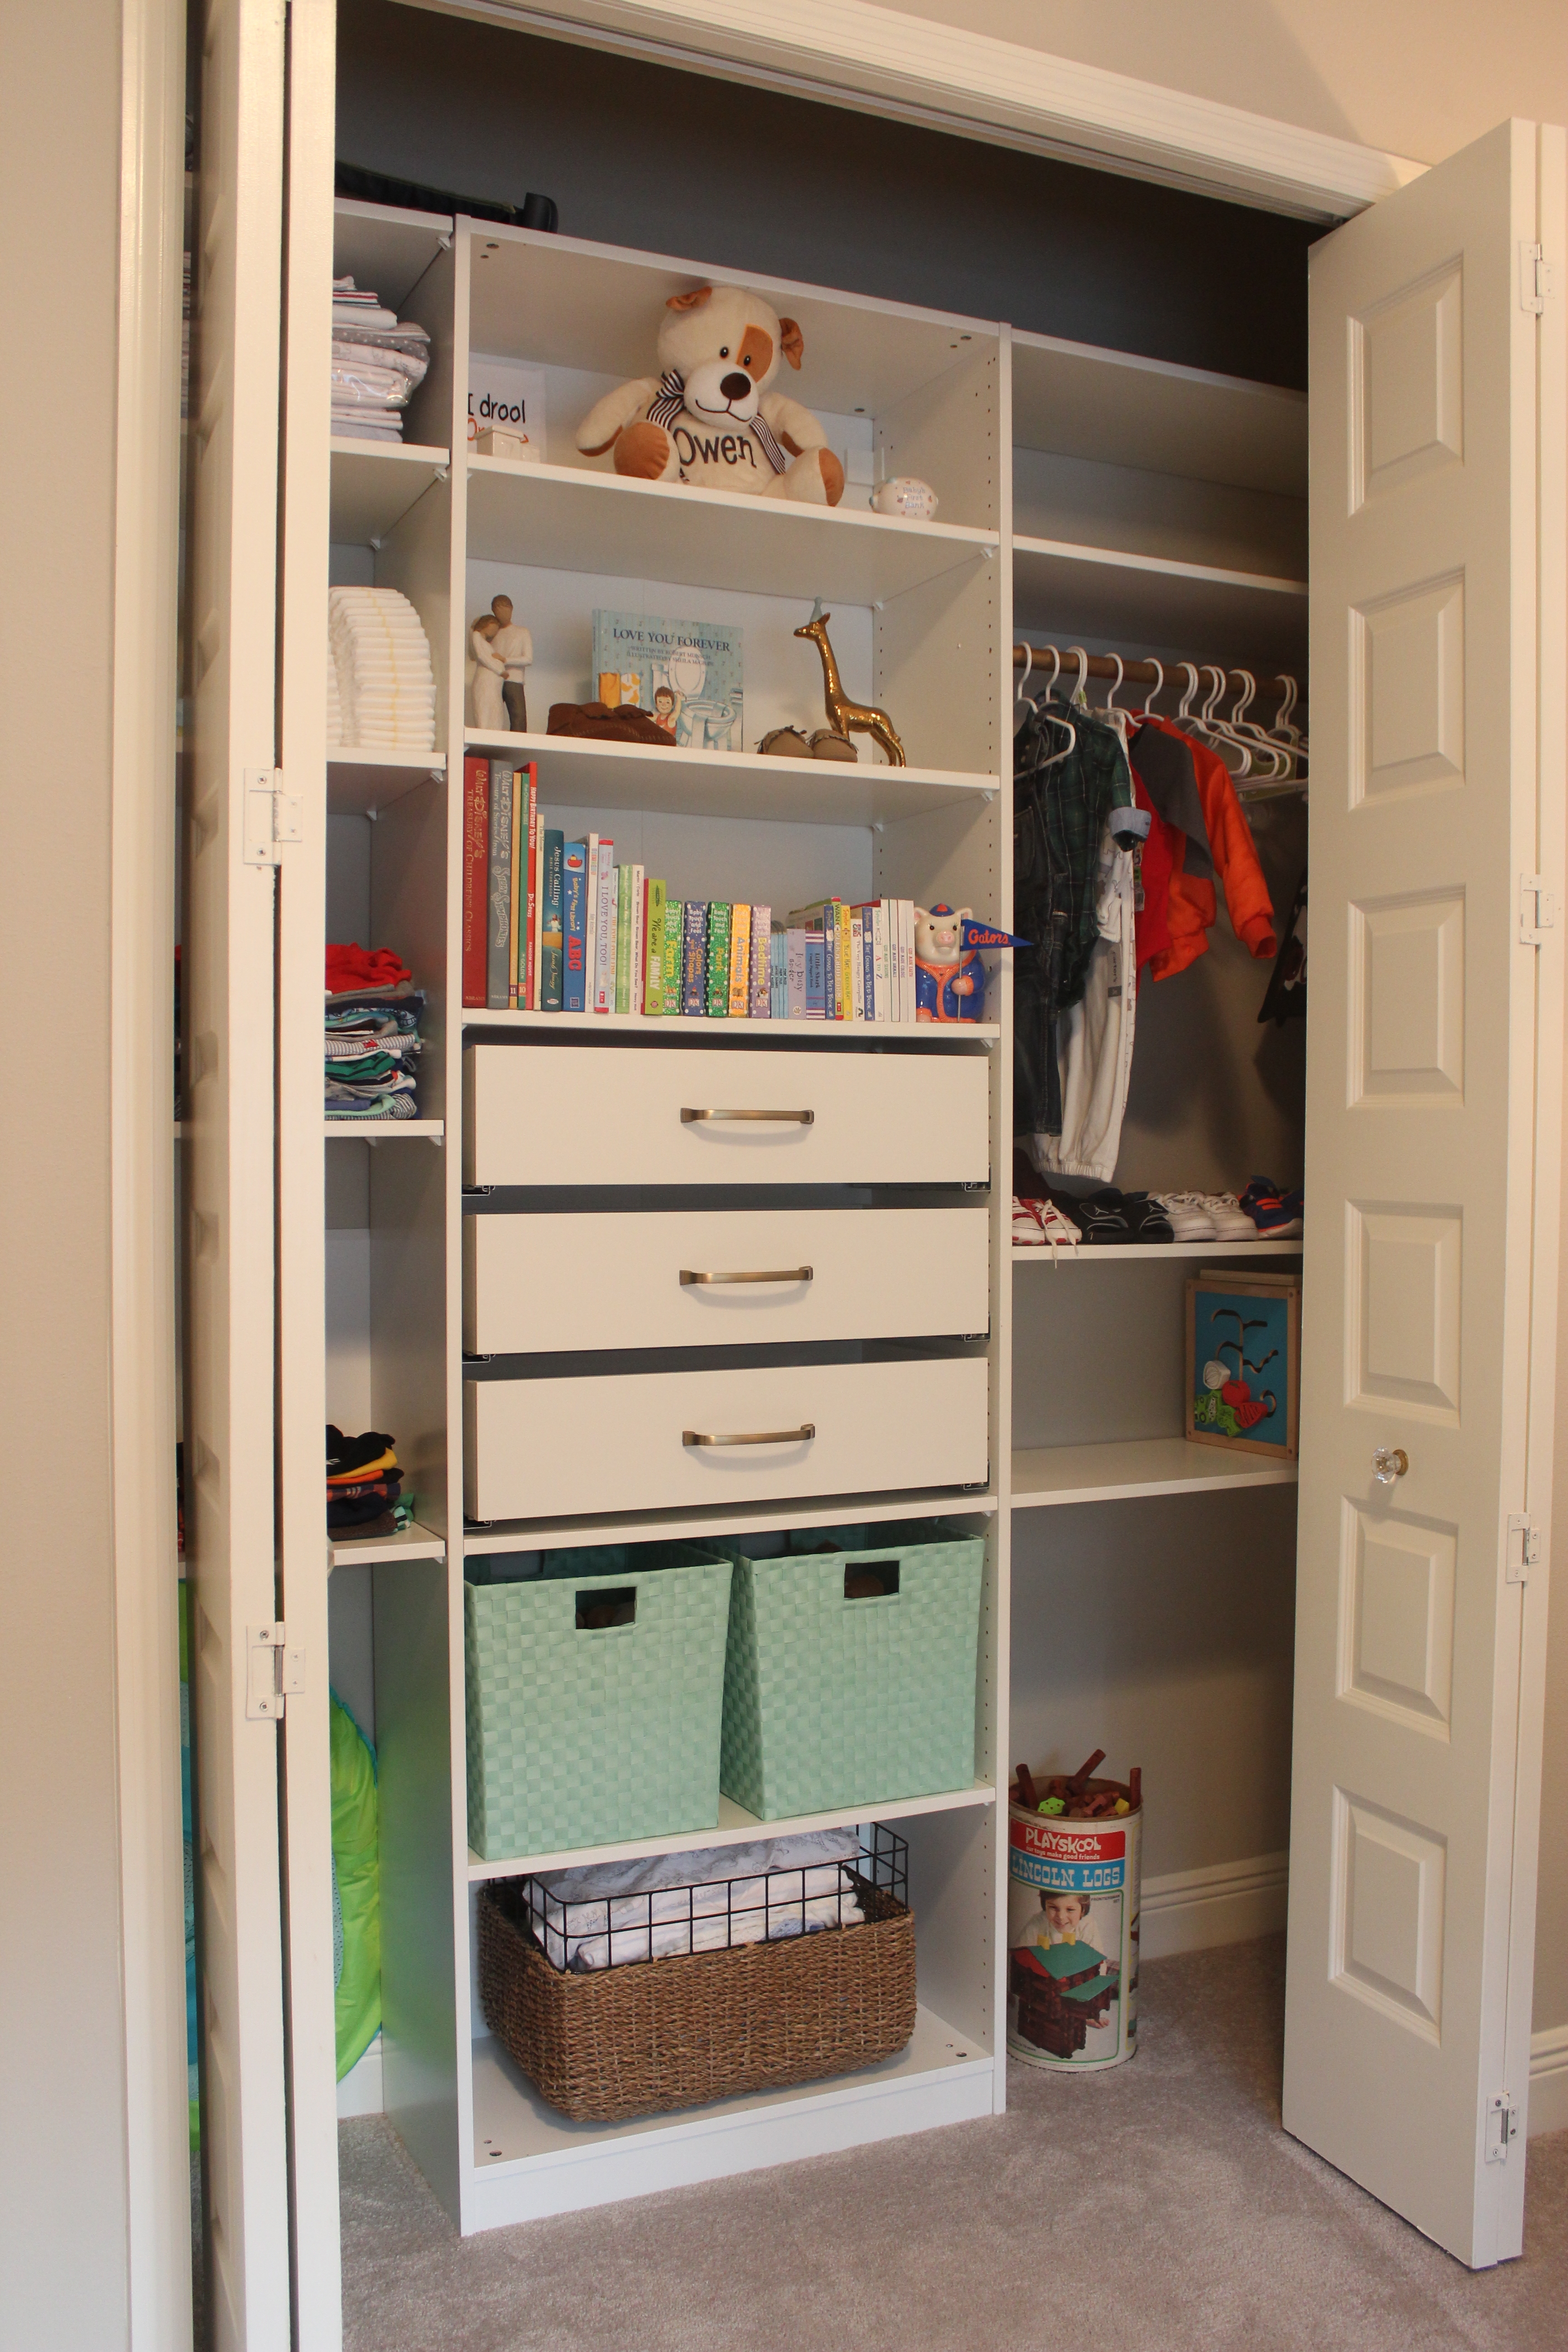
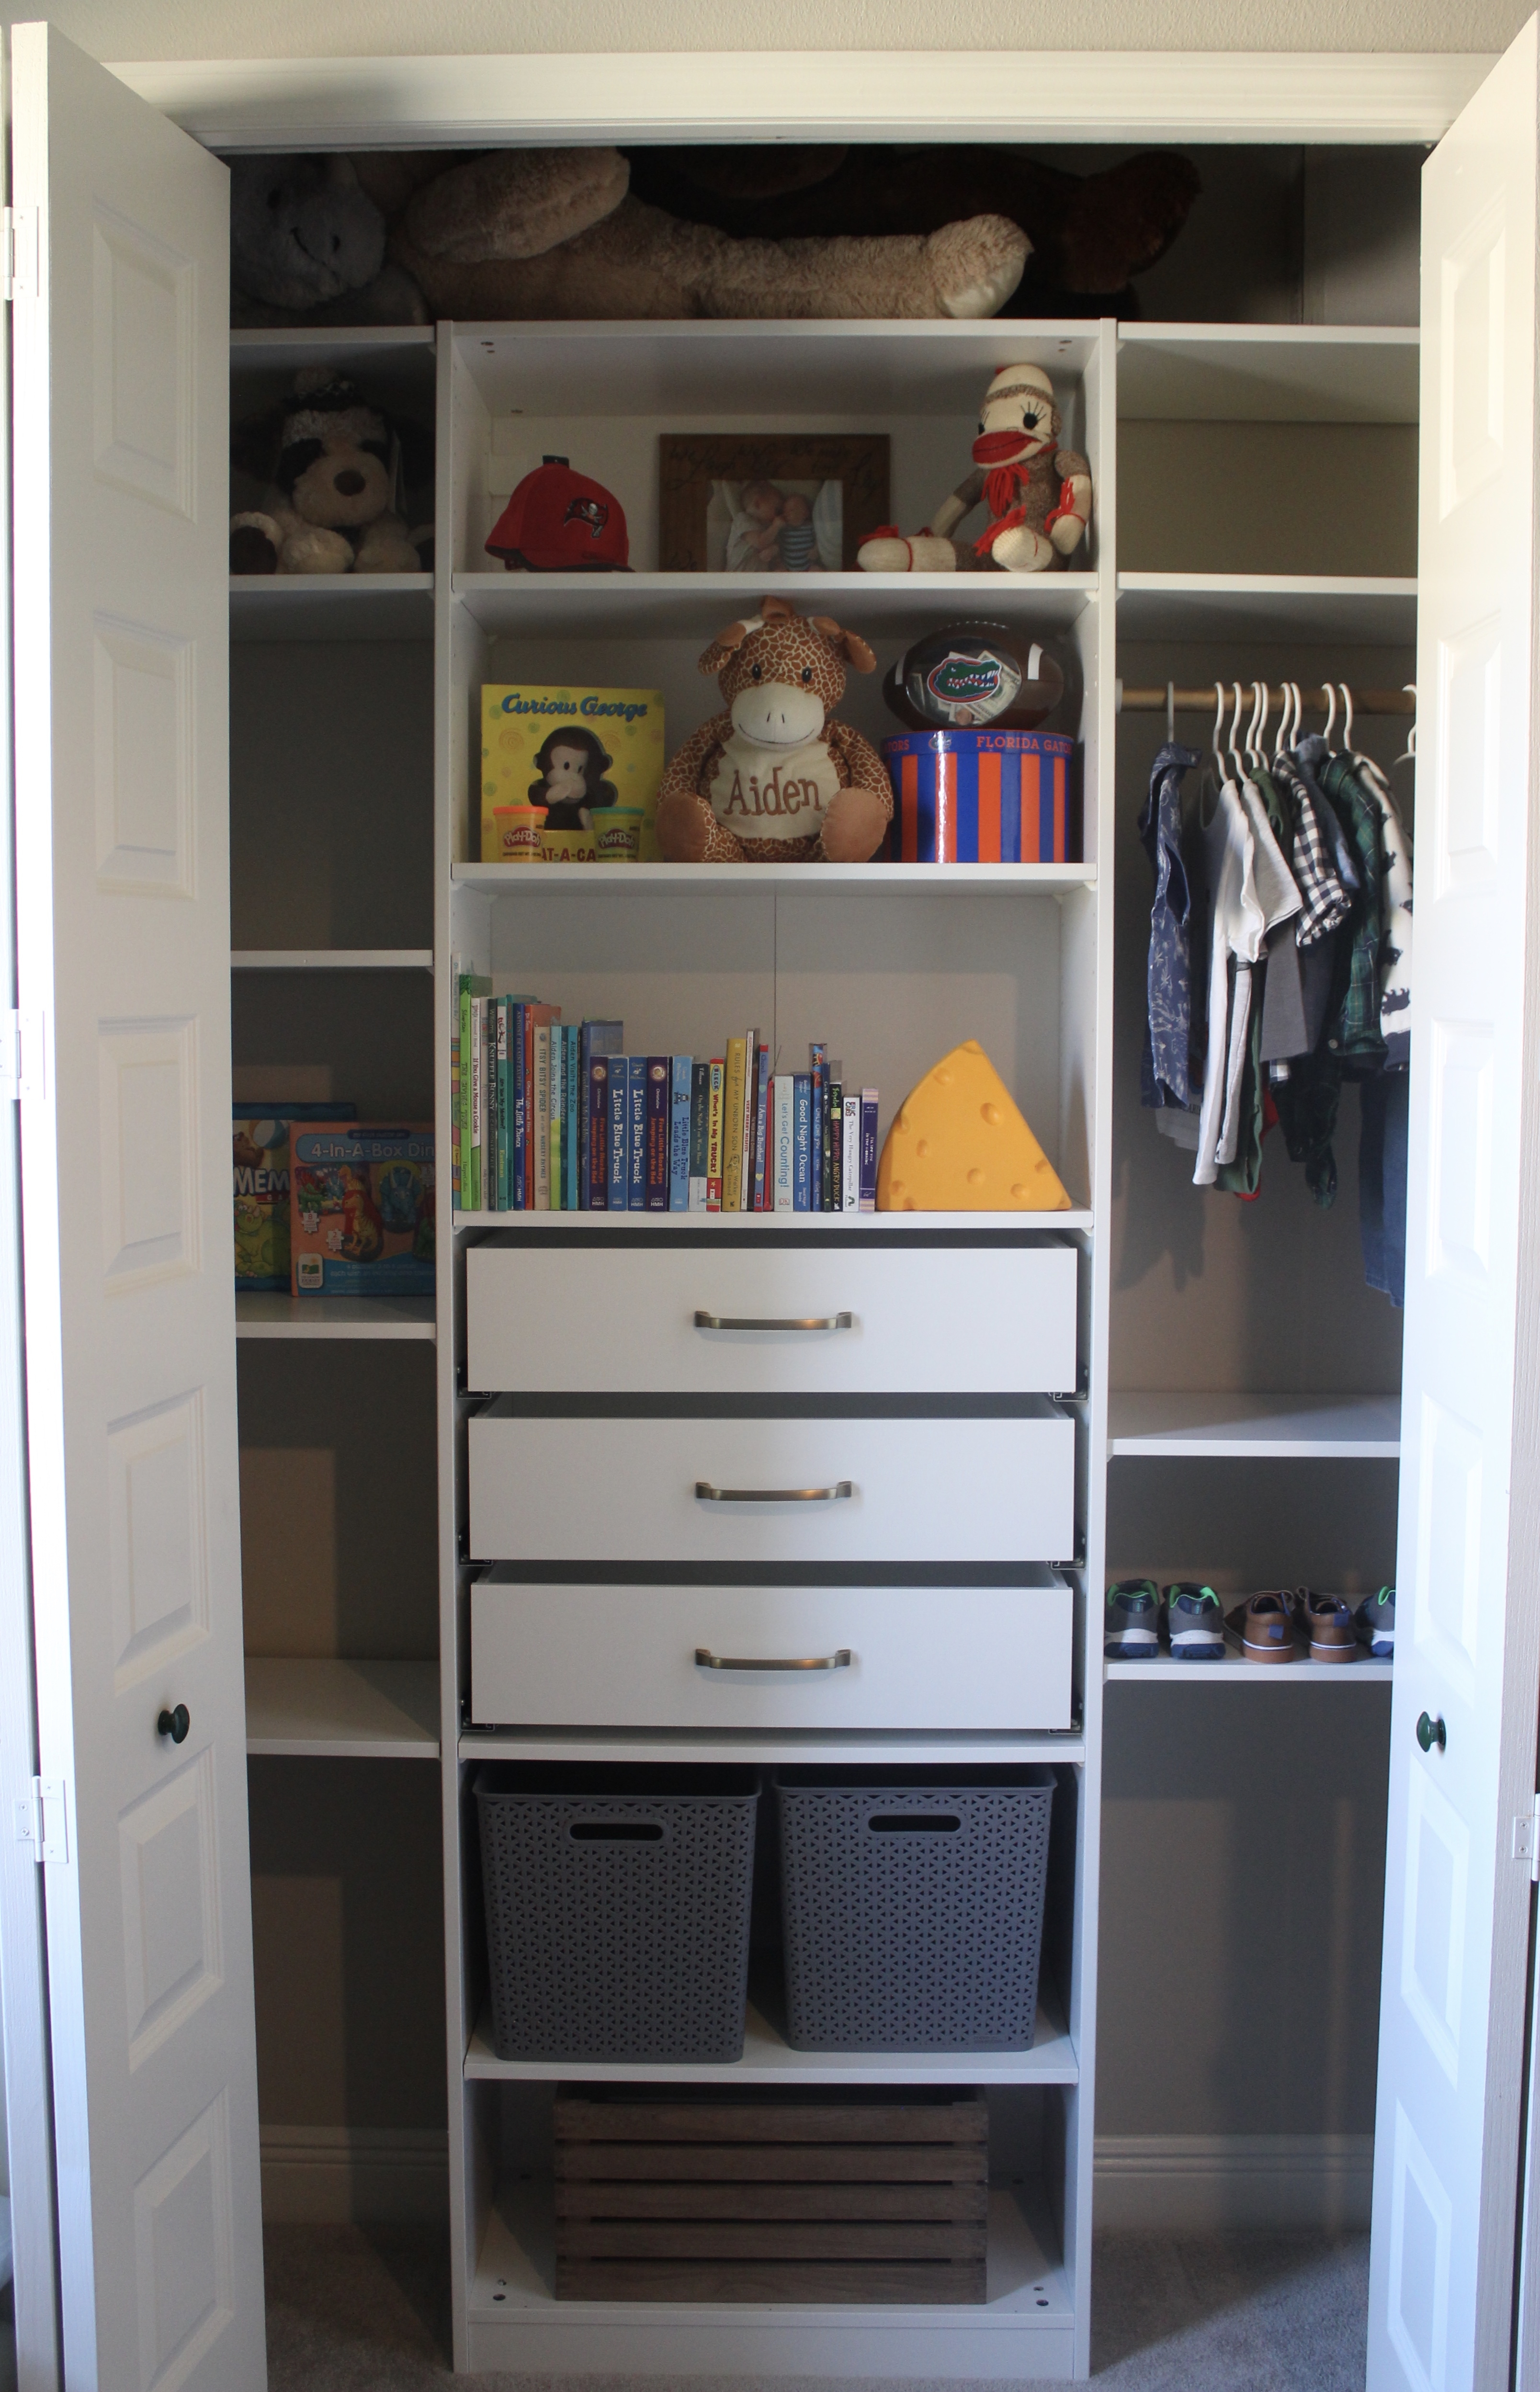
Below is the closet completed minus the drawers for the middle PAX unit.
Let me break it down again for you with cost:
- 29″ wide x 93″ tall x 13.75″ deep PAX unit: $85
- 14 shelves @ $10 each: $140
- 3 drawers @ $25 each: $75
- rod, hardware, and extras: $35
TOTAL: $335
Here are the drawers installed. They do not come with any pulls, so I bought and installed these pulls myself to match my kitchen.
And here are both of the closets completed!
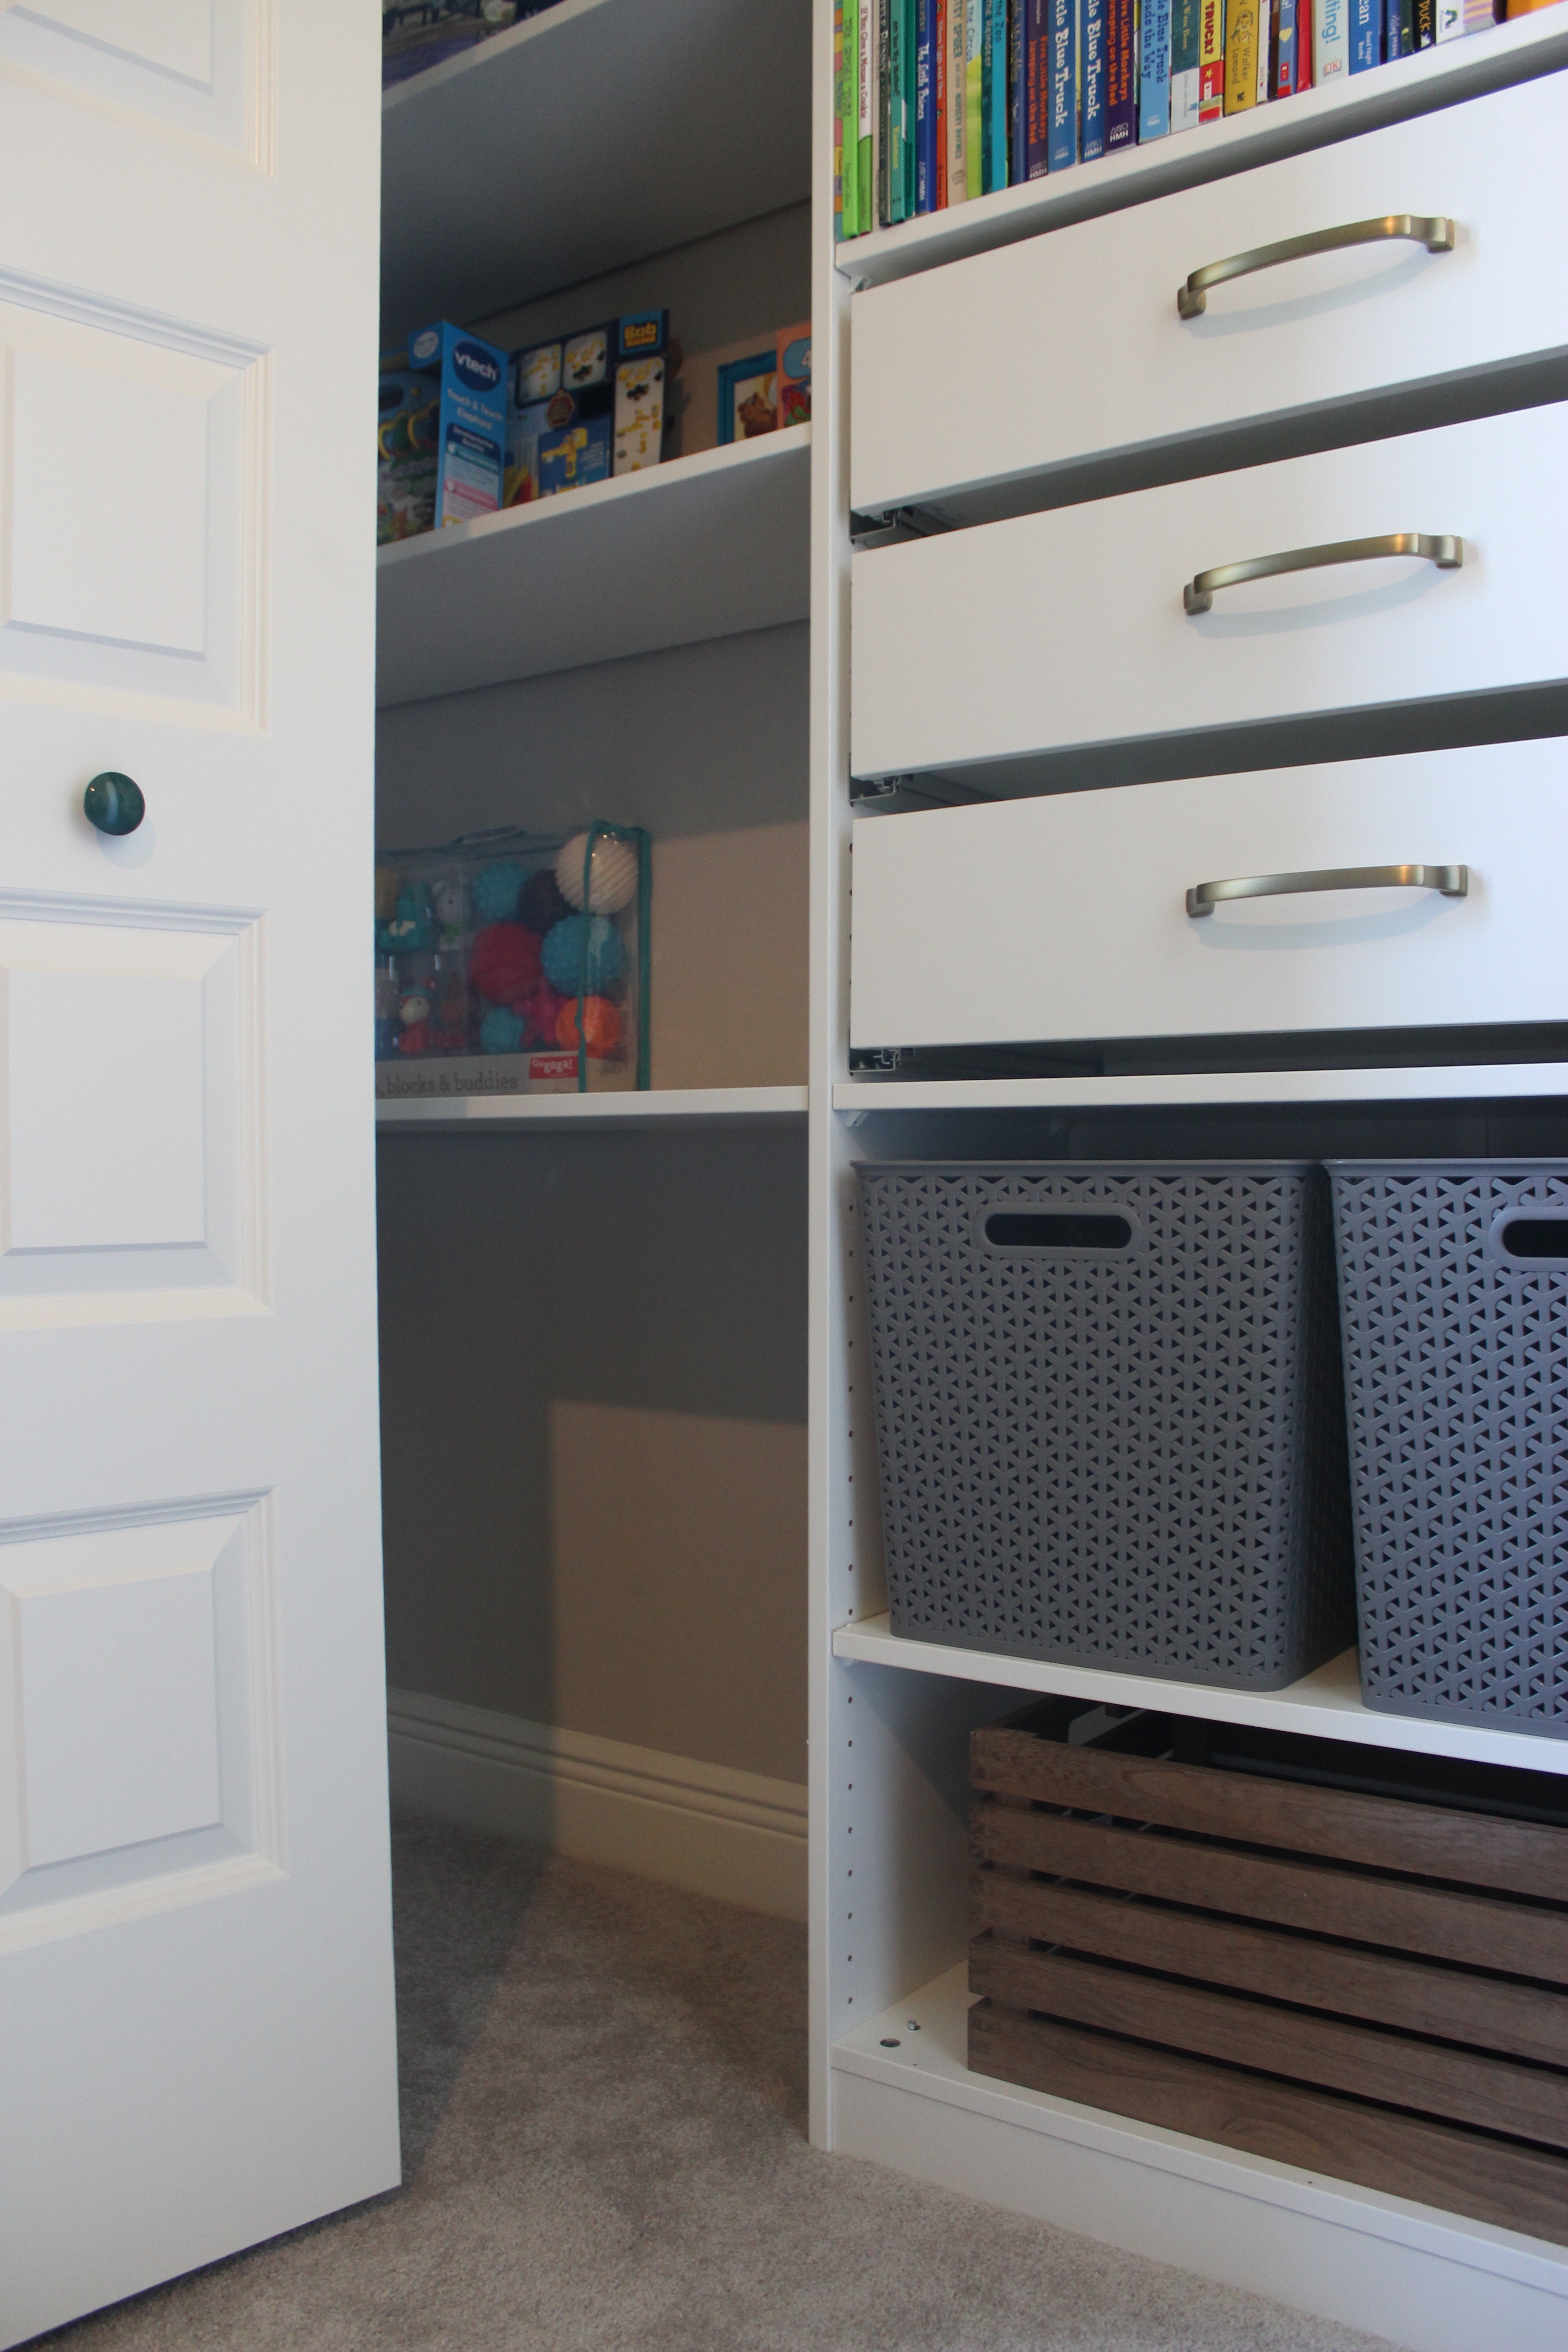
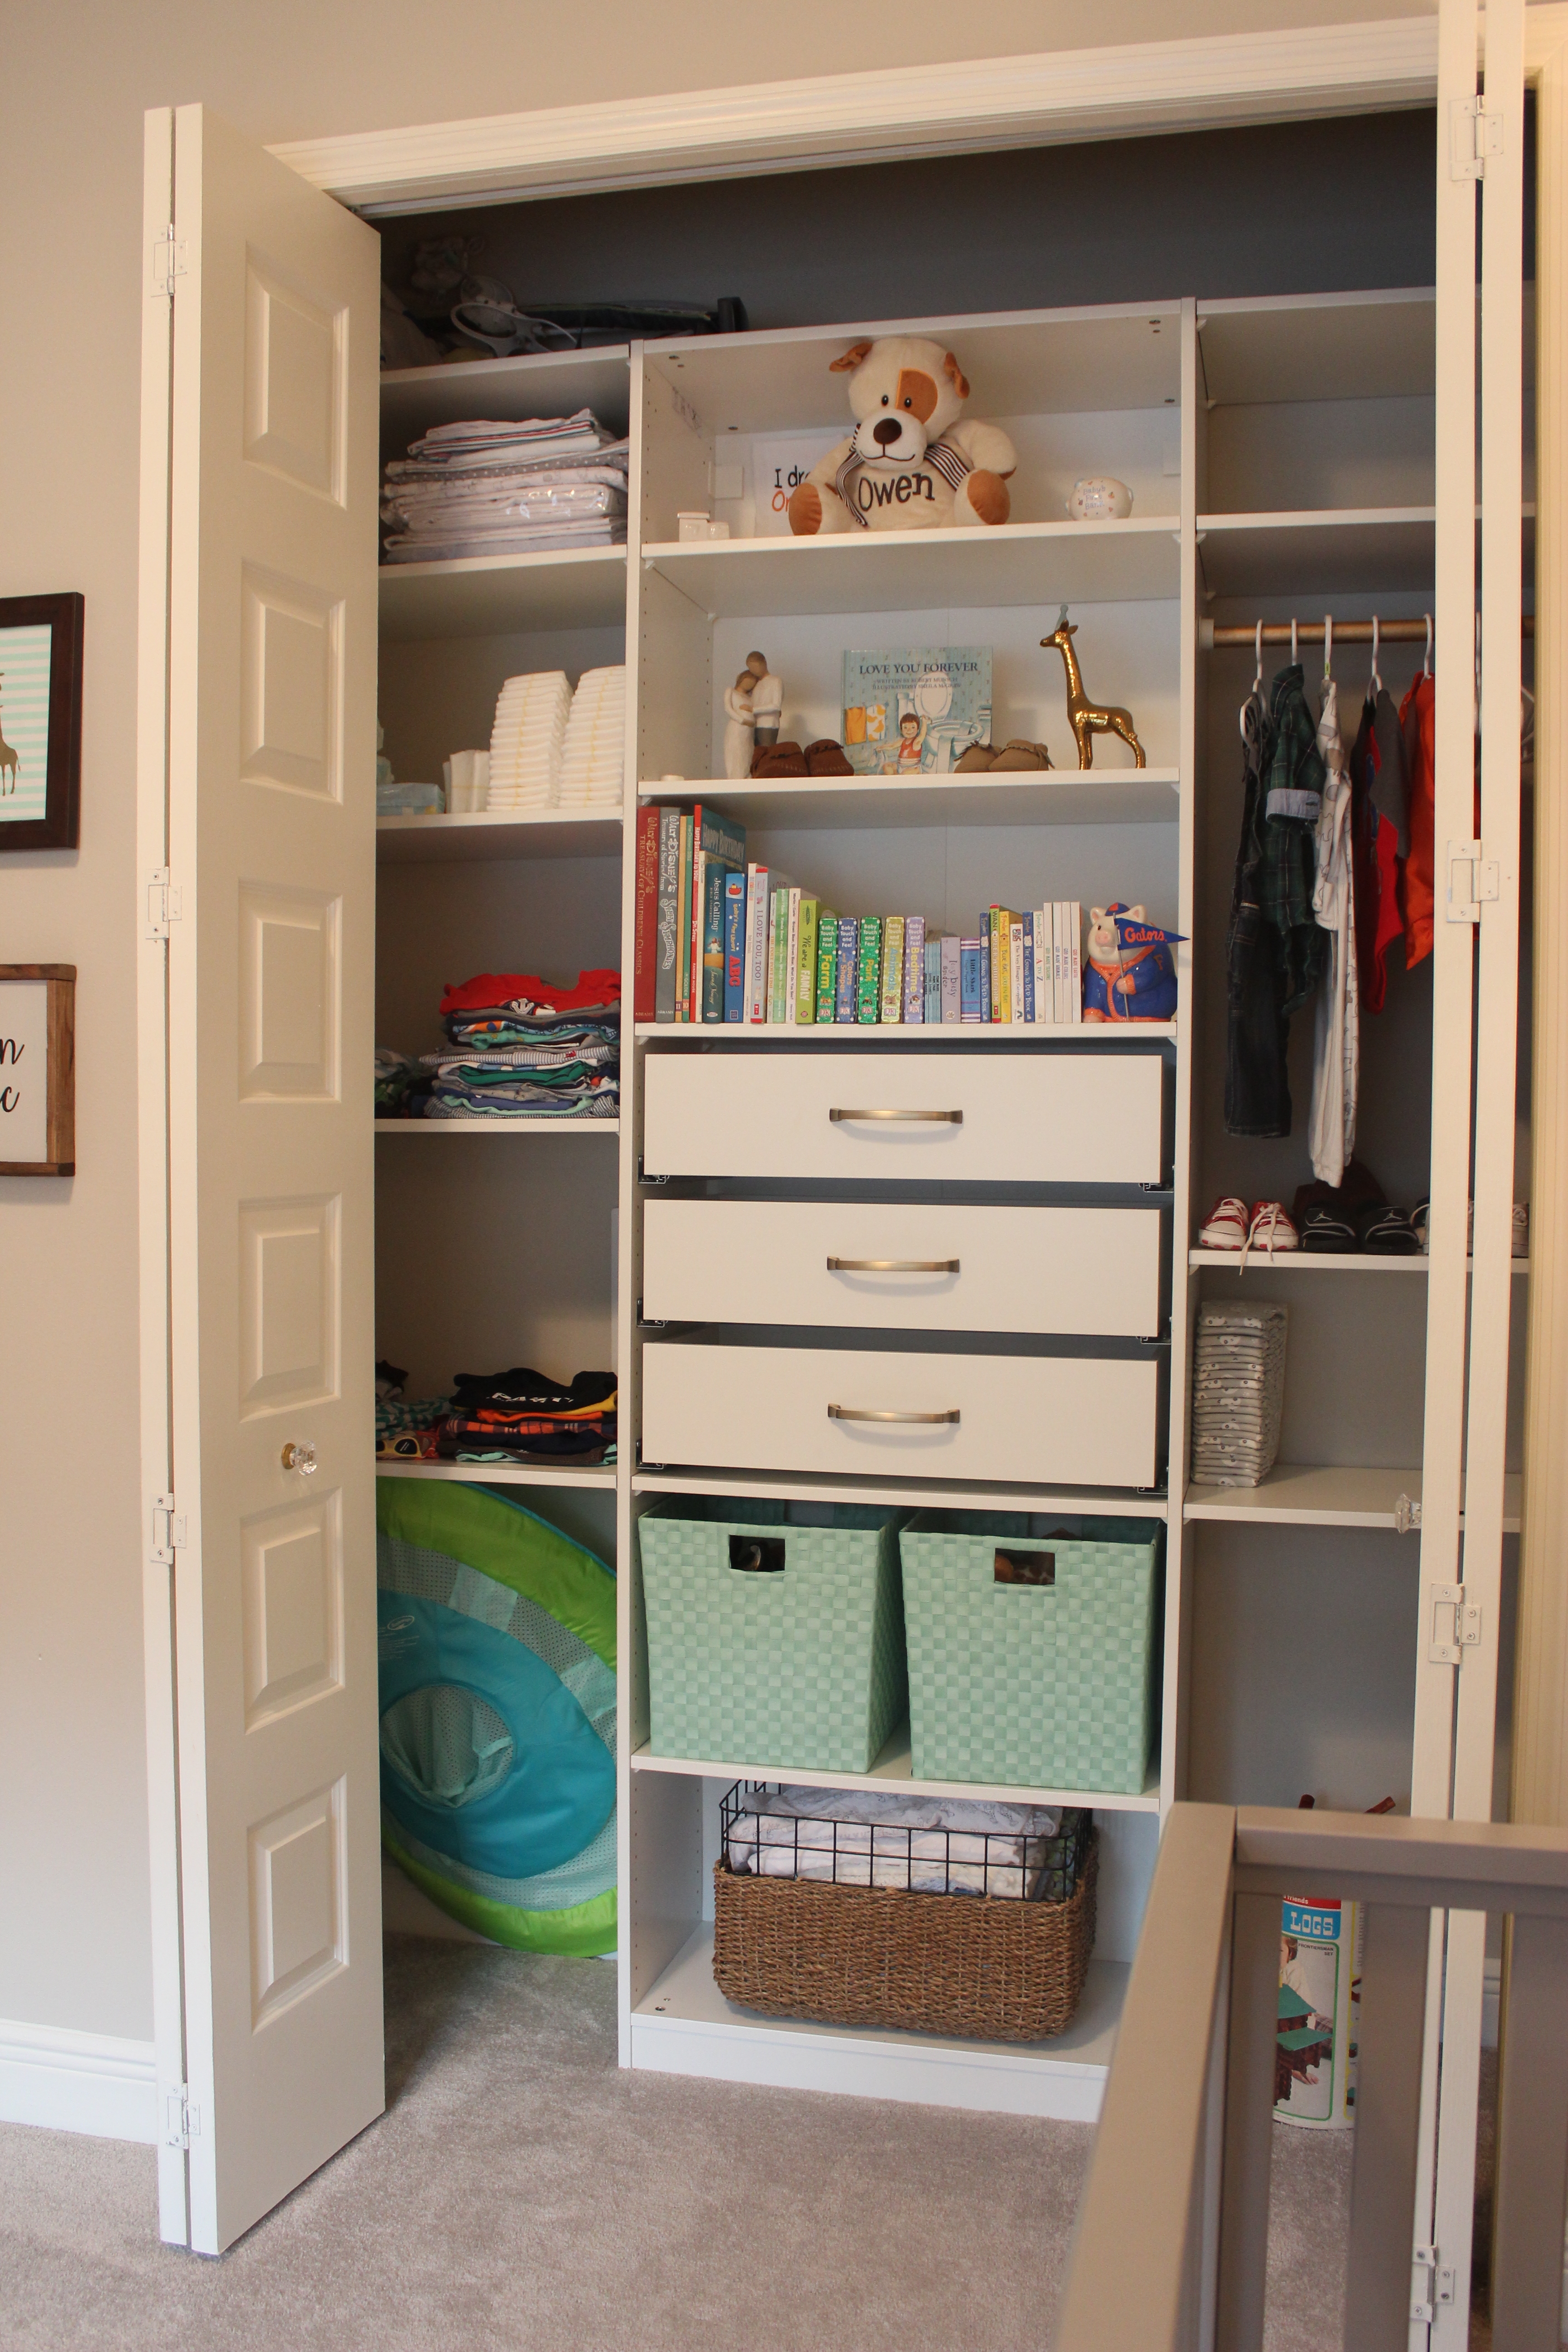
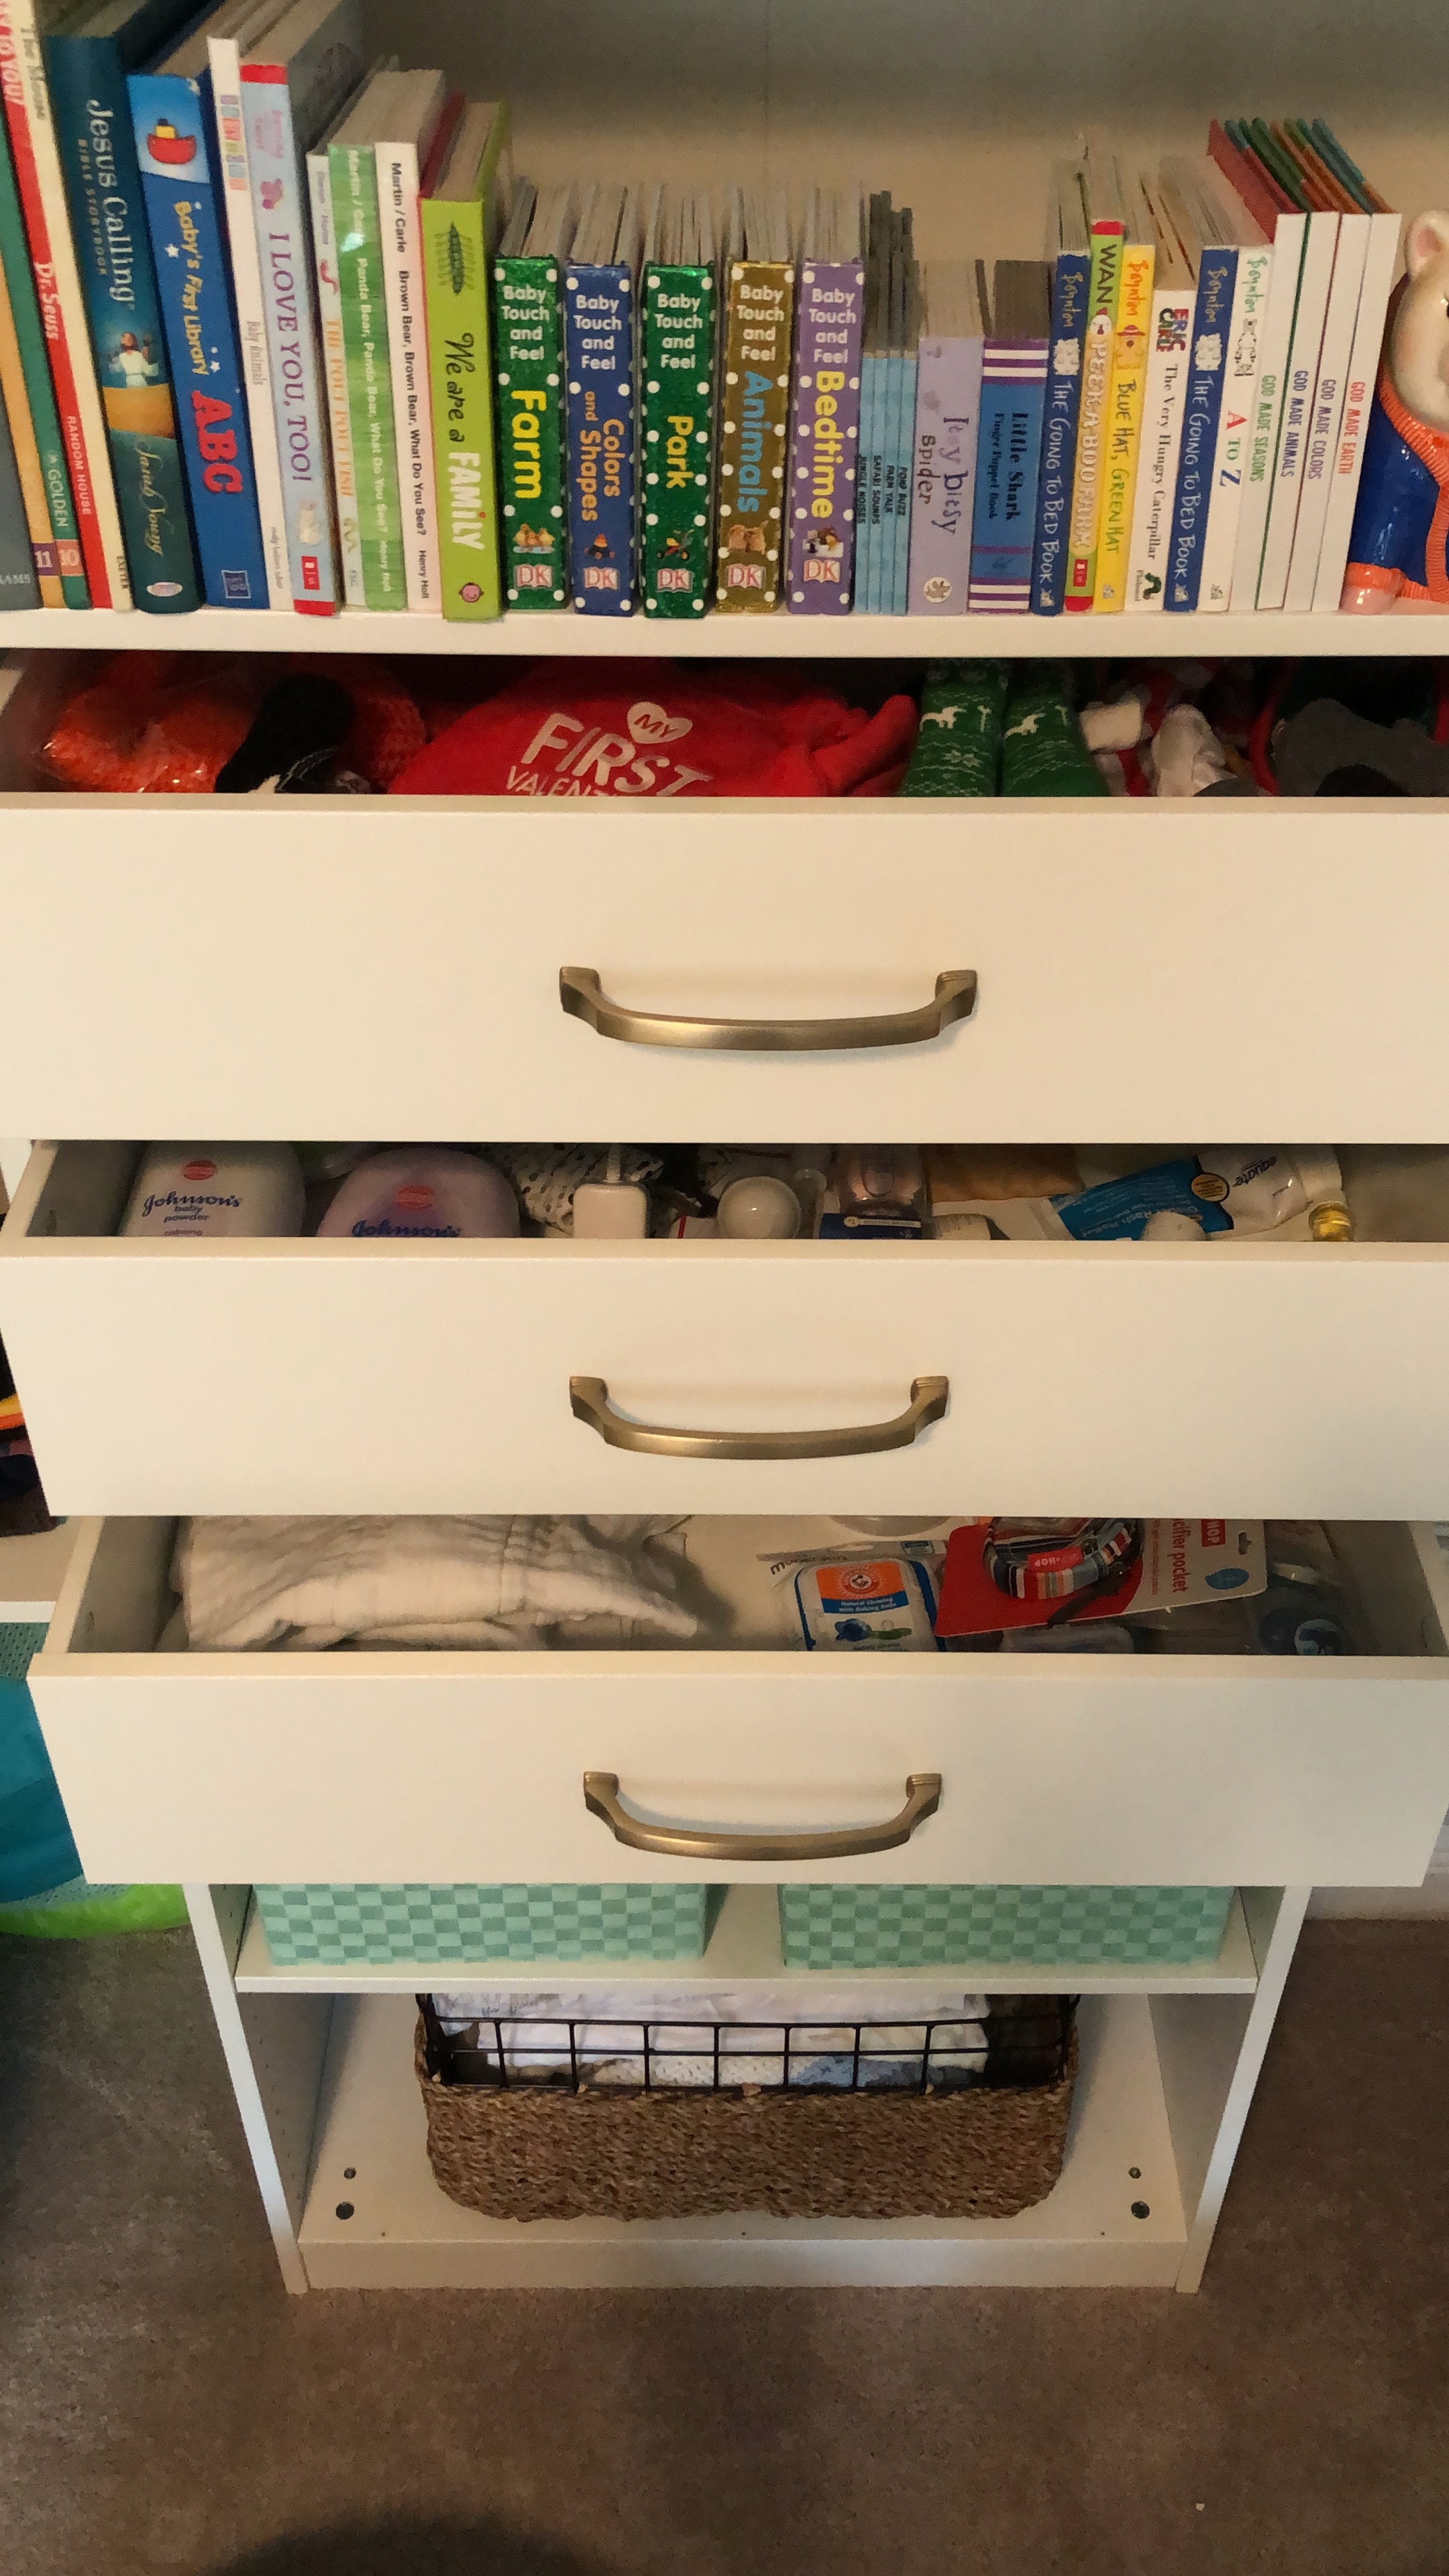
Sources for the mint storage boxes and basket linked.
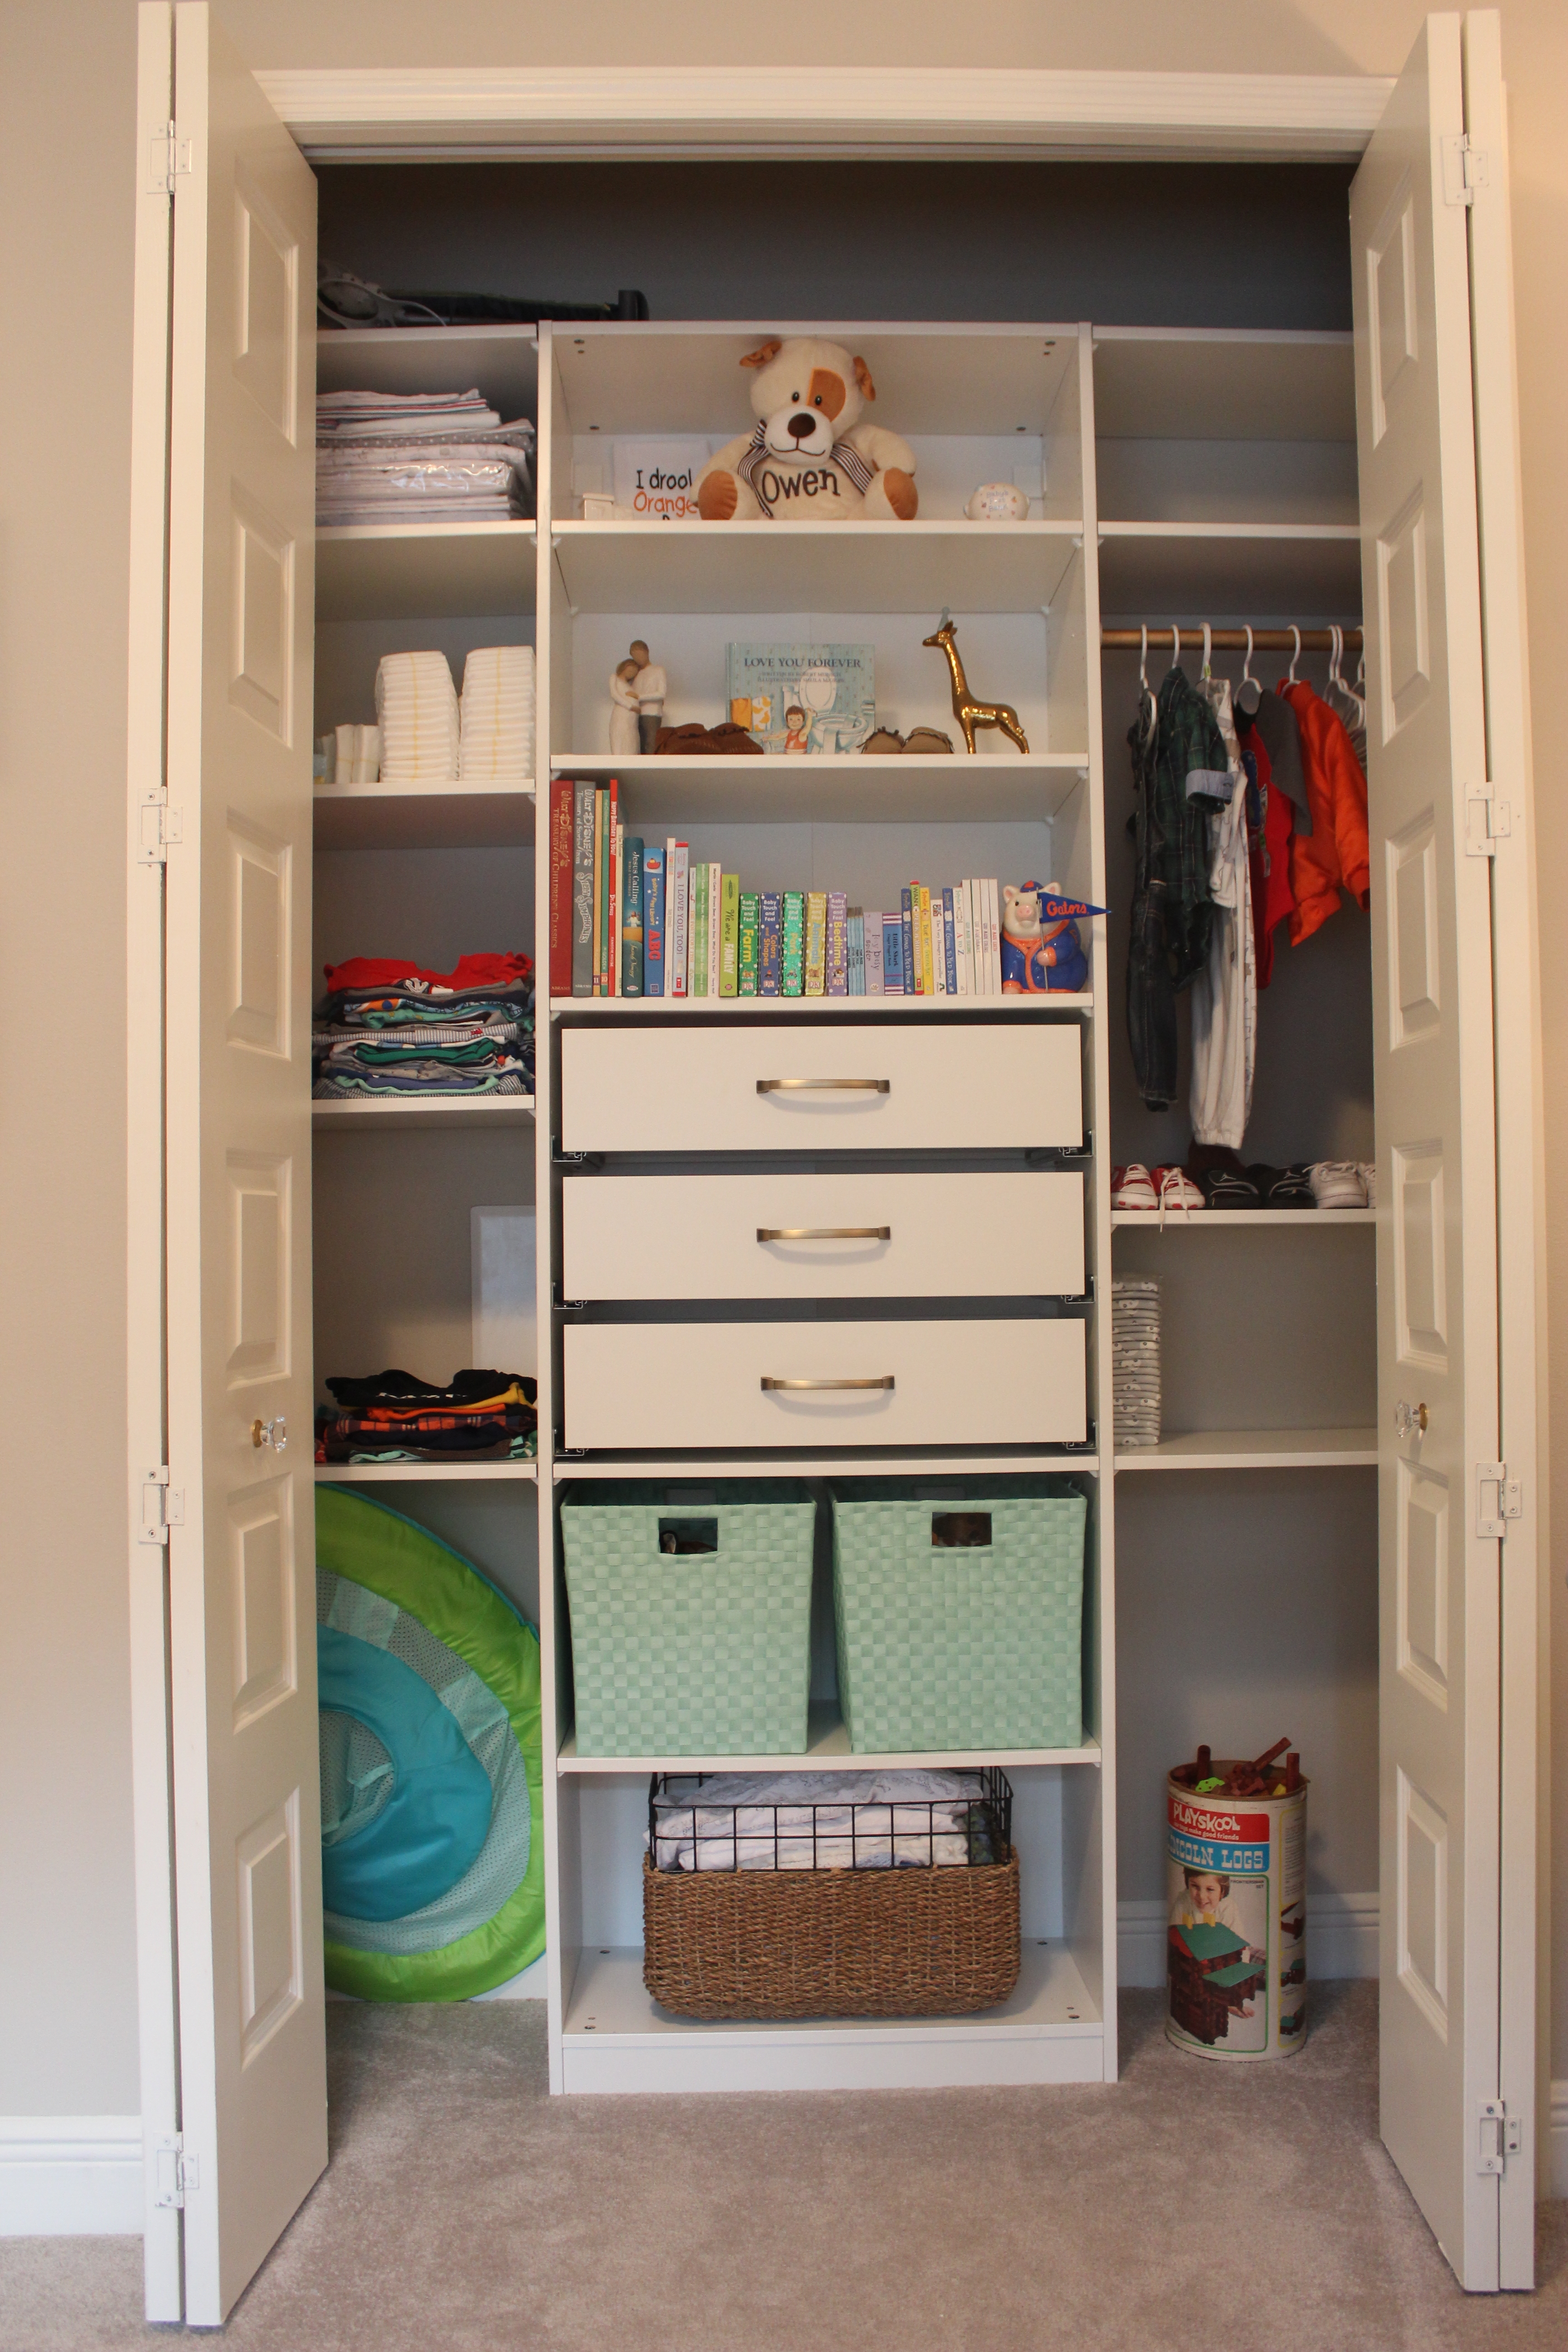

Sources for the gray storage bins and wooden crate.
Hopefully this is helpful to those looking to give their closet an overhaul! I LOVE the amount of storage and organization these provide compared to the wire rack that was previously there. Comment and let me know your thoughts, I love hearing from you guys! And if I missed anything, please shoot me a comment or email so I can help you!
I just love it. You did an amazing job. I really liked this kids closet makeover. These pictures are nice. Thanks for sharing.
Thank you so much!