Easiest Crown Molding Ever
I will go ahead and say this up front.
I cheated on this project and bought pre-made crown molding corners. There, I said it.
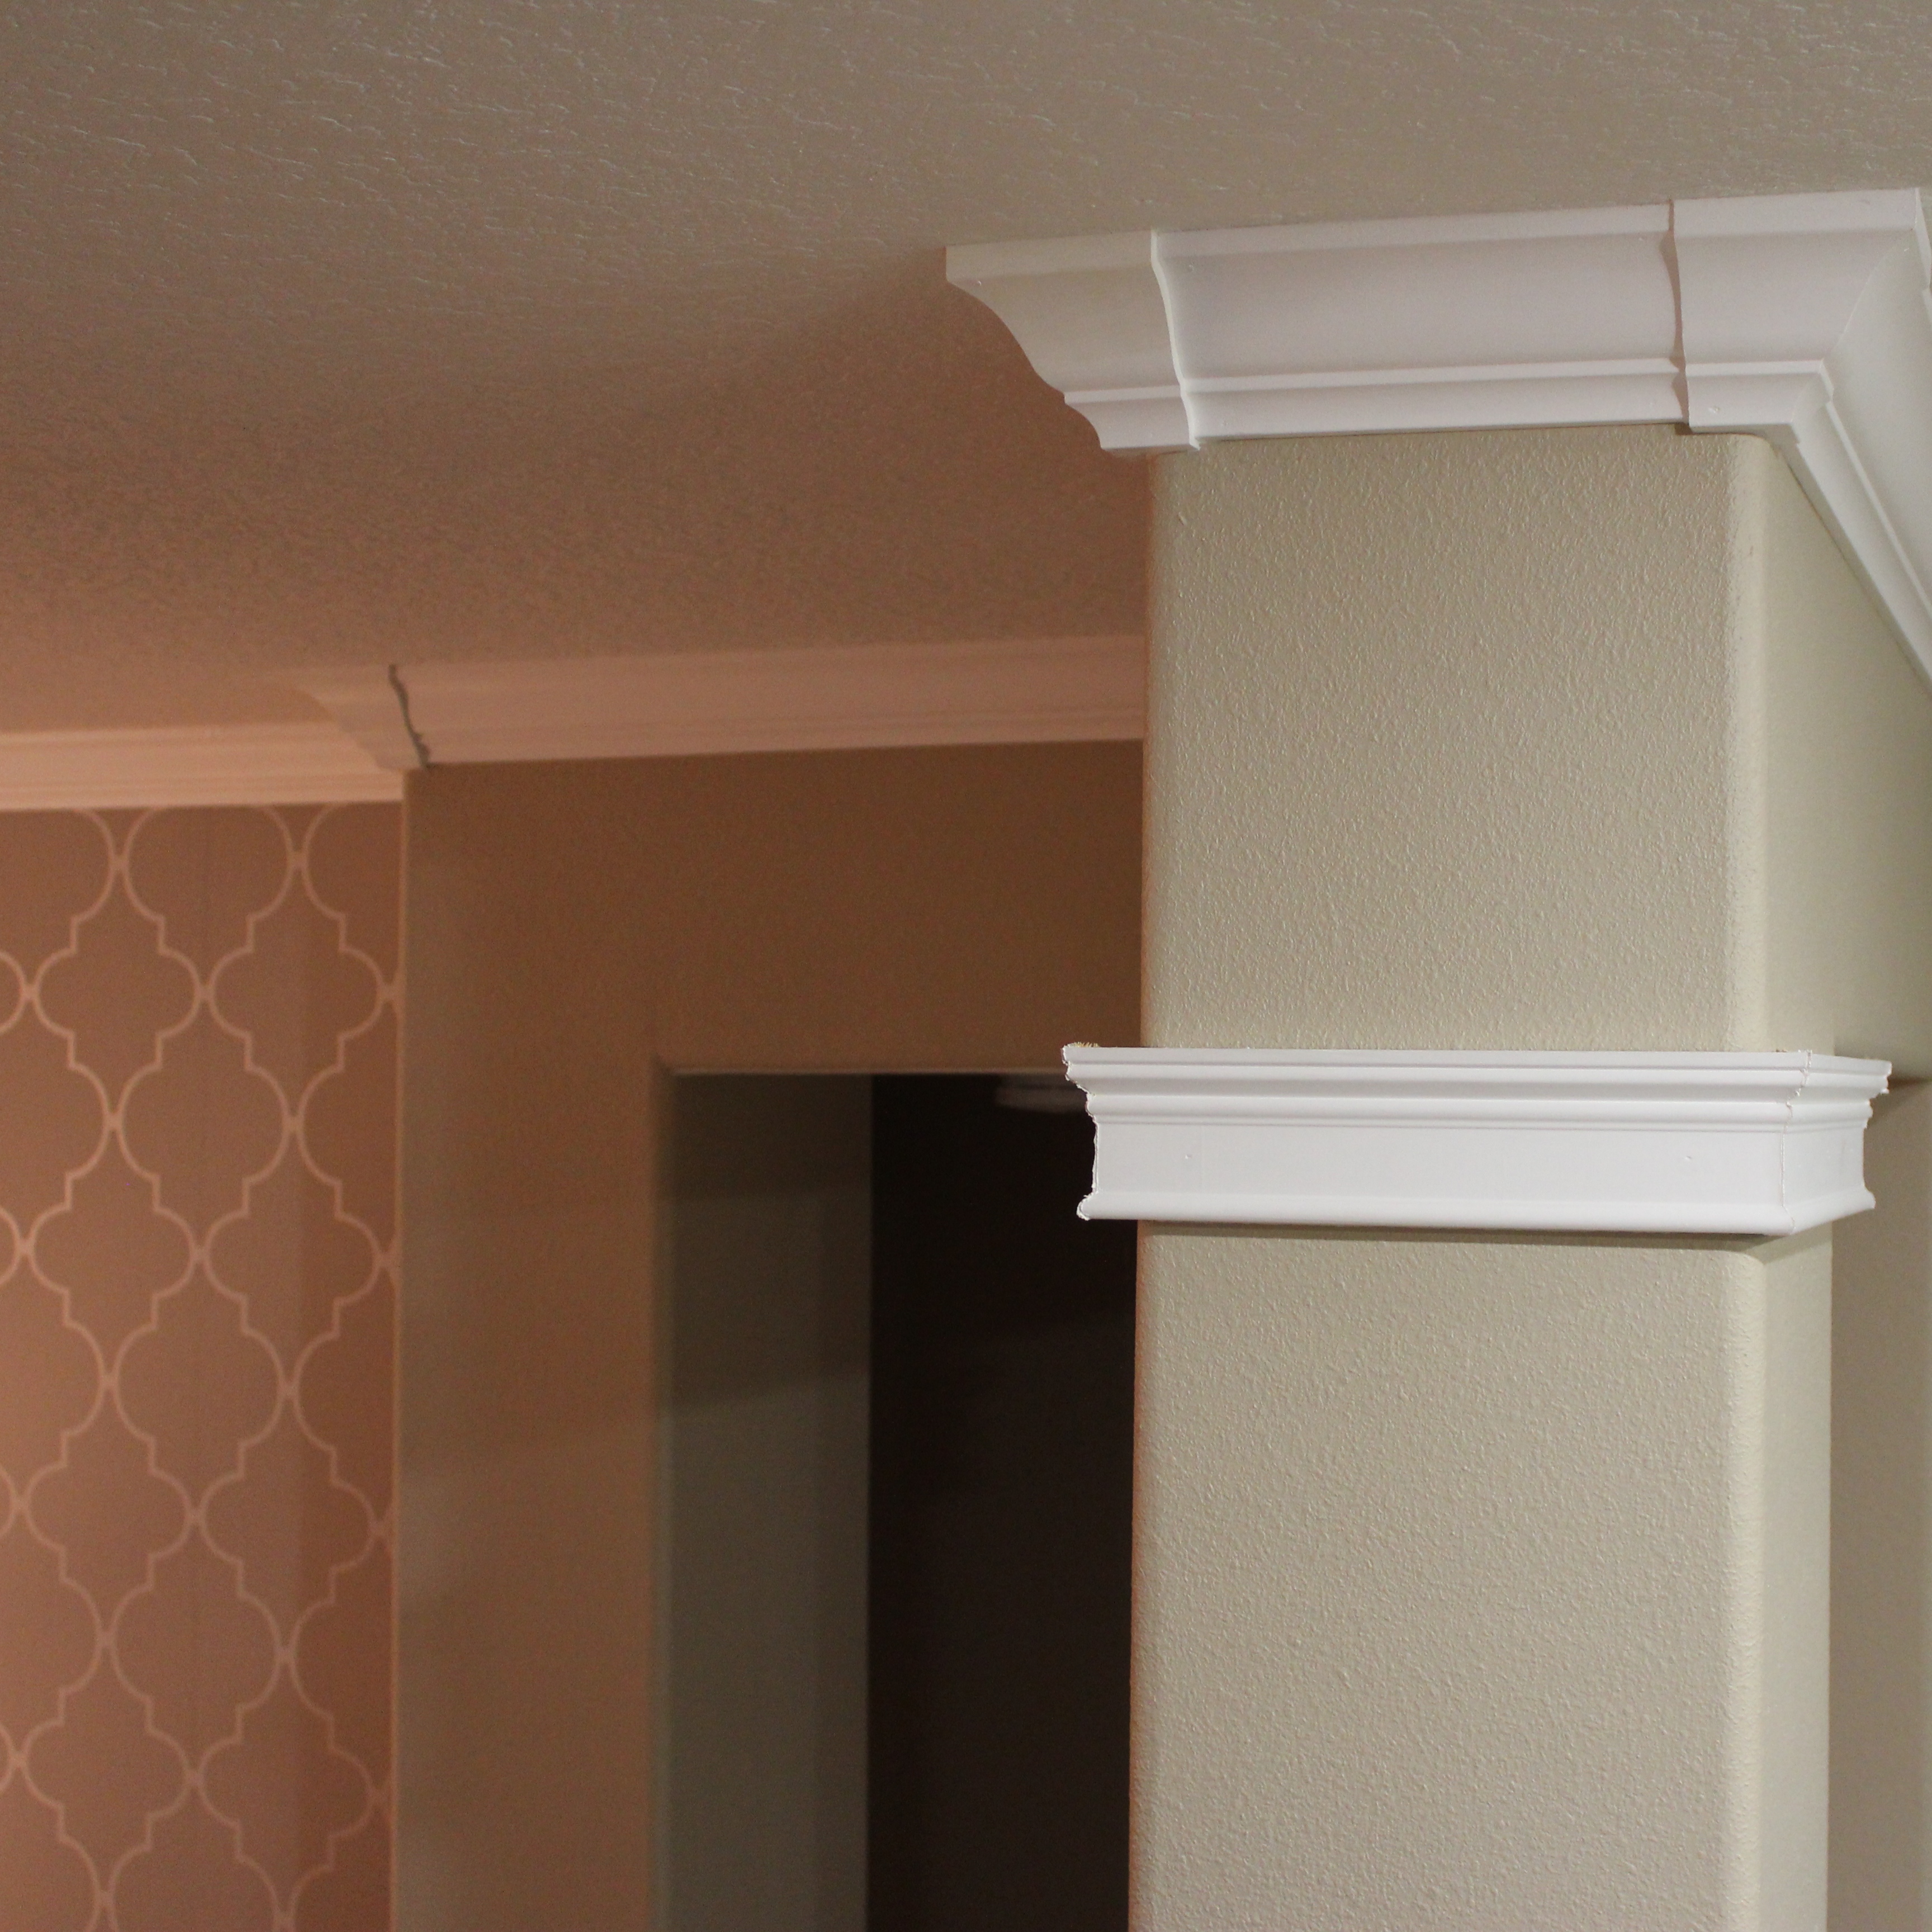
Why? Because crown molding is a very, very difficult project to take on. It involves lots of cuts, lots of precision, and a whole lot of accuracy. And it’s not that I don’t strive for all of those things, but it was just more than I wanted to take on. So here are the corners I found at Lowe’s. They are reversible, meaning they can be used for inside AND outside corners. You just flip it upside down.
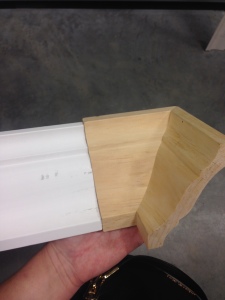
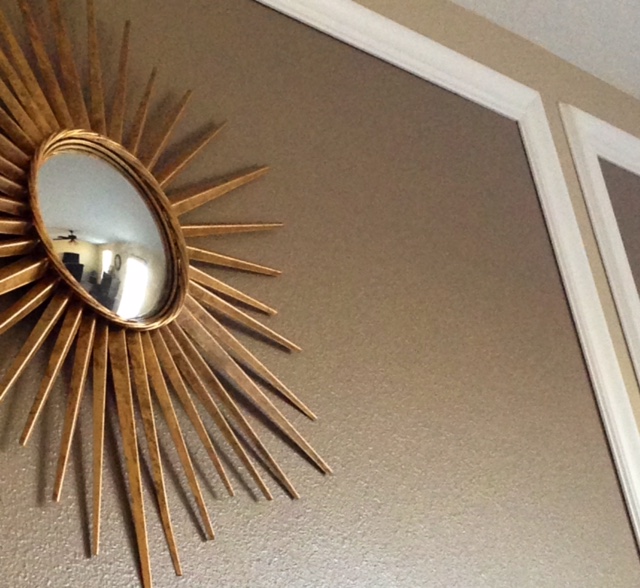
As you can see from the picture, they are slightly larger than the crown itself. That’s because it’s reversible, but it also gives it a sort of decorative look. I made sure I bought crown molding that was the exact same design as the corners so that they matched up perfectly. I bought this primed white crown molding from Lowe’s and these are the pre-made corners. I purchased the crown molding in 8 foot pieces so that it could fit in my car easily.
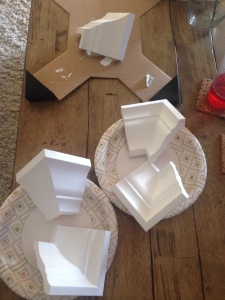
I painted 2 coats of pure white on the corners, and one coat on the pieces of crown since it was already primed.
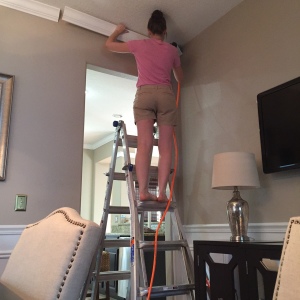
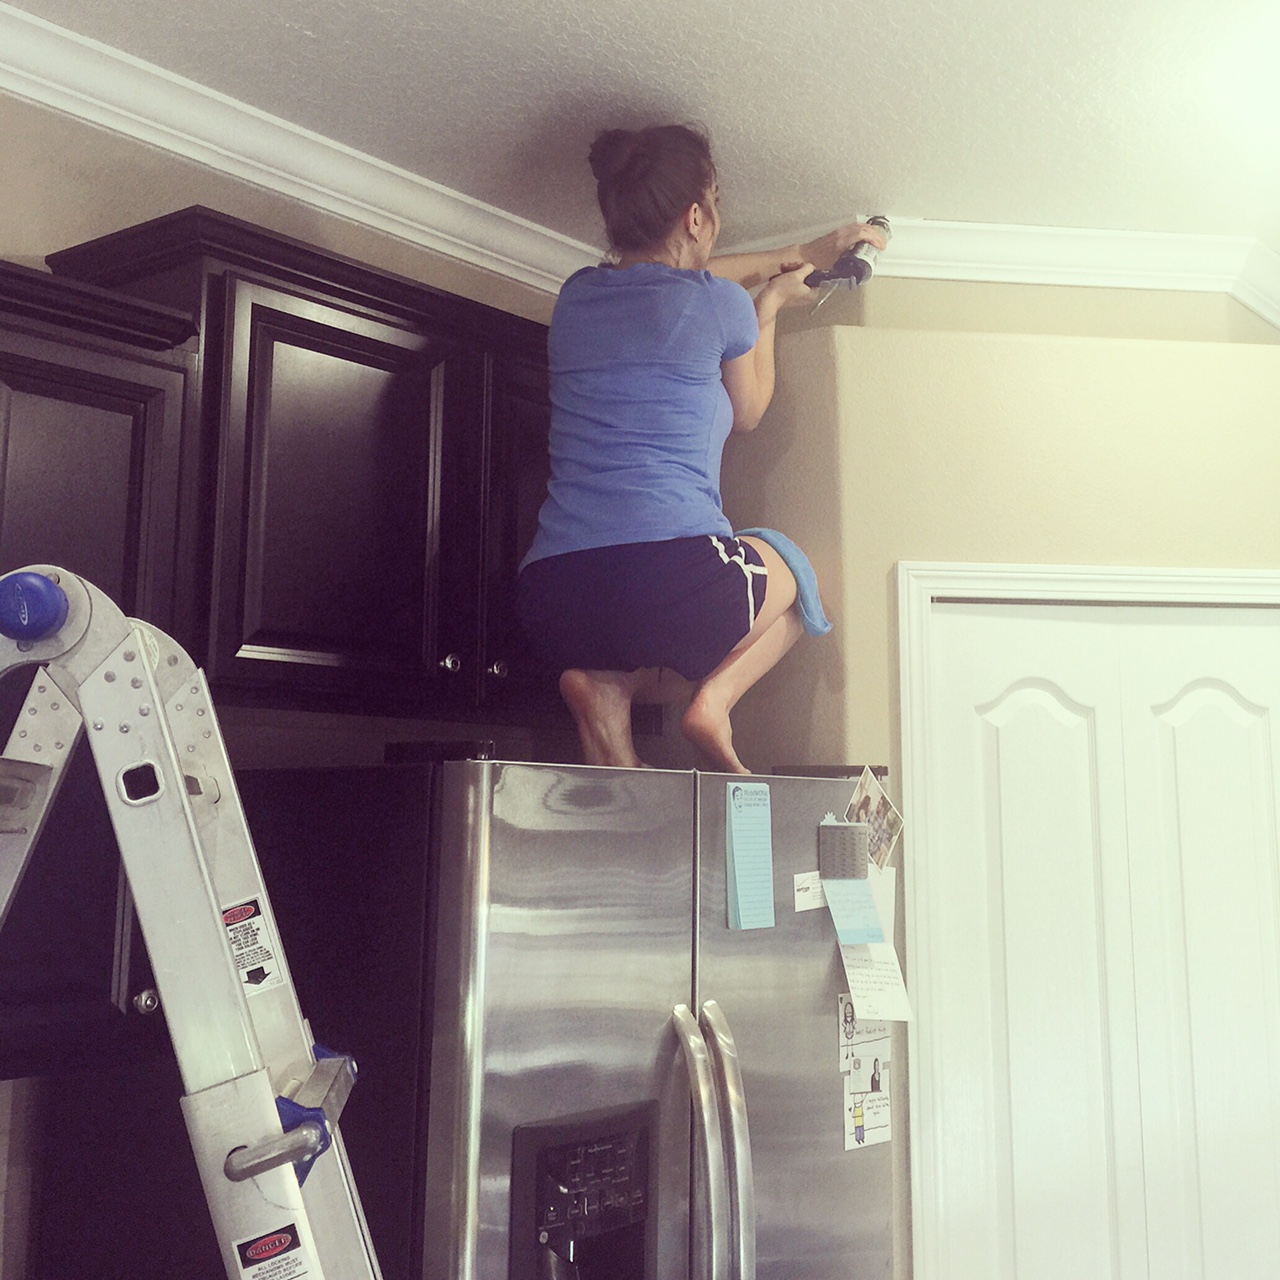
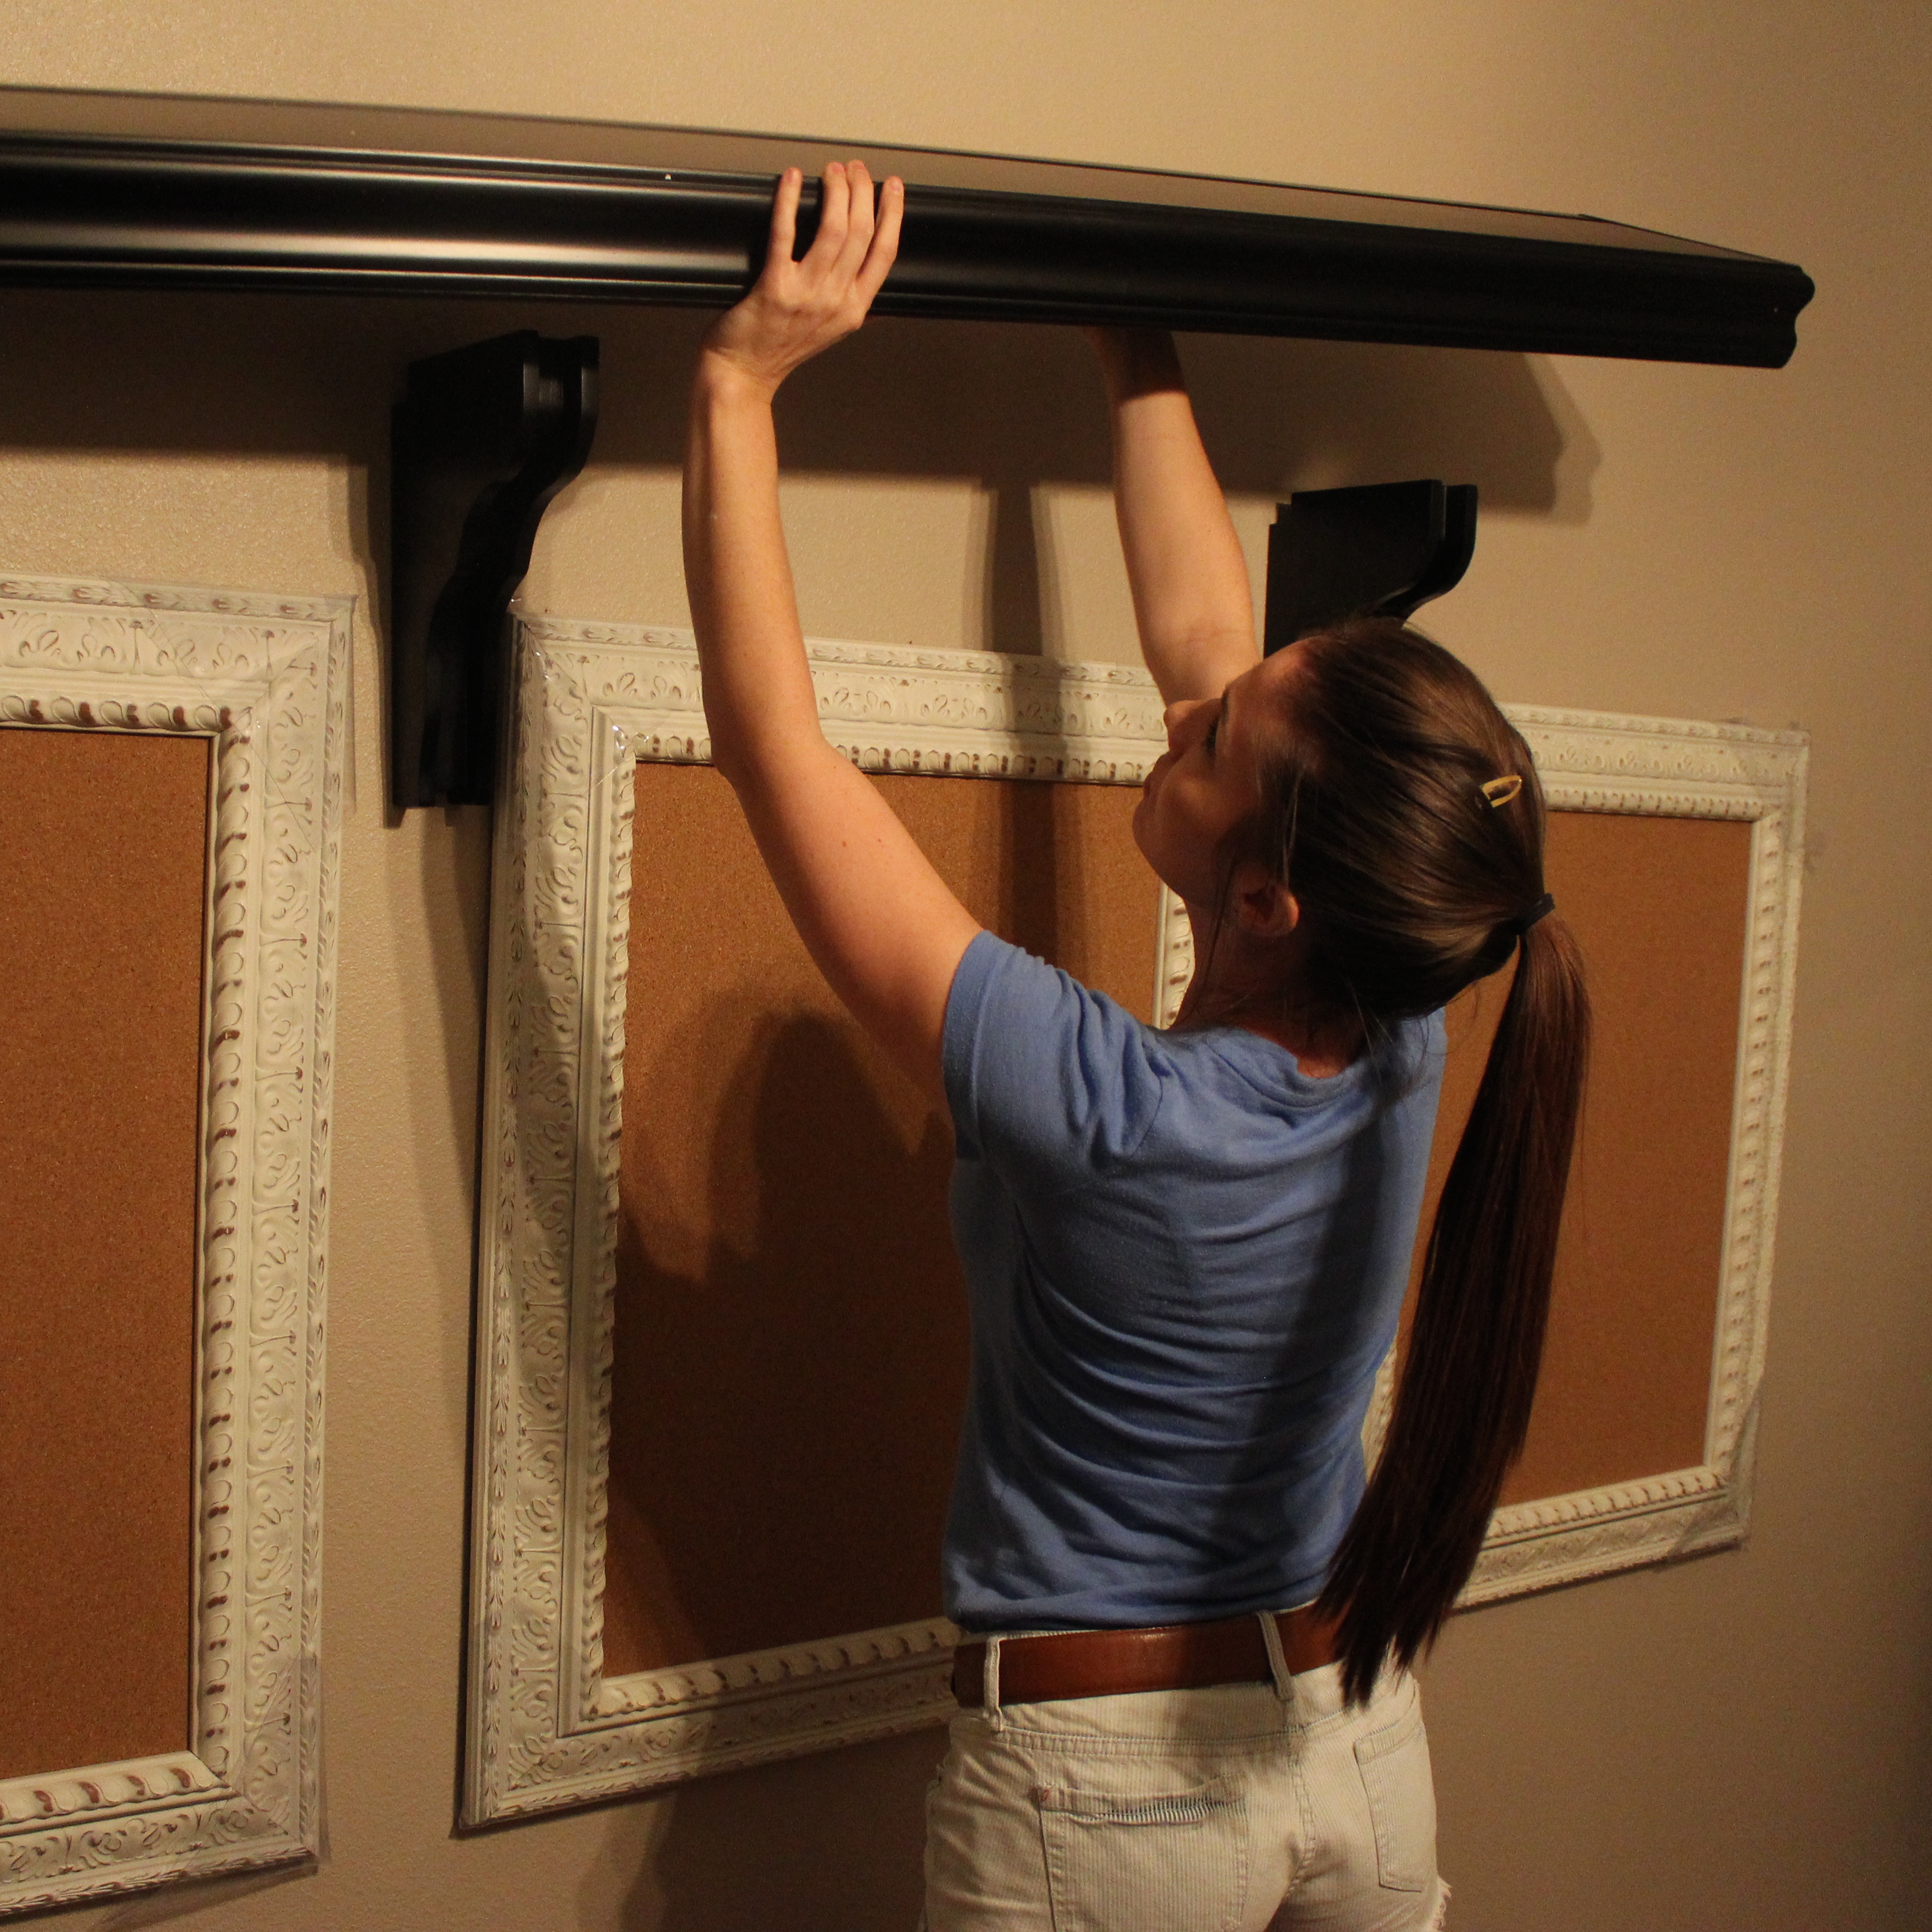
The first thing I did was pick a corner and hang one of the corner pieces. They sandwich right up into the corner of the wall pretty perfectly because of the way they are made and it creates your starting point for the rest of the crown. I used a couple finishing nails with my nail gun to secure it in place. (Sorry for the poor picture quality, this was before I had my nice camera.)
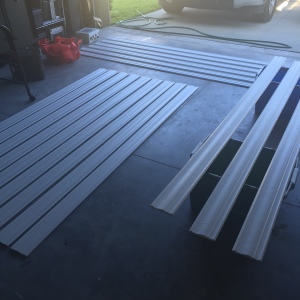
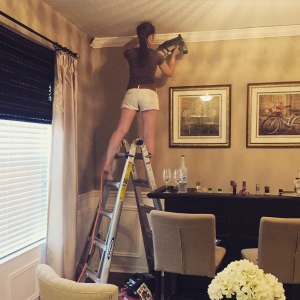
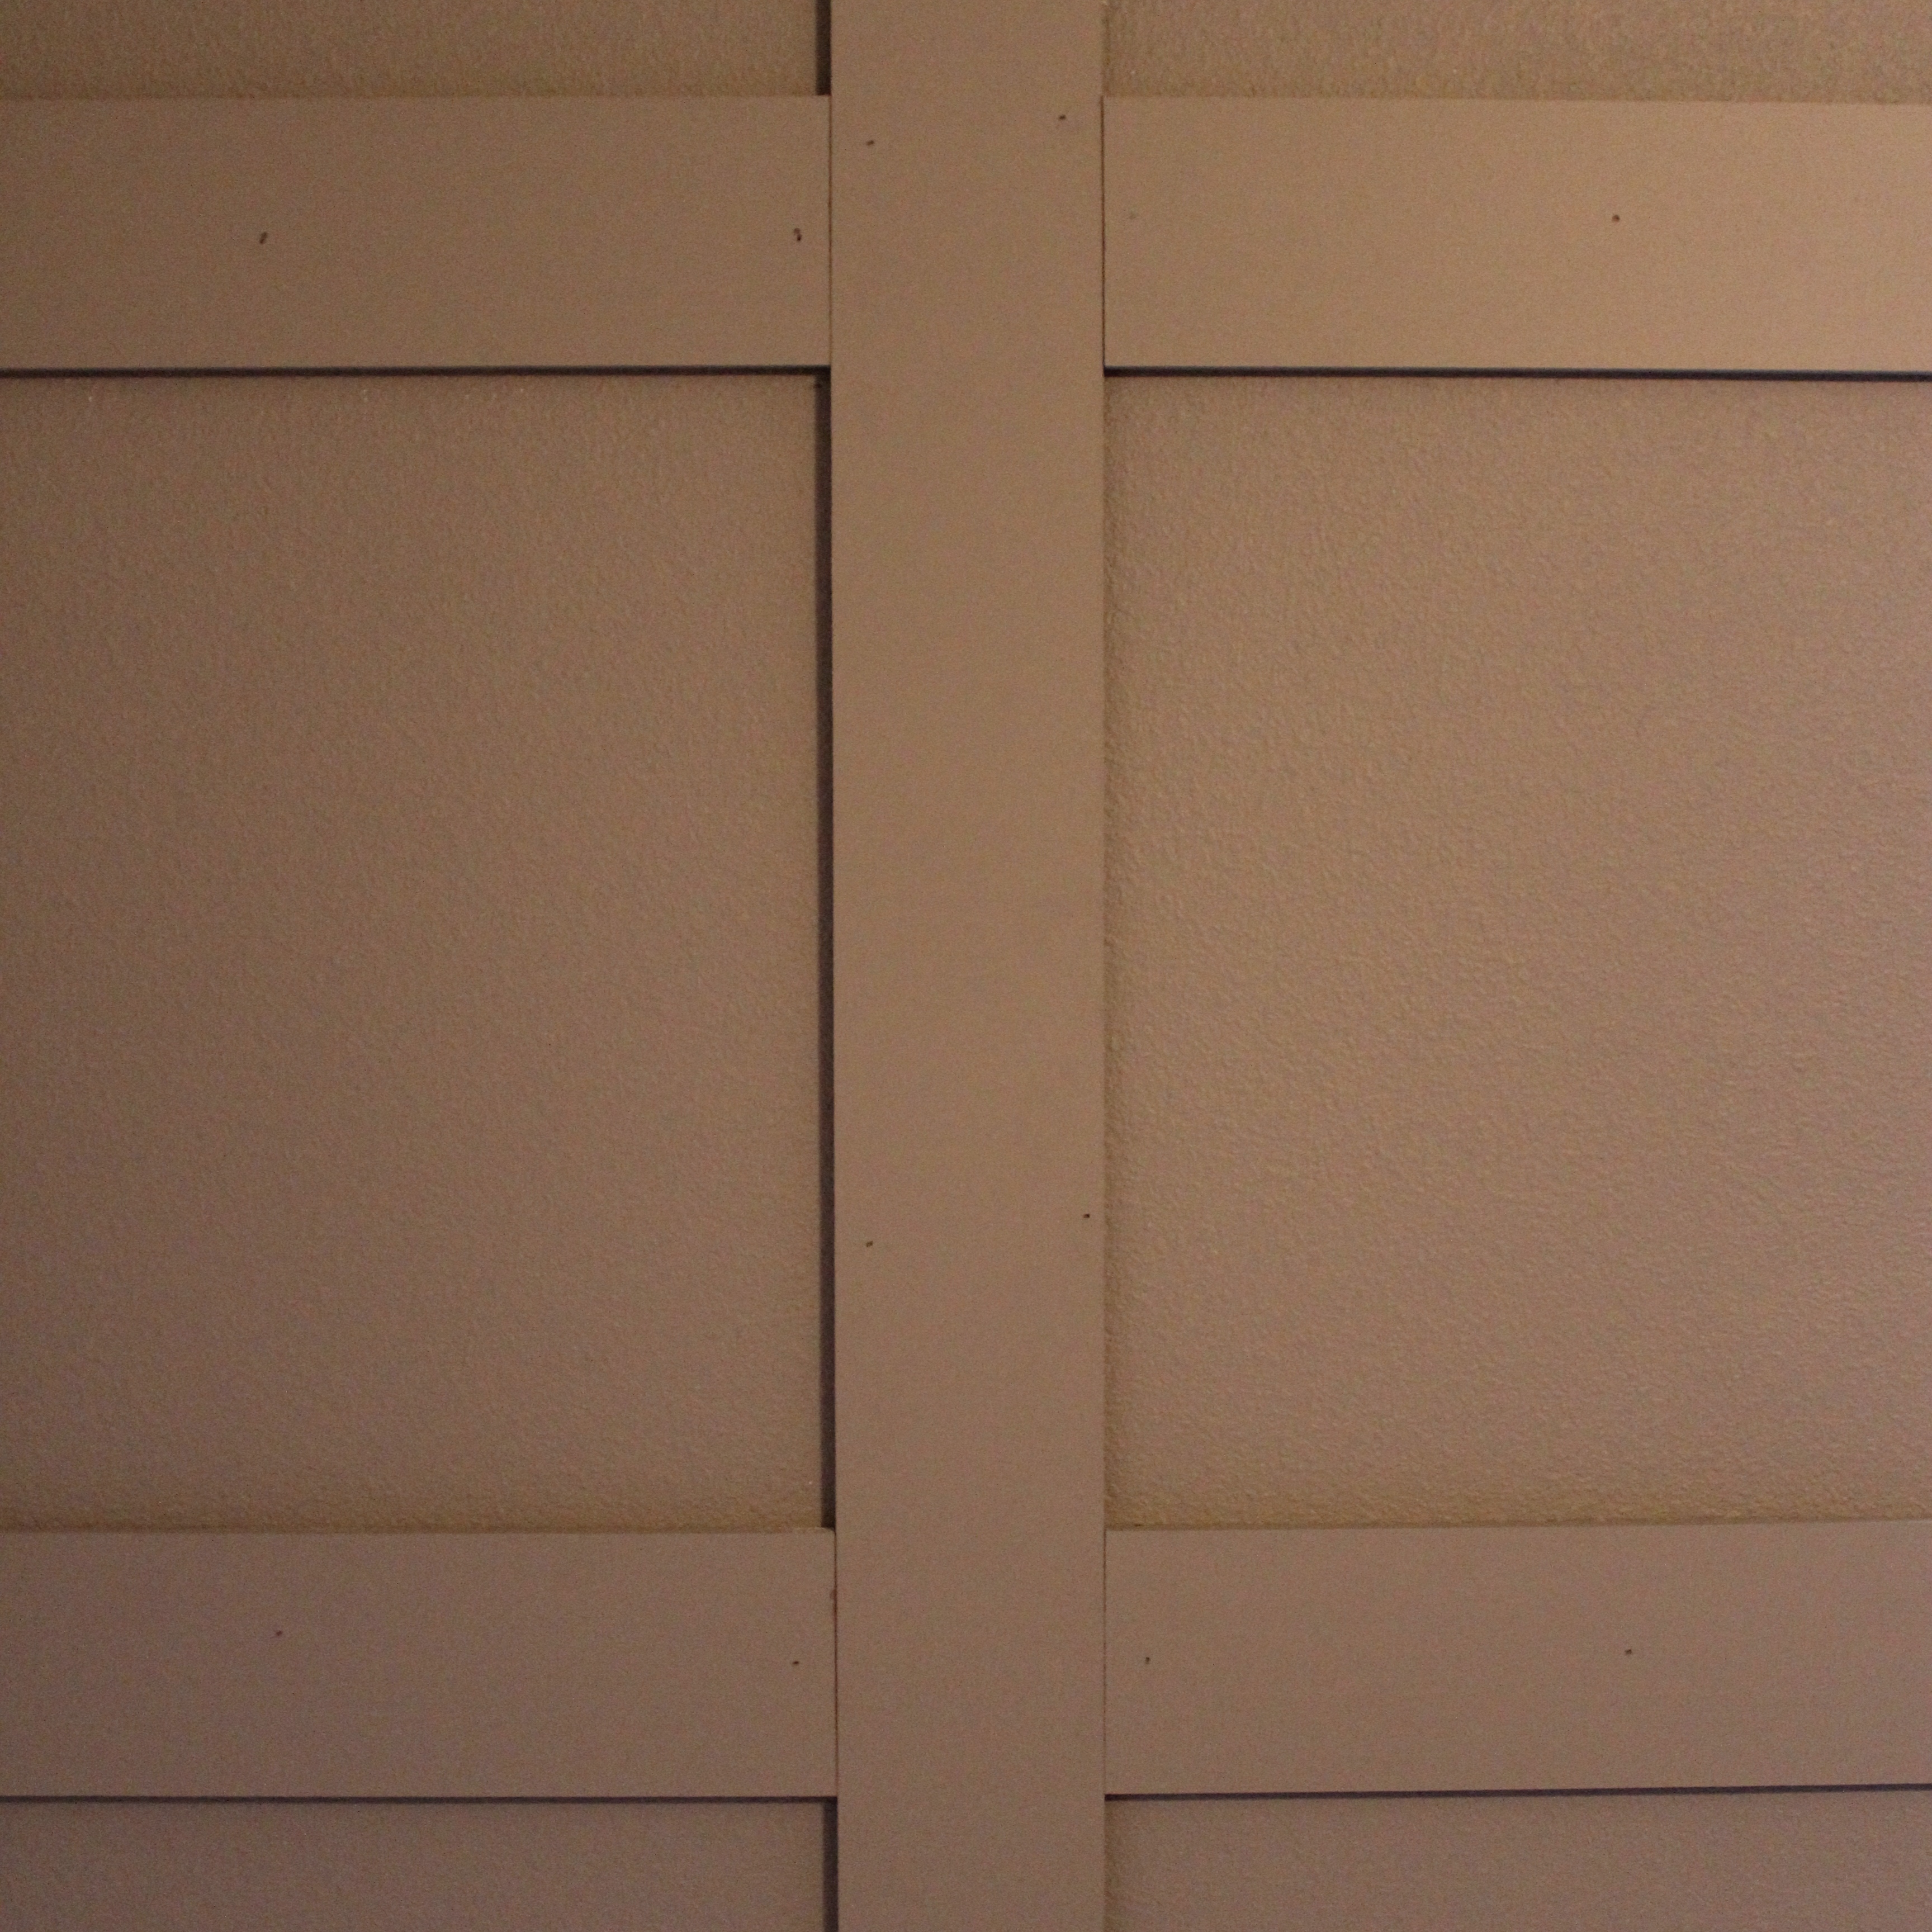
Then I worked my way around the room hanging ONLY straight pieces of crown. No cutting involved. Unless of course I came to the end of the wall and needed a piece less than 8 feet. I used my nail gun, placing a nail into the ceiling, and into the wall, about ever 12 inches or so. The crown molding has straight edges that meet up against both the wall and ceiling so it’s pretty easy to guide it and make sure it’s flush on both ends.
I hung the second corner before I reached the end of that wall, and then measured the distance between the last straight piece of crown and the corner to hang the last straight piece in between the two.

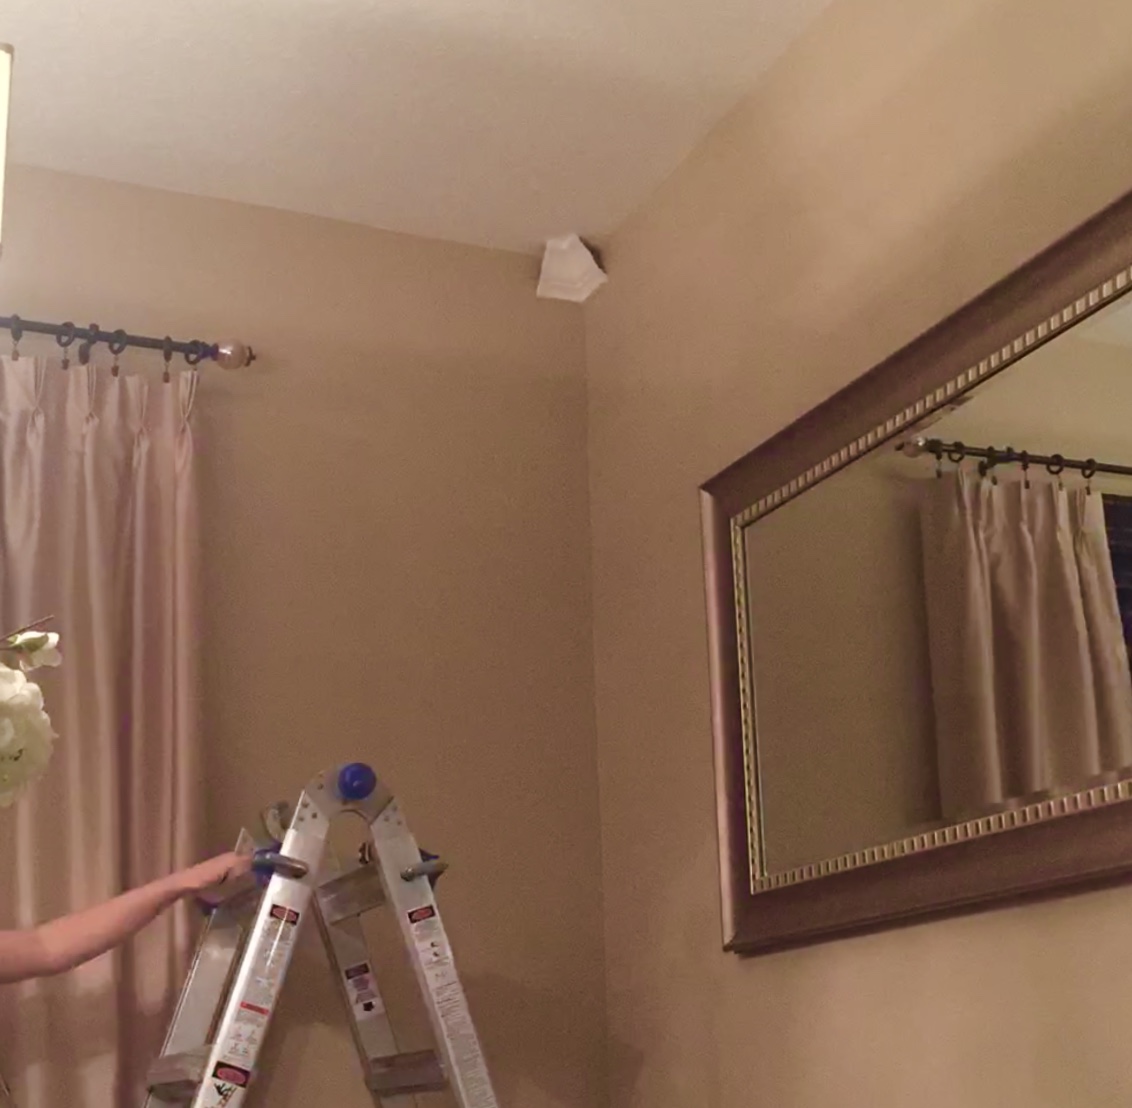
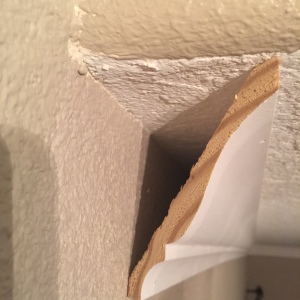
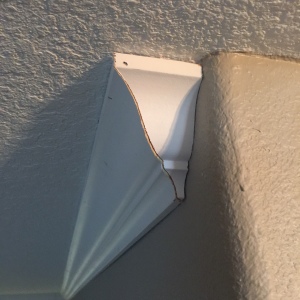
I have a unique spot in my dining room where the ceiling height changes when it meets my foyer. For this situation, I had to make an “end cap”, or a return. To make this, I used 2 pieces of crown and cut them at opposite 45 degree mitre angles.
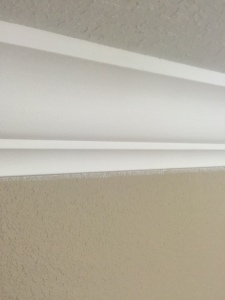
After everything was nailed in place, all that was left to do was go back and caulk. I ran caulk along the top line where it meets the ceiling, the bottom line where it meets the wall, and of course all of the corners and joints.
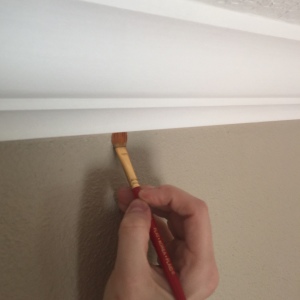
The caulk blended nicely with the white ceilings, but along the bottom where it meets the wall, I had residue left in the texture of my walls even after wiping the excess.
Because of this, I went back with a small paint brush and touched up using the wall color to make it nice and crisp. I thought this would take a while, but it actually went very quick.
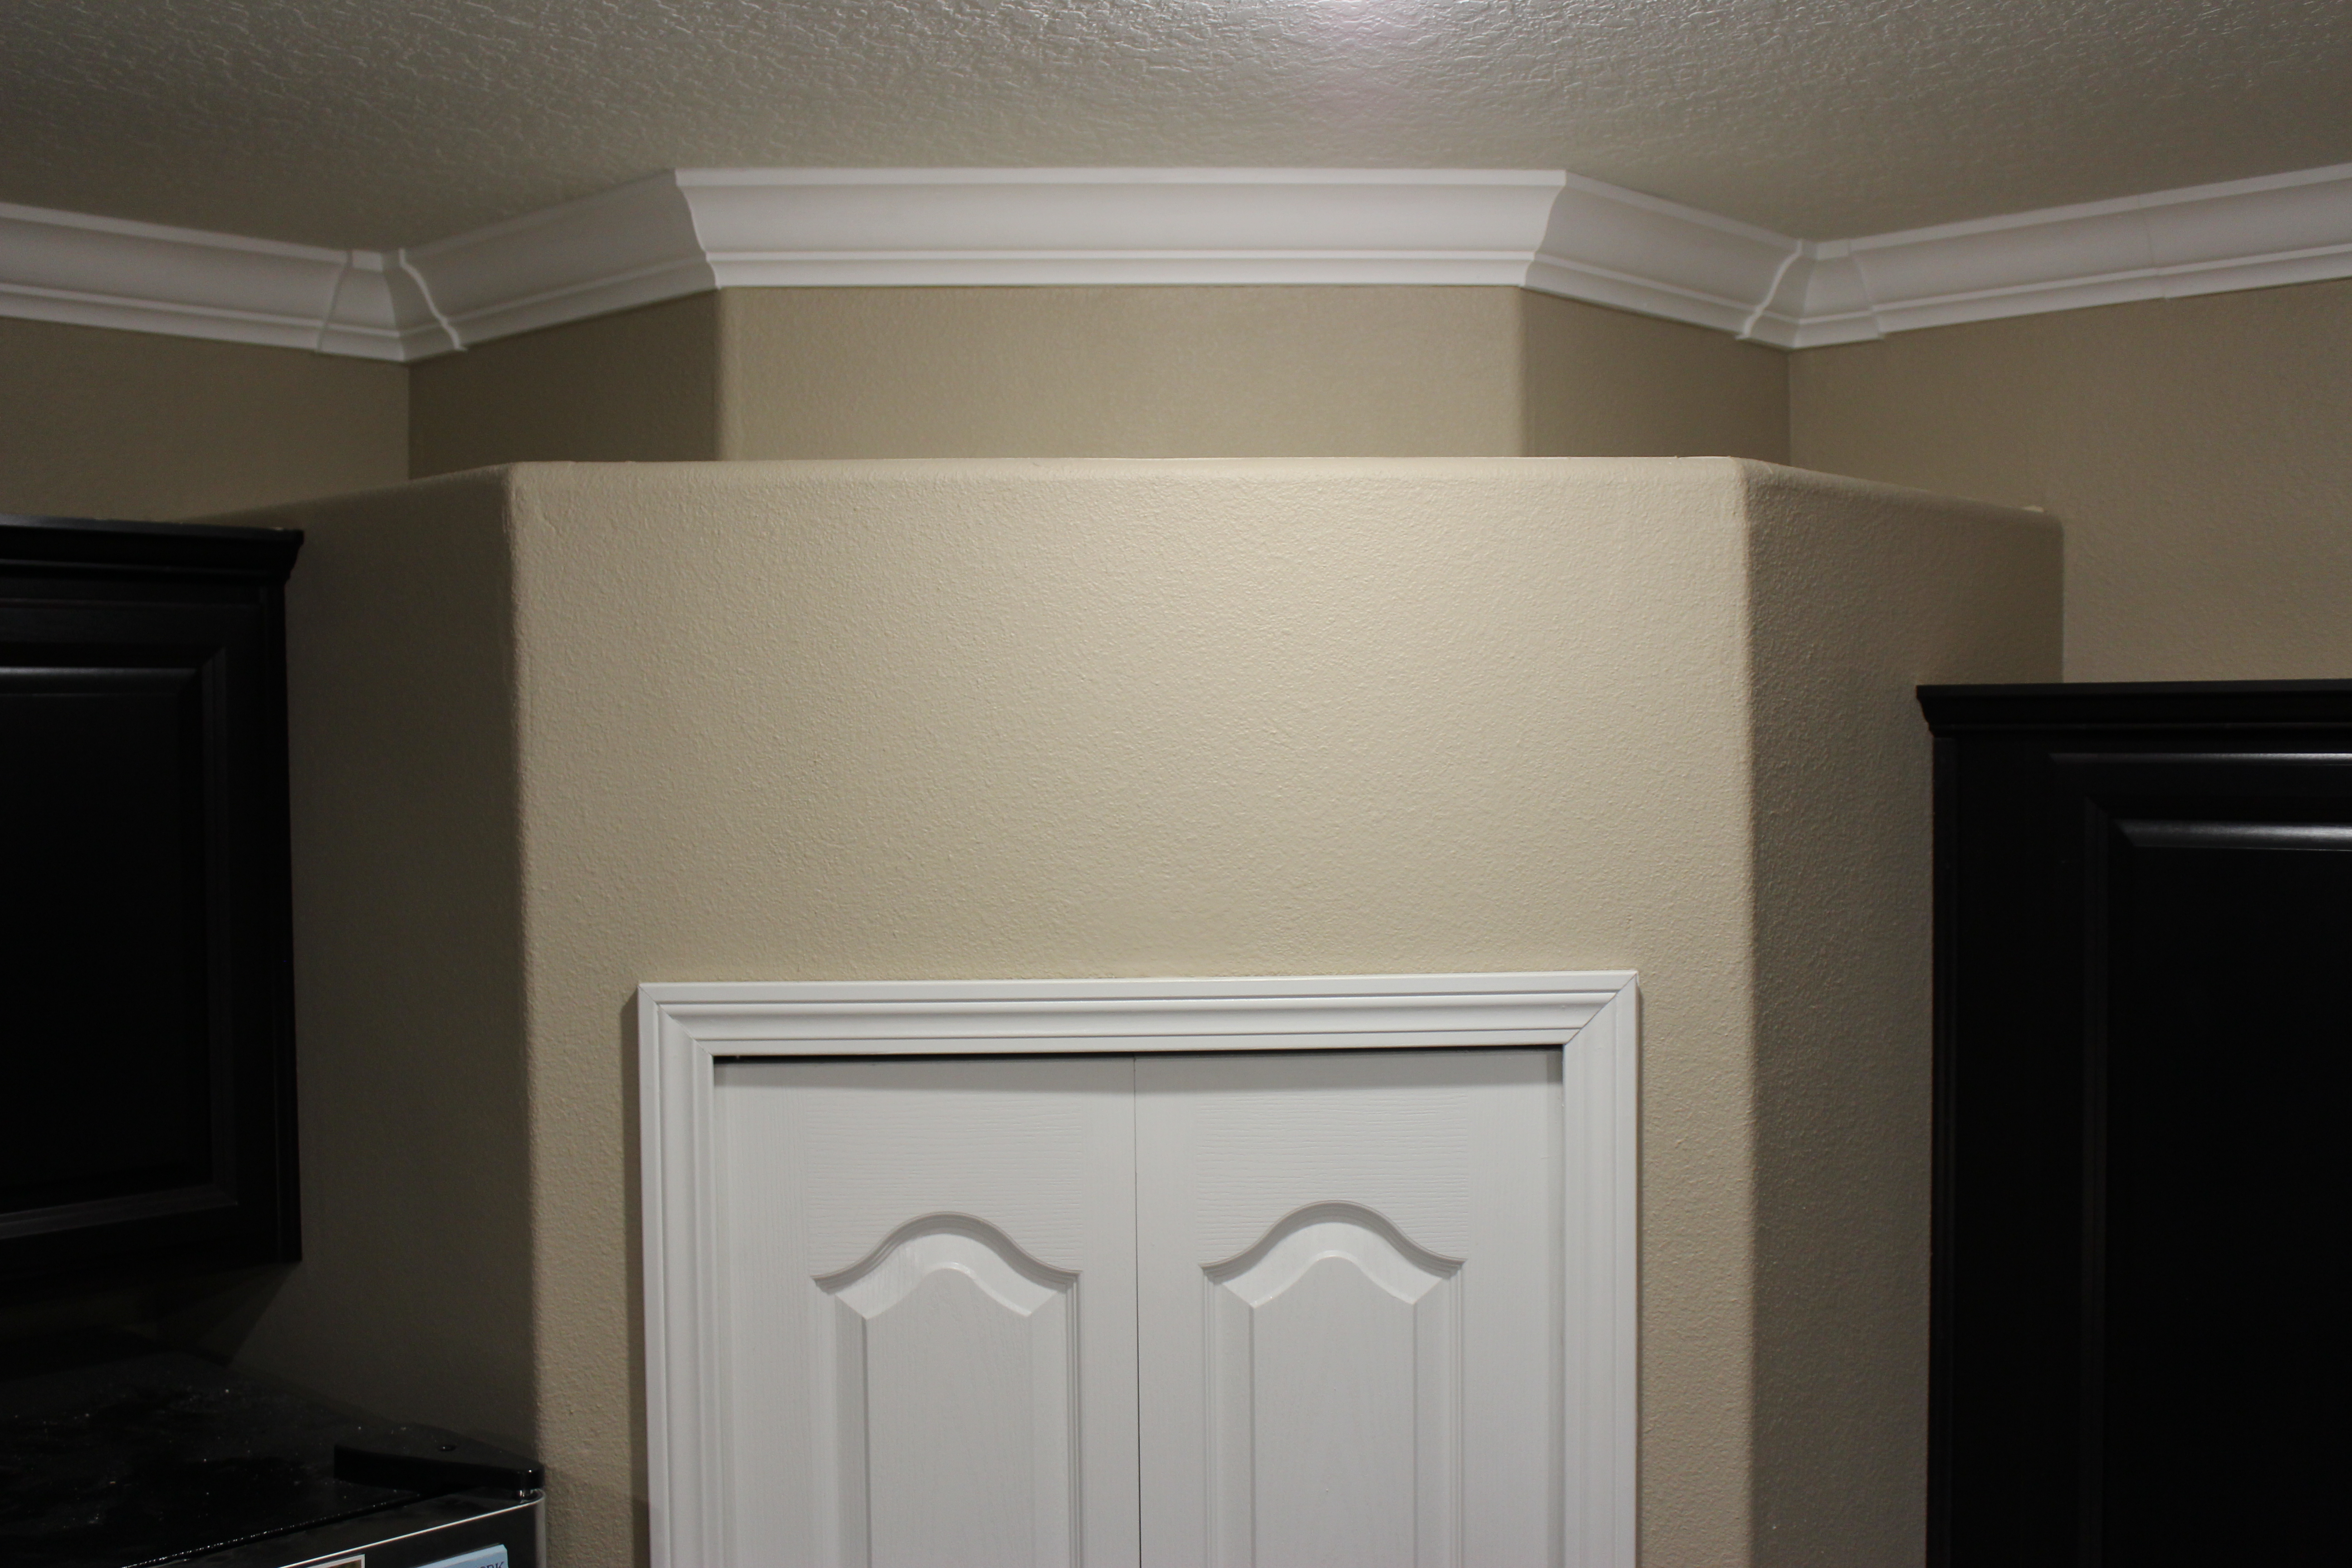
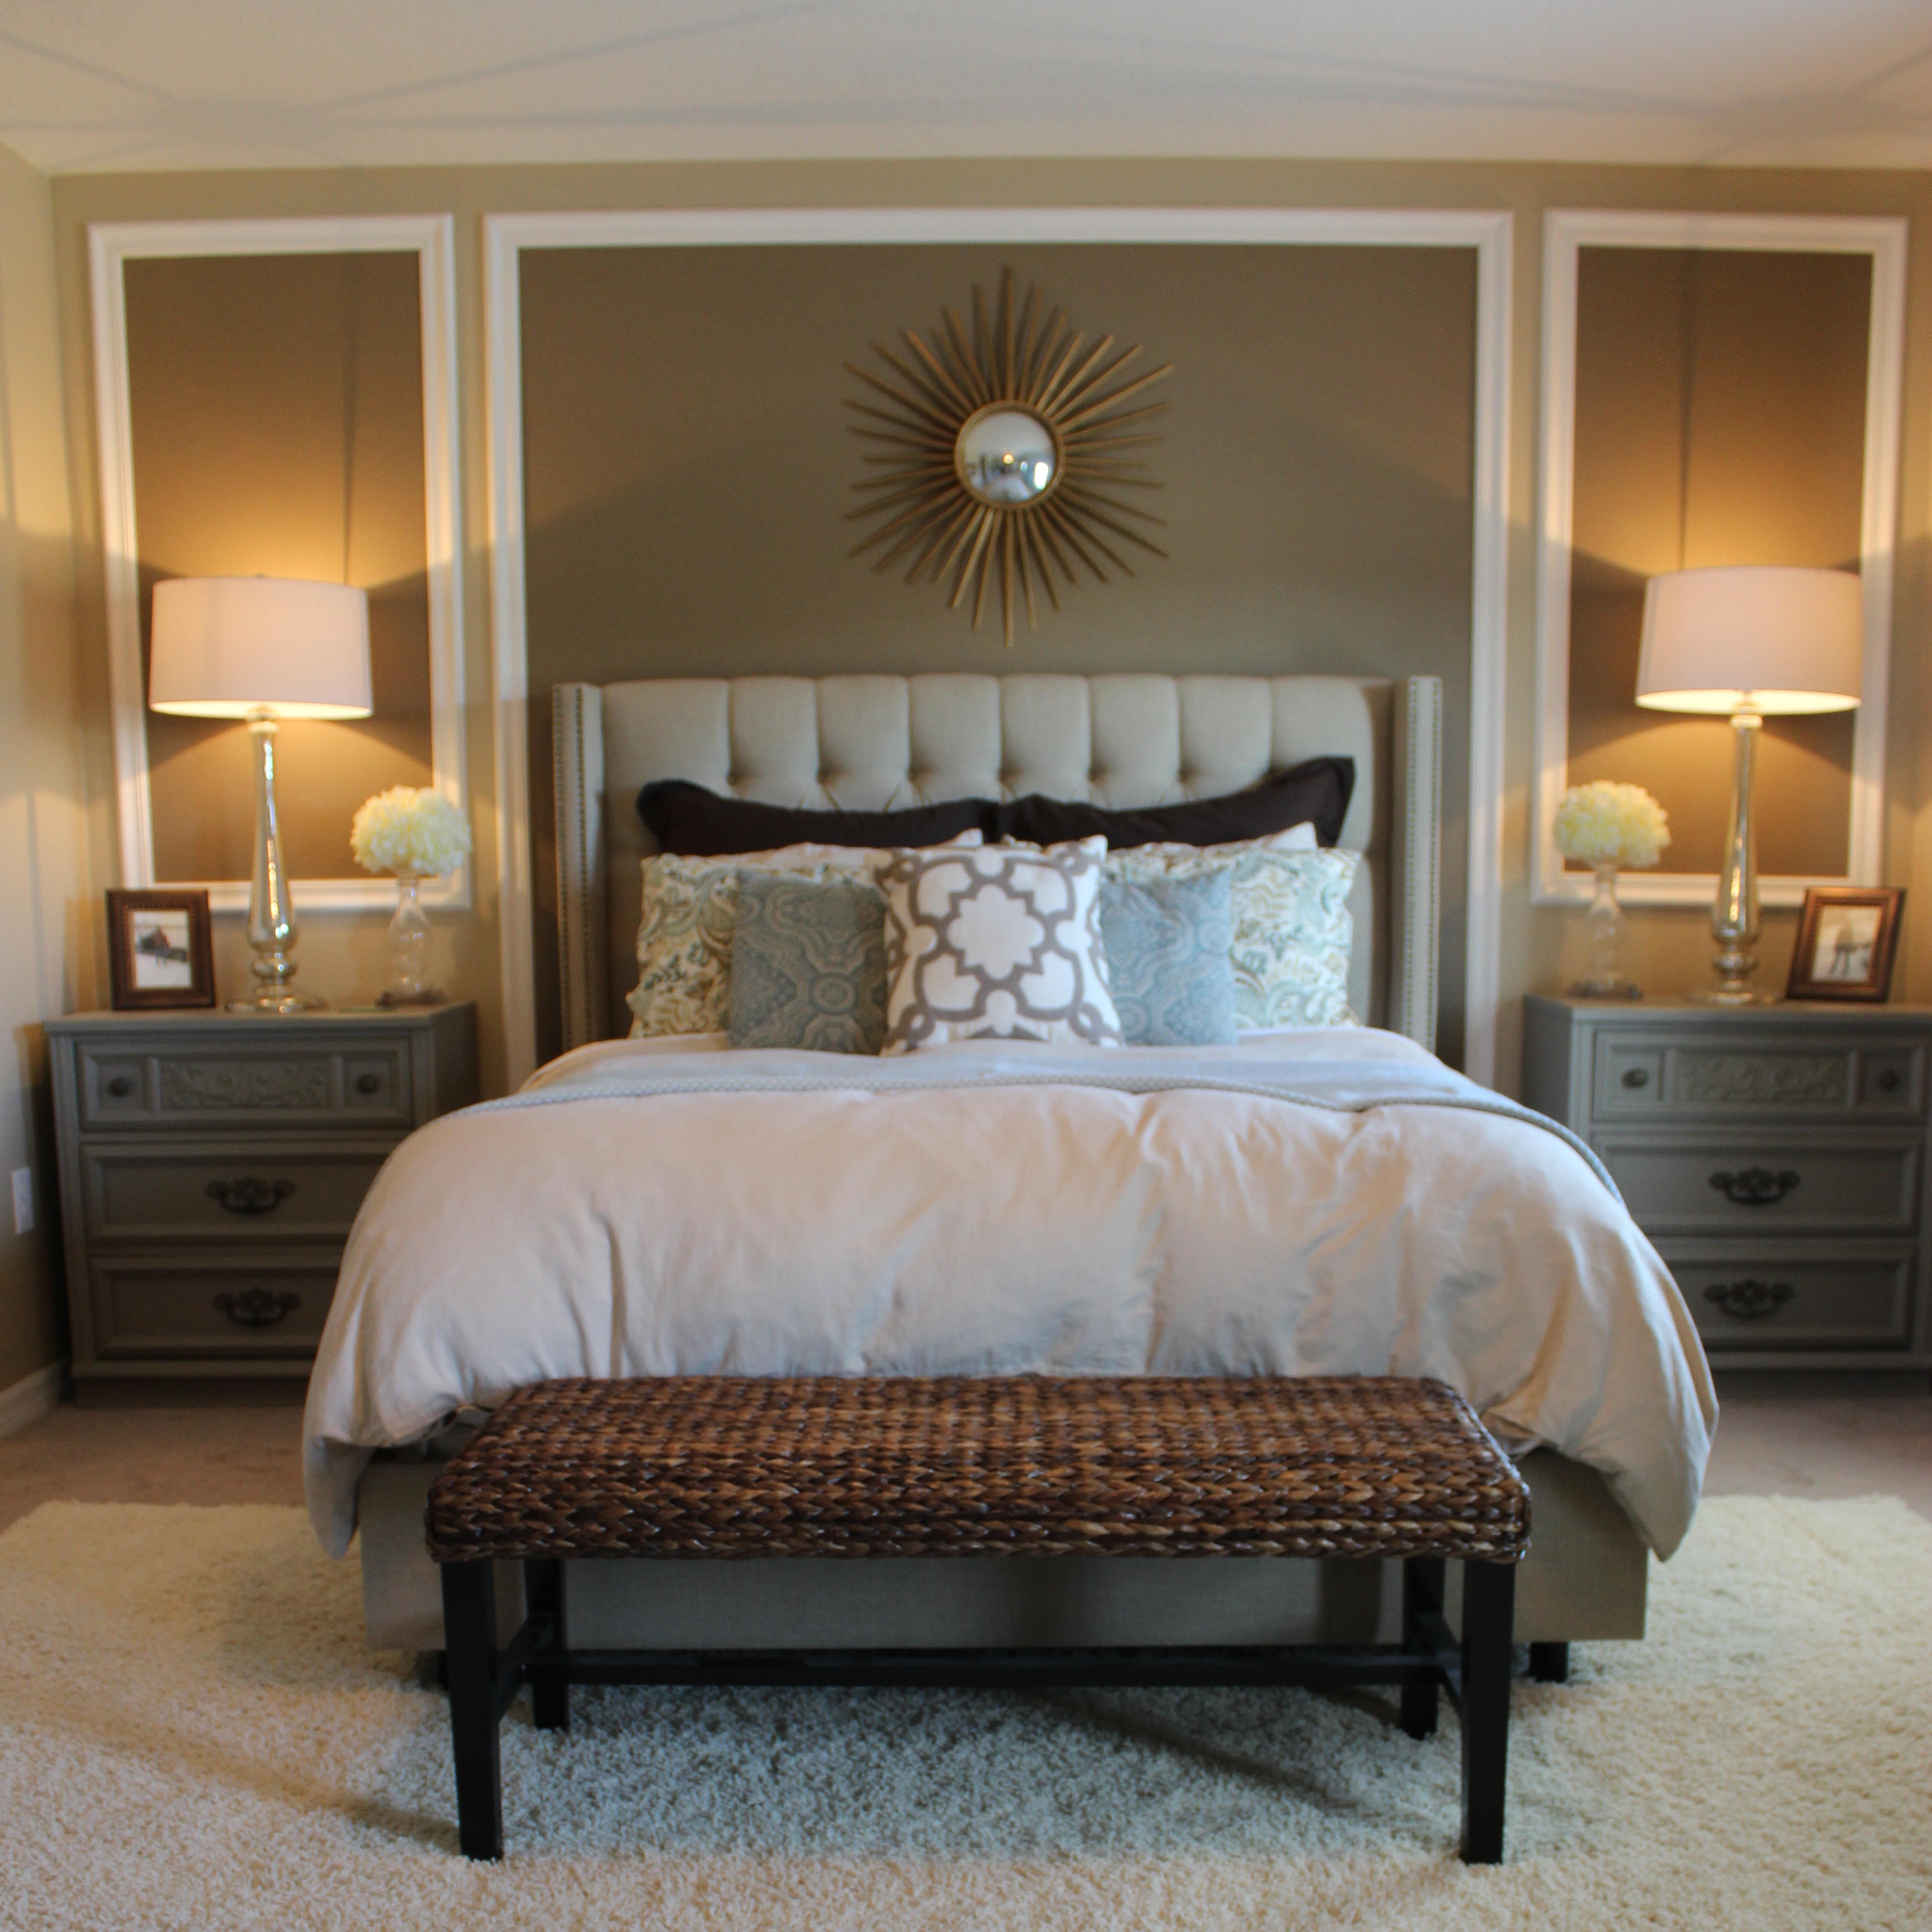
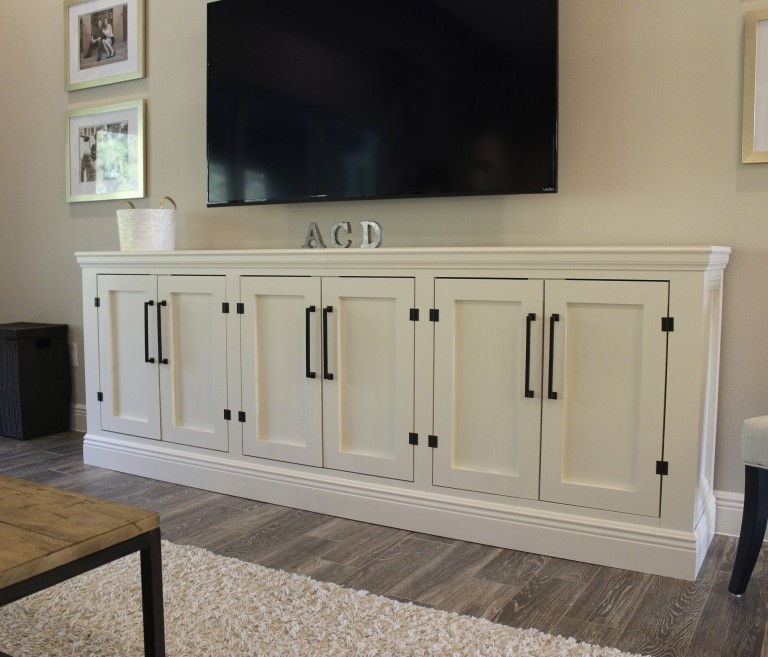
Here is the finished product.
I installed crown molding in my entire downstairs, including the kitchen, dining room, and family room. I spent approximately $750 total. When we had the option of paying the builder of our home to install it, they wanted several thousand. I think the money, time, and frustration that I saved is well worth it!

Amazing!!! A must try, because our home needs it! I truly enjoy your decorative eye
Thank you so much! It’s a very easy project so I hope you try it and wish you luck!
You rock! I am currently doing your chair rail and faux wainscoting project but once I’m done, I am on this! We just don’t have it in the budget to pay a contractor and I consider myself pretty handy. Your tutorials are great and easy to follow once I put aside my fear of messing it all up.
That’s awesome!!! I would love for you to share your wainscoting project when you finish! Thanks so much for stopping by 🙂
Your crown looks great! may have to try this. I’ve been considering attempting crown molding but coping all those inside corners scares me. This could make it doable! Thanks.
Thanks Cara! Coping is definitely not something I wanted to deal with, so I opted for this! And it was definitely worth it! Good luck with yours!
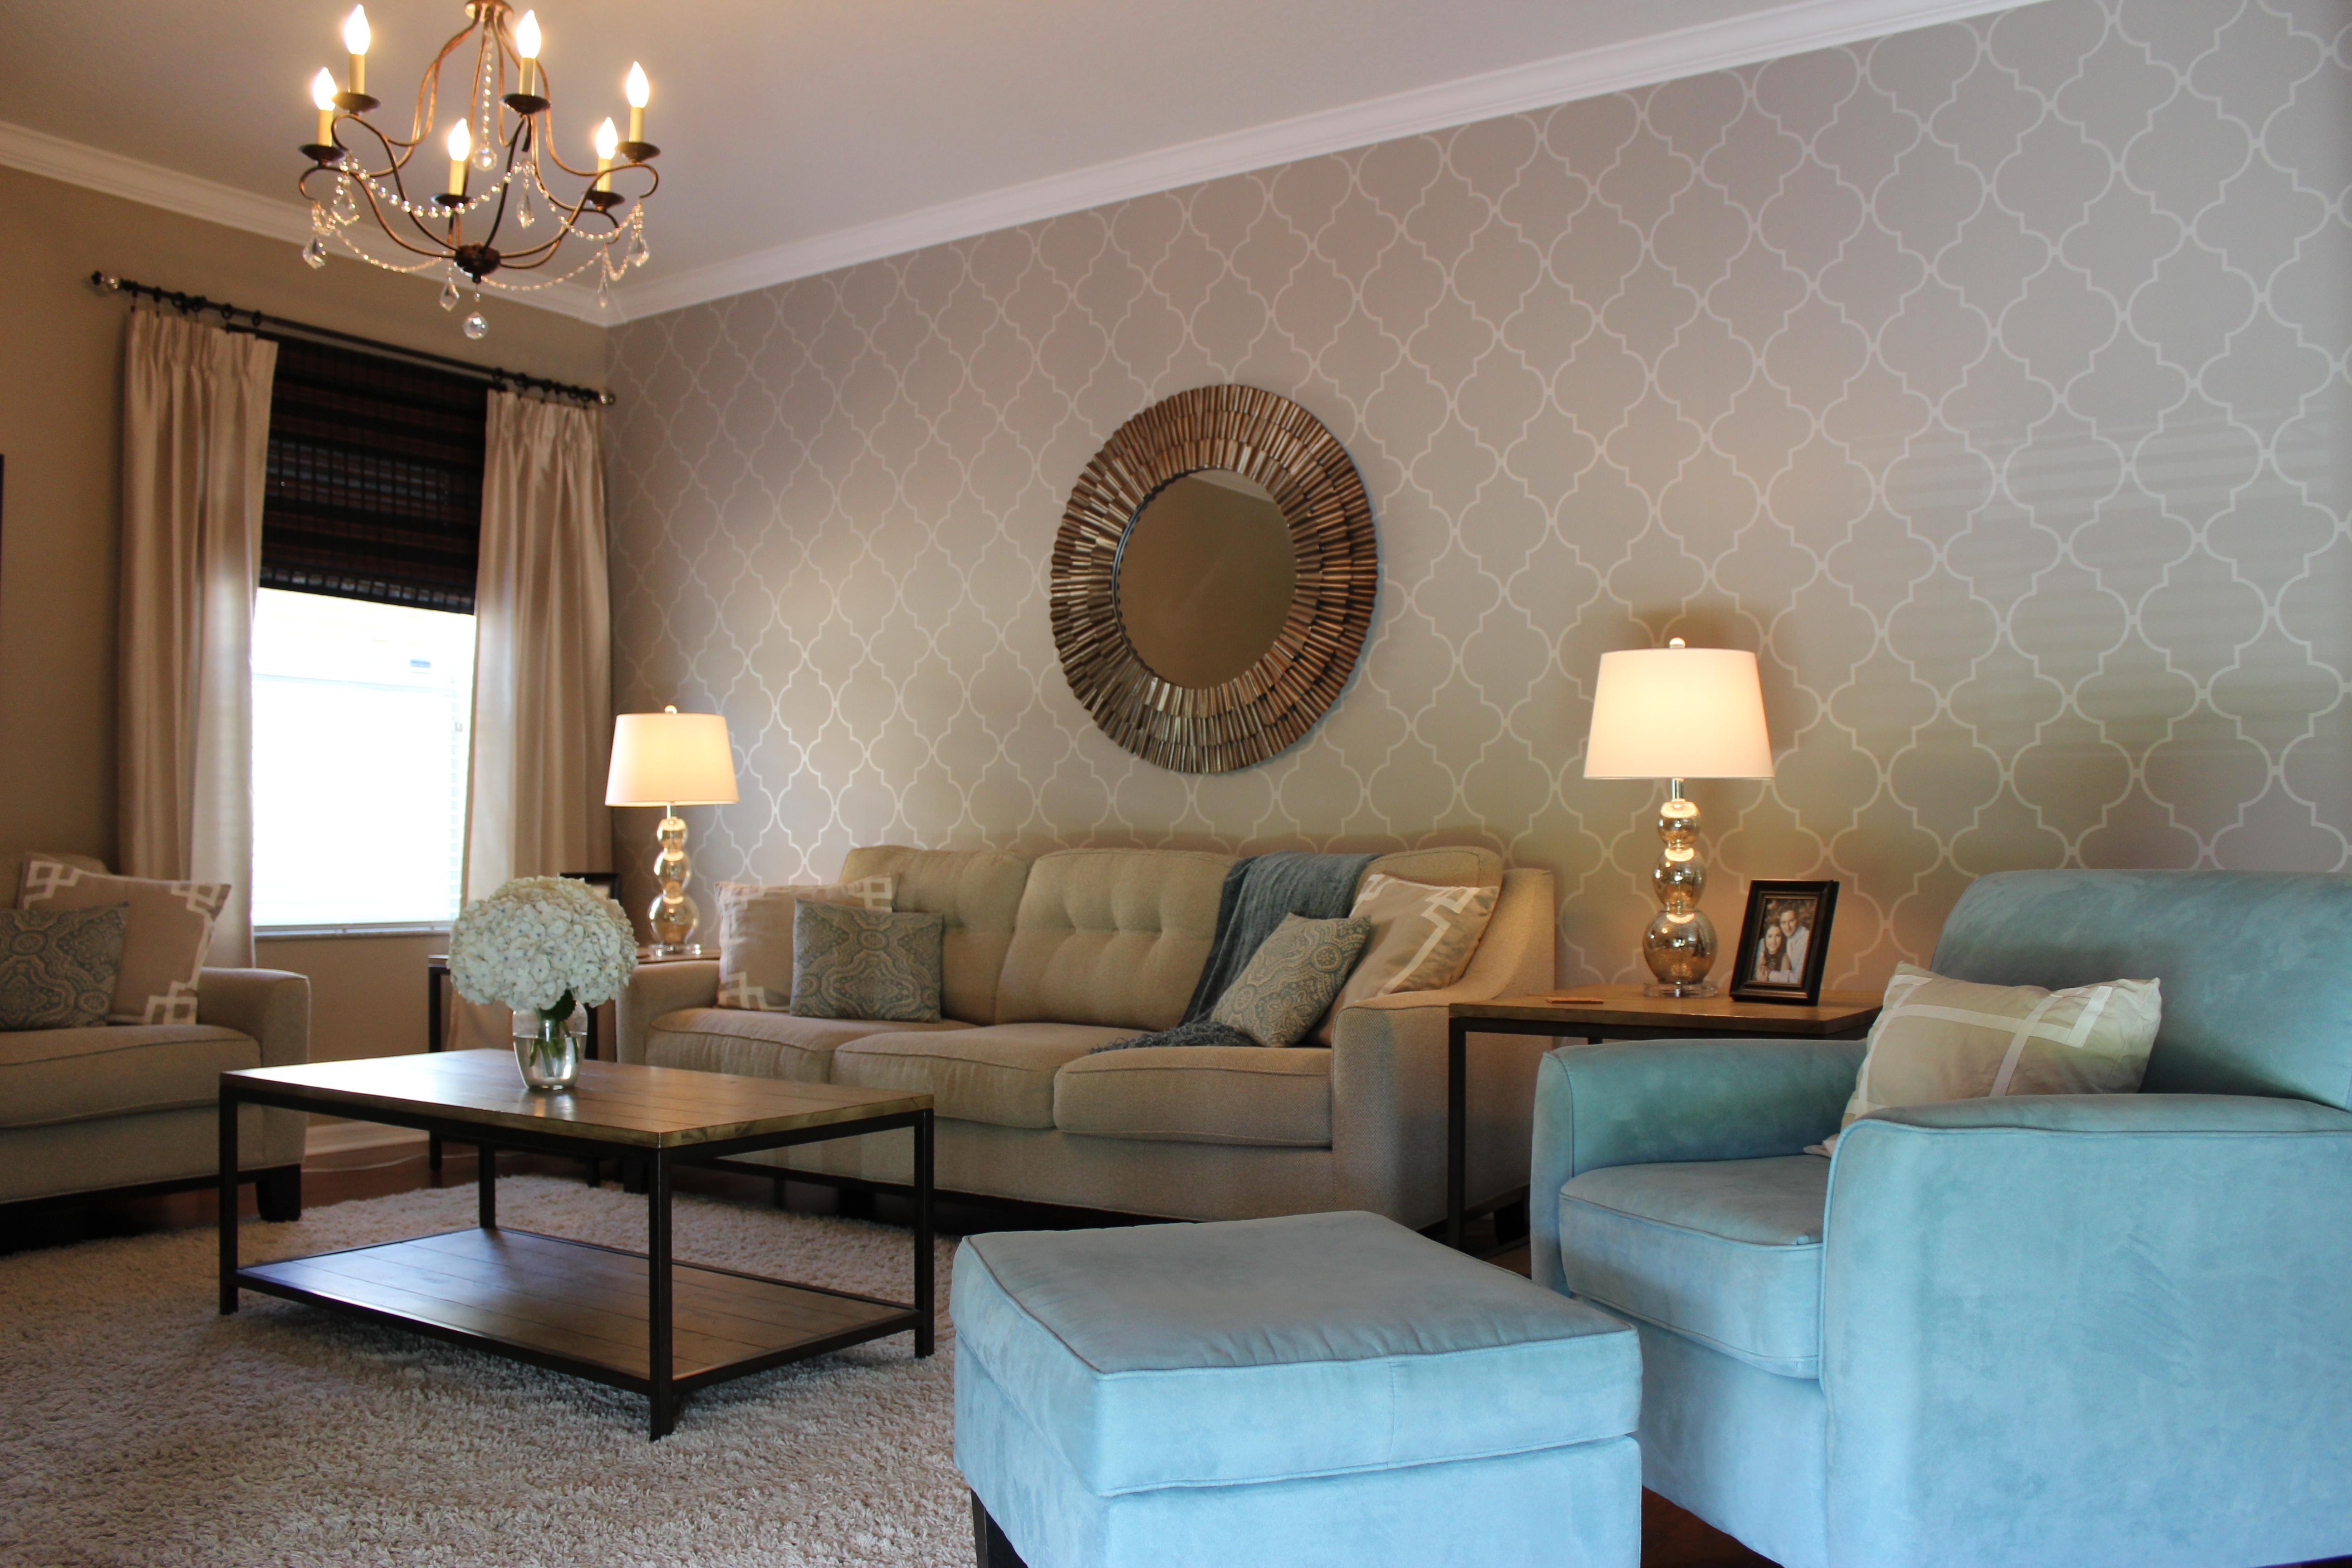
Wow, it looks great! I am getting ready to have some cabinets installed (family) above my washer and dryer later this year and I wanted crown molding. It might be simple enough to try it on that project. Yours looks absolutely gorgeous. P.S. I love your living room. So pretty!
Wow you did a great job! I can’t believe how easy you made it look. I might actually have enough confidence to do mine now. Thanks for posting!
Thanks for the comment Drew! It’s very easy and I’m sure you will do great with yours! Good luck!
Looks amazing! Can you tell me how high your ceilings are and the thickness of the crown you used? Thank you!
Hi Lisa! My ceilings are 9′ high and the crown molding is the biggest one of this style they sell at Lowe’s. I believe I linked to it in the post (or at least I hope I did!). I think it’s 4.5″ wide if I recall correctly!
Thanks so much!!