DIY Panel Wall
I’m very excited to have just completed this panel wall for Ryan’s office so I am here to bring you the full tutorial! I’ve seen this done a few times before and always loved the statement it makes, and knew it wasn’t that hard to do. I thought it would be very appropriate for his office makeover, though it looks awesome in a bedroom, dining room, or anywhere really! So let’s get started.
Materials:
– Paint color of your choice
– Sand paper/Electric Sander
– Nail gun/compressor (or hammer & nails)
– Mitre saw
– Caulk
– Multitool (to remove baseboards)
– Measuring tape
– Level
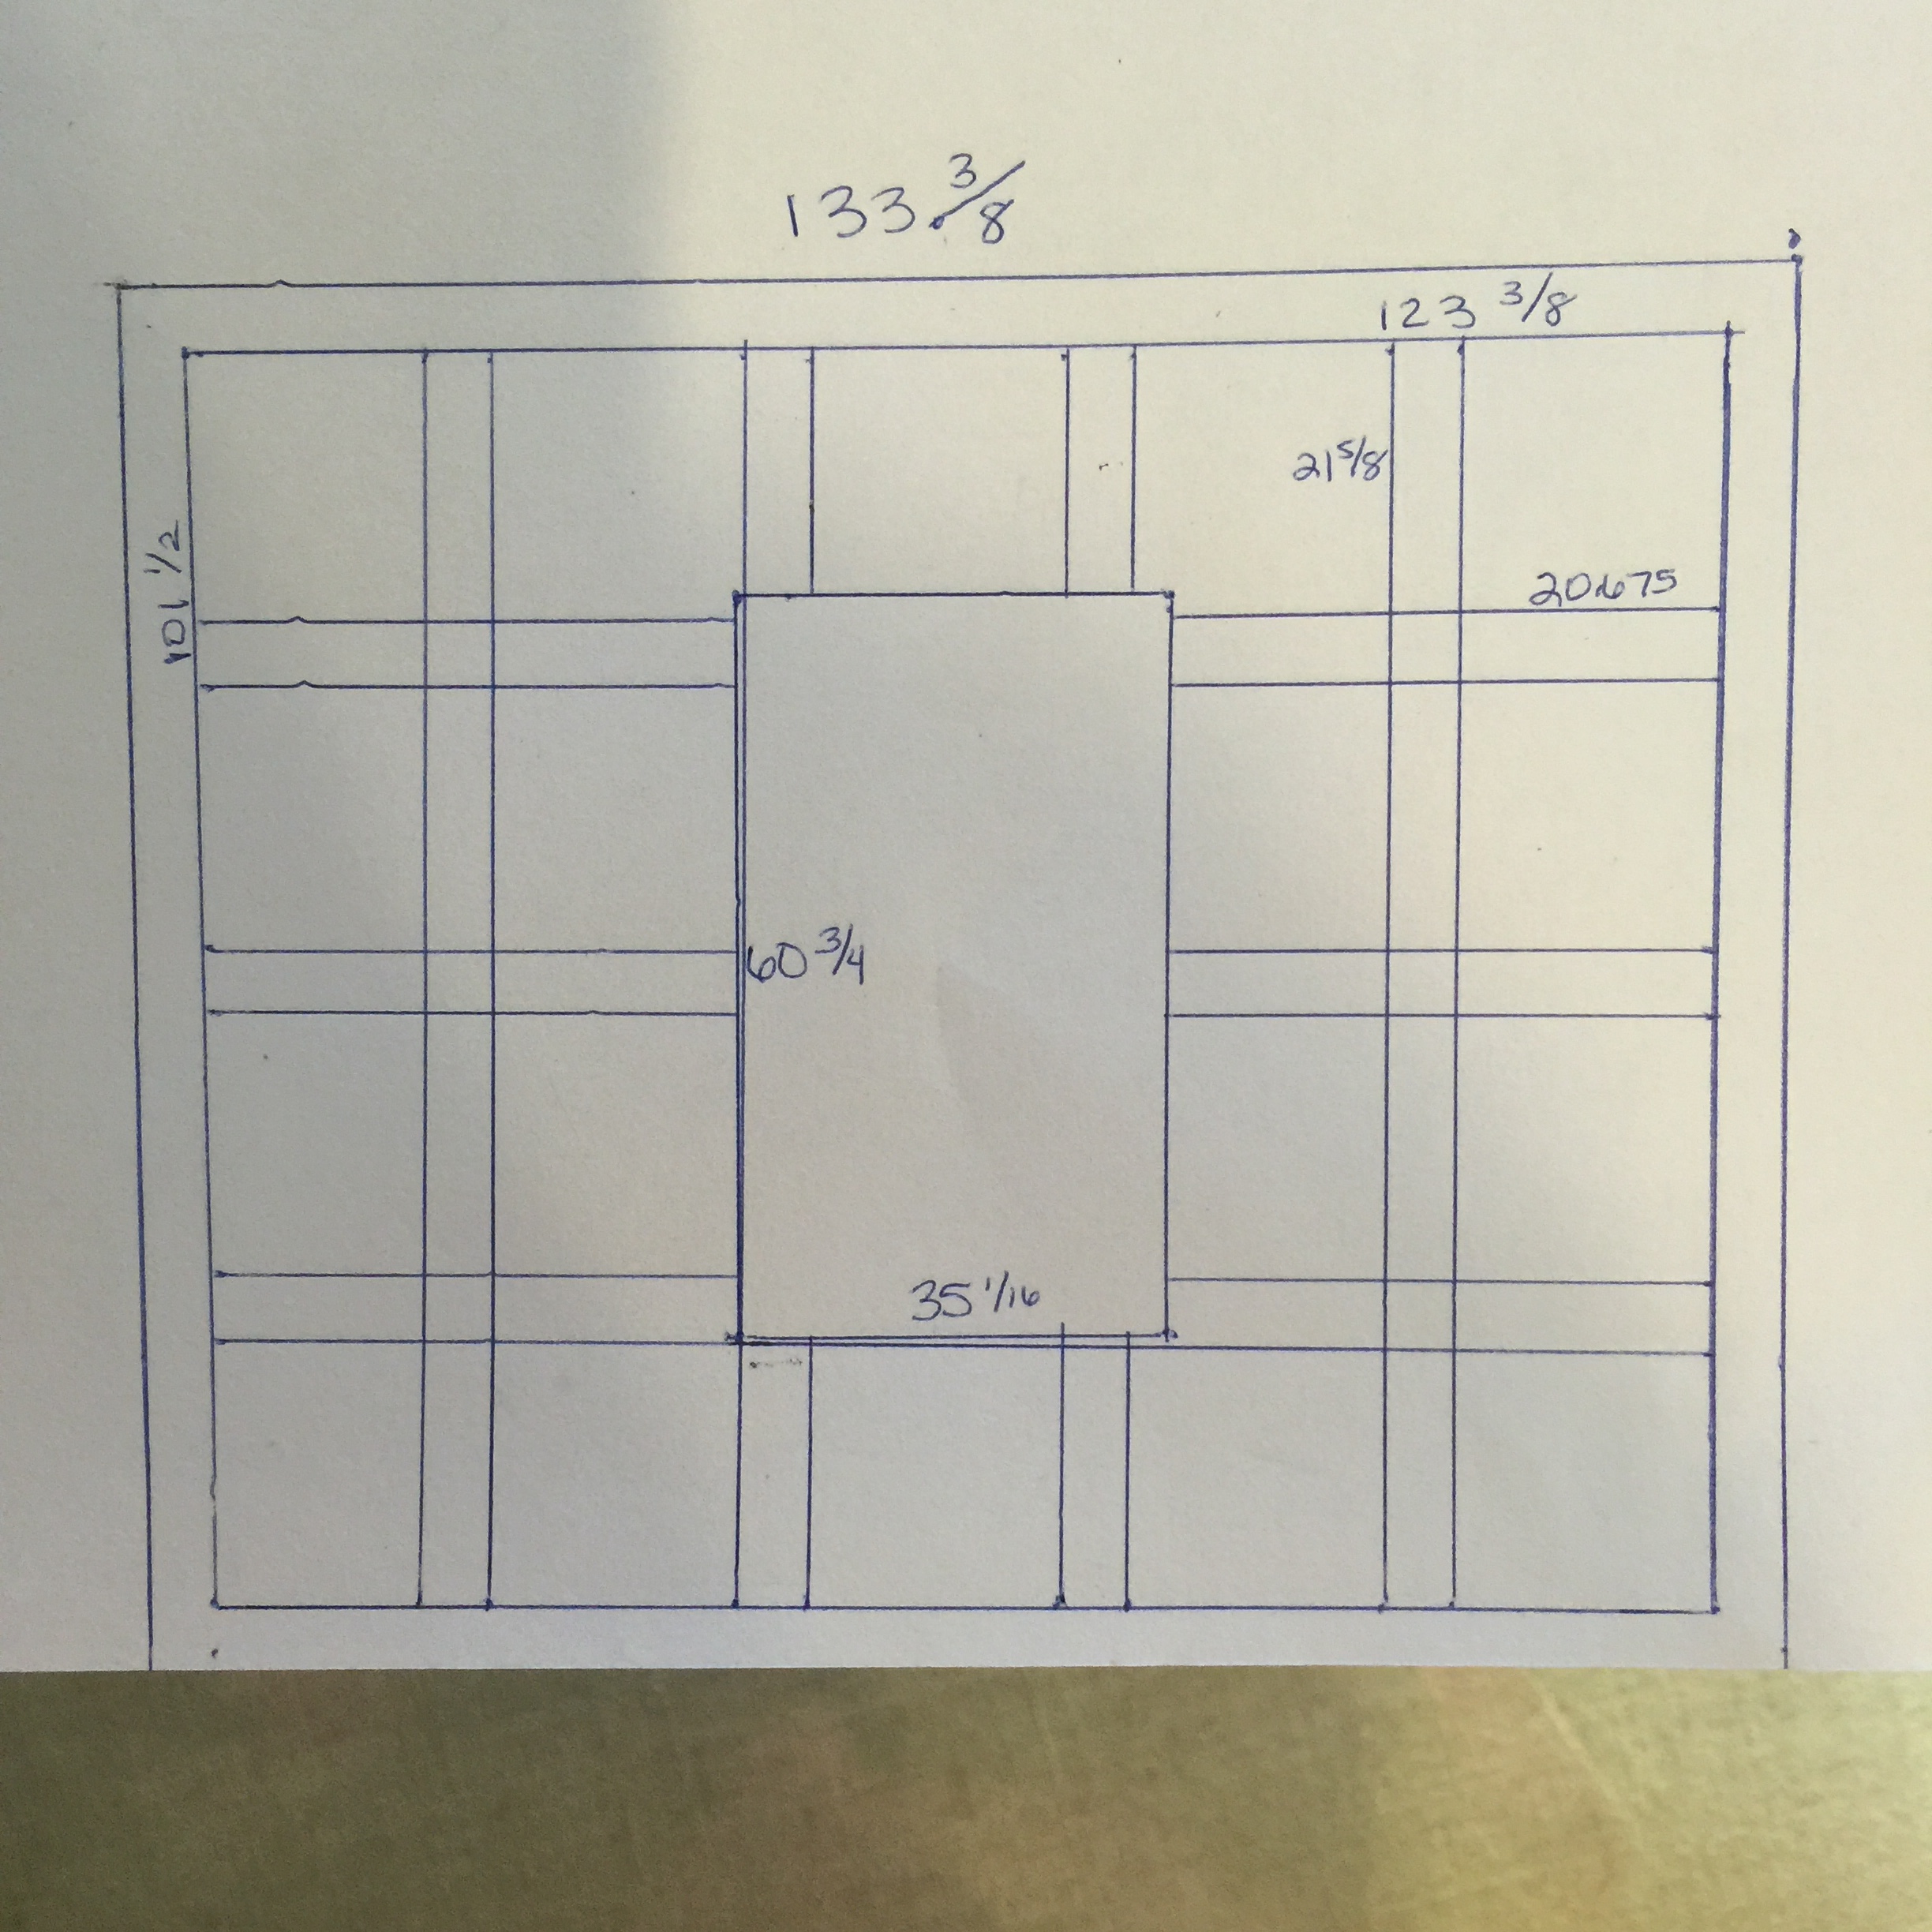
1) First things first. MEASURE. And then measure again. I created this diagram by hand drawn to scale using the dimensions of the wall. I drew the outline of the wall and then drew the window inside. From there I subtracted 5 inches for the width of the boards that would outline the wall. Then I subtracted the dimensions of the wall that would be left and determined how many boxes wide and tall I would need. Ideally, you want the boxes to be as close to square as possible, so it takes a little bit of trail and error to determine the magic number of boxes that will work. For me, that ended up being 4 down by 5 across for a total of 20 boxes. I went to Home Depot and purchased 2 4×8 sheets of 1/2″ thick MDF and they cut them into 5″ strips for free. The boards cost $24 each for a total of $48. Not bad!
2) SAND. Before I even painted or nailed any of the MDF boards up, I used my multitool with the sanding attachment in order to smooth out the rough edges left by the saw at Home Depot.
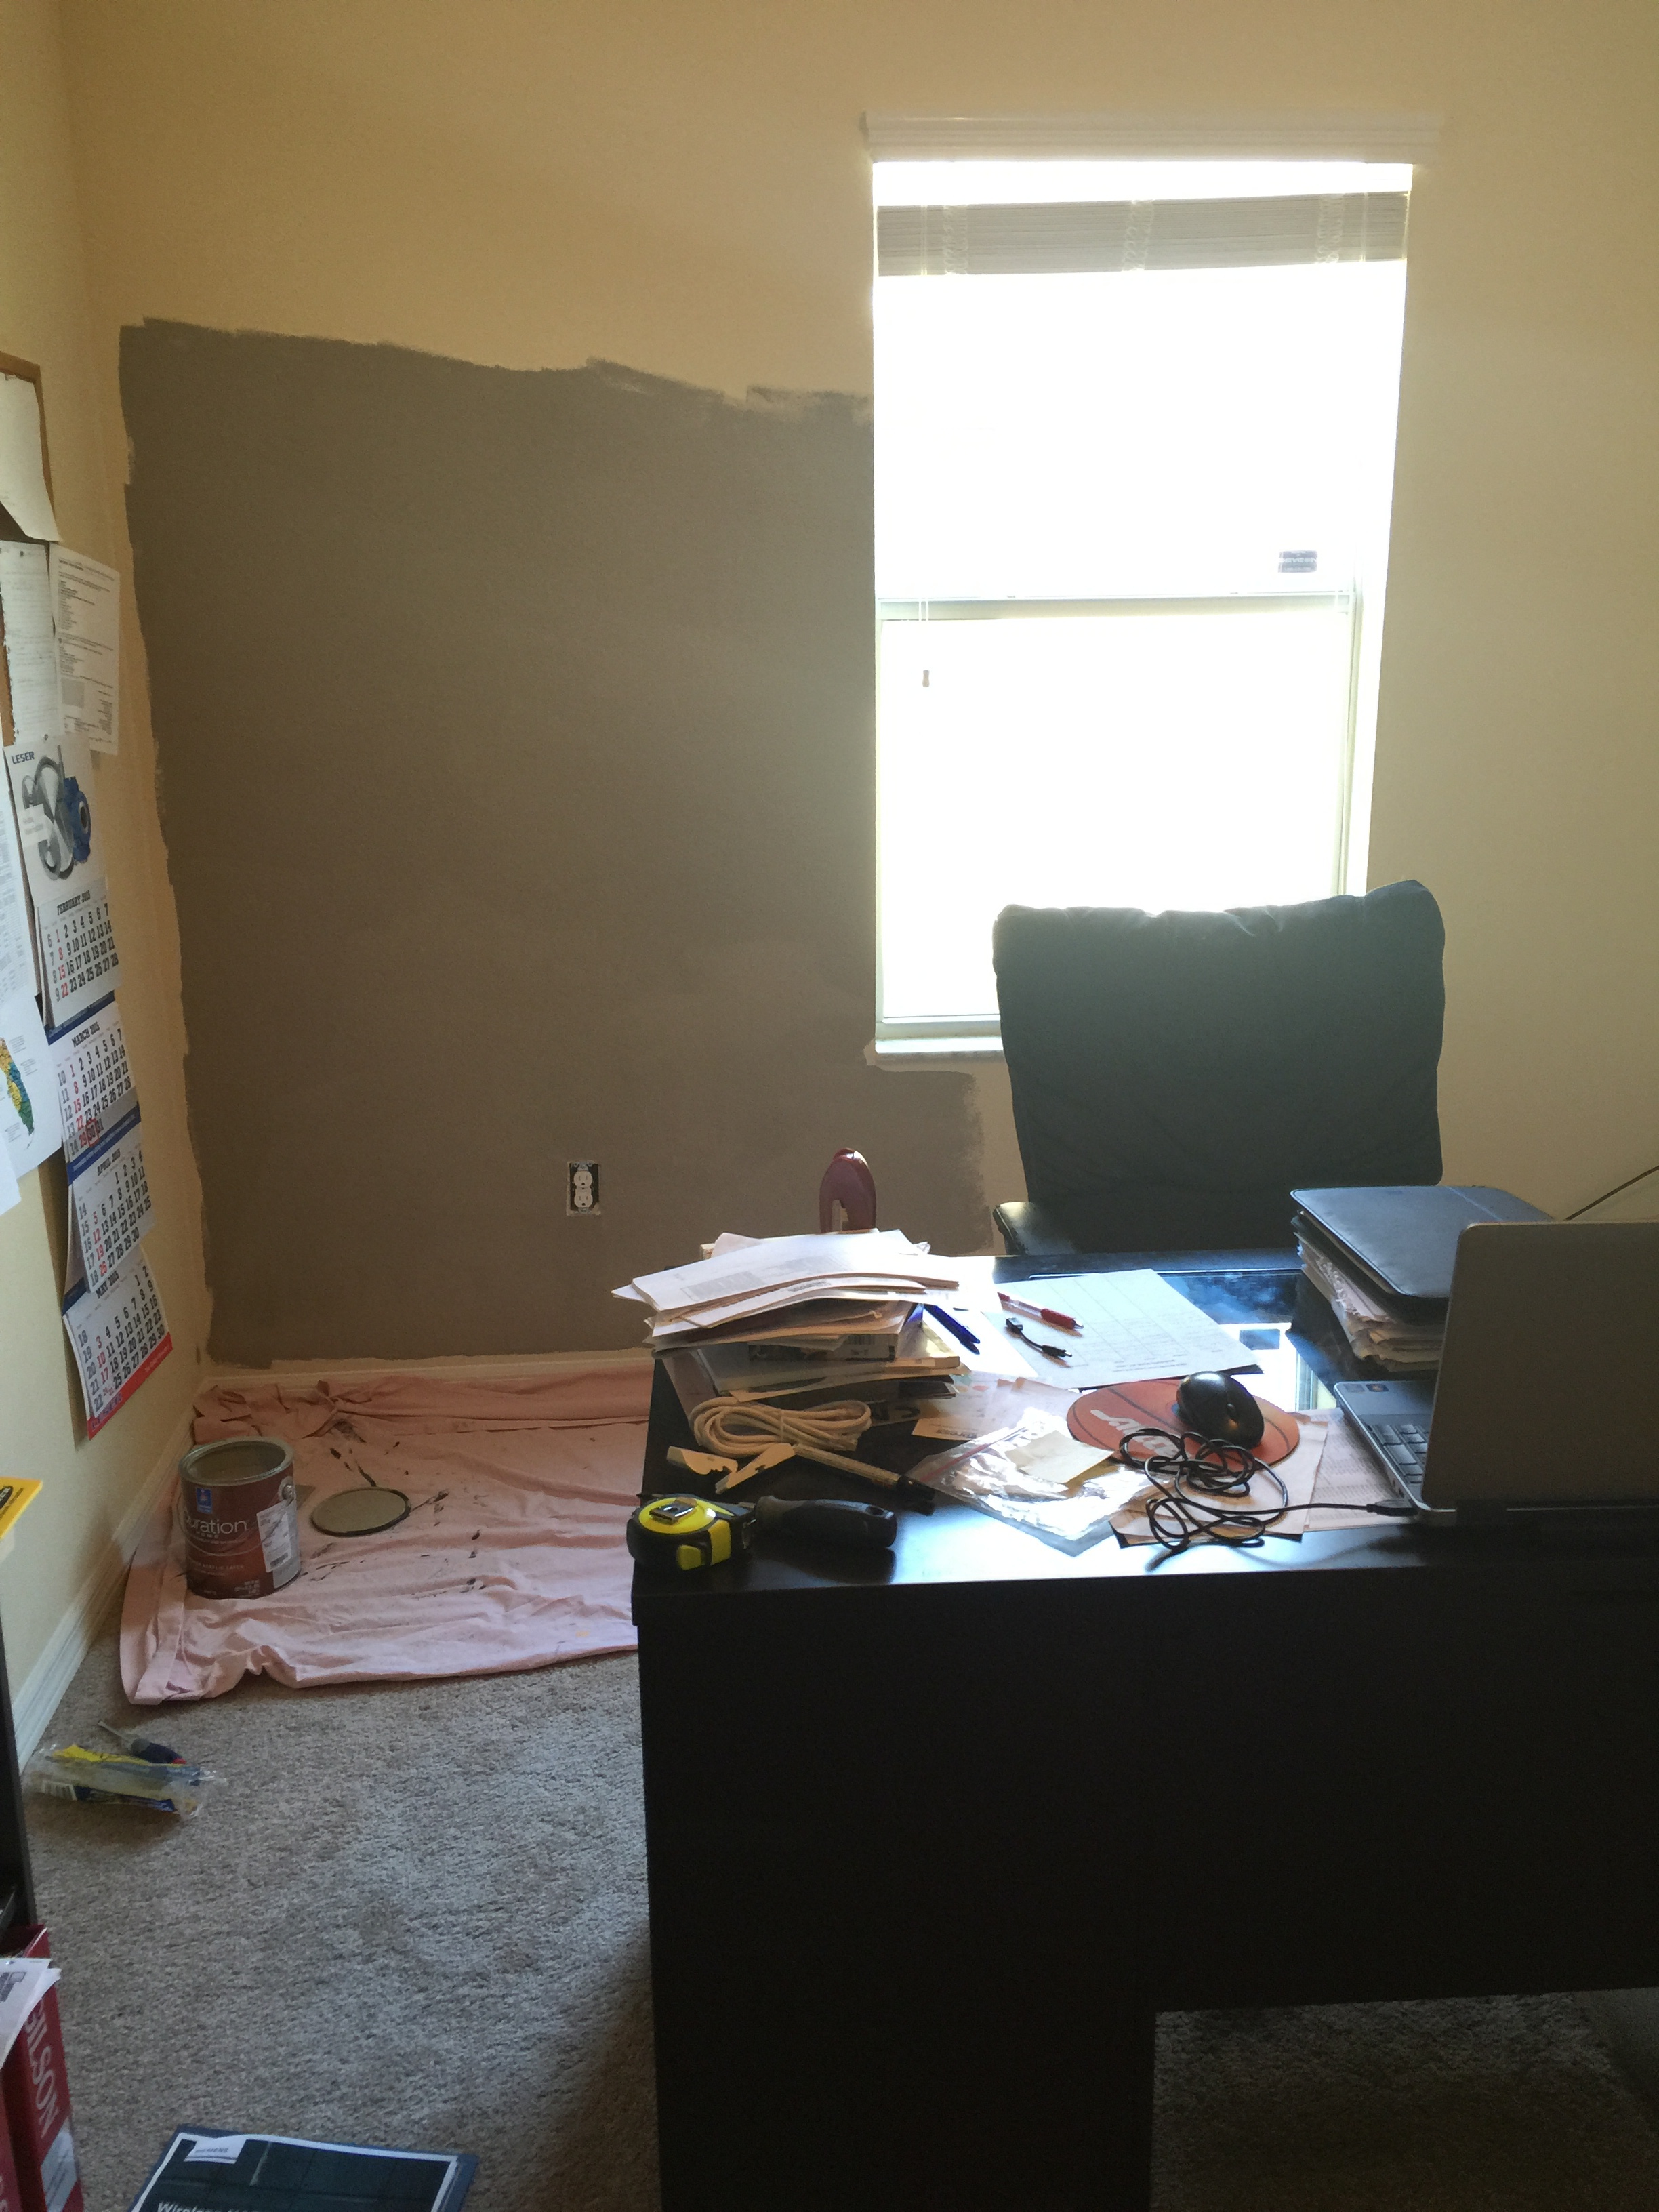
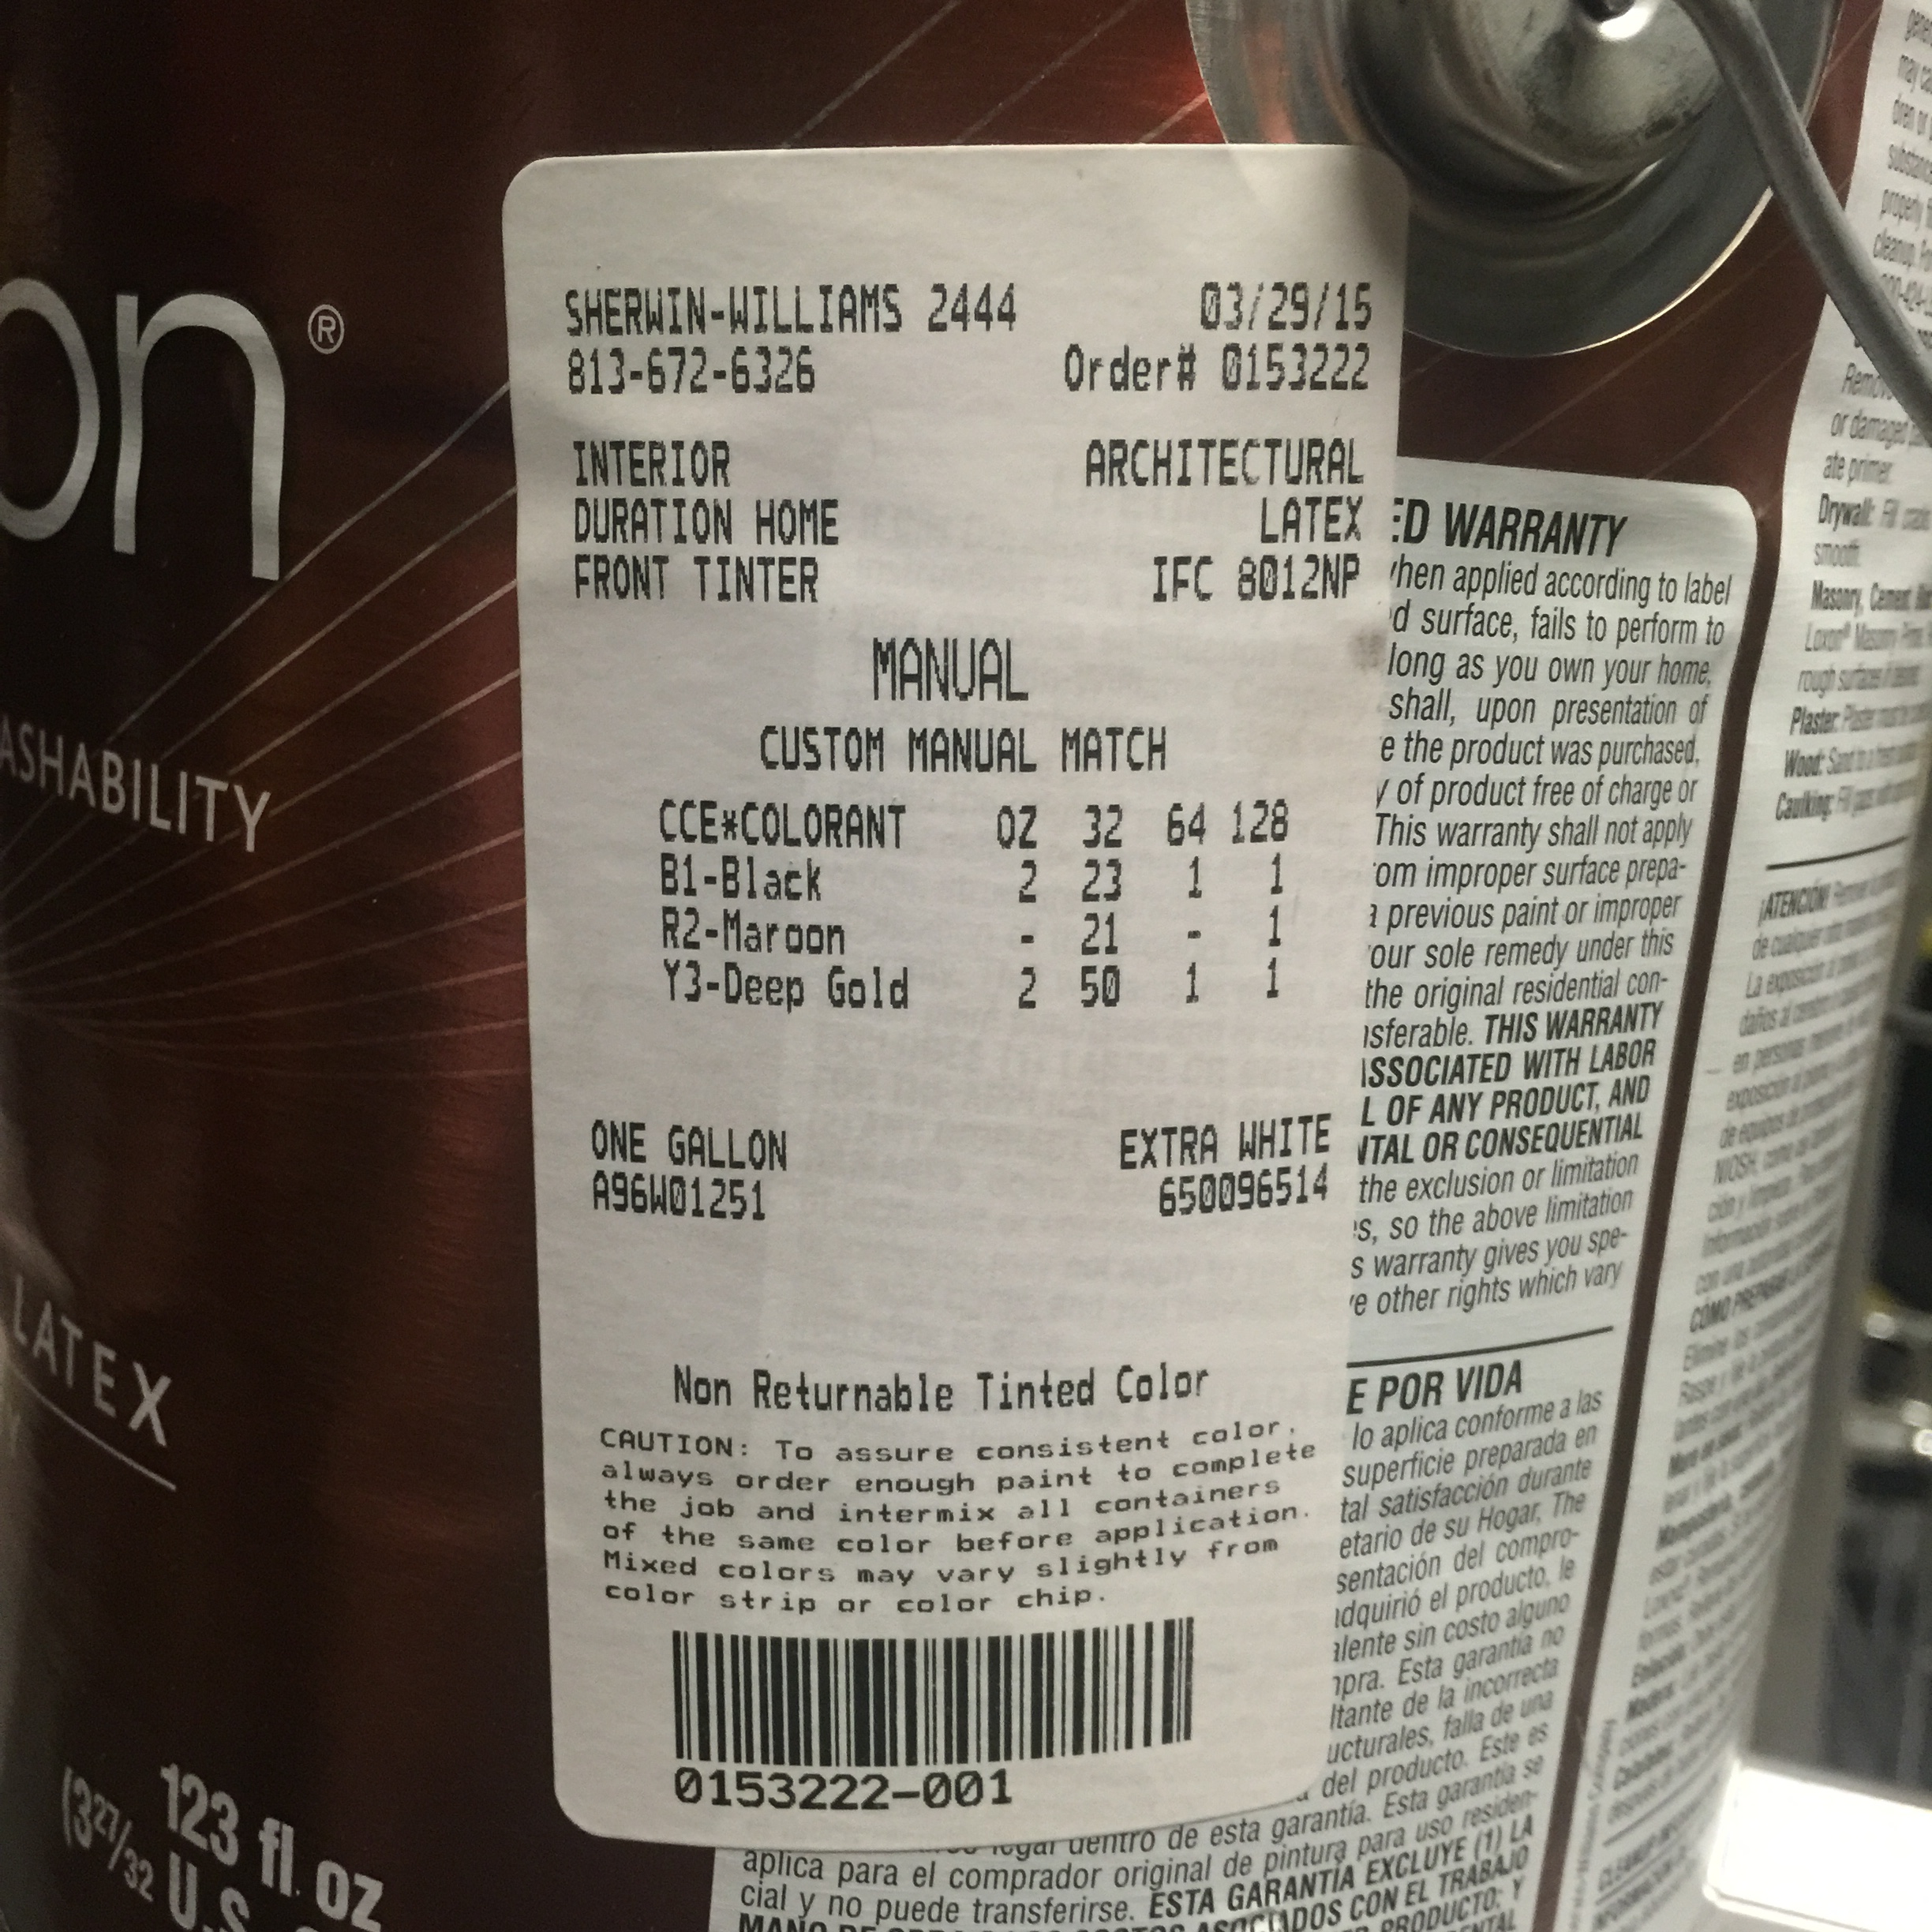
3) Next up: PAINT. I 150% recommend to paint the wall and the boards BEFORE you nail them to the wall. It saves so much time. I used a custom color mixed by Sherwin Williams. I included a picture of the label in case you’d like to recreate it. It’s a perfect warm, smokey gray.
I gave the boards 3 coats of paint because MDF just really soaks it up.
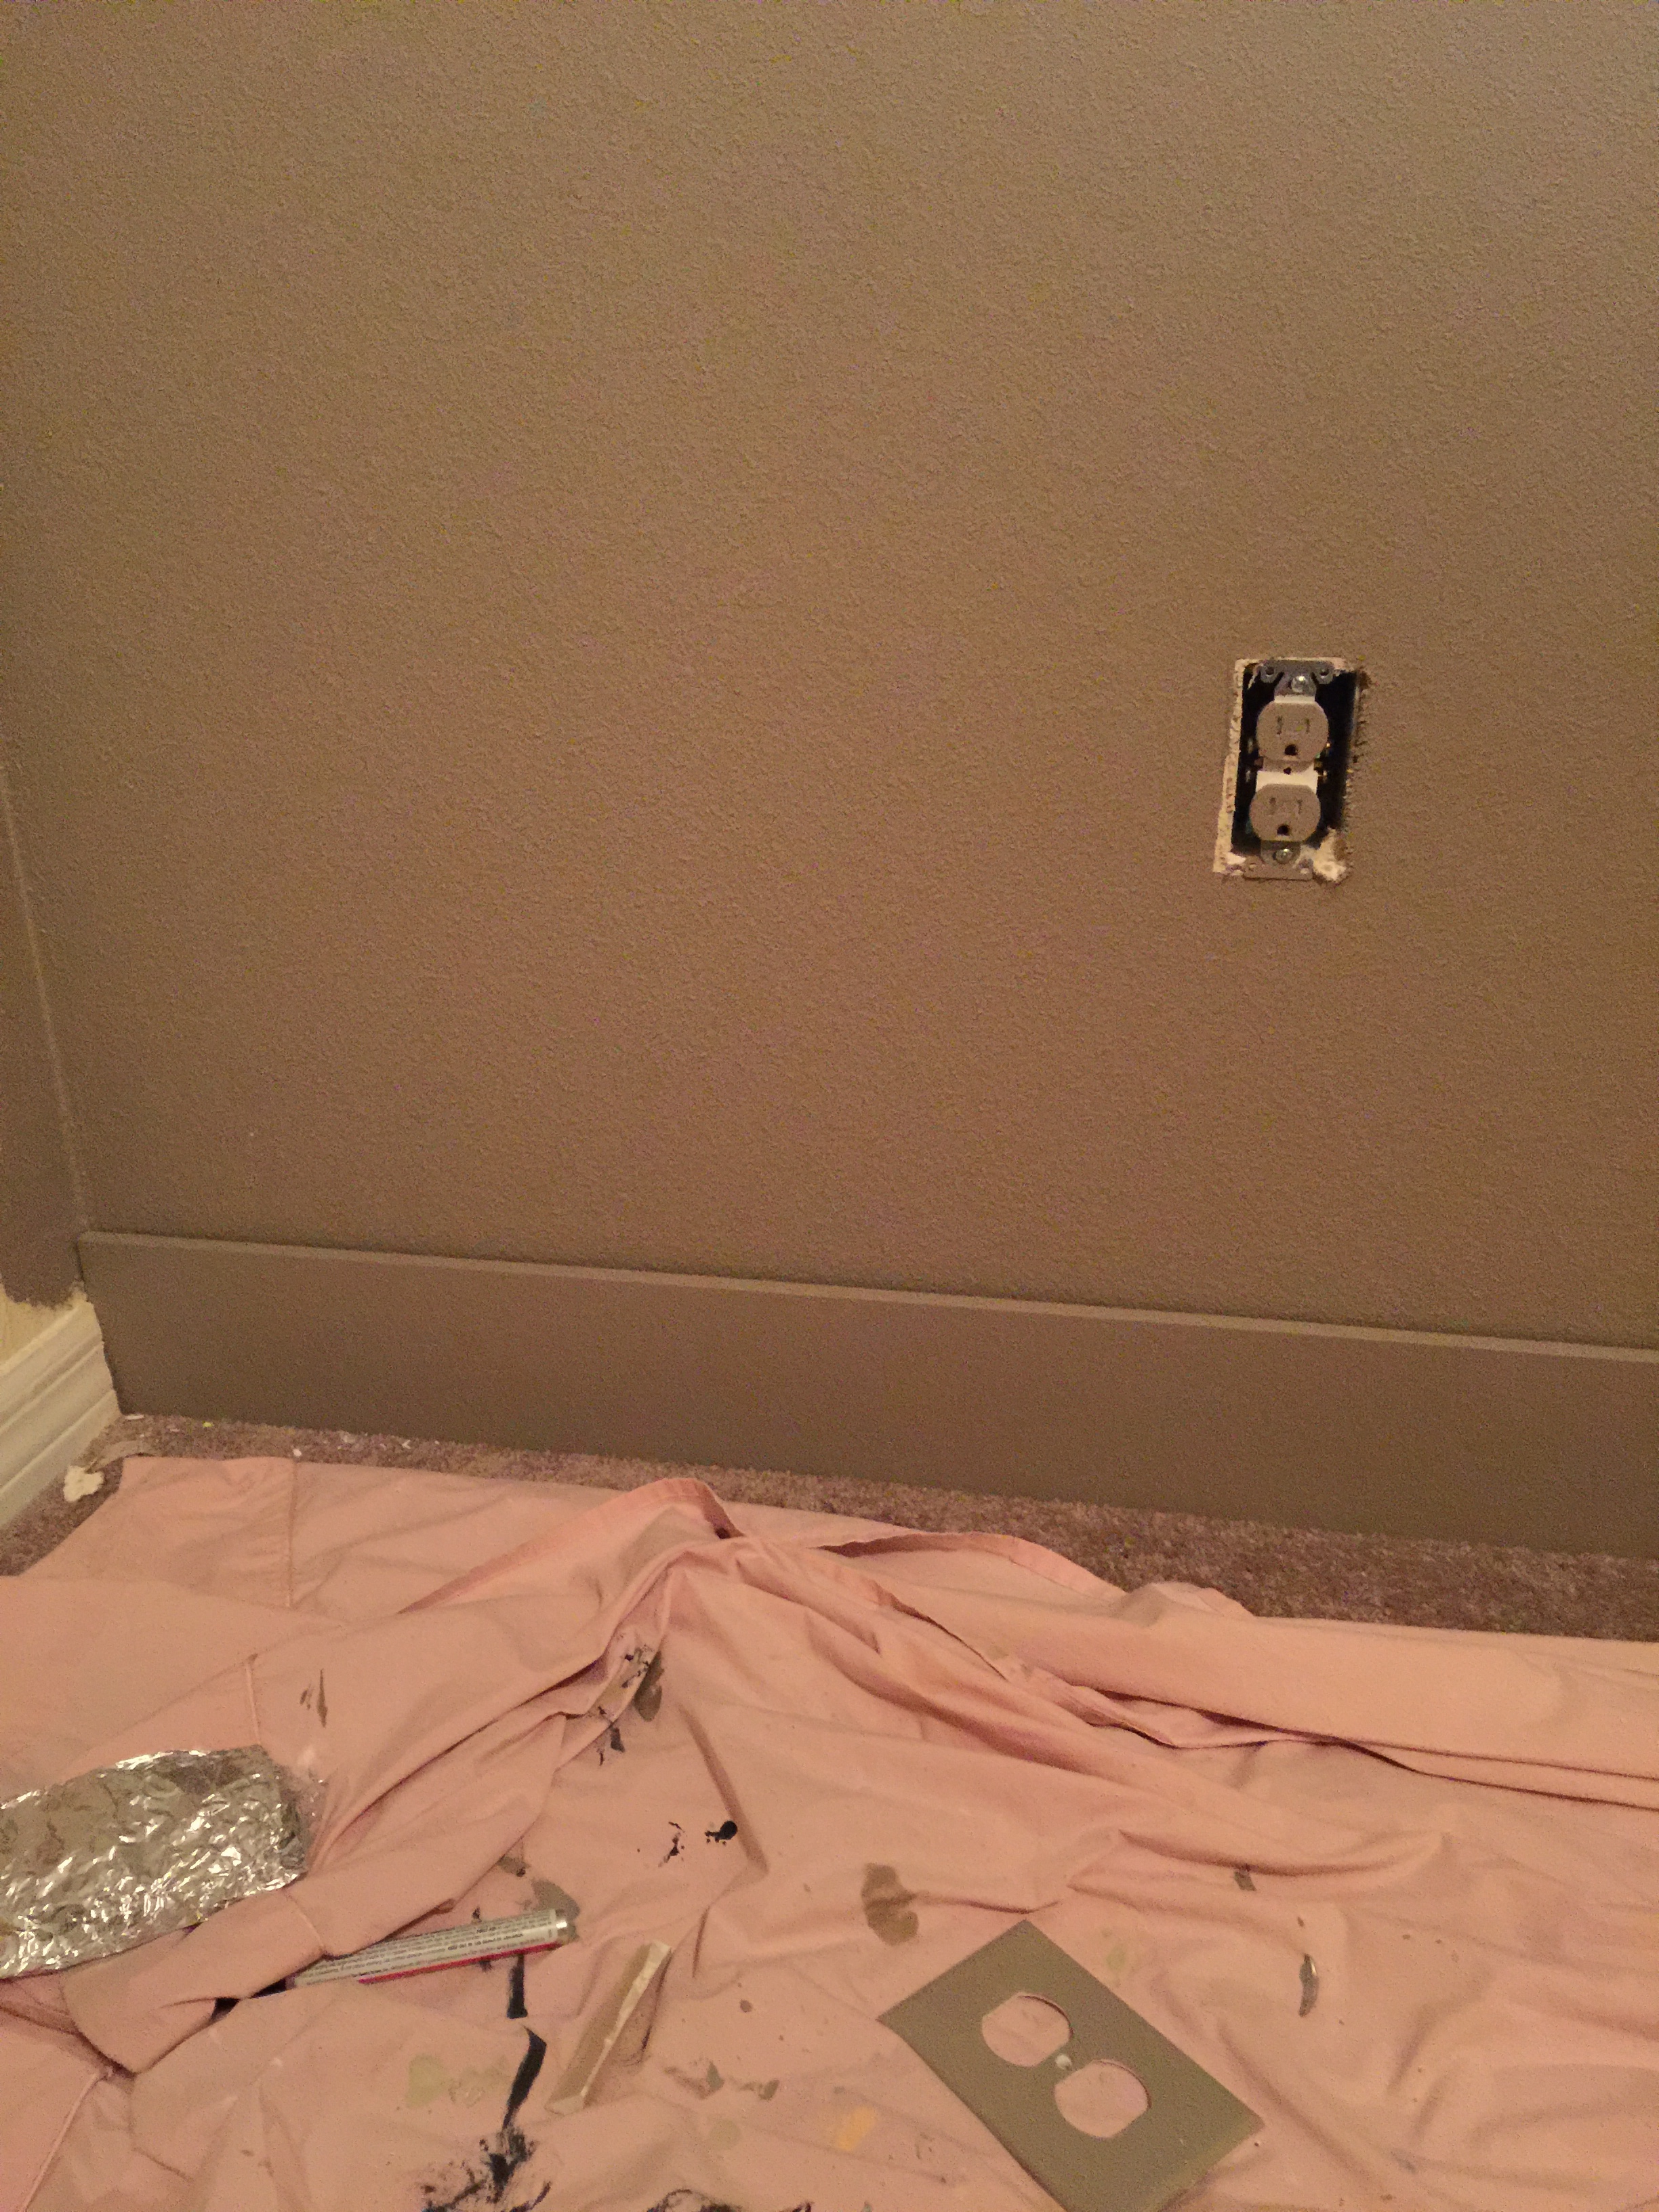
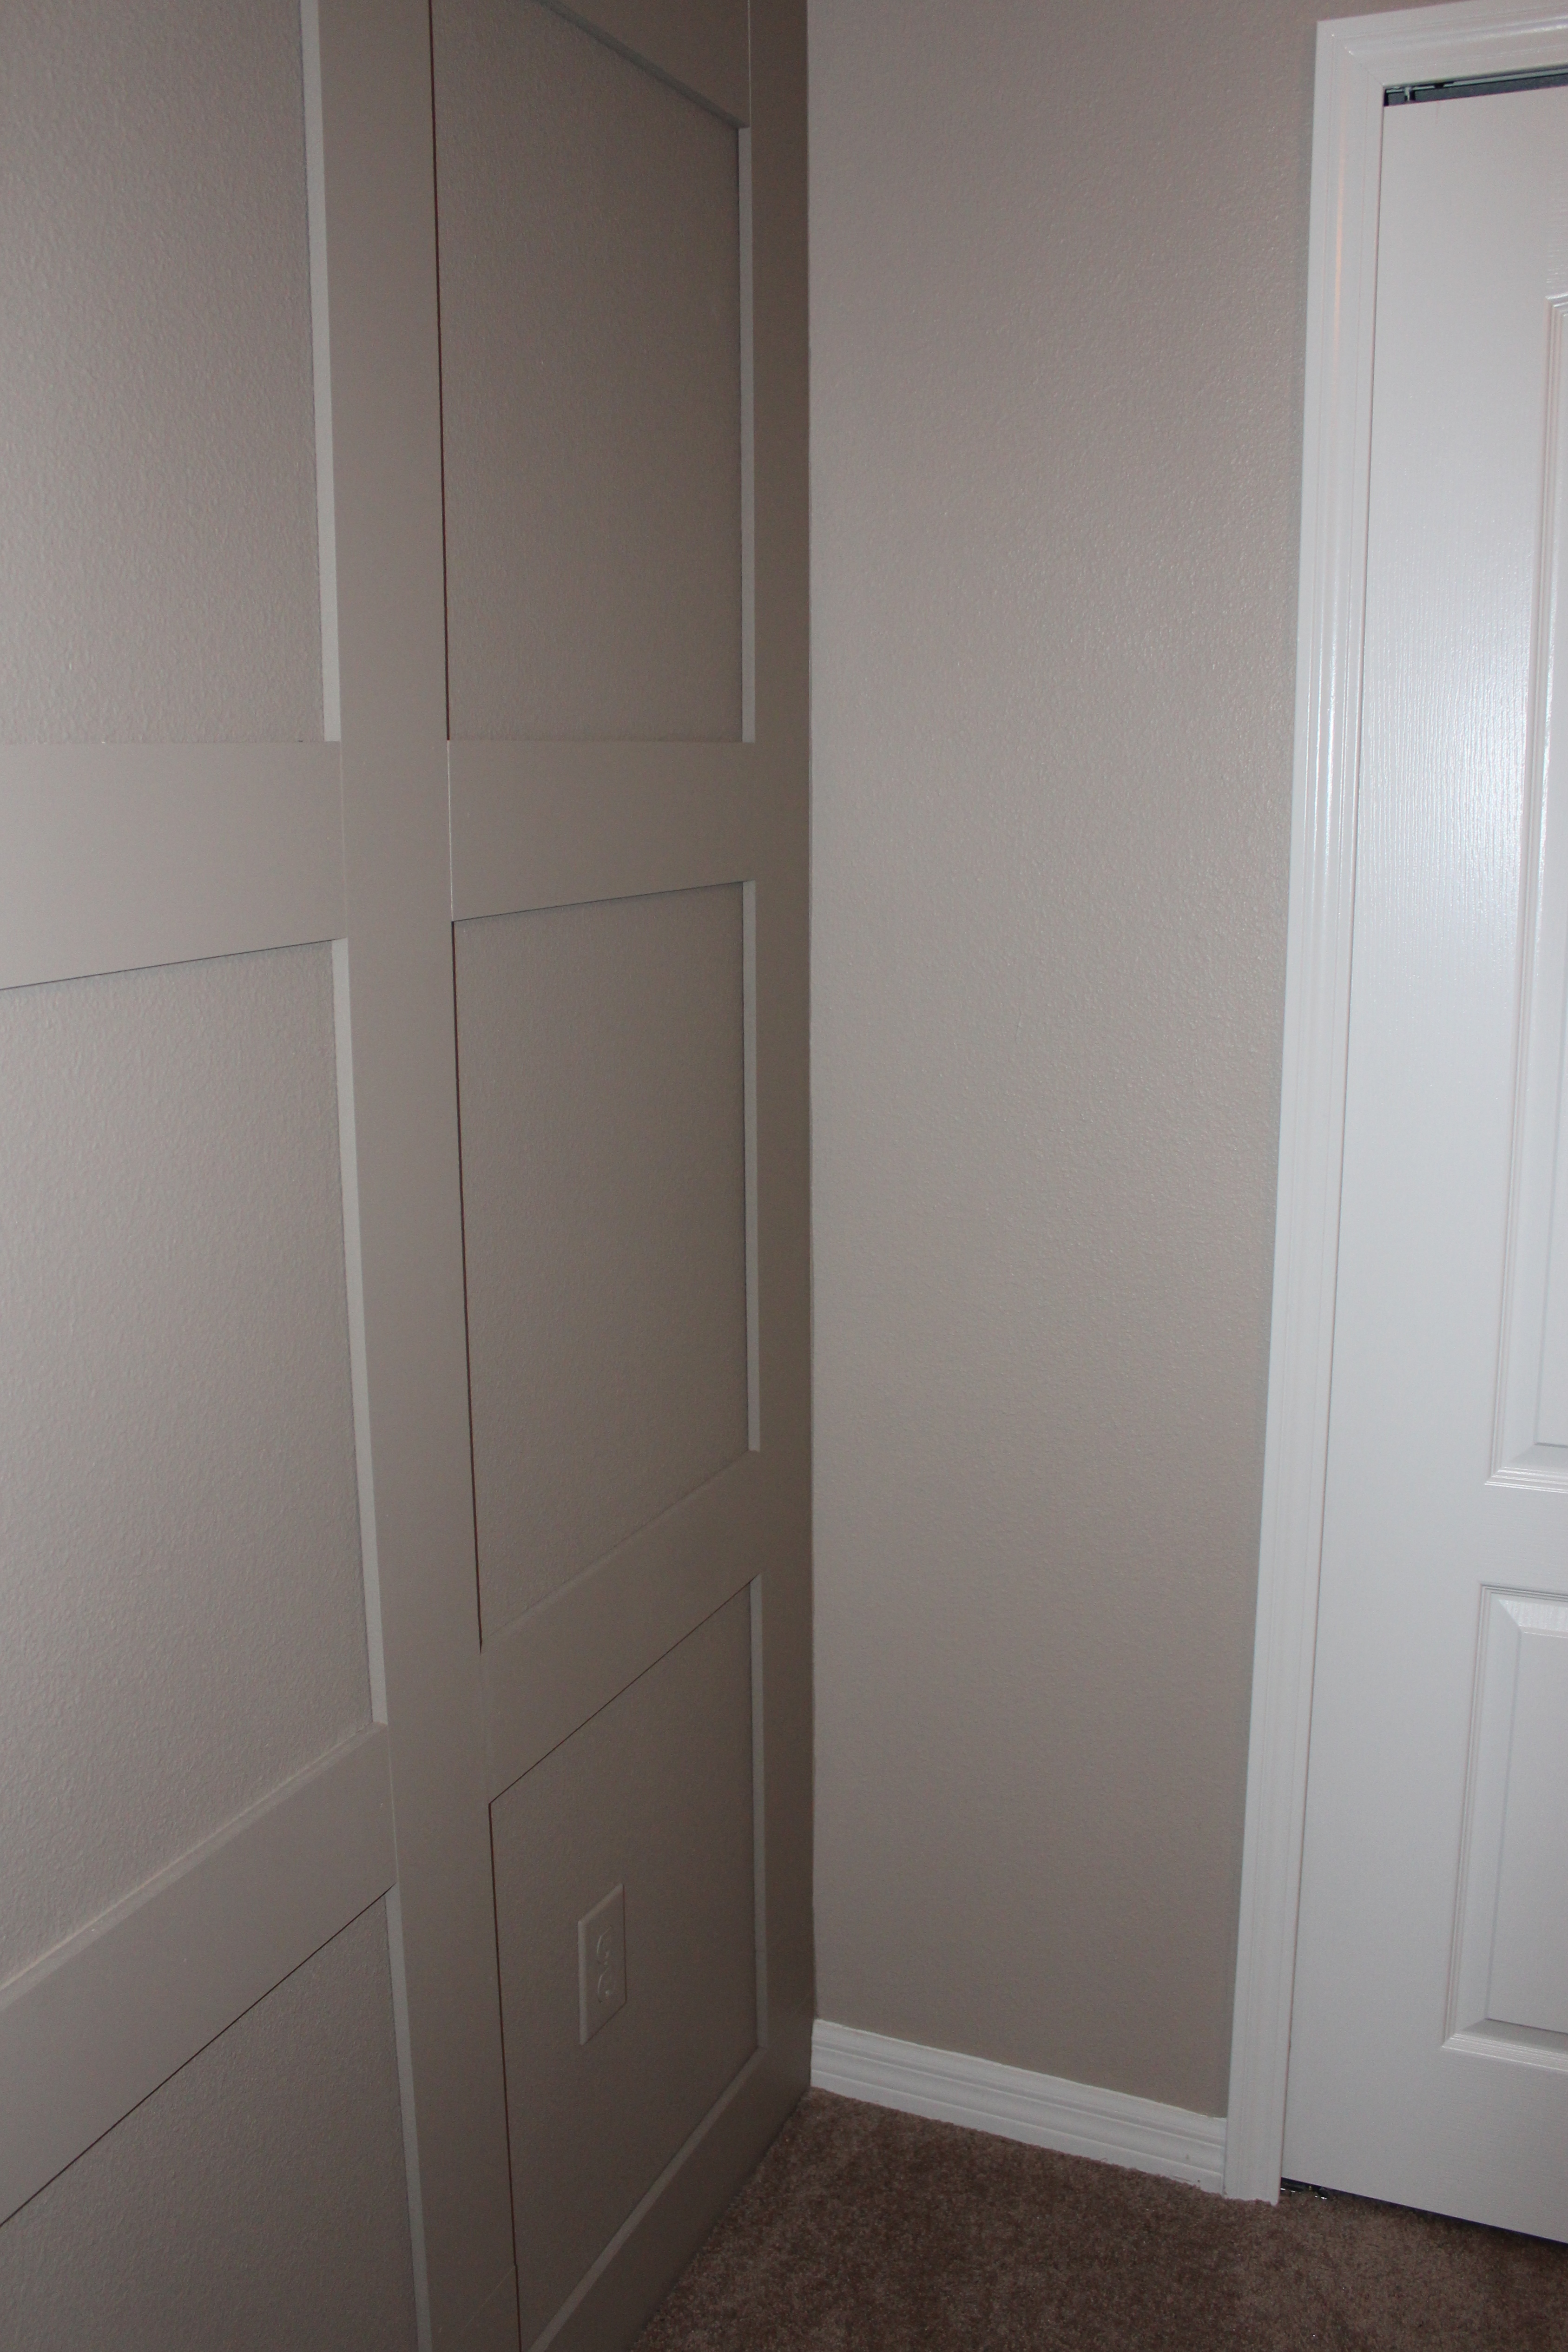
4) I started out by framing the wall in a square around the outside. To do that, I had to remove the baseboards along the bottom. Now I suppose that step is optional, however, I preferred that look. To do so, I used my multitool with the blade attachment and cut right through the corners of the baseboards. Then I simply used a flat head screw driver and blade to pry them off the wall.
I placed a nail in the boards using my nail gun and compressor about ever 12 inches or so.
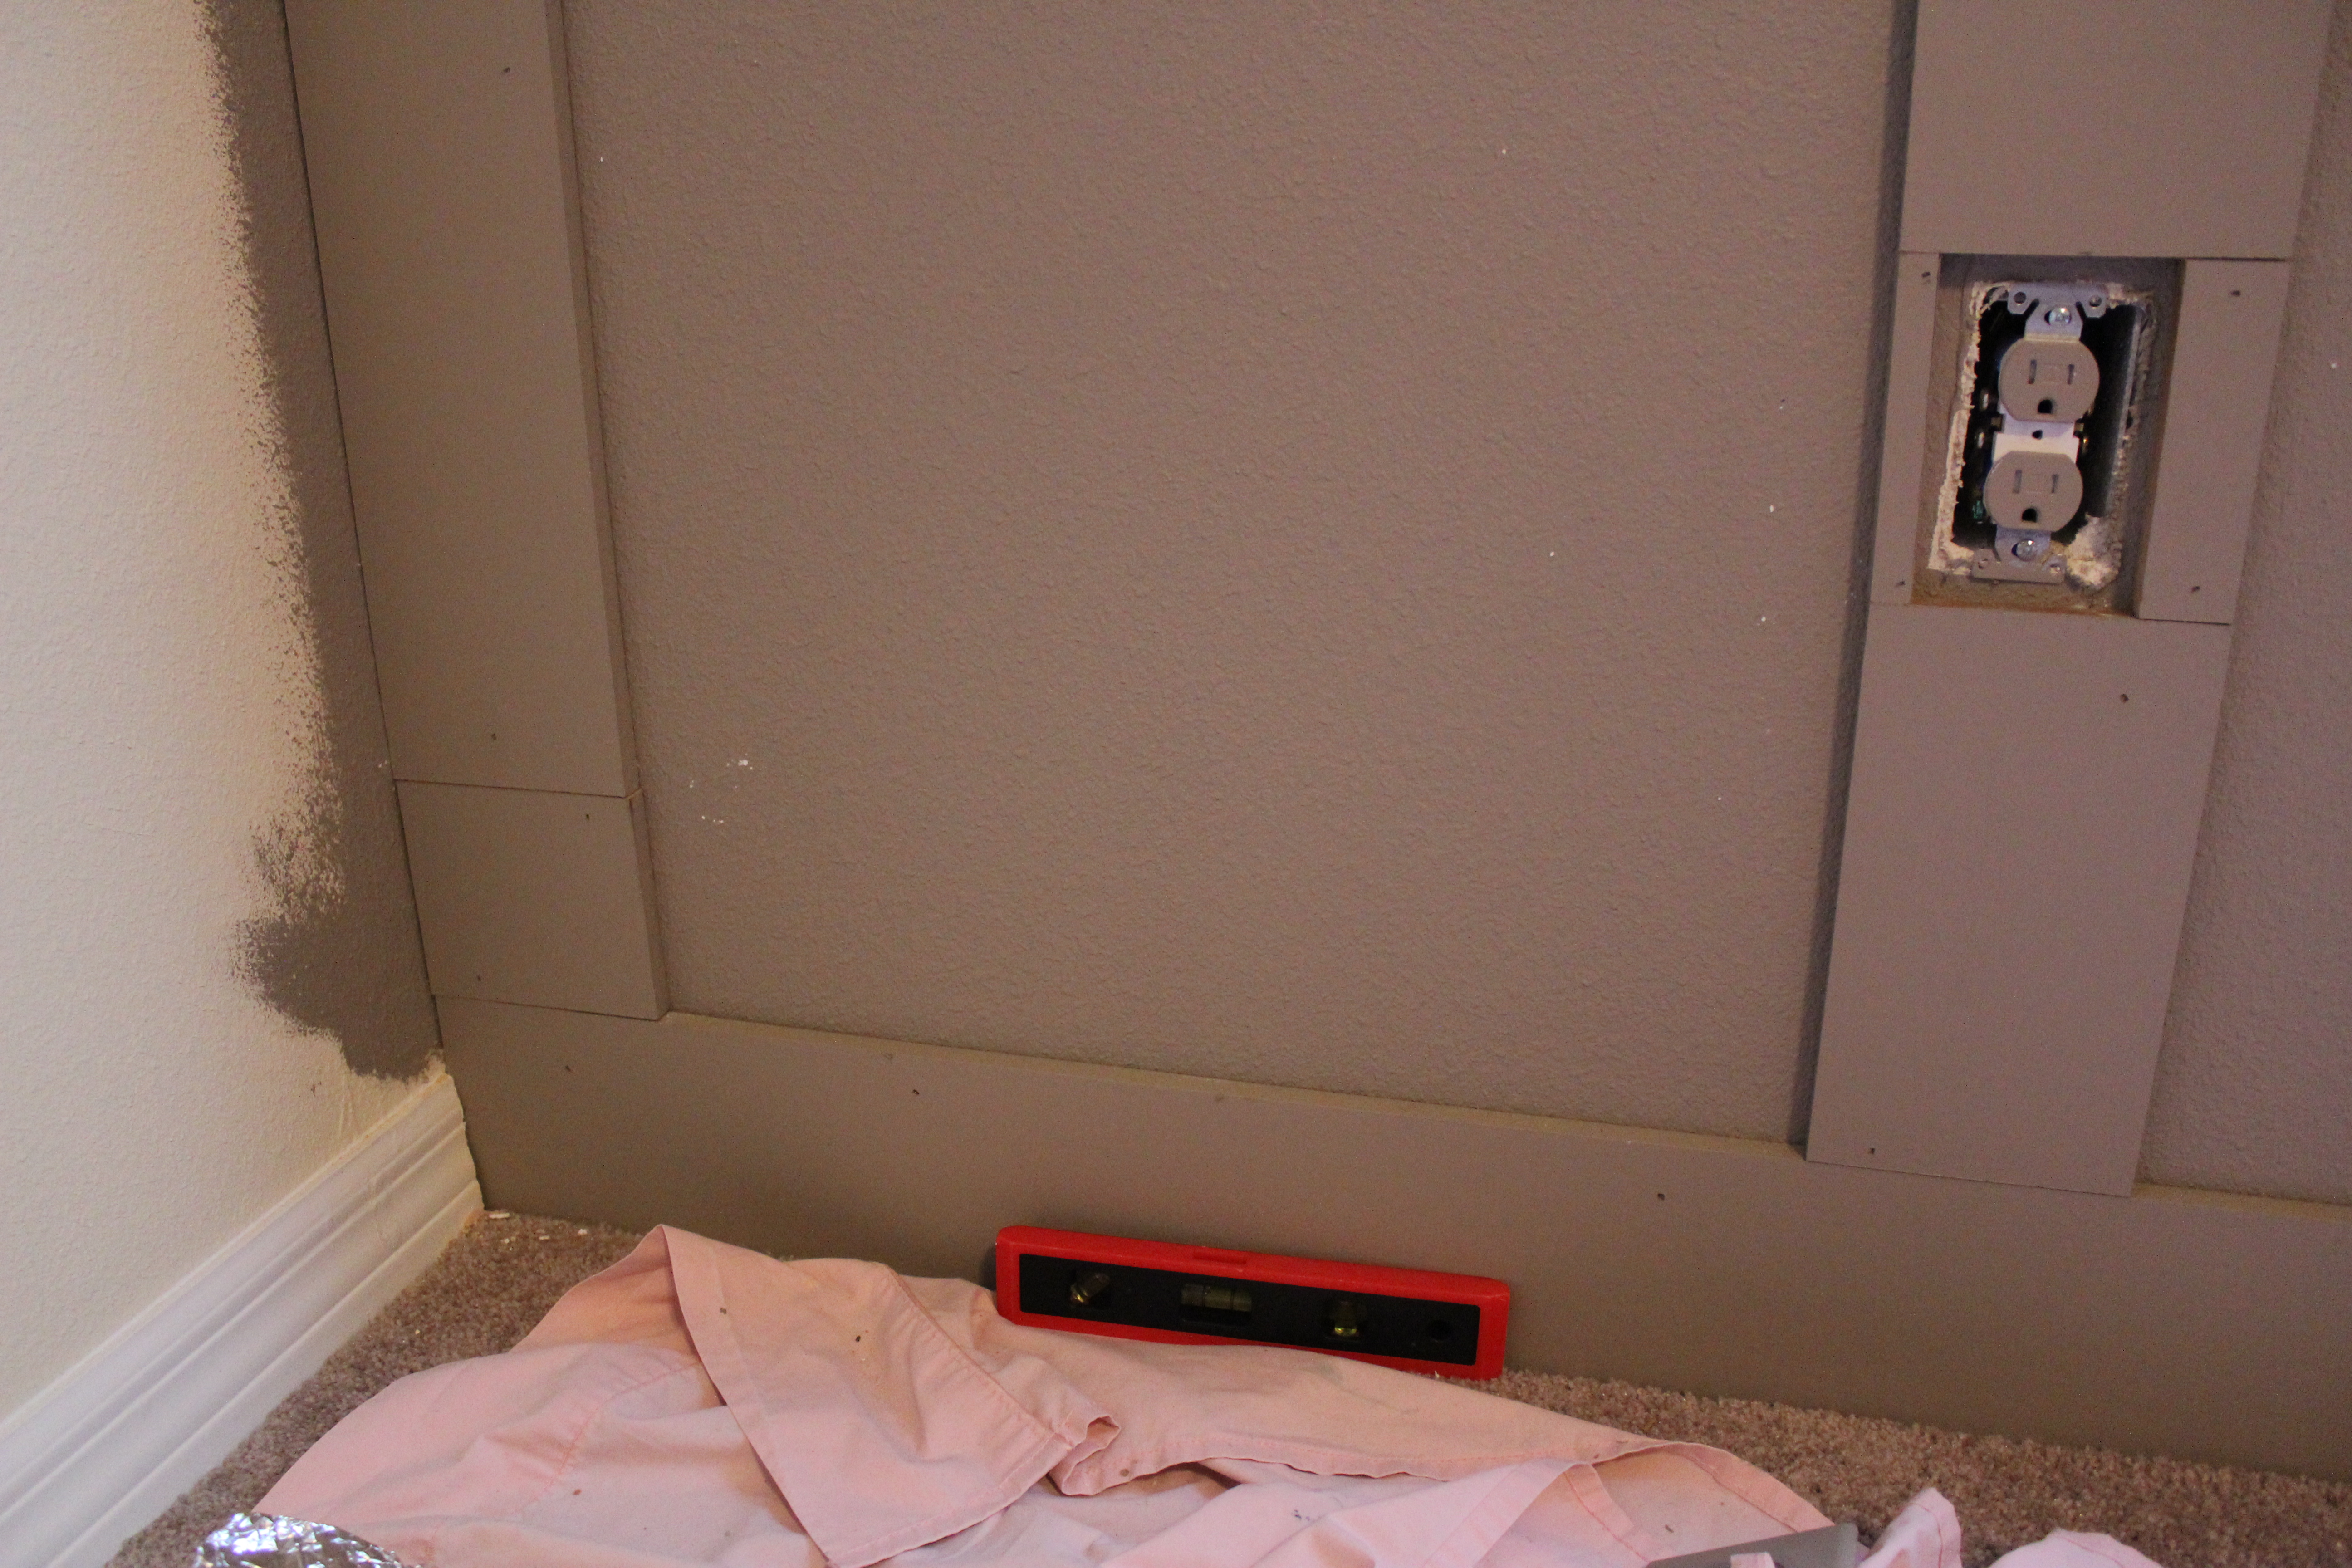
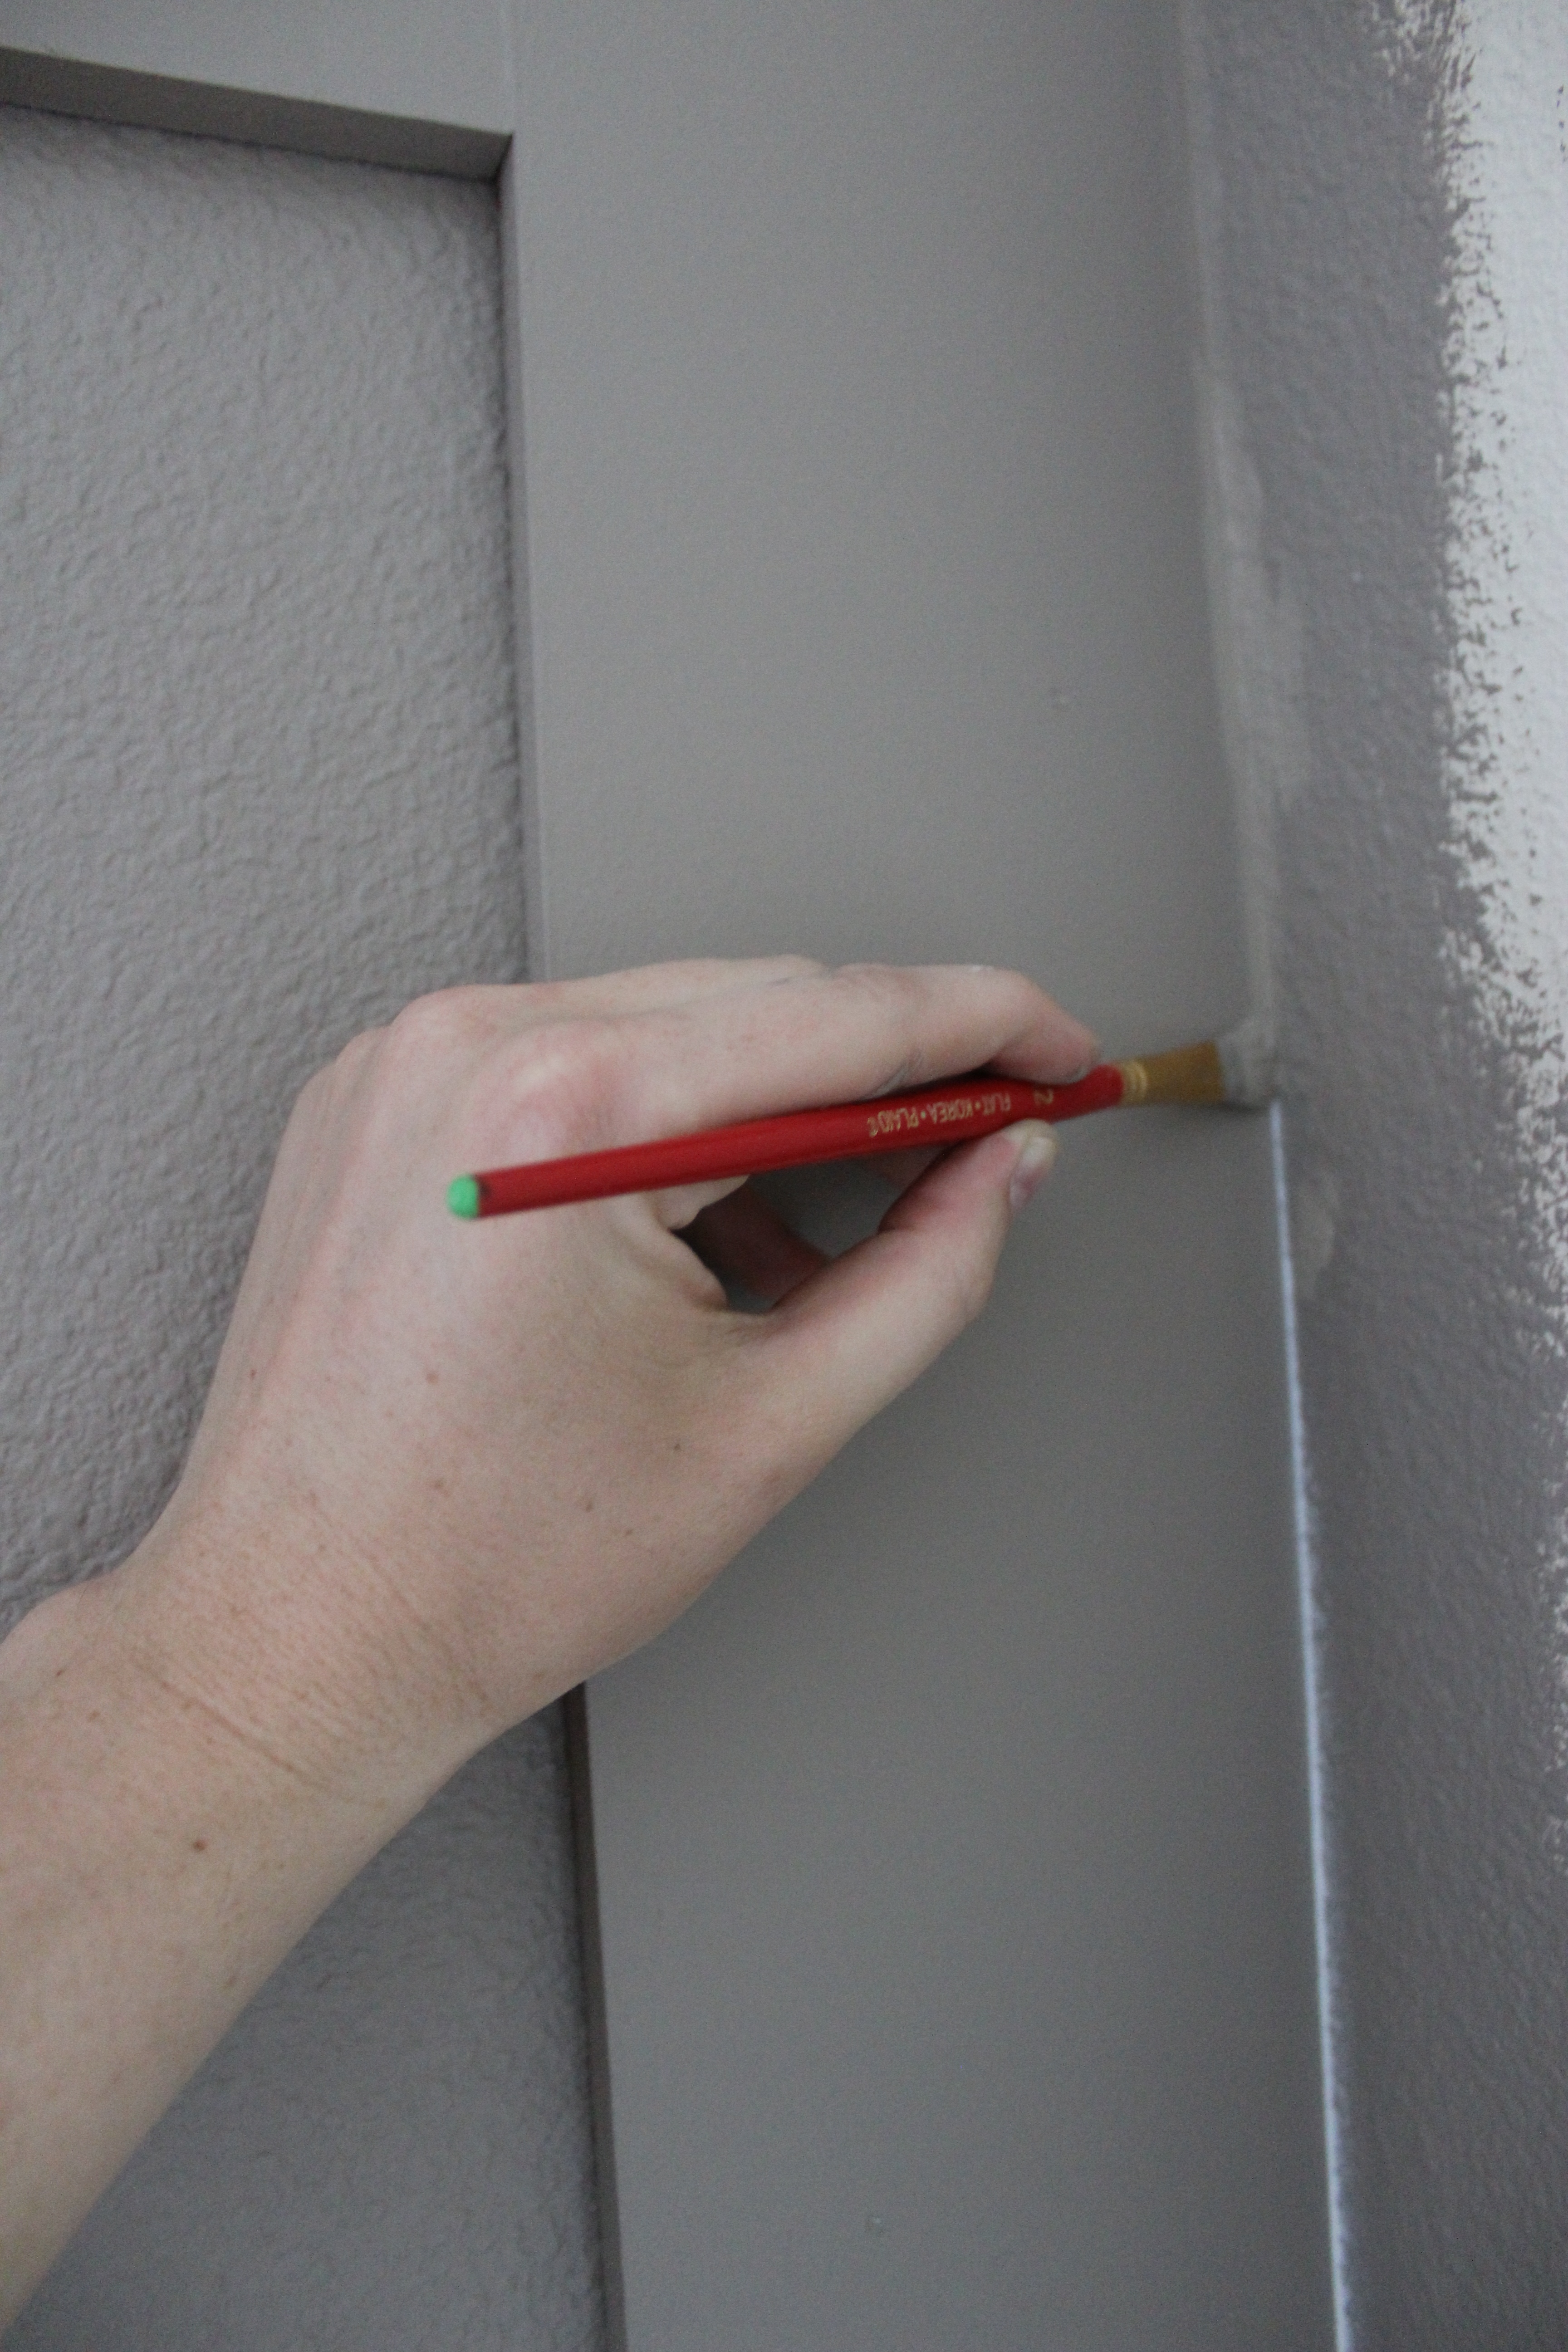
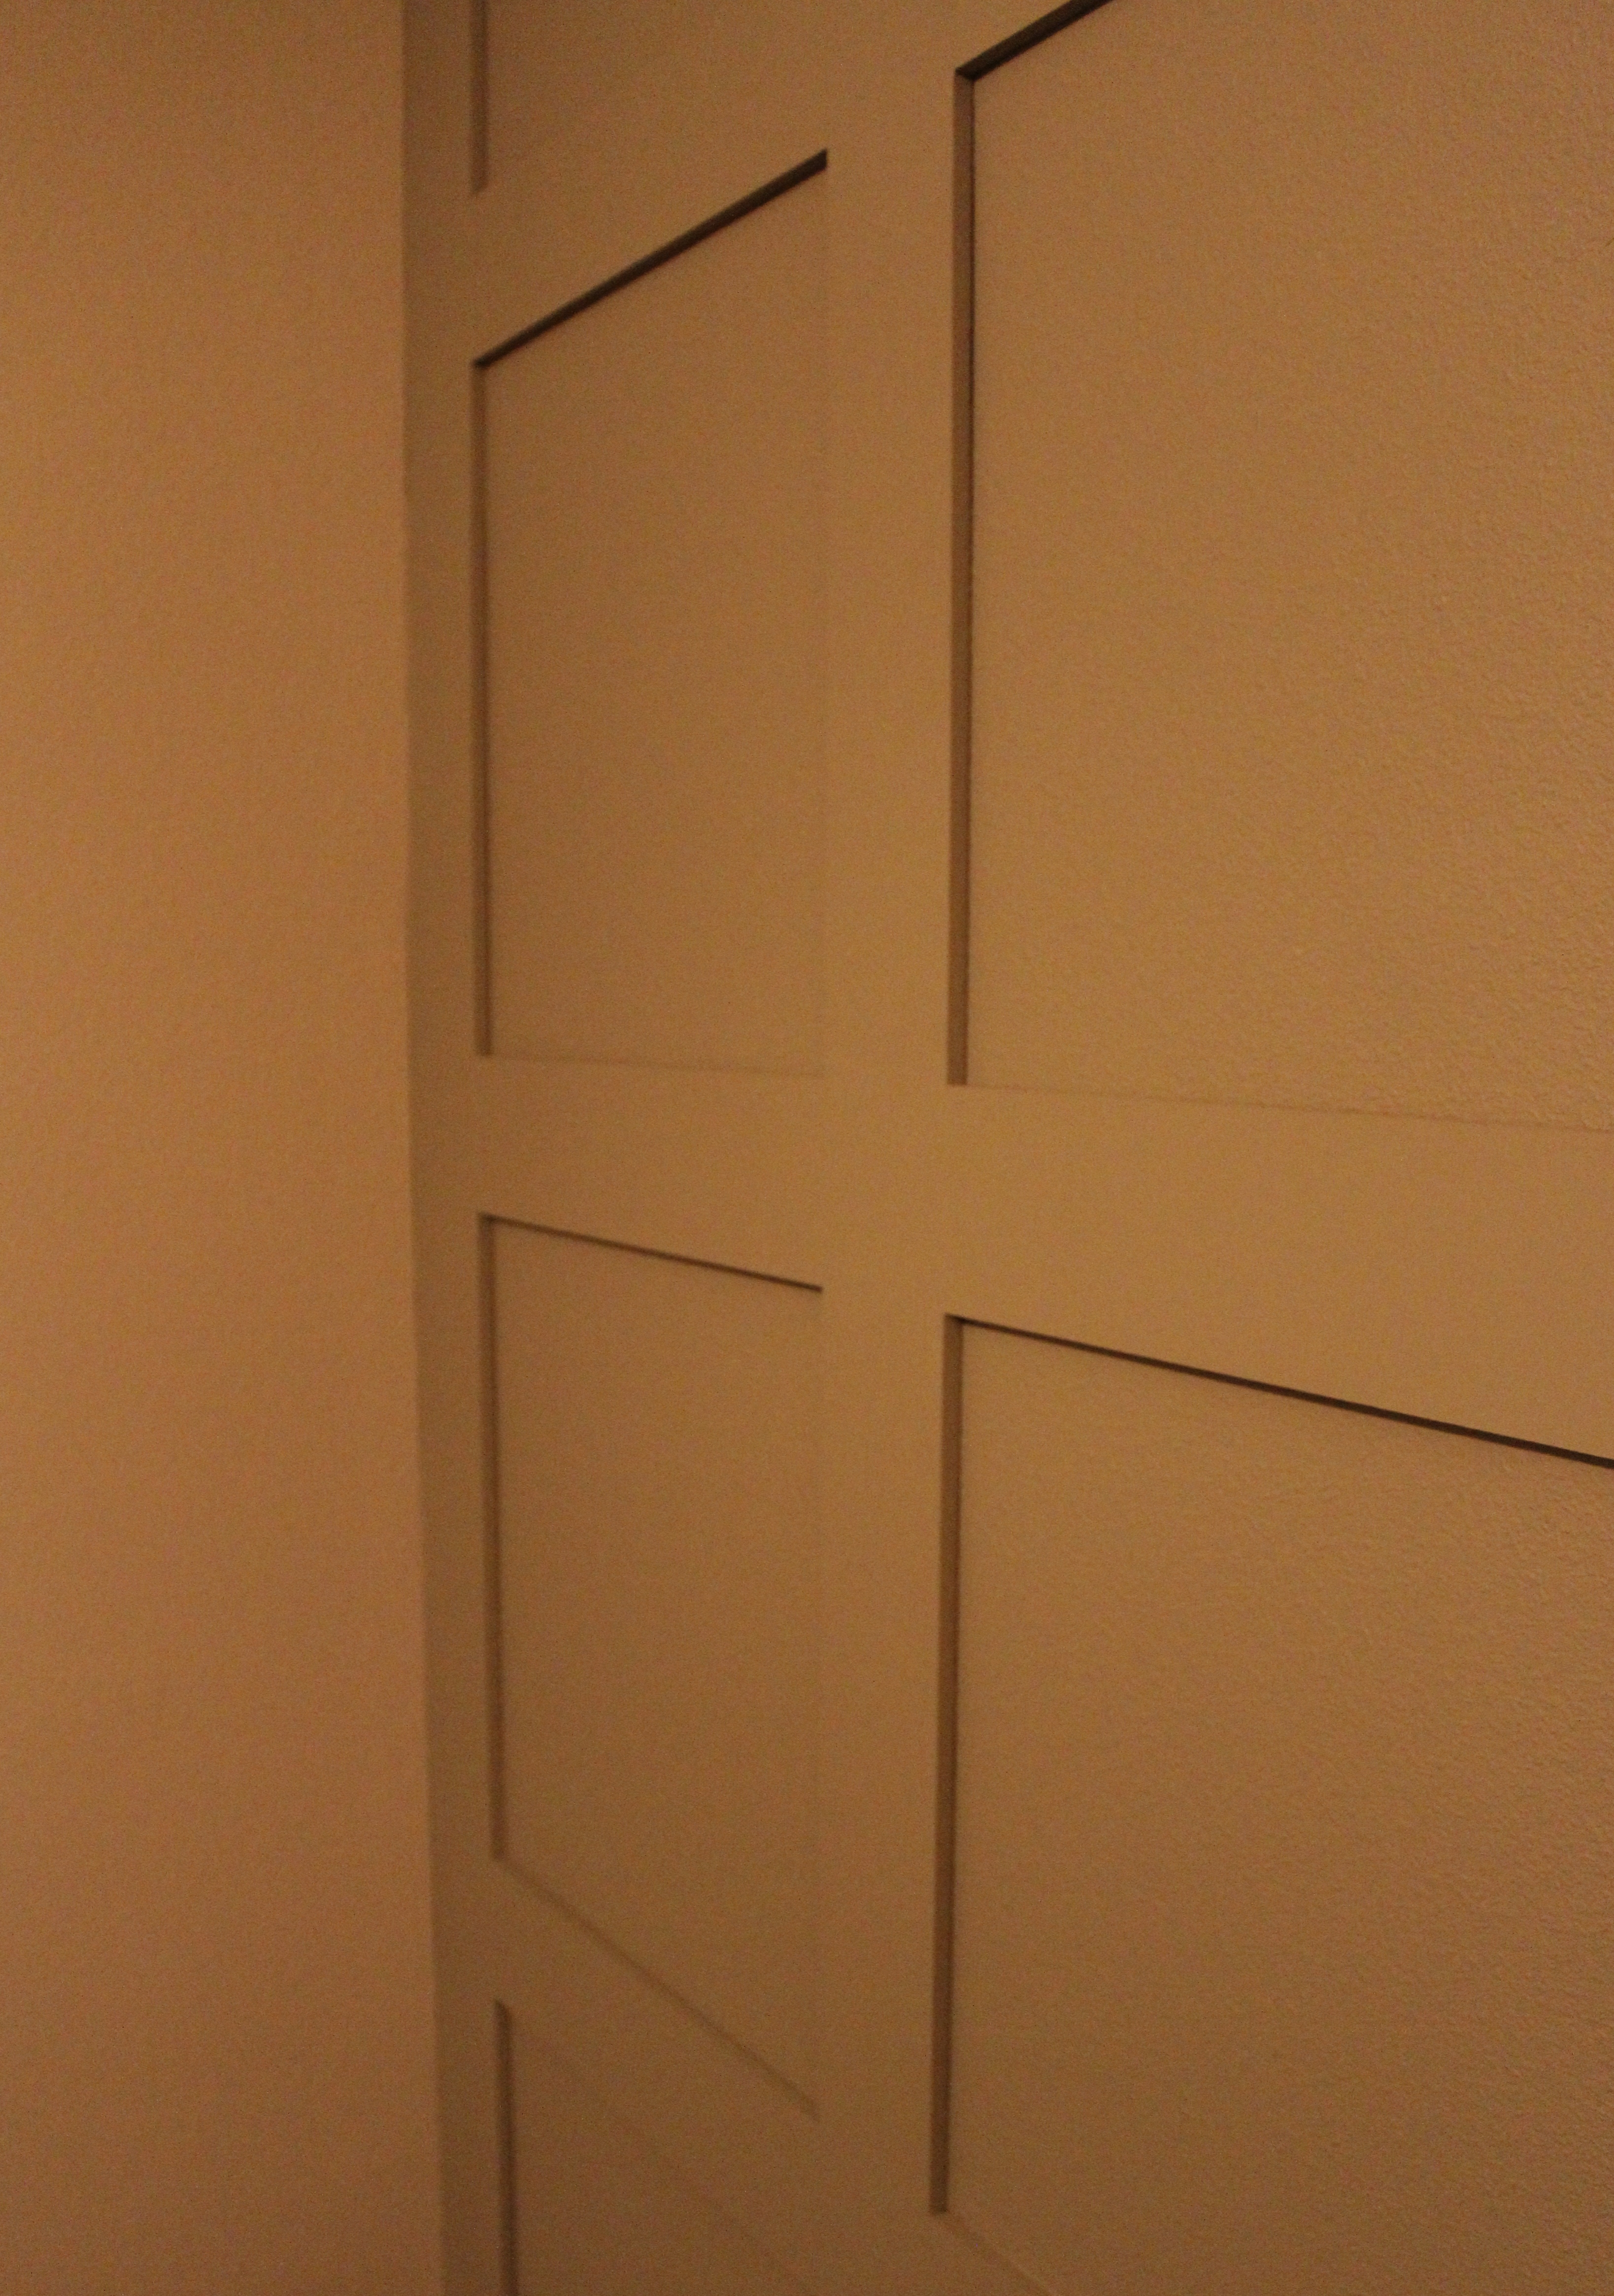
5) The vertical boards were up next. I used my measuring tape and drew small marks on the wall where every board would start, according to my drawing. I butted the board up against the top board as flush as possible and then placed a nail at the top of the vertical board. Then I used my level to guide the board and ensure it was perfectly straight as I was nailing it down the wall. The short pieces around the window were nice and easy.

As you can see in the picture above, I ran into an outlet. There are two outlets on this wall and there was really no way to avoid both of them. So I cut very small strips with my mitre saw that fit snugly around the outlet plate. I gave them a nice sanding after they were nailed in to ensure the edges were entice and flush with the vertical pieces. I also painted the outlets and the plate themselves to really blend in with the wall.

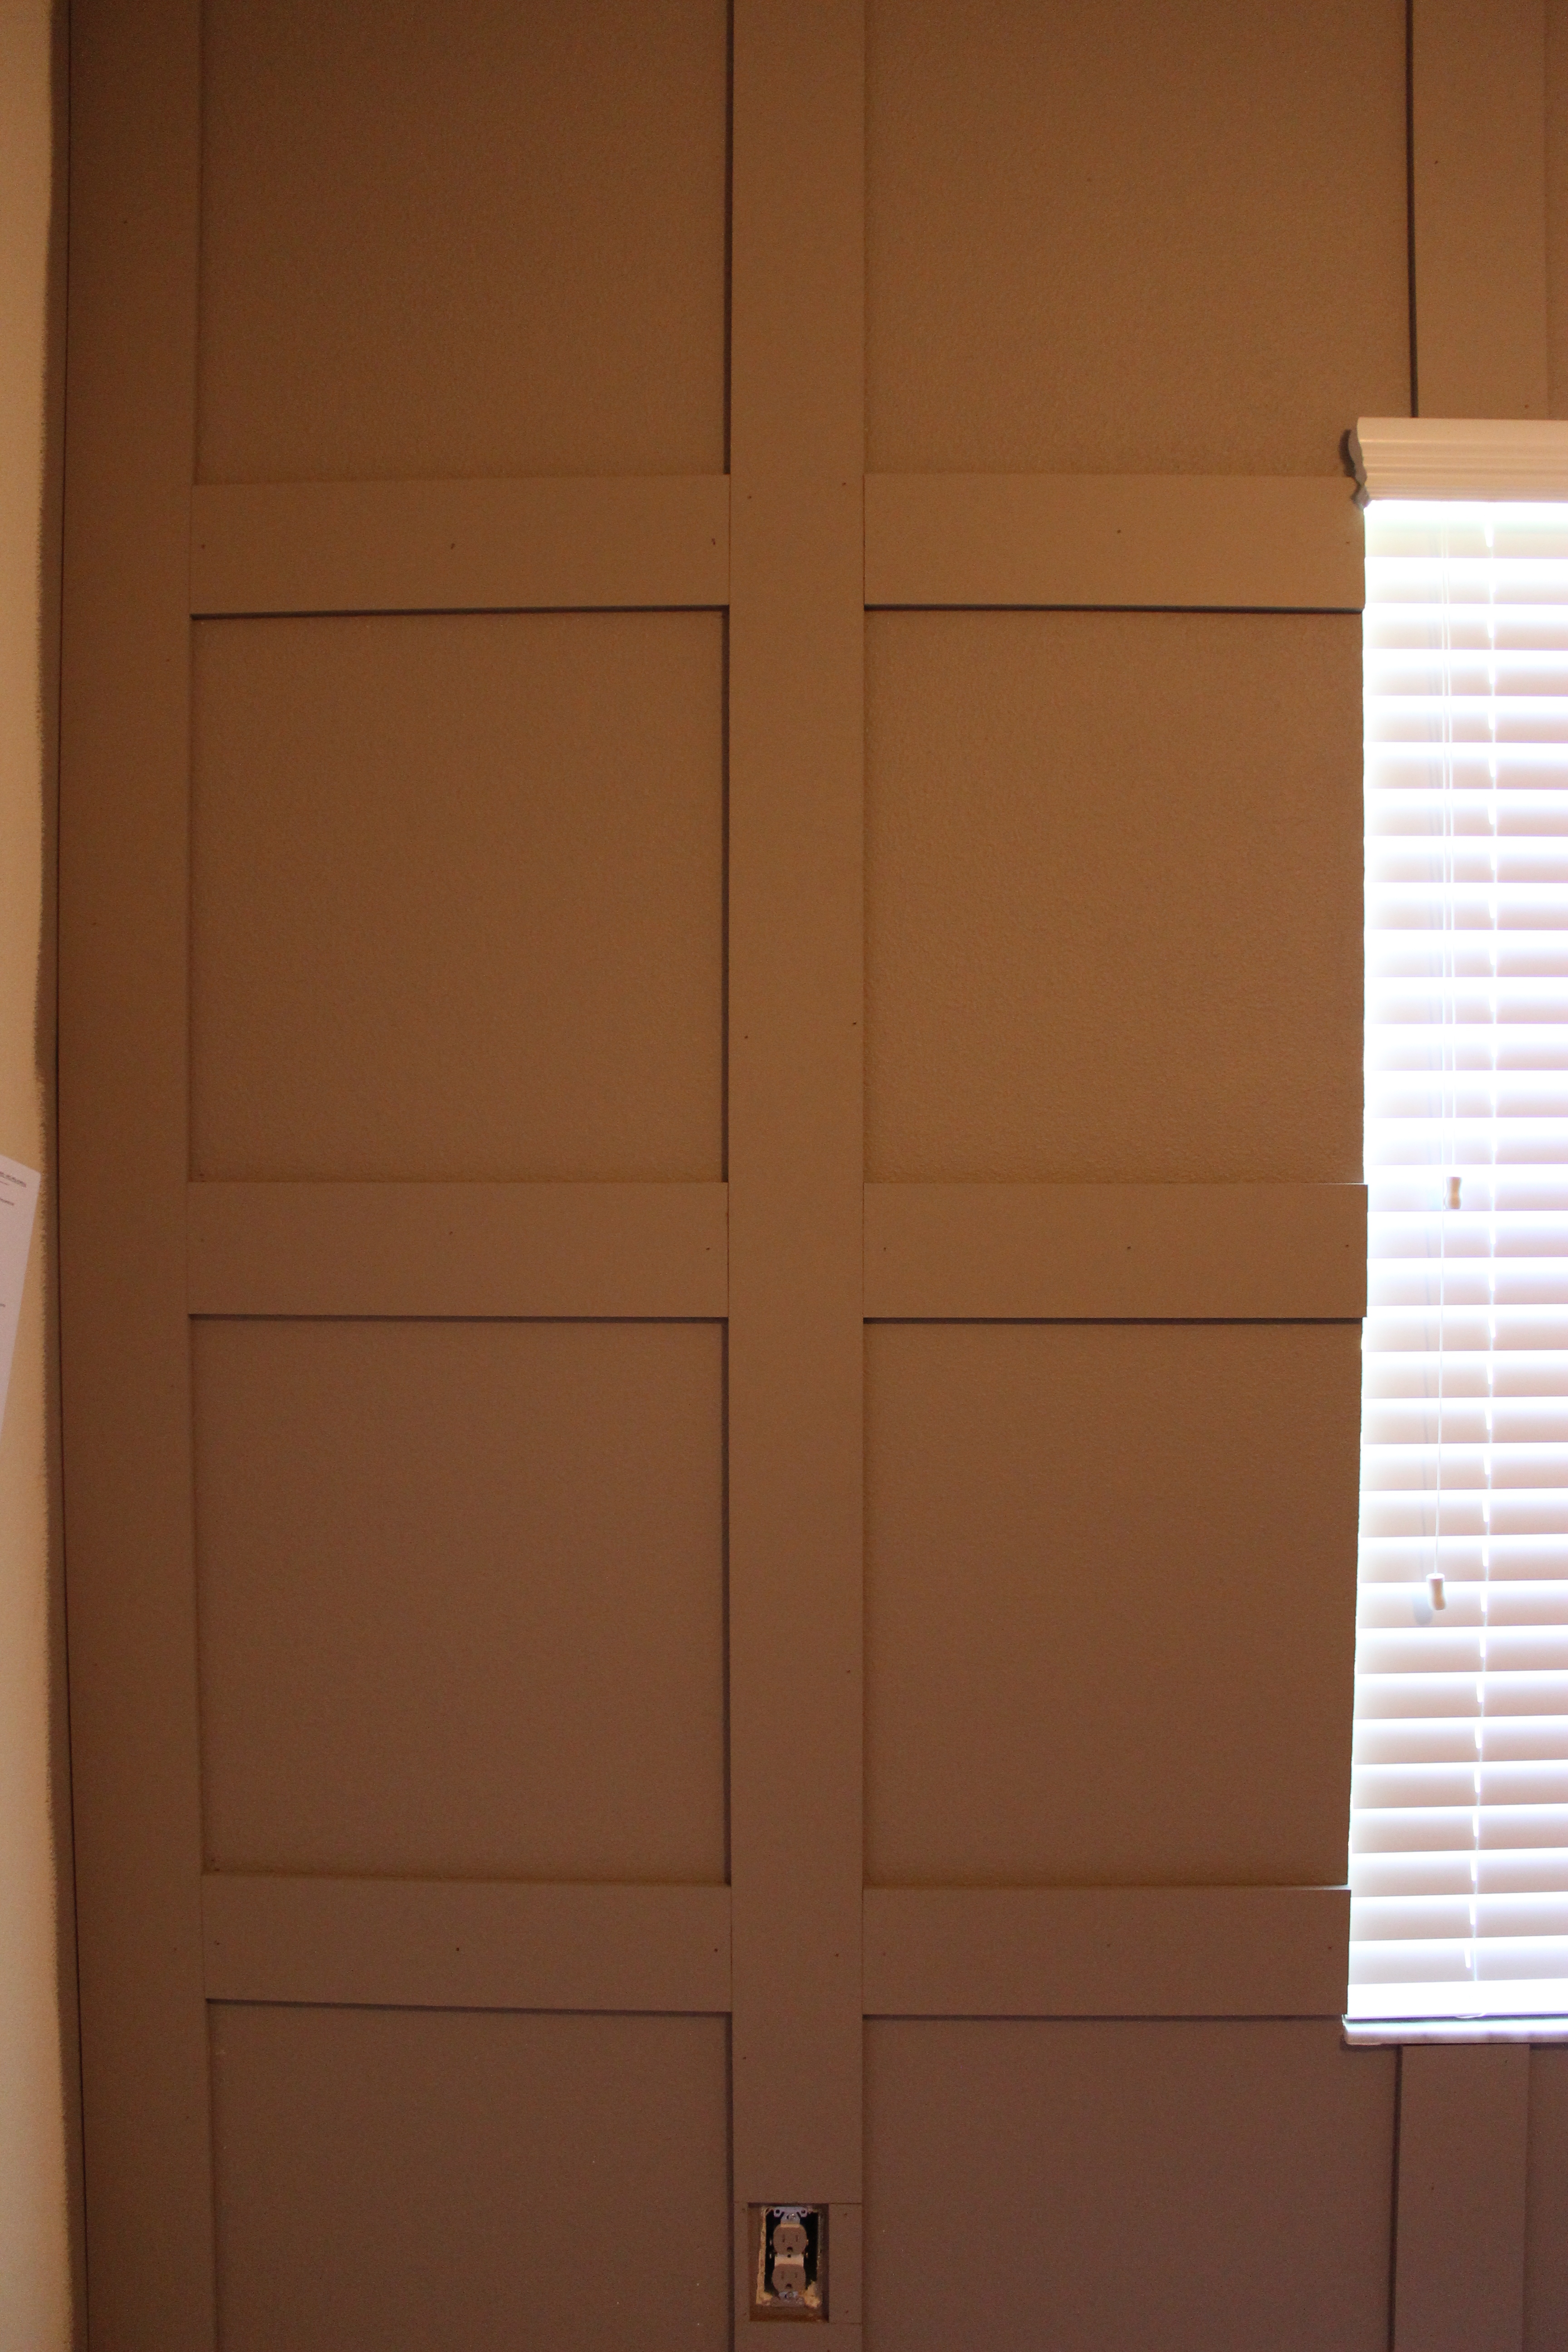
6) Last up – the horizontal pieces. This was definitely the easiest and quickest part of the installation. All I did here was draw marks with a pencil on the wall where the horizontal boards would be placed according to my drawing. Then I measured the distance between the two vertical pieces (to get an exact measurement) and made the cuts. My drawing already had the measurements of the horizontal pieces, however, at different points the measurements actually differed by an eighth or a sixteenth of an inch, so it’s always important to continually measure!
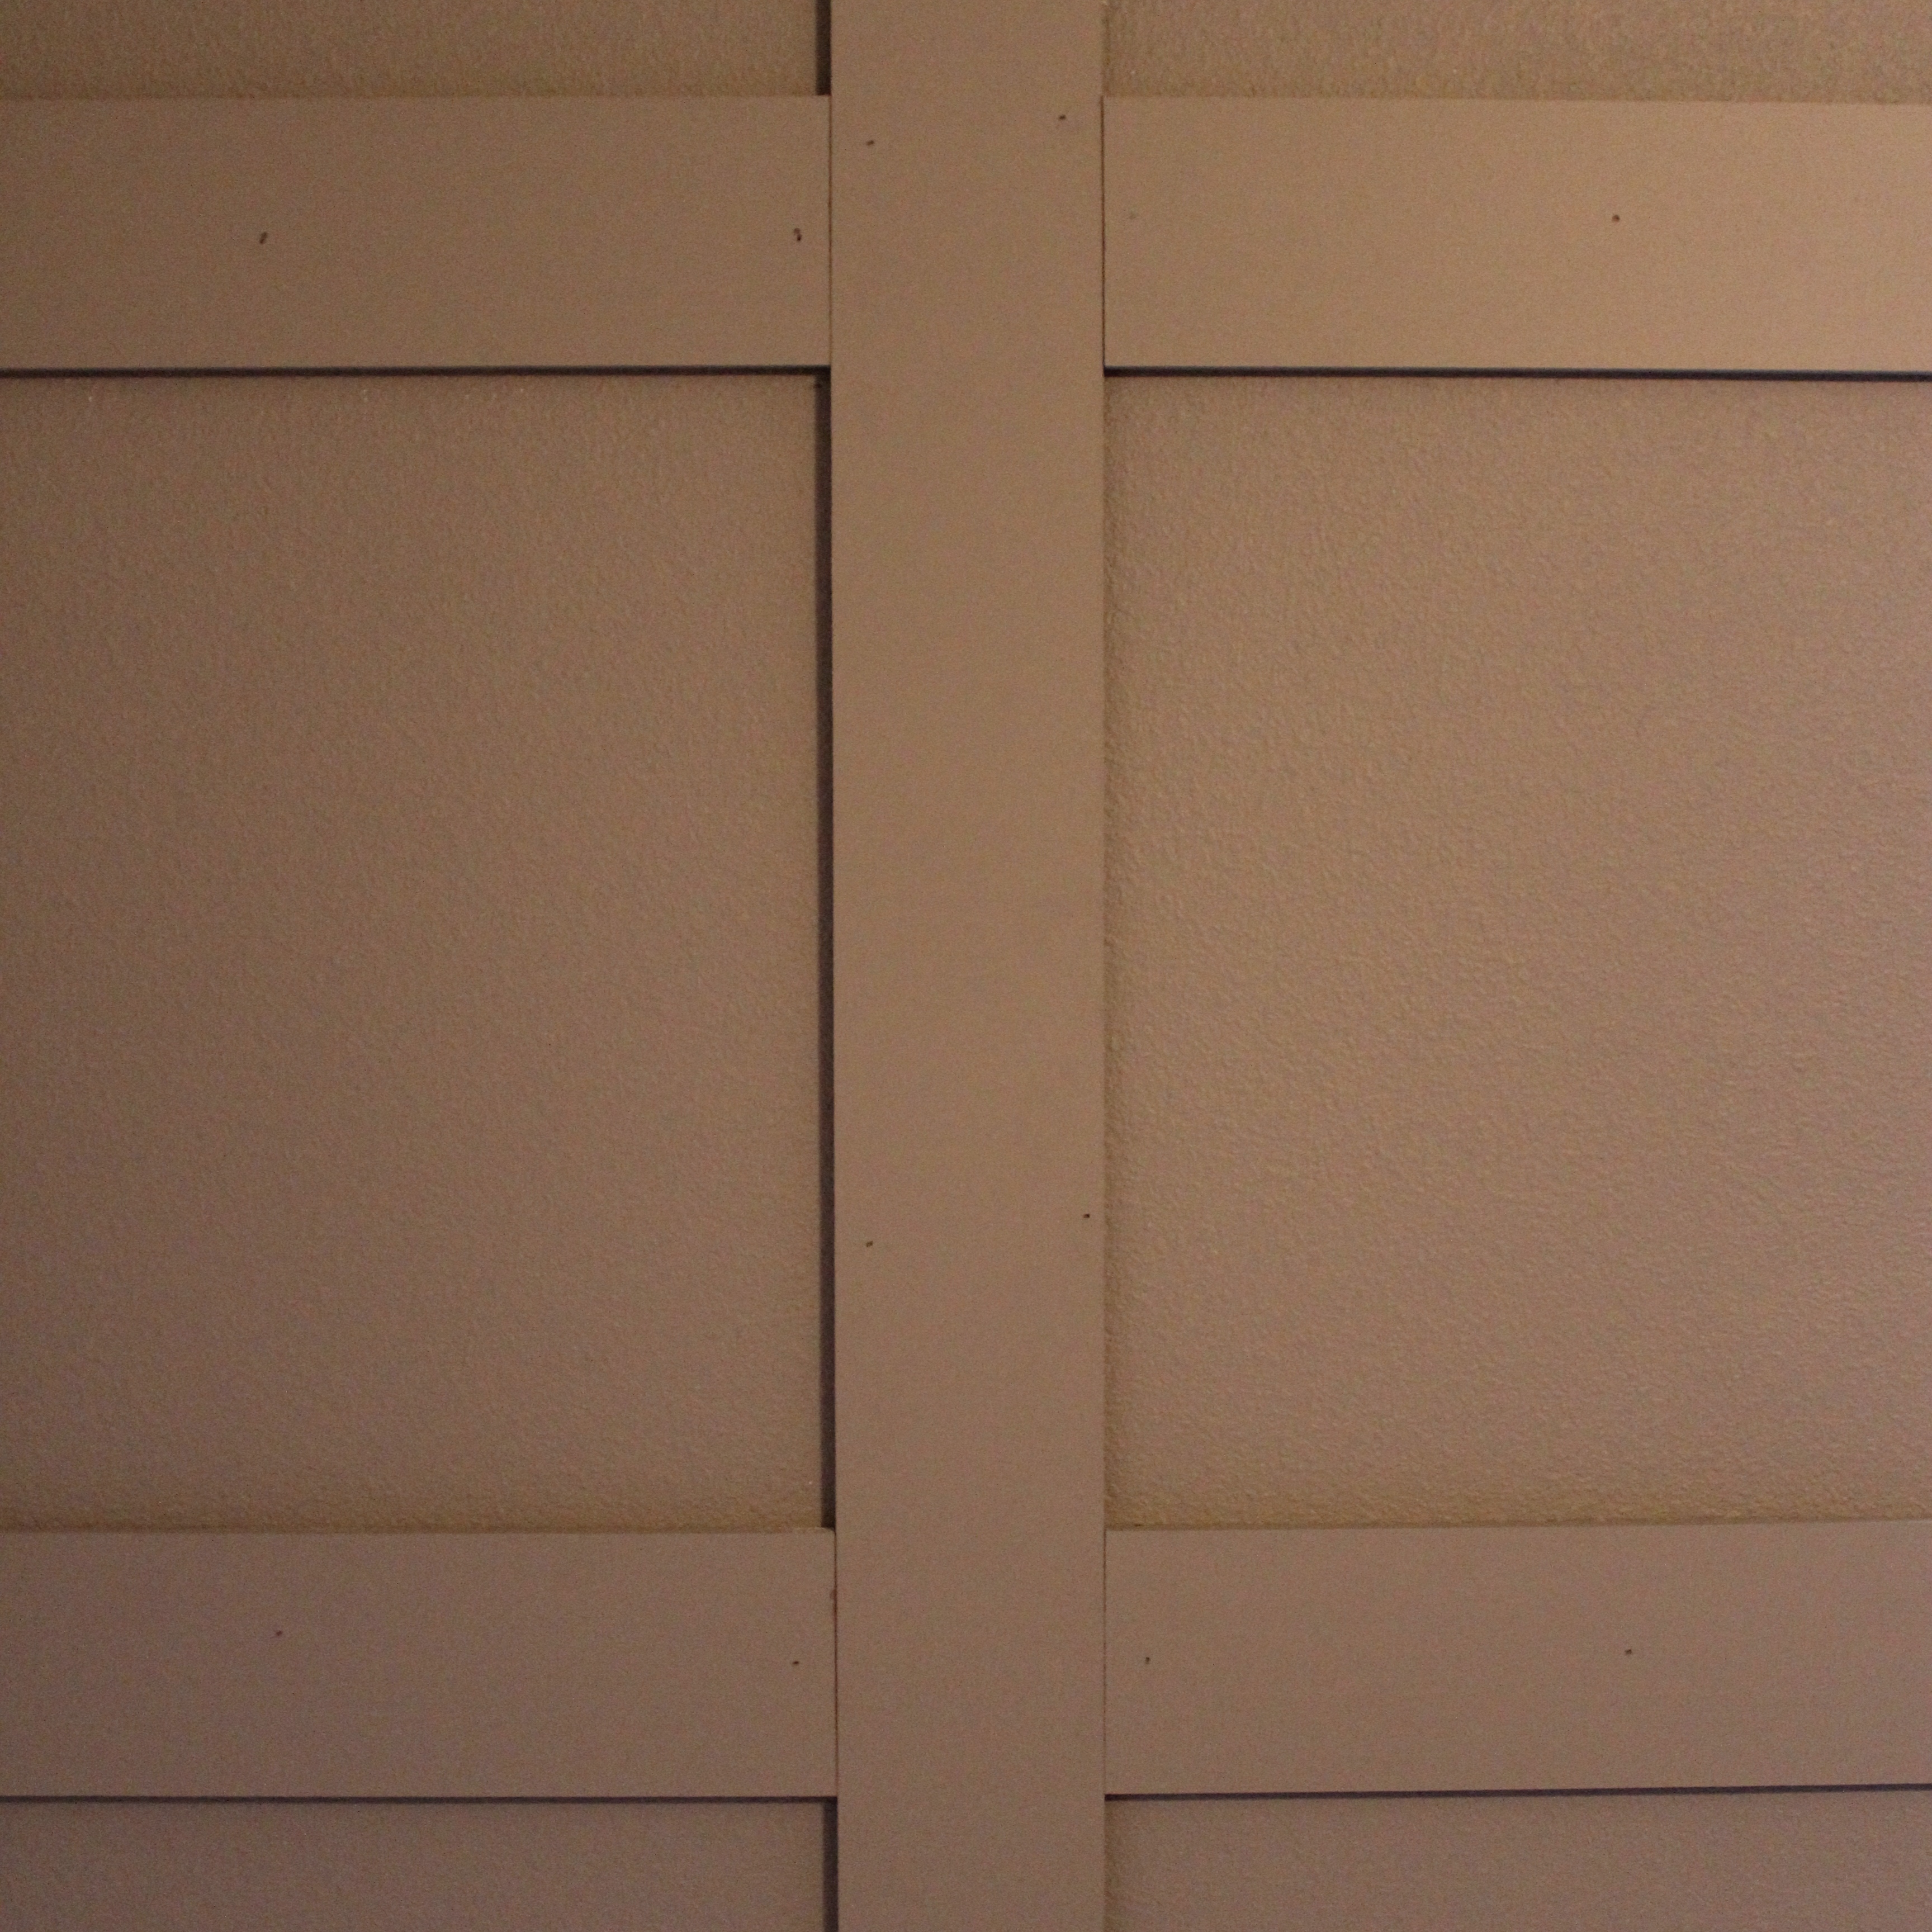
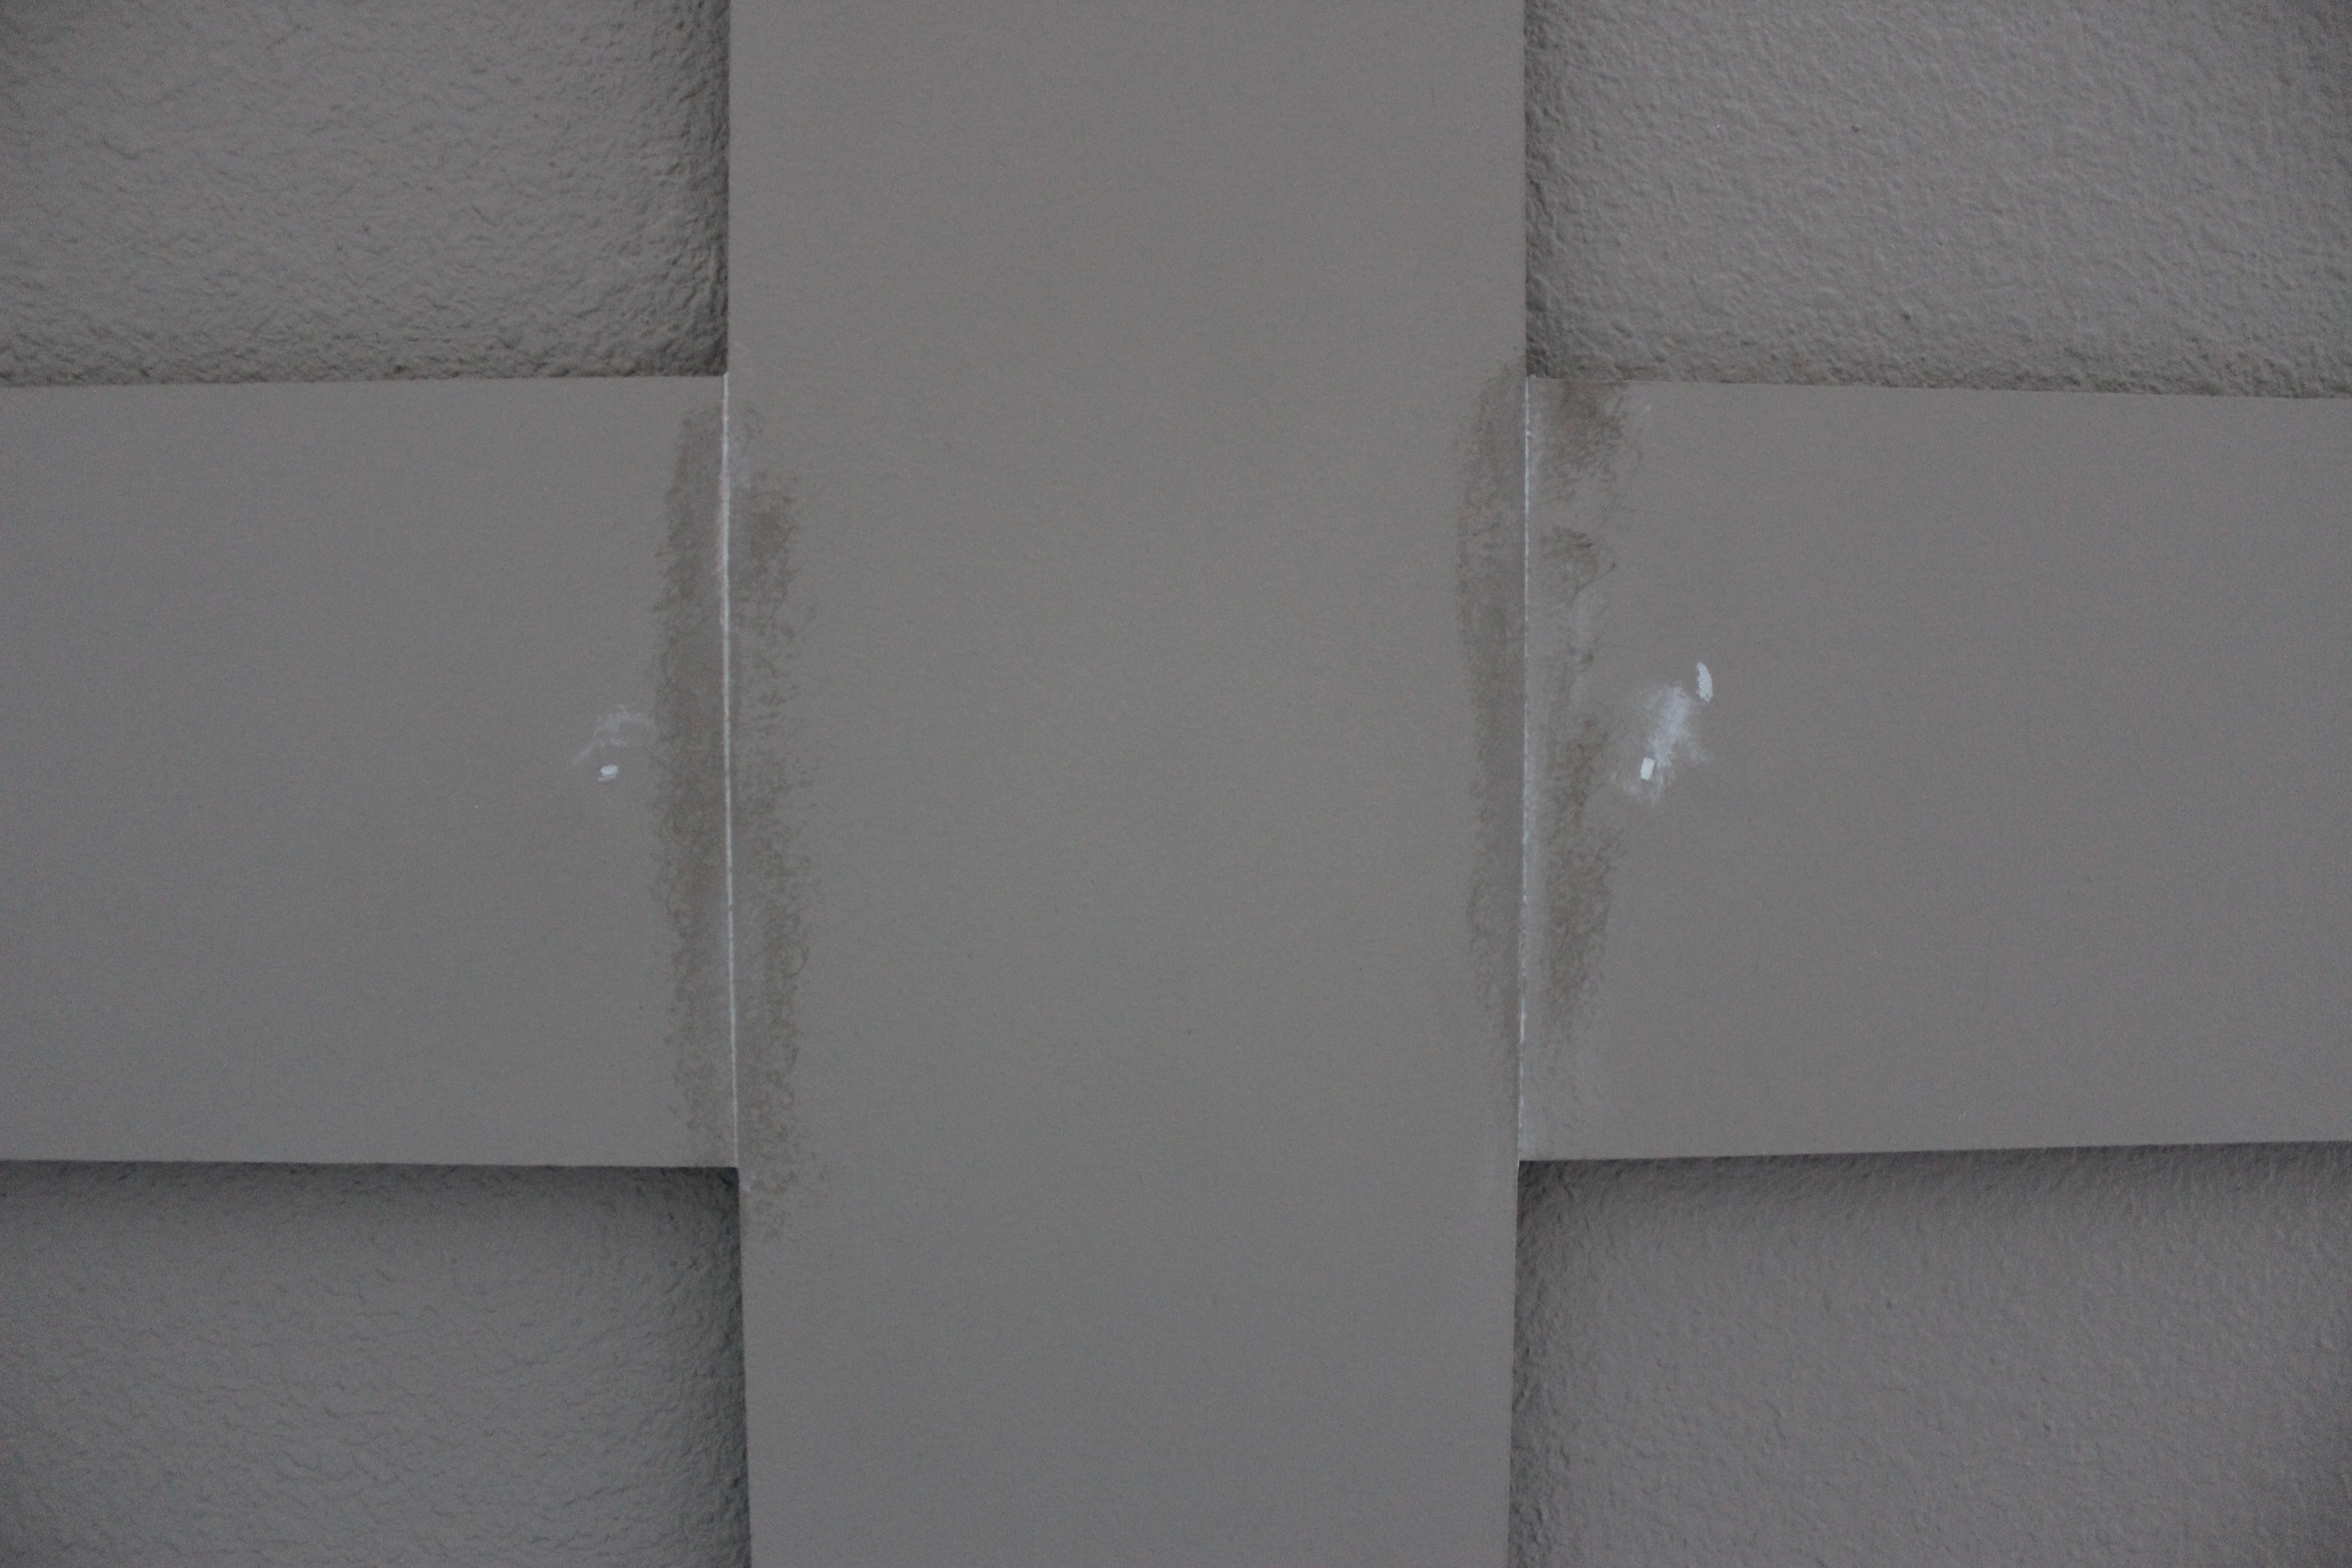
7) Now for the finishing touches. After all the boards were nailed in, I caulked around all seams and intersections. Then I painted over them with a small brush which really finanlizes that “built in” look.
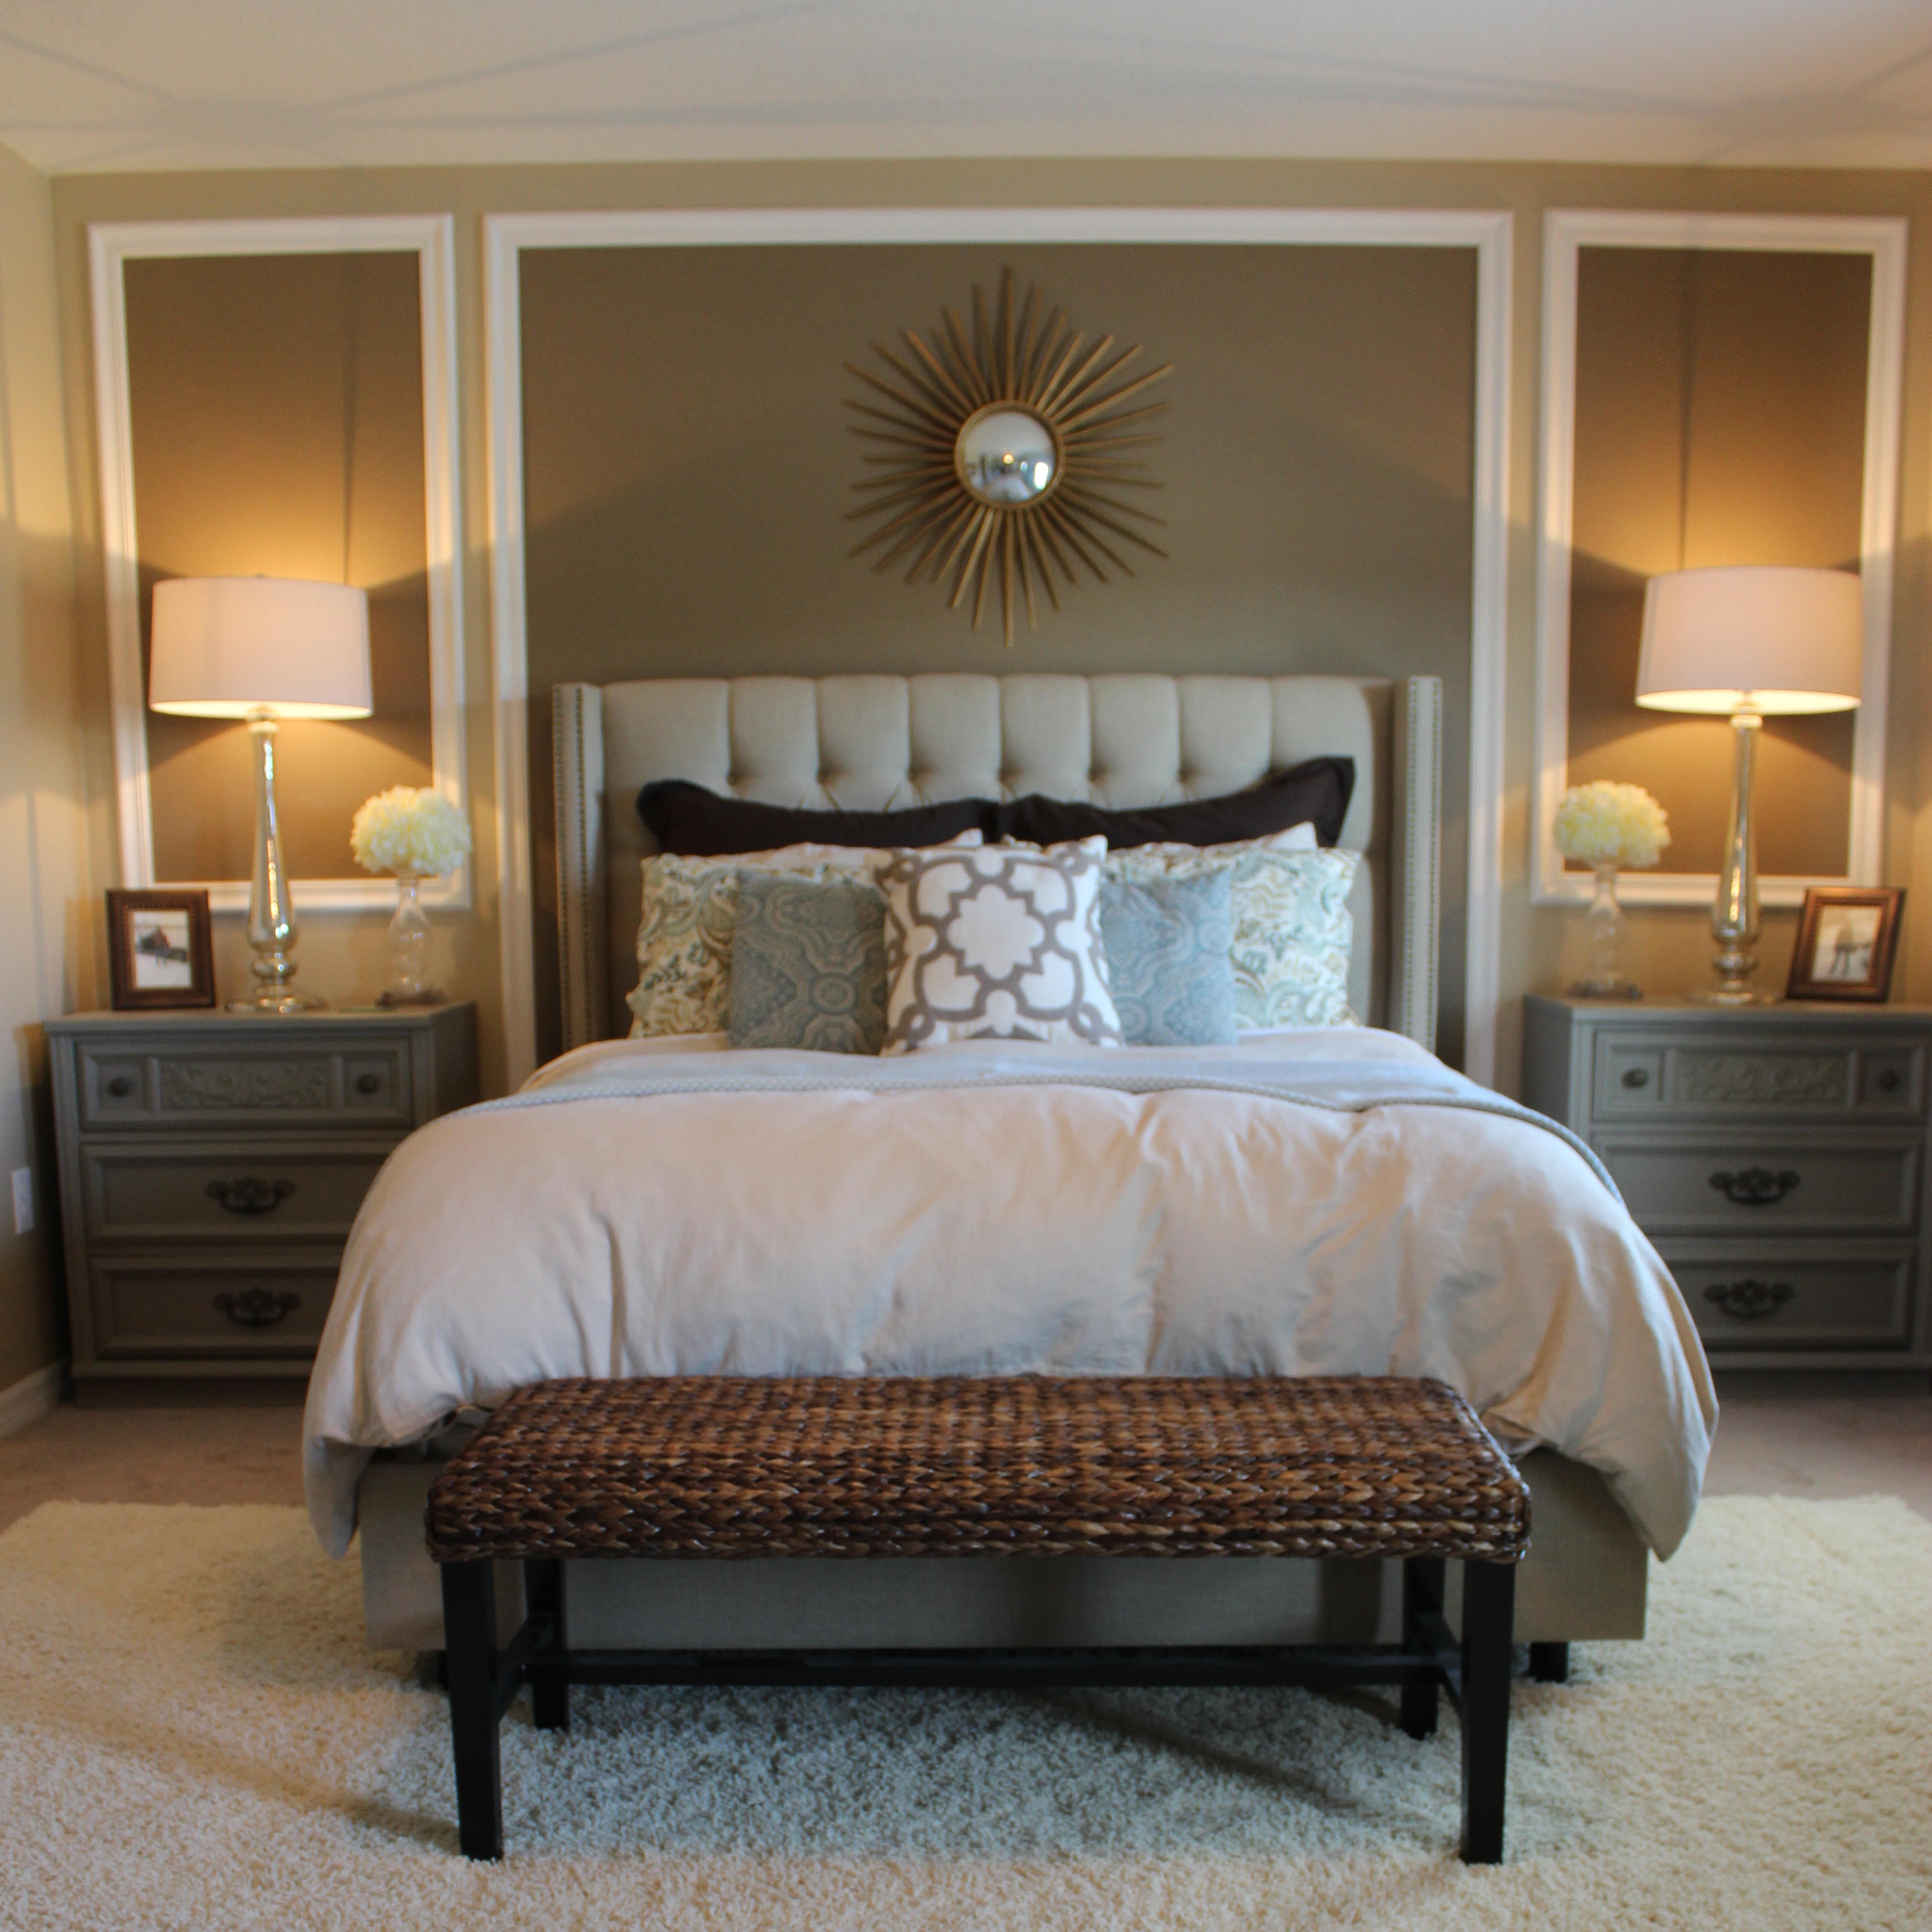
And here’s the finished product. The pictures are taken at night because photographing directly at a window during the day doesn’t work well!
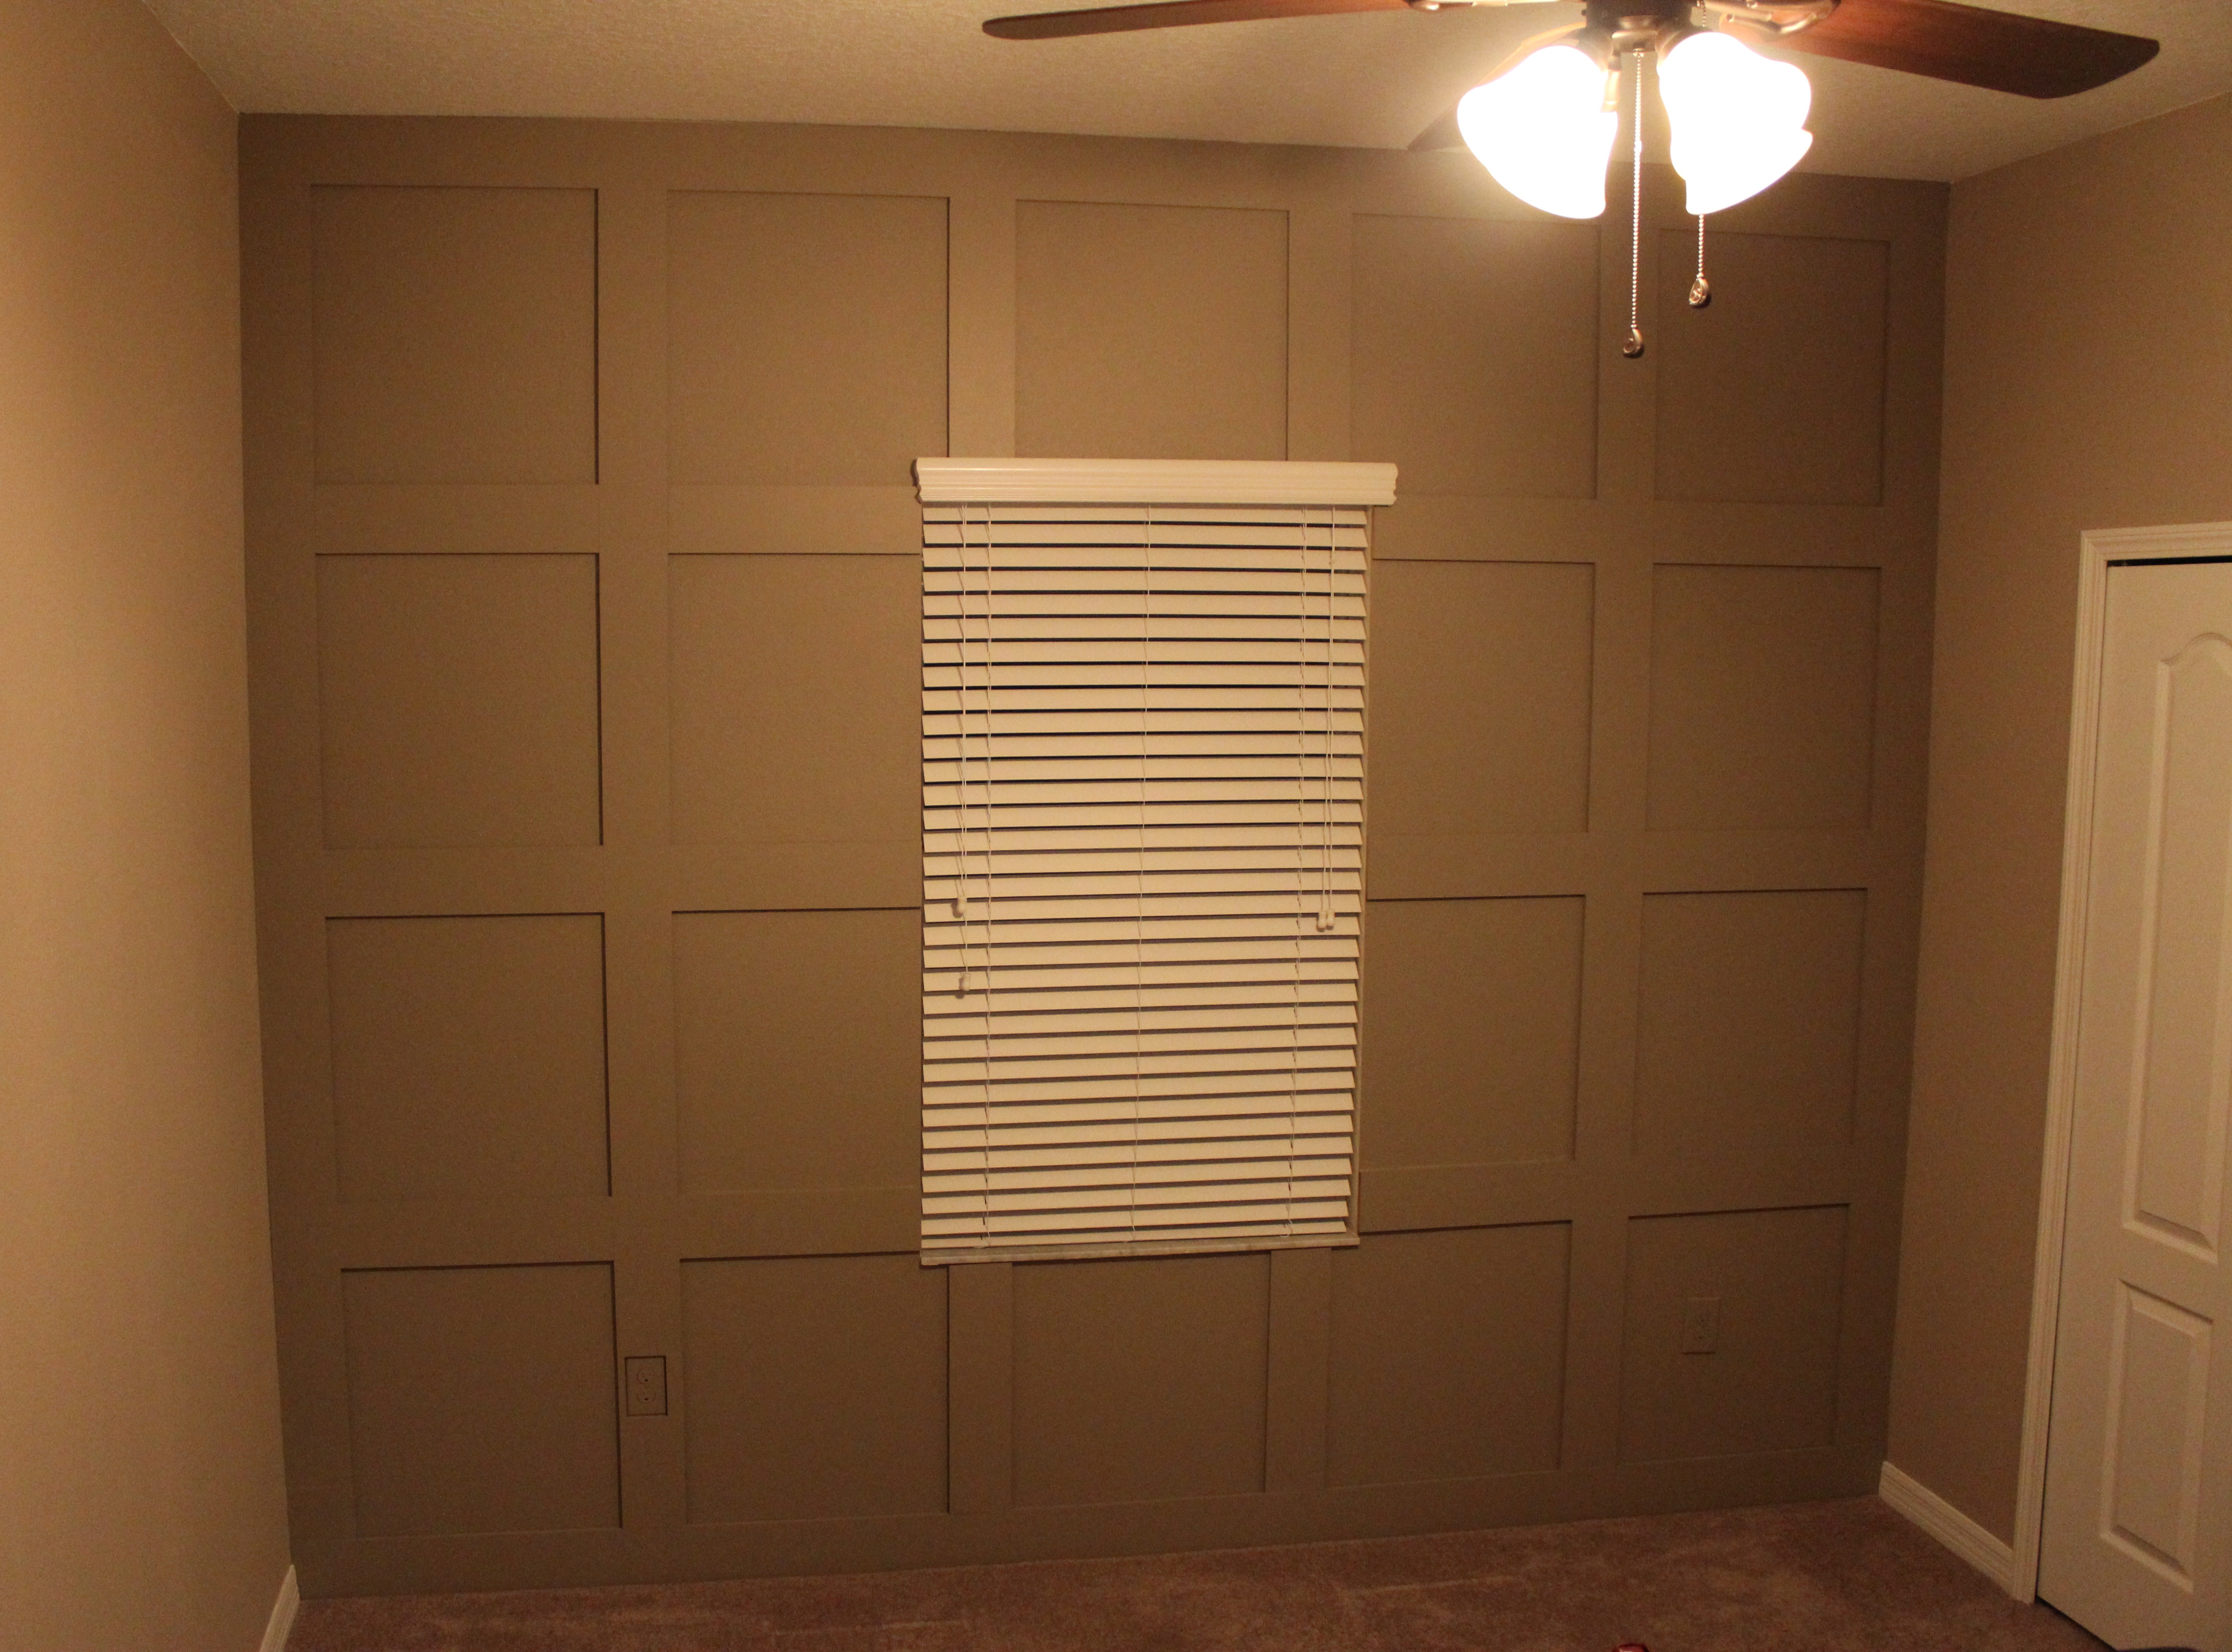
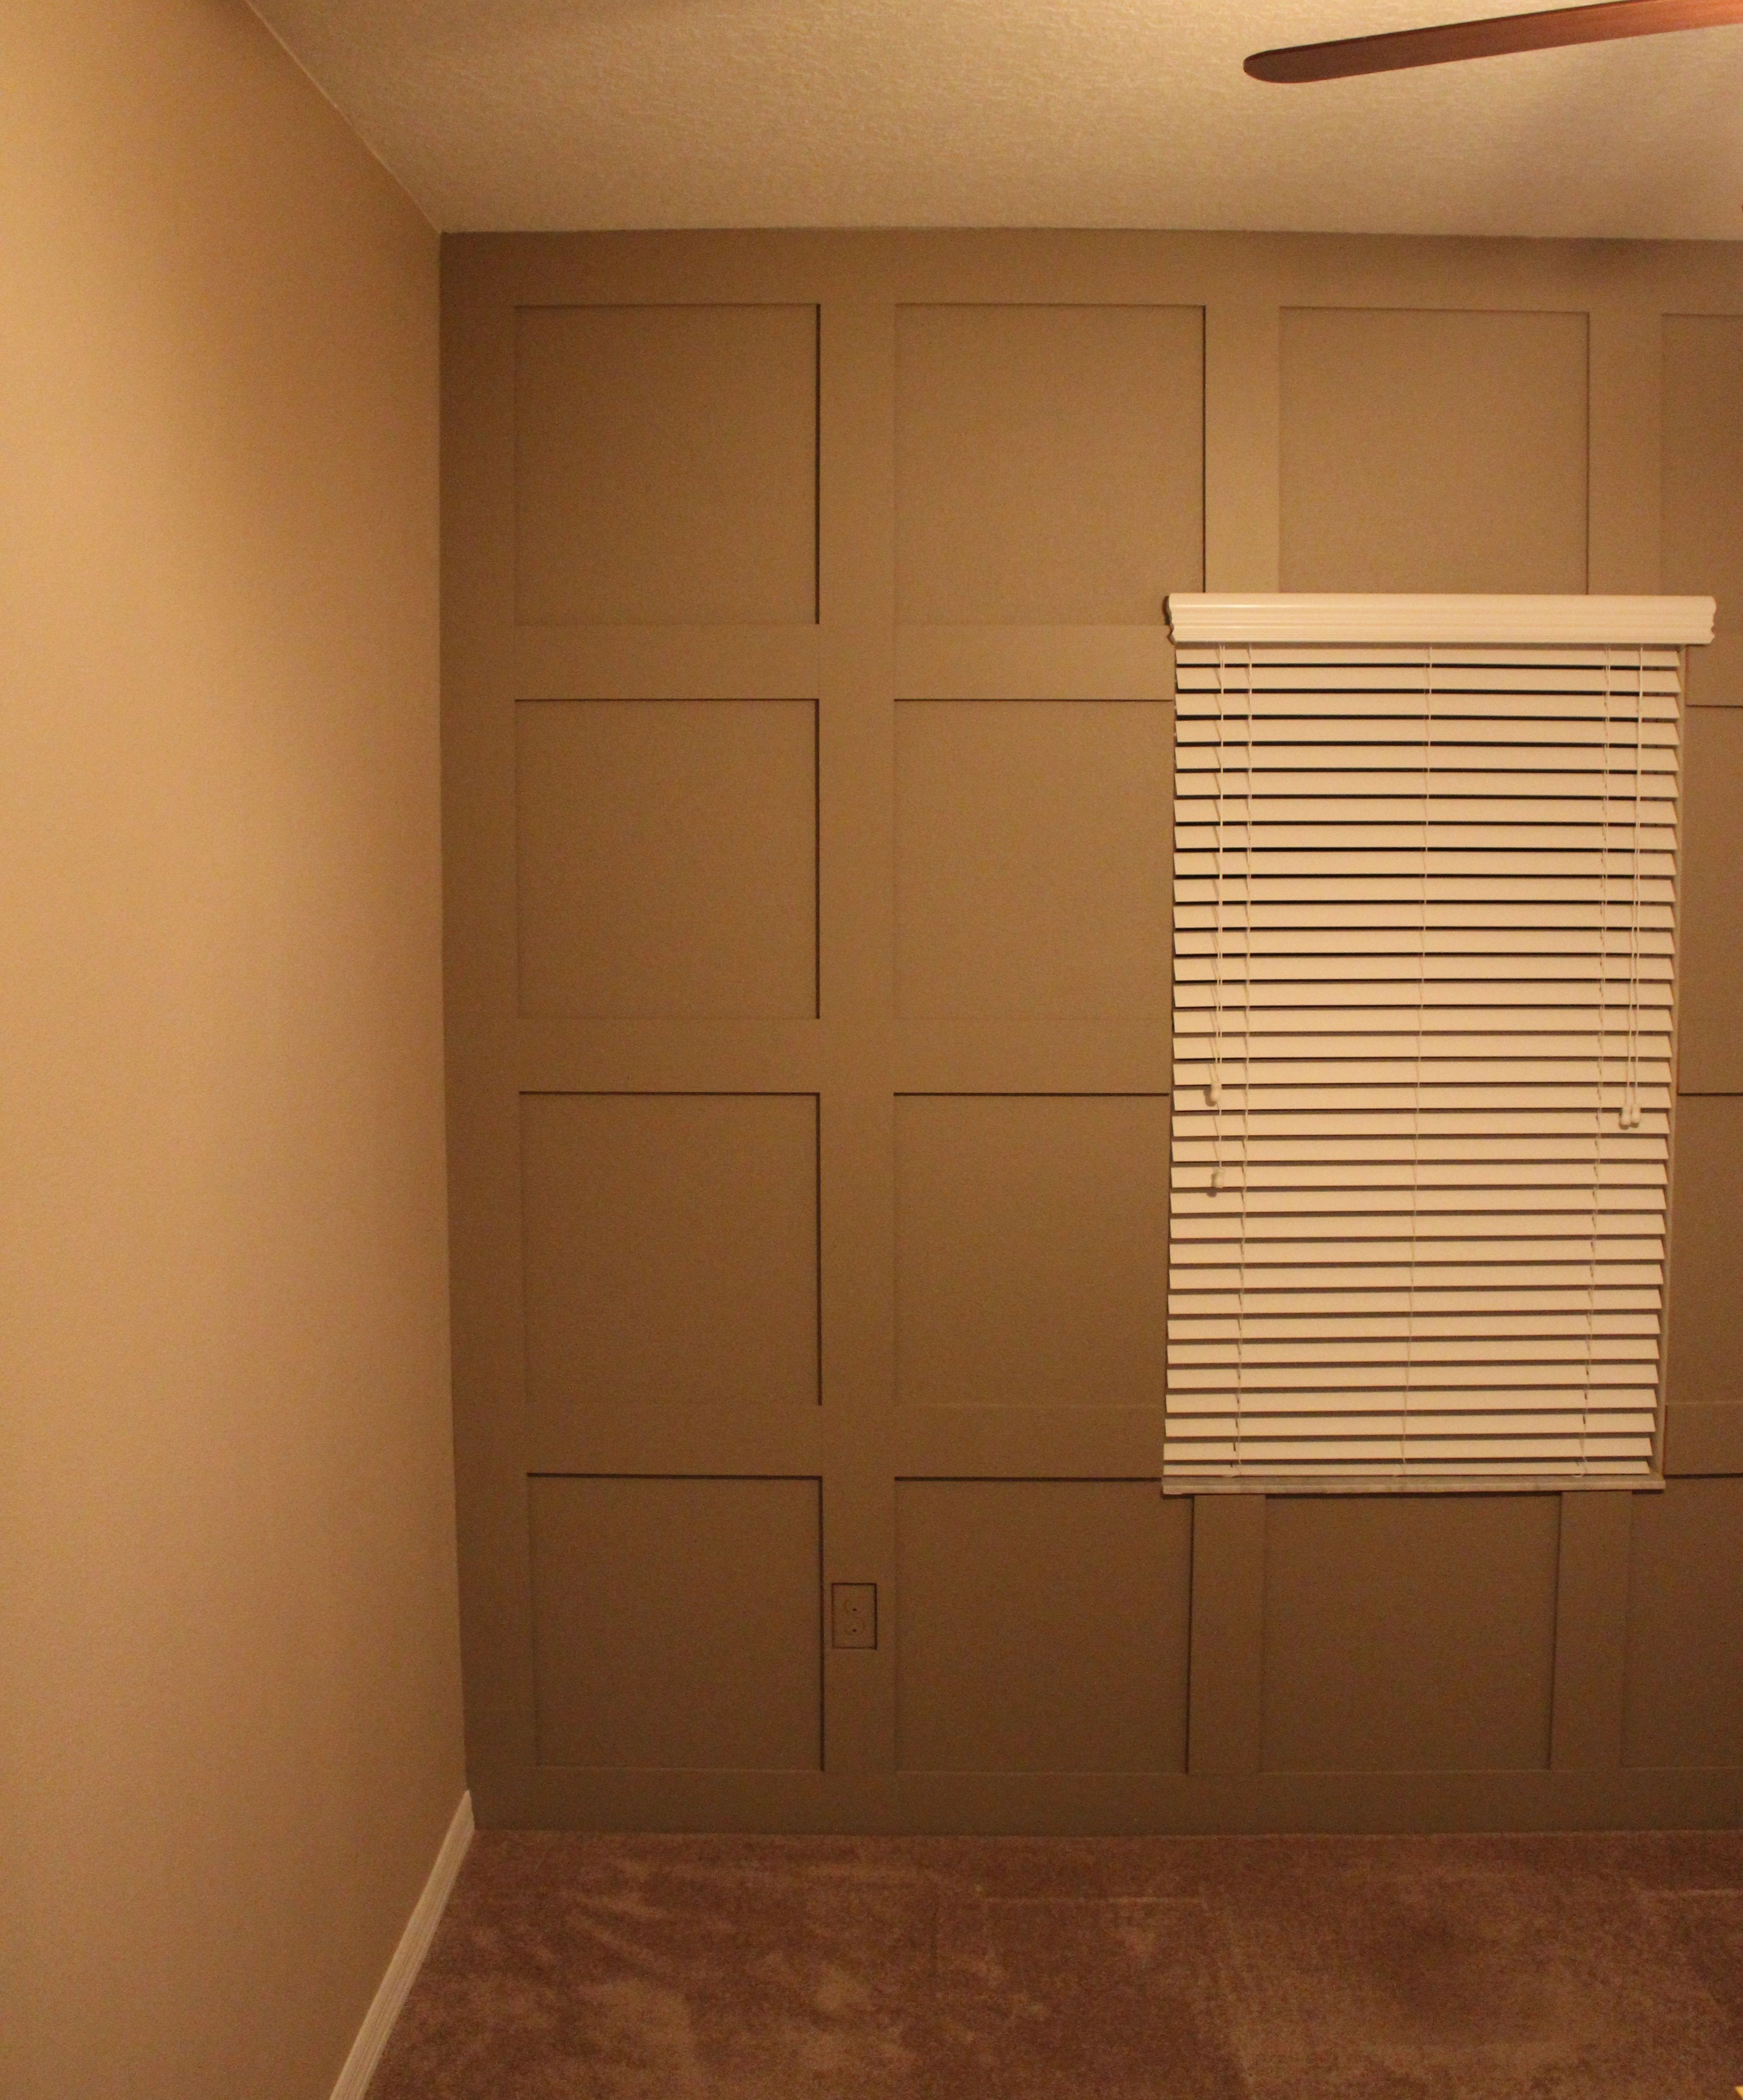
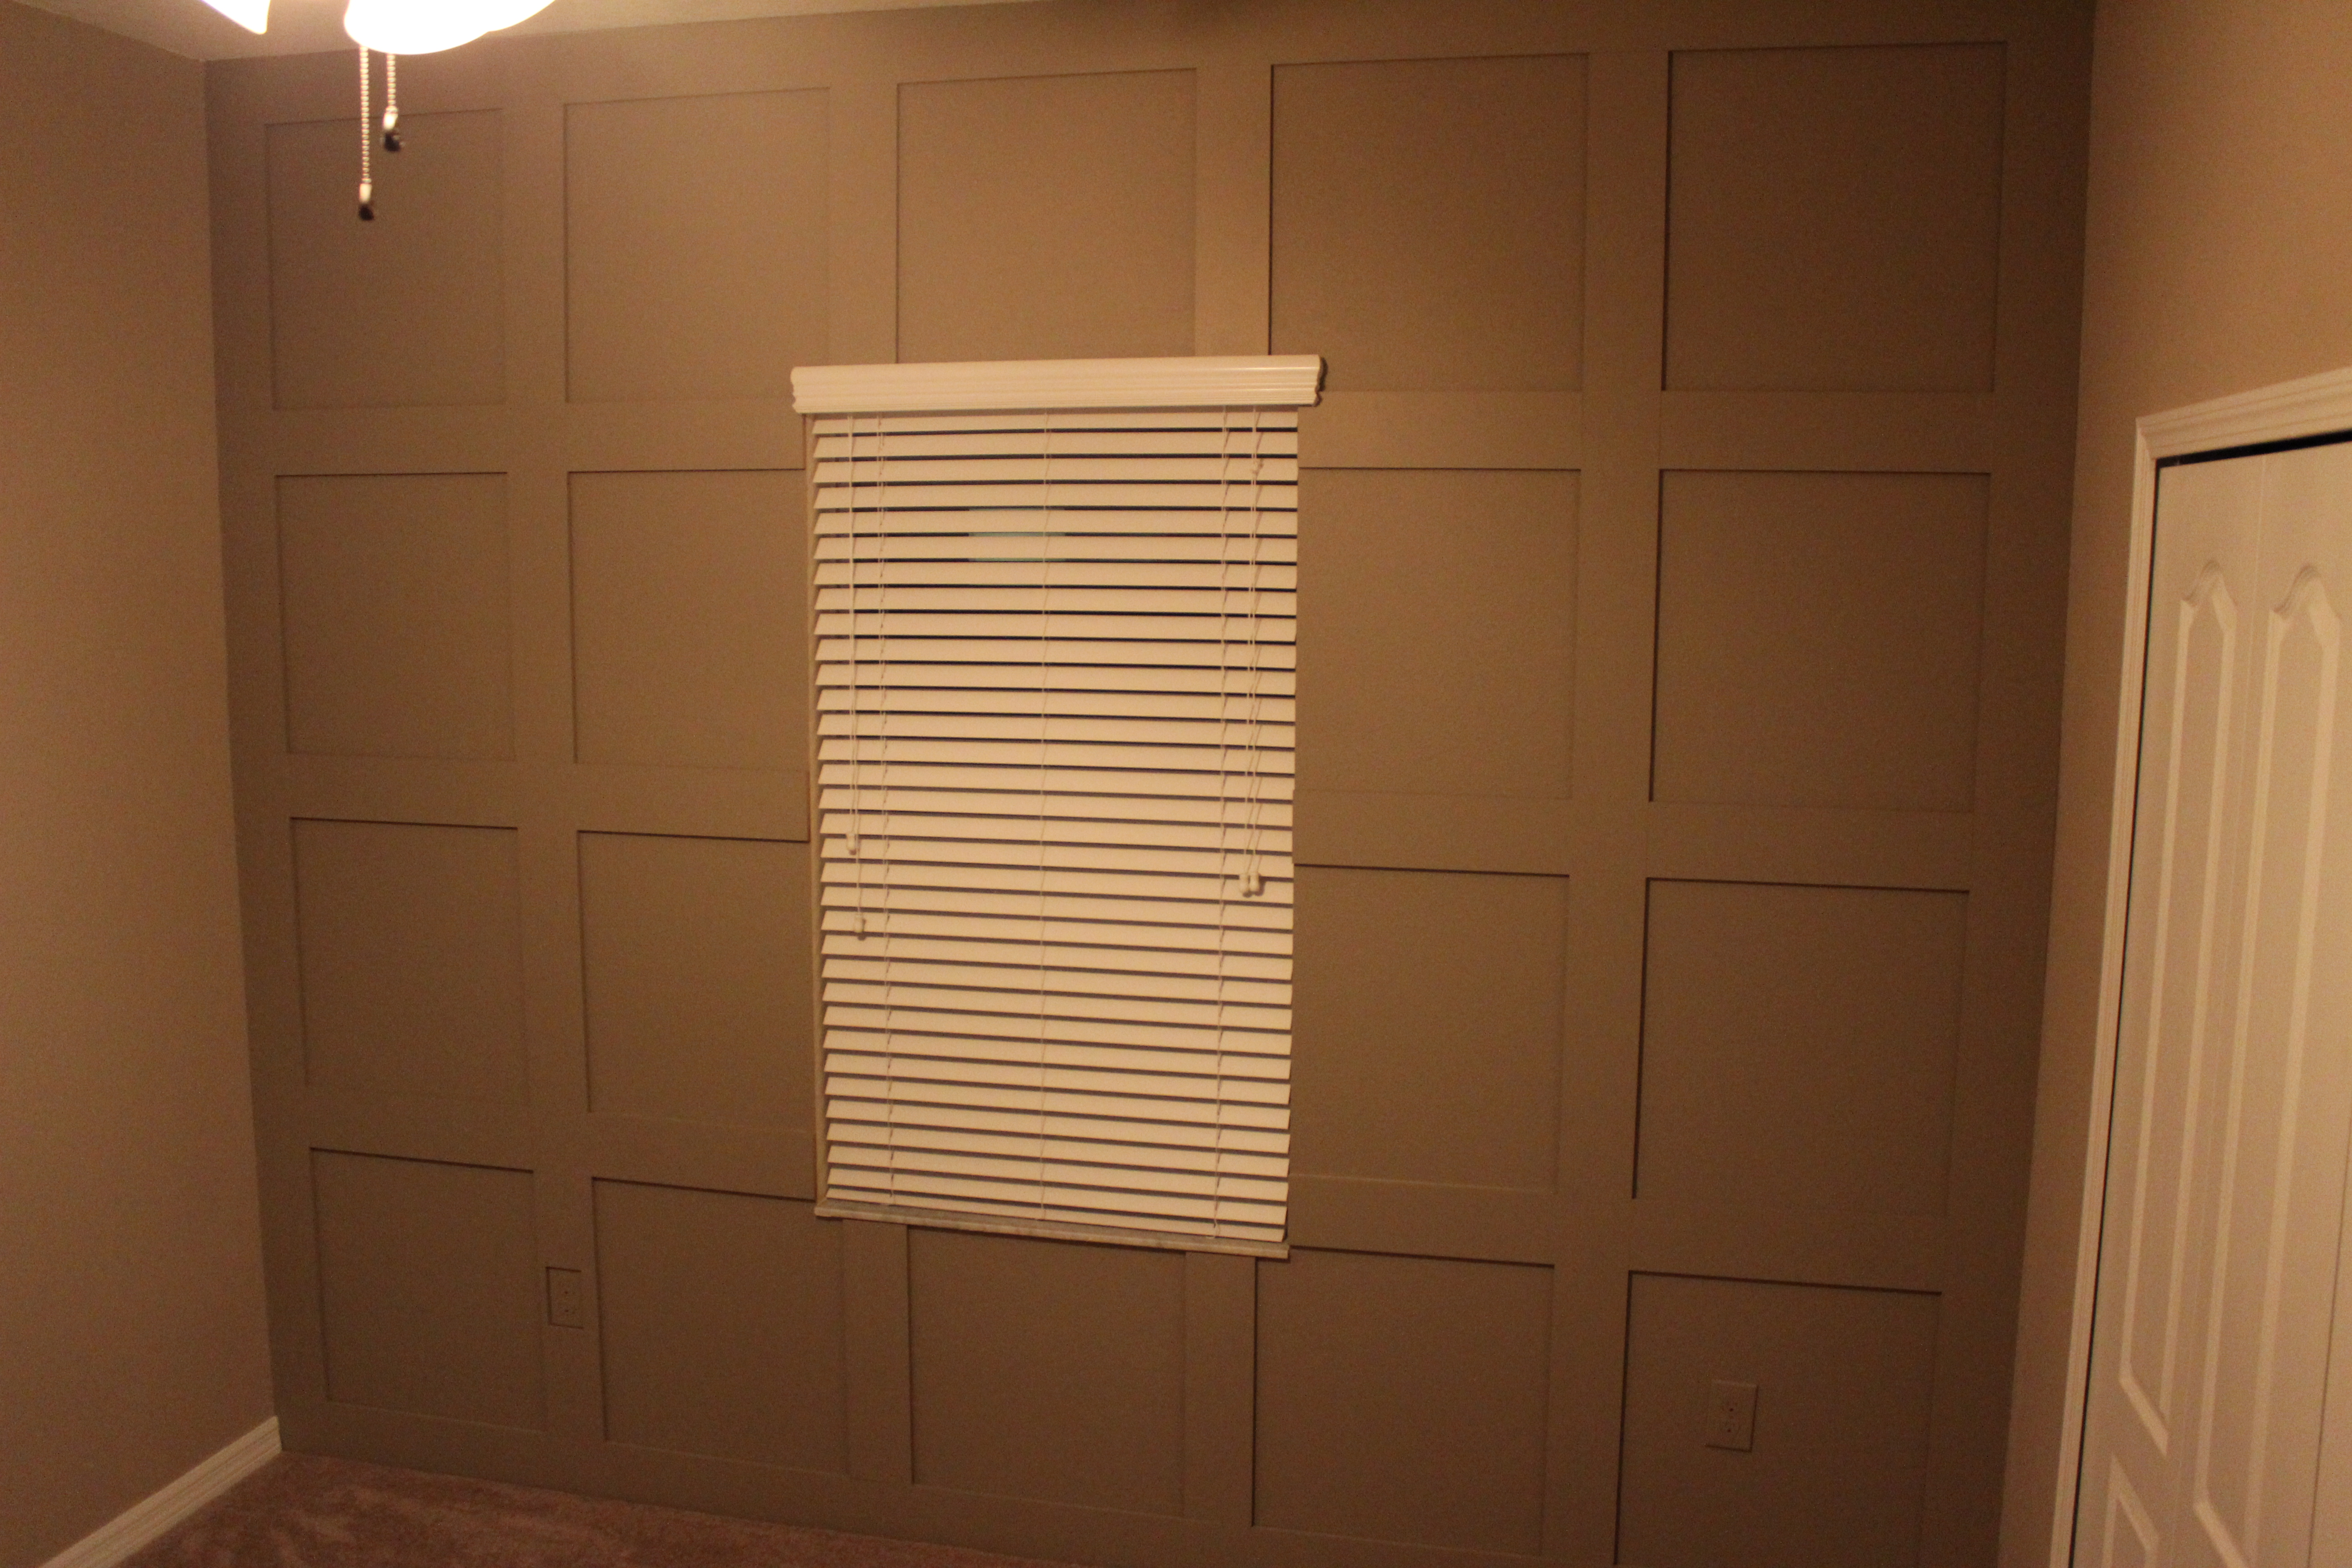
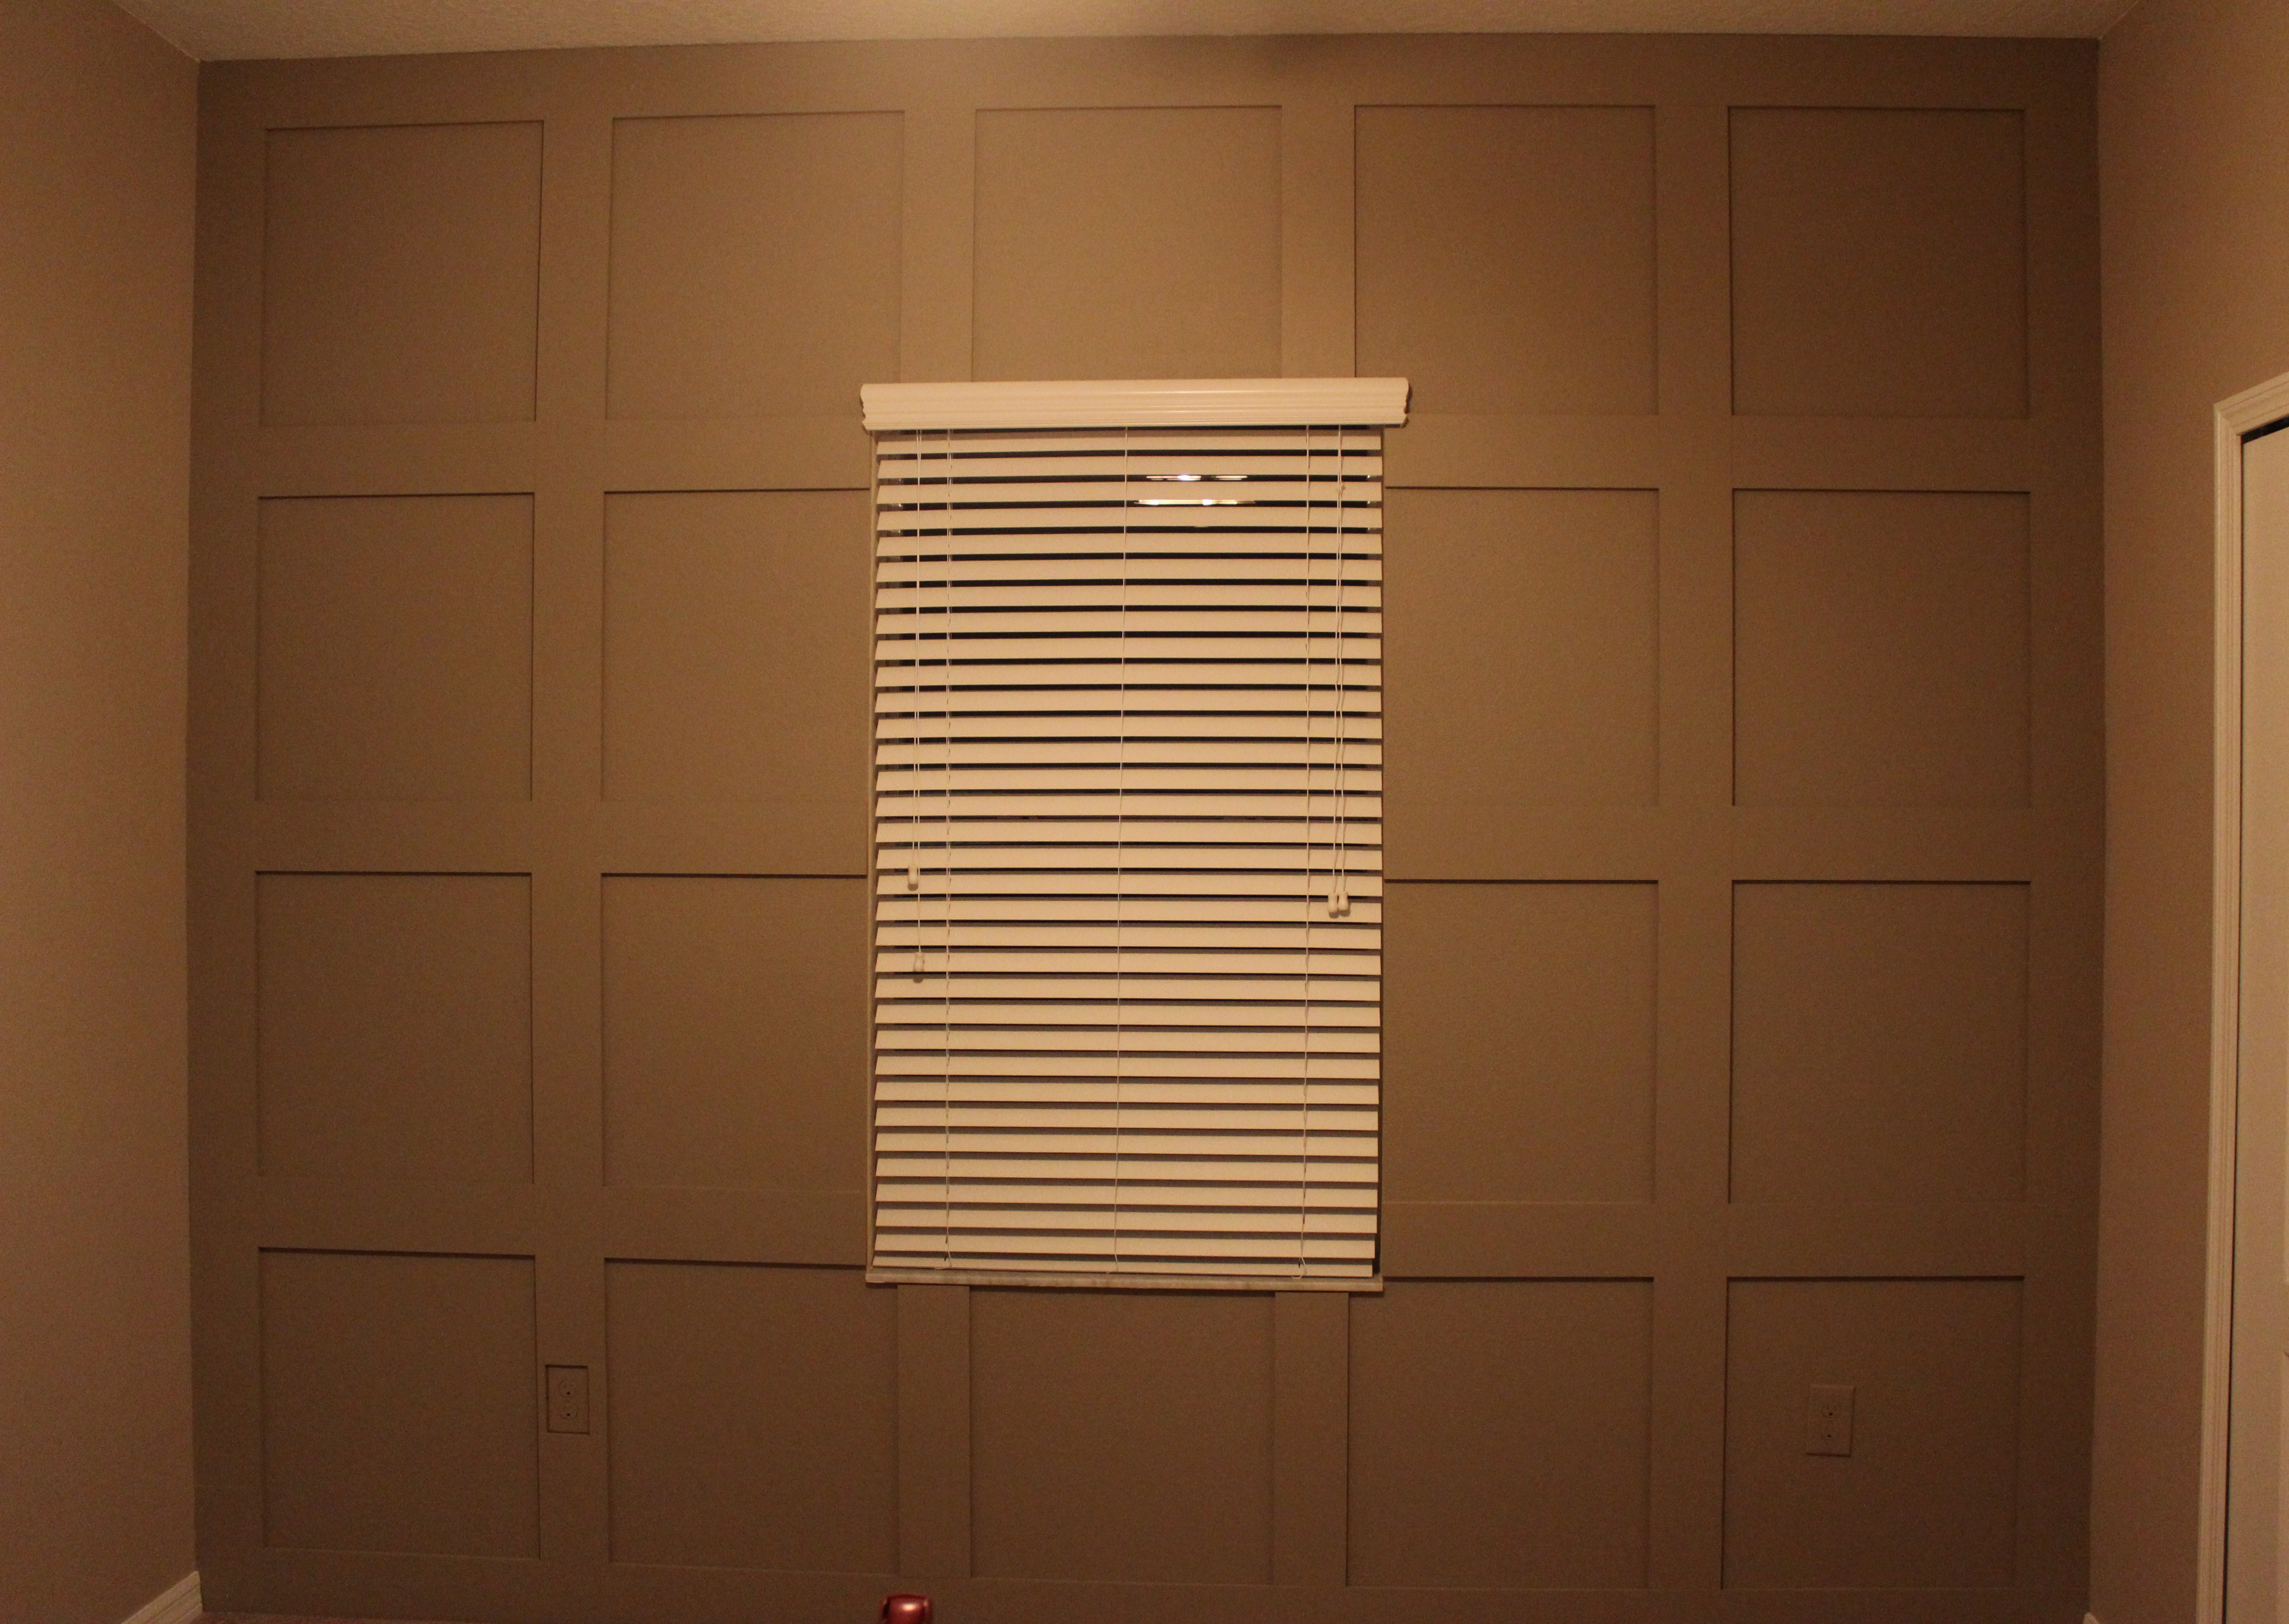
(The rest of the room is painted in the same color, but only 20% intensity.)
So what do you think? Not too difficult of a DIY, right? Stay tuned as I finish this office makeover!

I was wondering what kind of texture your wall has? I have been wanting to dot thin kind of feature wall in my master bedroom but the walls have an orange peel texture to them and I’m worried it might look weird. I love the way yours turned out!
Hi Kara! Thanks for the comment :). My walls are actually pretty textured as well, but I don’t think that matters. Once everything is painted you really can’t tell so I say go for it! Good luck!