DIY Office Built-in Desk with Shaker Doors
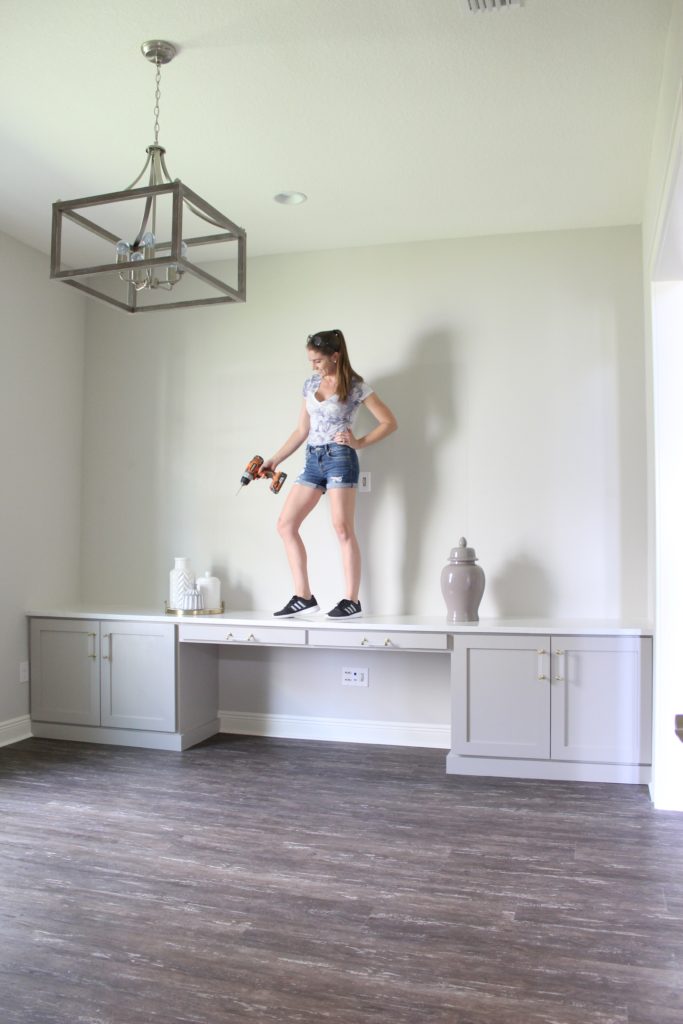
If you’ve been following along on Instagram @frills_and_drills, then you’ve seen me working on this DIY office built-in desk with shaker doors at my mom’s house! I want to share details on how I built the lower half of this unit, specifically about the cabinet doors that I purchased from Fast Cabinet Doors. Let me take you along the process.
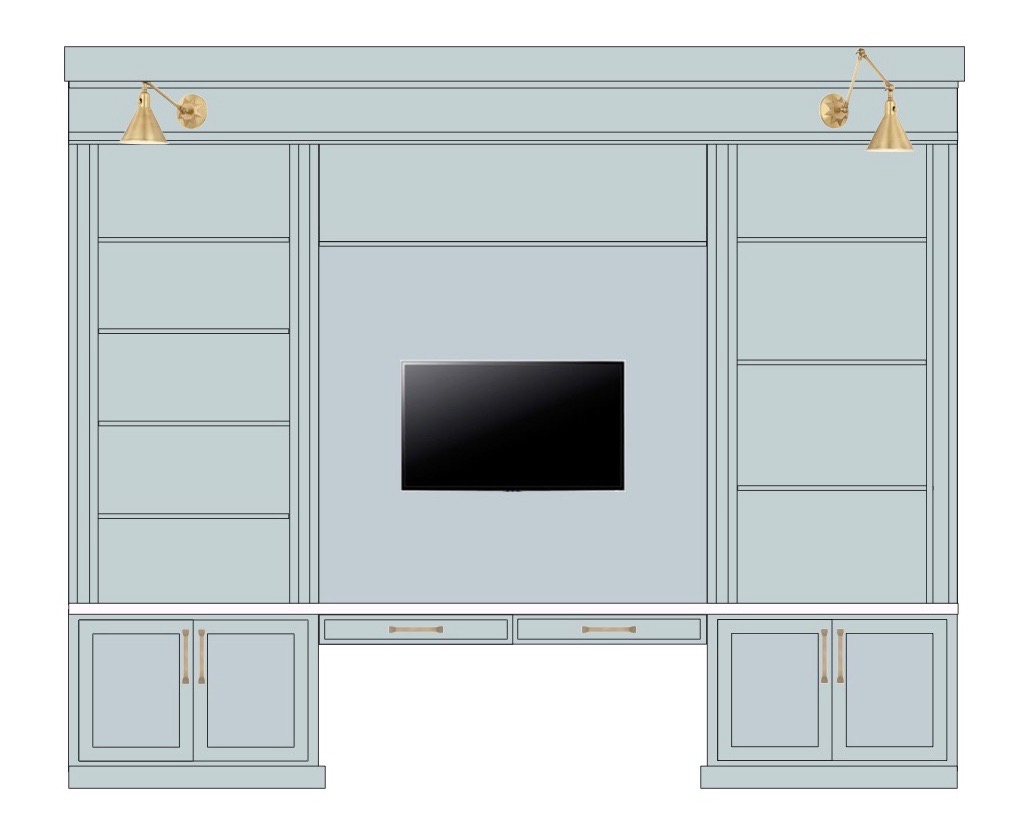
Here’s the design plan I came up with for this entire unit. (I use the pages program on my mac to create this drawing by the way.) I knew from the beginning that I was going to order pre-made doors. The biggest question I get asked is “why?” When I plan on building this entire unit from scratch, why would I not just build the doors from scratch, too? The answer for me is easy.
Doors are 95% of what you see when you look at cabinets. They need to look perfect. Or really really close to perfect.
And while I have a little bit of self taught DIY building experience, I’m not a professional carpenter, and don’t have the skills to create near perfect custom cabinet doors. Because it’s HARD. Is this something I may attempt in the future as my skills develop? Sure. But for now, buying them is much wiser because I can obtain a professional look with my not-so-professional skill level.

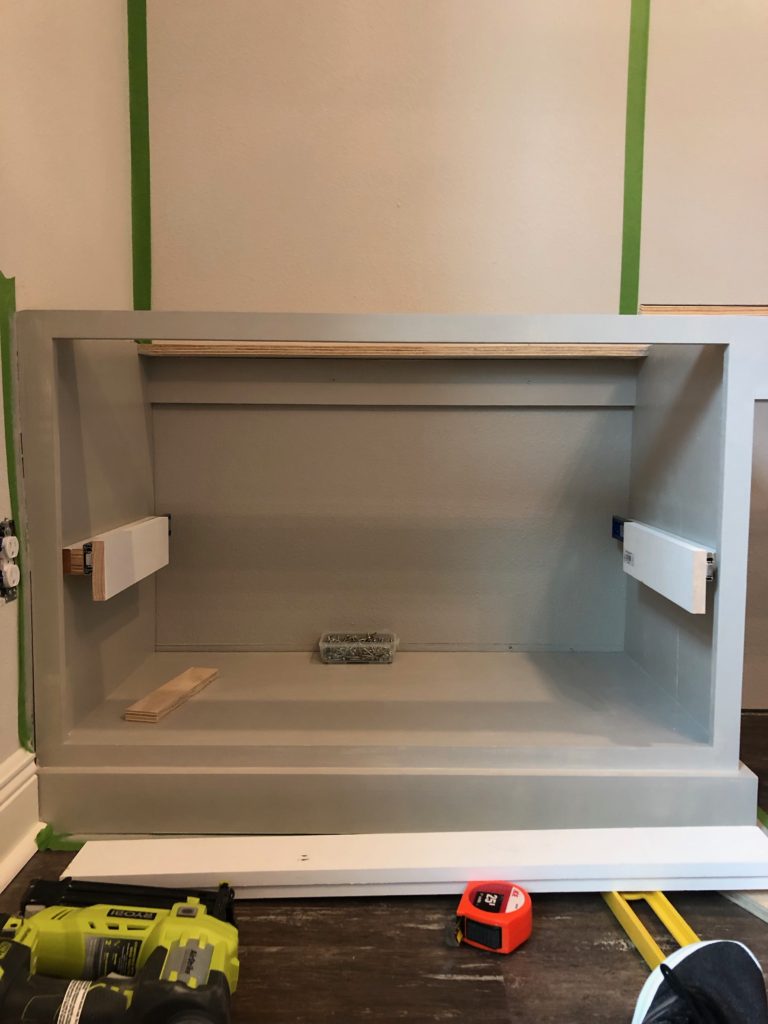
Here was the start of the DIY office built-ins with shaker doors. These cabinet boxes were built with birch plywood and poplar trim from the hardware store. I used cabinet box plans like these from Ana White and modified them to the dimensions I wanted.
I painted them using a sherwin williams enamel paint in the color Anew Gray. It was at this point that I took the measurements for my shaker style doors. This part is crucial.
And it starts with deciding what kind of hinges you plan on using.
I used 3/4″ overlay hinges. Why? Because it’s what my kitchen cabinets have, it’s what I used on my laundry room cabinets, and honestly it’s just what I’m familiar with. It means that the door covers 3/4″ of the cabinet box face frame all the way around. There are several different kind of cabinet door hinges including 1/2″ overlay, flush inset, and several others. Let me show you a diagram of how I achieved my door measurements.

Like I mentioned, deciding on hinges is the first step. The type of hinges you choose also determine how the carcass of your cabinet is built. So all of this needs to be decided up front. For additional help on measuring, they have a measuring guide on their website.
The doors I chose:
Here is the link to the exact doors I purchased from Fast Cabinet Doors. For wood type, I chose Paint Grade Hardwood with MDF Panel. This is the cheapest option for painting your doors, yet the quality is still awesome. From there I typed in my exact height and widths. All 4 doors were the same measurements. Then I chose my hinges (salice soft close compact hinge) and finally the rail and stile size (2.5″). This brought my total to $67 per door. Which is $268 for 4 doors plus shipping.
Here are my doors once they arrived about a week later. Built and sanded to perfection and ready to paint to match my built-ins.
Priming any type of naked wood before paint is ALWAYS a good idea. This ensures the paint covers well, that you cover any wood grain or knots, and that it’s more durable. Seriously so important and I’ve learned the hard way plenty of times. I used a basic primer that sherwin williams recommended to me for the application.
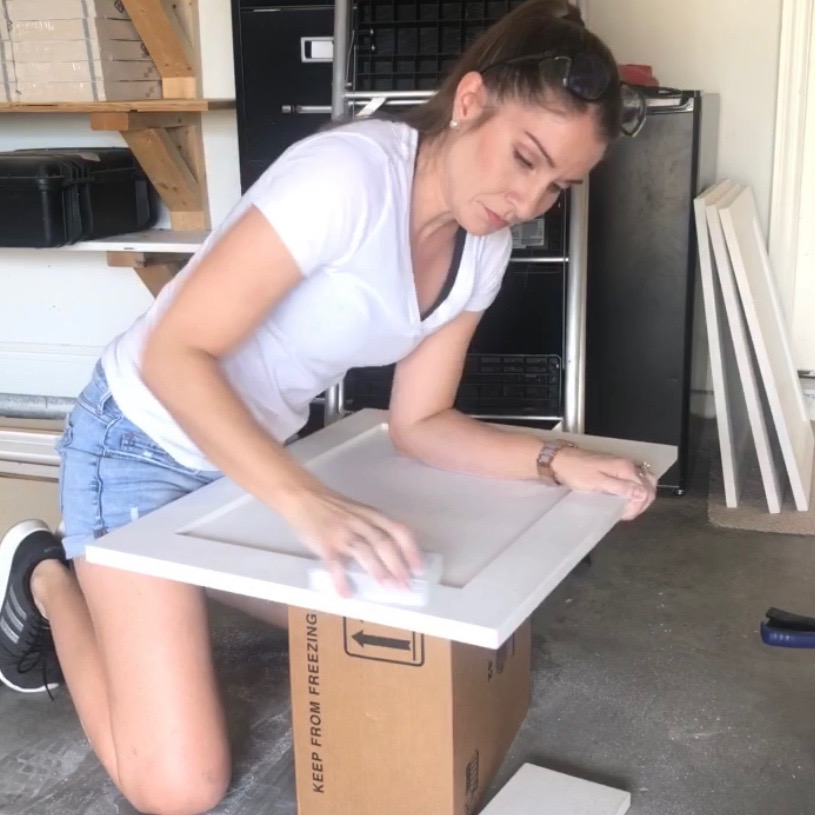
After one coat of primer, I used 120 grit and 220 grit sanding blocks and go over the entire surface. Sanding in between coats ensures the smoothest possible finish. Basically the same as a sprayer when you are painting by hand. After sanding I use tack cloths to clean up all the dust before the next coat of paint.
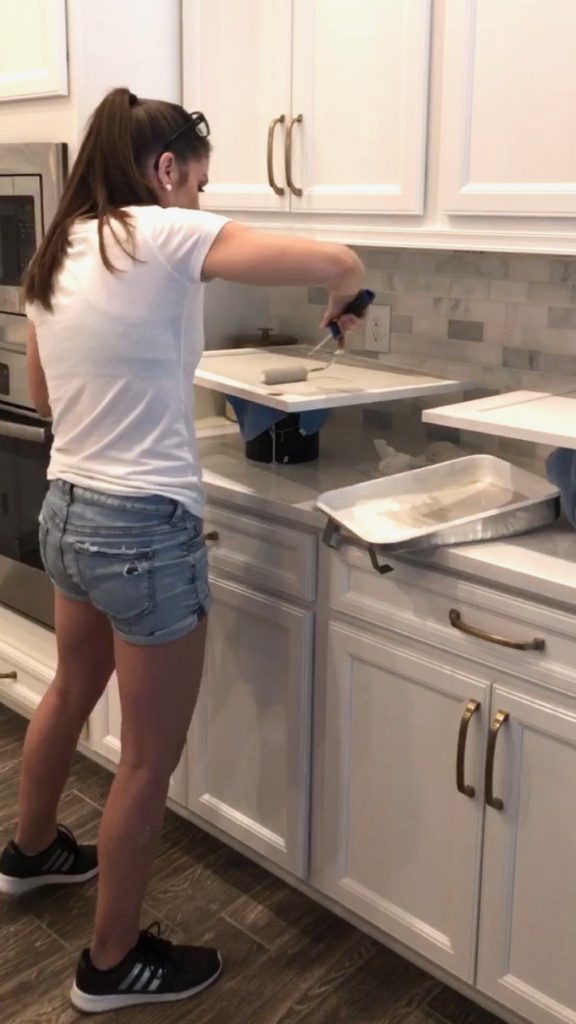
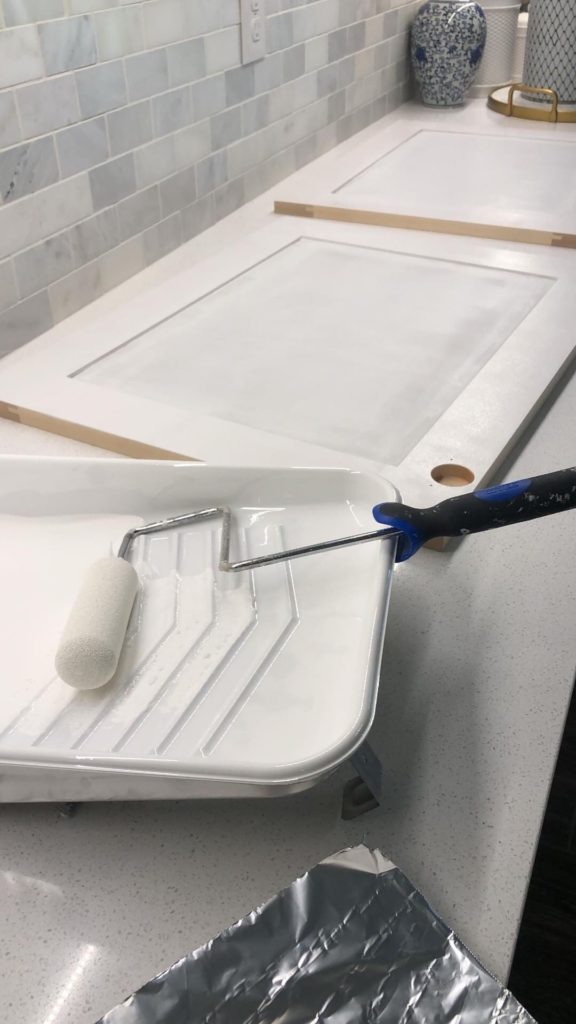
Speaking of that, I used a foam roller for the flat surfaces and a brush for the creases. A sprayer would be great to use for this project, though! I just personally don’t mind hand painting and find it therapeutic! Am I crazy?? I did two coasts of the enamel paint, and sanded after the first coat the same way I did after the primer. I do not sand after the final coat.
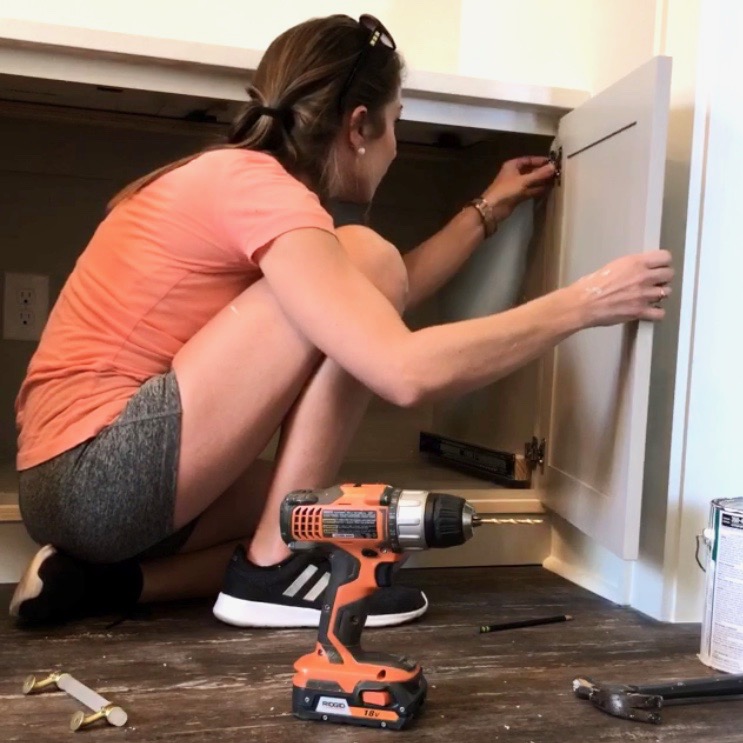
I let the doors dry for a full 24 hours before I started mounting them to the cabinet boxes. The hinge holes come pre-drilled when you order hinges, so I first attached the hinges to the holes. Super easy because the screw holes are also already pre-drilled so it’s fool proof.
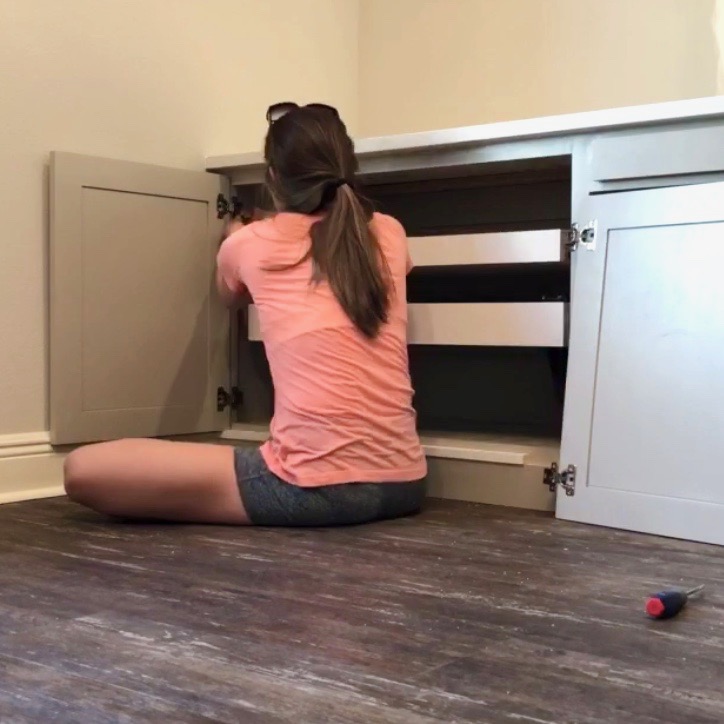
All I had to do to mount the doors on the face frame was measure the overhang on the top and bottom to make sure there was 3/4″ on each side. The overhang on the hinge side is already done for you with the hinge itself. I promise it’s very, very easy to hang and mount the doors to the face frames. The hinges are also completely adjustable. Meaning that after you hang them on the face fame, you can adjust the doors 3 different ways to ensure they are completely flush and plum with each other. This step is crucial in making sure they look perfect. Keep tweaking the adjustments until you get there.
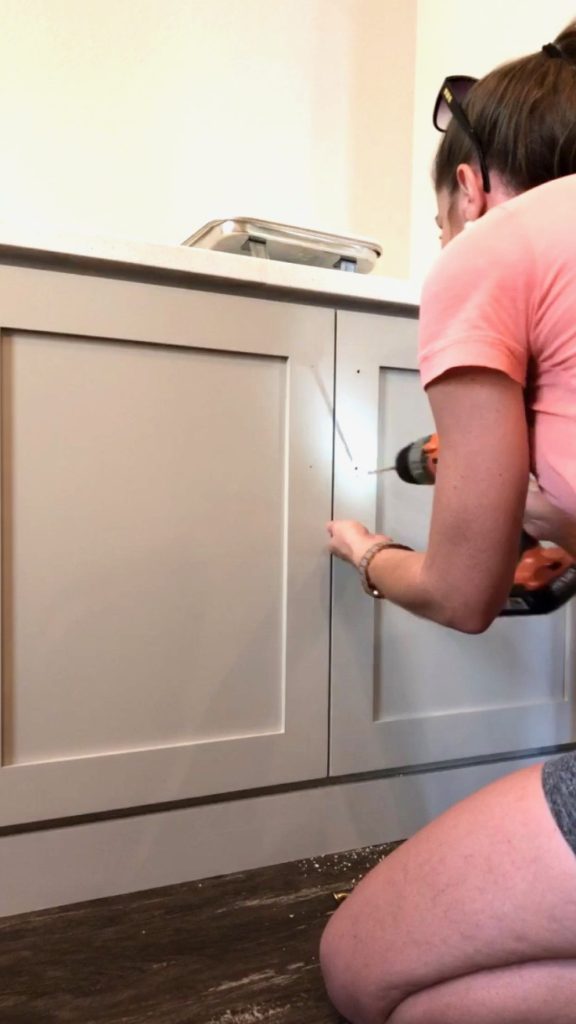
The last step was attaching the hardware! This might have been the most difficult part of the entire door process. And not because it was hard. But because it was scary drilling holes into perfectly made doors! Measure 4 times, drill once!
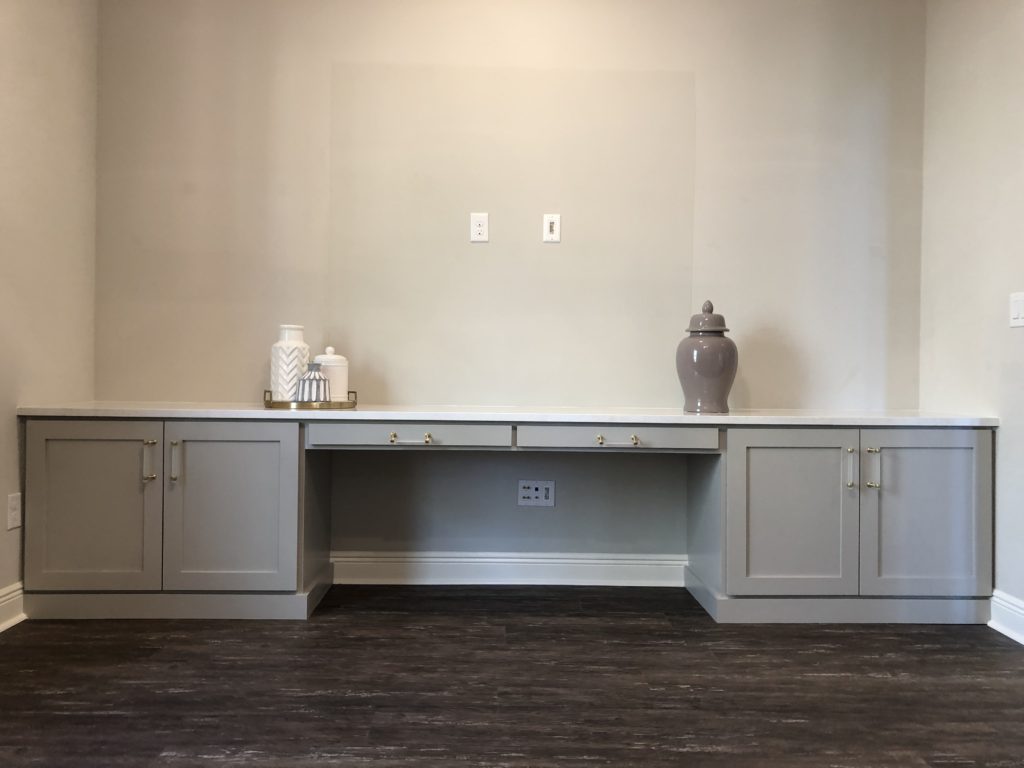
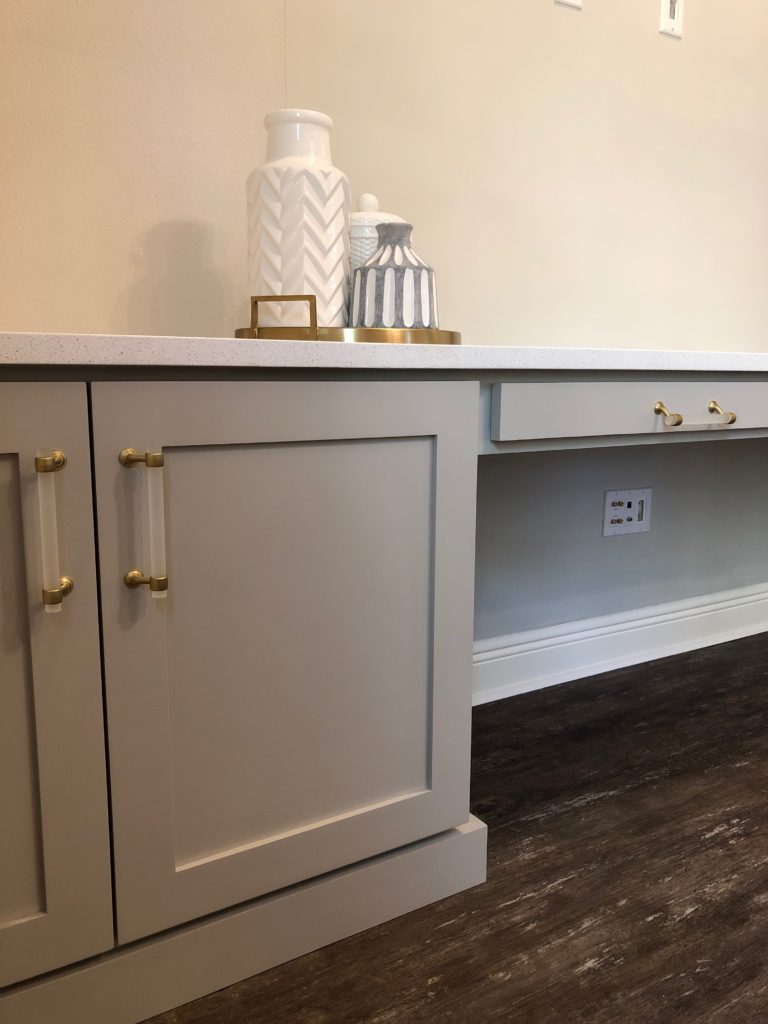
And that’s it! Professional looking cabinets without professional skills!
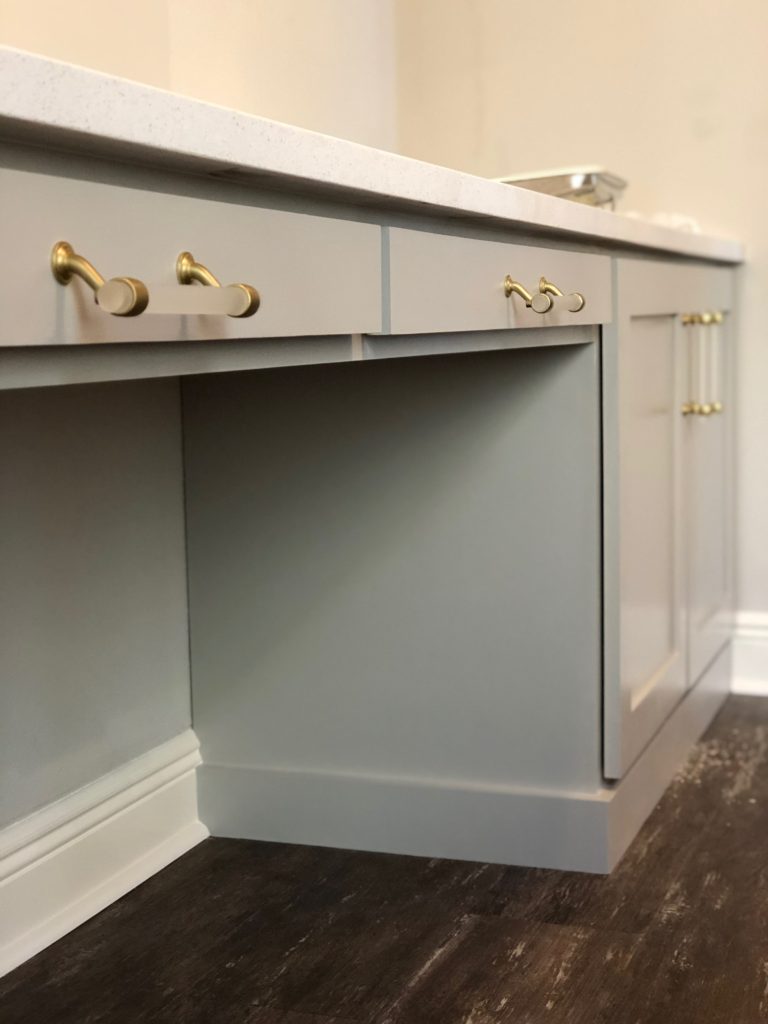
The drawers you see in the photo above are actually faux drawer fronts that I made myself. They don’t function and are purely for looks.
FAQ: DIY Office Built-in Desk with Shaker Doors
- Why did you buy doors instead of build them? Making your own doors require tons of accuracy and skill. Not to mention a lot of tools. Doors are 95% of what you see when you look at cabinets and because of that they need to look amazing. Buying doors is a no brainer for me because they are free of imperfections and make your overall finished product look excellent.
- How much did they cost? The prices of the doors vary quite a bit depending on style, size, and selections. The doors I chose cost approx $67 each plus shipping.
- Can you replace existing cabinet doors with these? Absolutely. A lot of people are curious if they could get rid of their kitchen cabinet doors, refinish the bases and then order these unfinished doors. The answer is absolutely yes!
- Do you order your doors before or after building the bases? I personally think it’s safer to order your doors AFTER the bases are built. More accuracy.
- How is the quality of the doors? I ordered some of the cheaper doors, and I still think the quality is excellent. Everything I could want or need in doors.
- Do they fit IKEA cabinets? These doors are not specifically made to fit IKEA furniture (SEMI handmade has this I believe) but since the doors can be ordered to any size you want, I assume you could order them to fit.
- Can you order blank faux panel doors? Yes. Just don’t order hinges or drilled holes for hinges and then attached them to fixed panels.
- Do the hinge holes come predrilled? If you order hinges, then yes. The hinge holes will come pre drilled exactly where you need them and installing the hinges is a breeze.
- Can you order the doors already painted? Yes, with the option of only a couple of colors.
- What type of paint do you use to paint these doors? There are dozens of paints you could use, but the one I personally use is this from Sherwin Williams.
- Why do you sand in between coats? To achieve the smoothest finish possible. Eliminates brush strokes roller marks.
![Master Bedroom Refresh [REVEAL]](https://www.frillsanddrills.com/wp-content/uploads/2015/11/IMG_2566.jpg)
![DIY Nursery [Cheater] Crown Molding](https://www.frillsanddrills.com/wp-content/uploads/2016/03/IMG_3119-768x791.jpg)
Another amazing build by one of my favorite DIY’ers. I seriously love watching your insta-story builds! Good job!! 👏🏽👏🏽👏🏽