DIY Faux Wainscoting
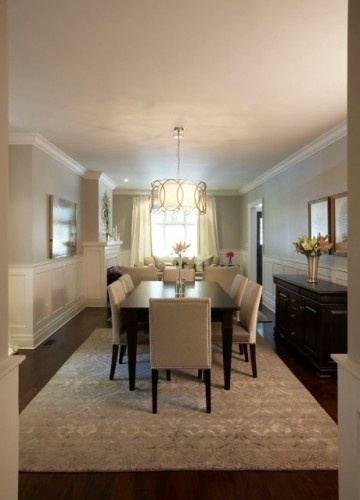
I fell in love with the wainscoting look a few years ago before we even had our new house. So once we moved in, I knew it was something I wanted to attempt. I saw it in dining rooms quite a bit and thought it would work well for ours also. This Pinterest photo was actually the primary inspiration for my dining room and I tried my very hardest to recreate the entire look, including the wainscoting! By the way – wainscOHting, or wainscOTTing? To-may-to, to-mah-to.
I know it may look or sound hard or daunting to do, but this project was actually no more difficult than my DIY Faux Headboard. It’s just like making lots and lots of…headboards. So without further ado, here’s my tutorial on how to get this classy, expensive wainscoting look without the huge price tag.
Supplies:
– Painters Tape
– Ultra White Paint
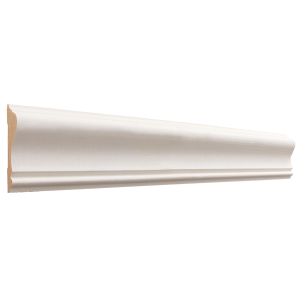
– Chair rail molding and box molding (linked below)
– Level
– Measuring tape
– Caulk (lots of caulk)
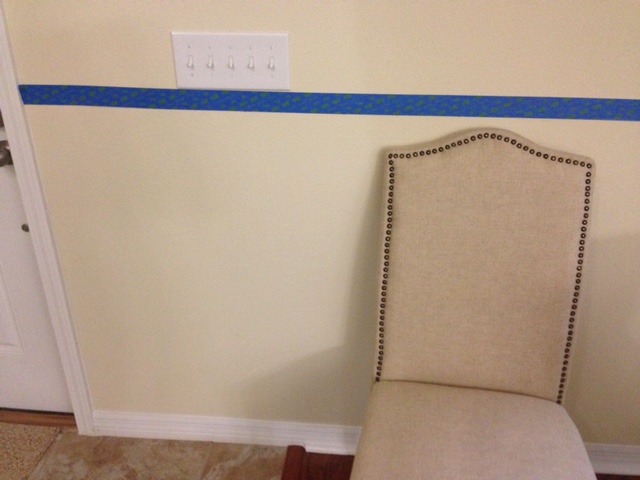
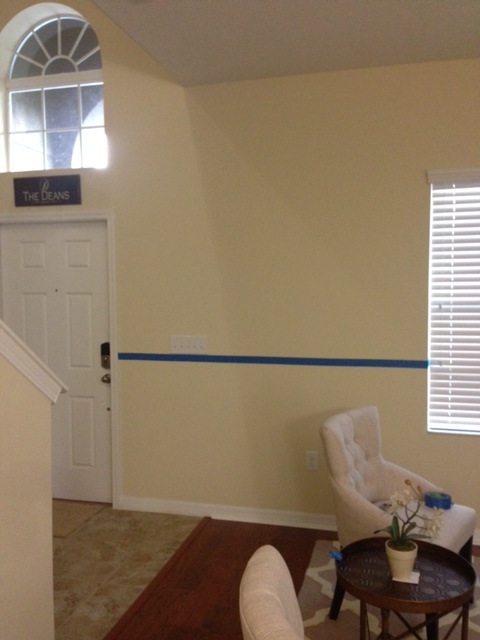
I started out by figuring out what height to make the chair rail. No math involved here, I just threw a chair up against the wall and boom. That was my height. For mine – the bottom of the tape was 38″ inches from the floor. I went around the room making dots at 38″ and then connected them with the blue painters tape.
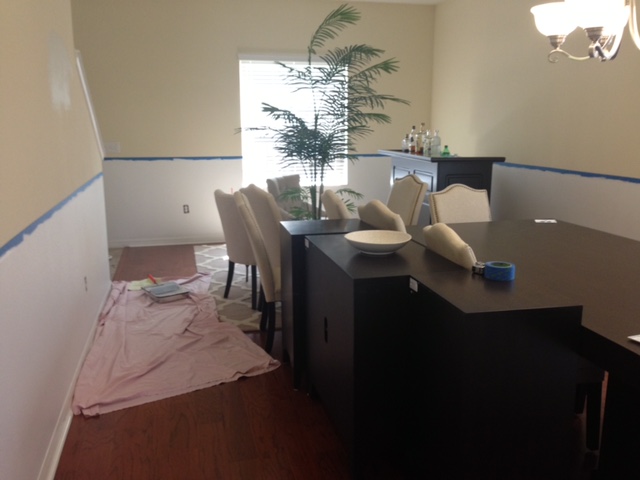
Then the painting began. I used an ultra white in an satin finish. The awesome part about painting this is that I didn’t have to worry about edging much because the baseboards are also white. 2 coats and it was a very quick paint job.
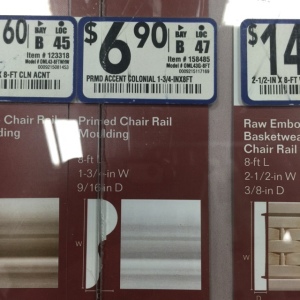
Next I bought this chair rail molding from Lowe’s. It’s a traditional chair rail that runs about $1.26 a foot. I bought it in 8 foot pieces (so it fits in my car) and it took about 8 pieces. My room is 56 feet around but you need some extra for cuts and mistakes.
I don’t recommend doing this part the way I did, but my impatience and stubbornness got the best of me. I taped the full piece of molding on the wall at the right height while simultaneously using the level and the nail gun to get it secured in place. Like I said, I don’t recommend this. This part should most definitely be a two person job, one holding level and one nailing in place. I placed a nail about every 24″ along the chair rail.
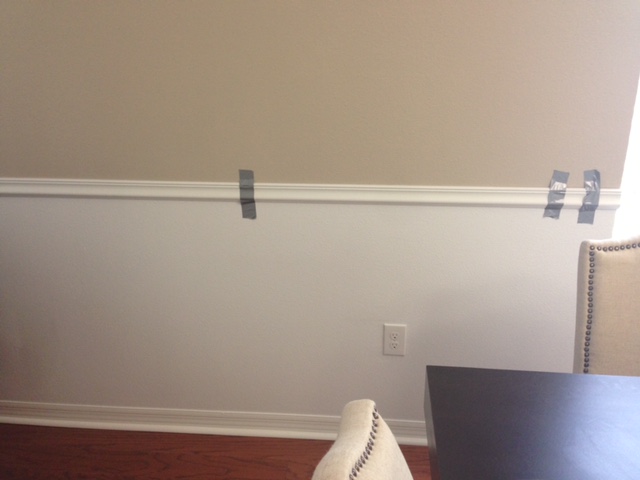
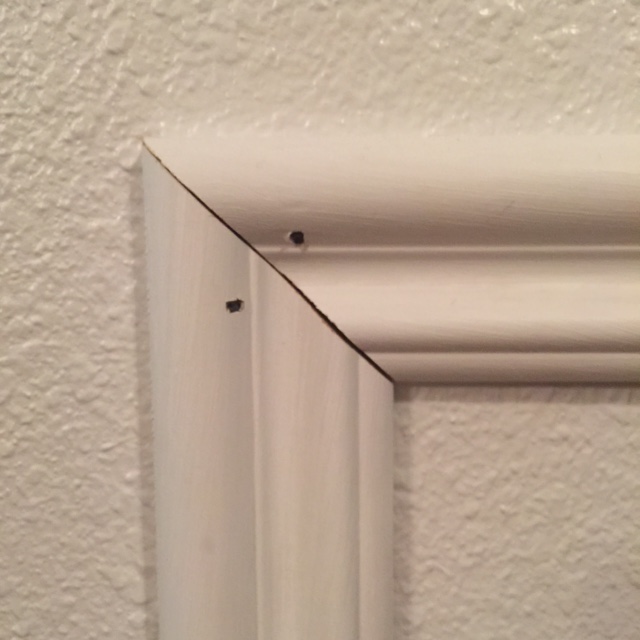
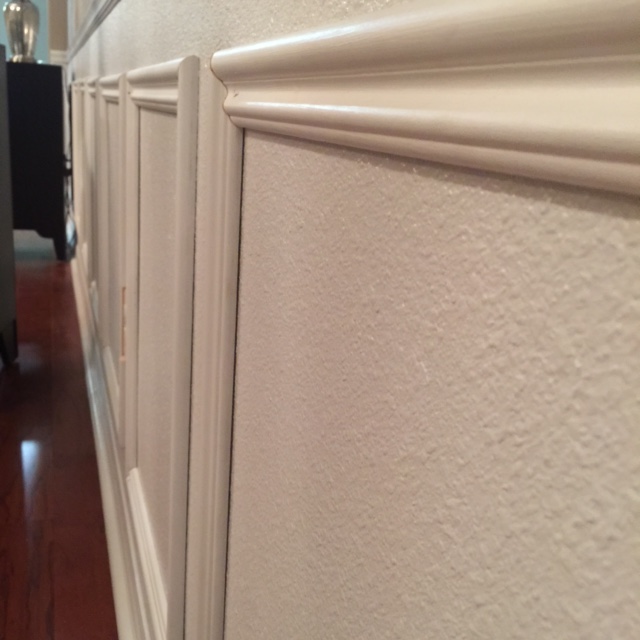
The corners were cut using a miter saw at 45 degrees.
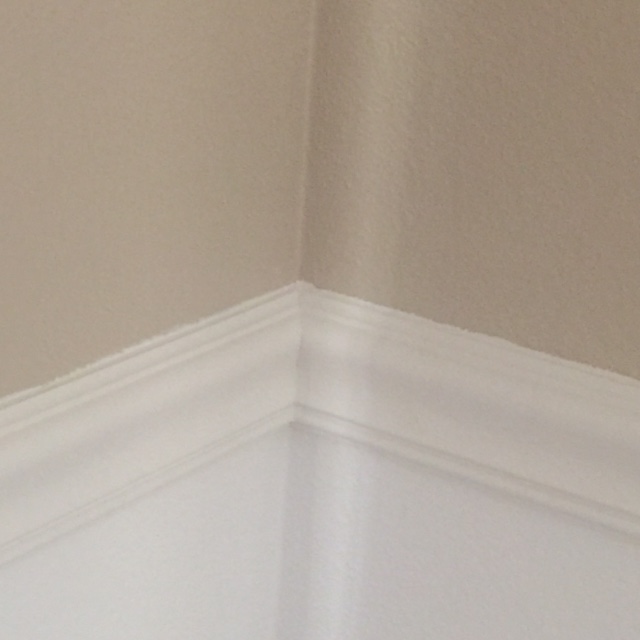
This is the finished look of the chair rail after caulking along the top, bottom and corners. Now for the boxes.
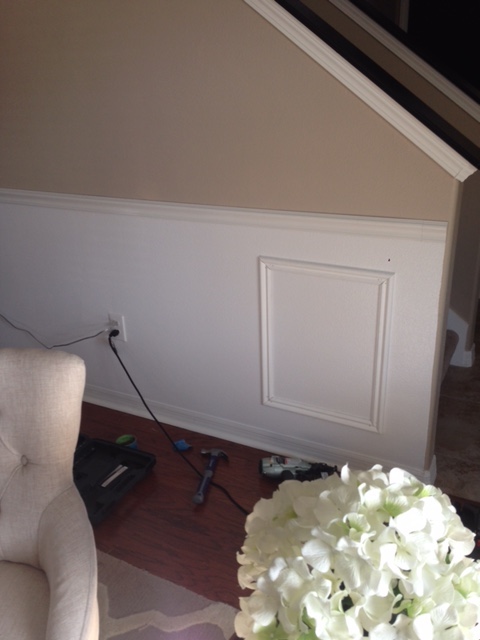
Here is the molding that I used for the boxes which I bought at Lowe’s. It took exactly one 8′ piece for each box which made it nice and easy.
This is me doing lots and lots of math making it WAY more difficult than it should have been. Seriously y’all. I’ll show you the example of how I figured out the boxes for the long, stairway wall you see pictured below.
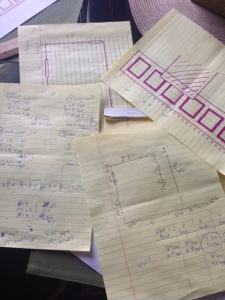
It’s 192.5″ long. I knew the boxes were going to be somewhere around 19-20″ wide and gave gaps between them around 4-5″ wide (from my online research). If you take 192.5″ and divide by 19″ (for box size) you get 10.13. But that doesn’t leave you any room for gaps. So I knew I was going to have LESS than 10 boxes. So I tried 9. 9×19=171 which leaves me 21.5″ for 10 gaps (you will always have one more gap than you do boxes on each wall). Well 21.5″ divided by 10 gaps only gives me 2.15″ gaps. Which doesn’t fall between 4 and 5″ like I wanted. So I tried 8. 8×19=152 which leaves me 40.5″ for 9 gaps. Or 4.5″ for each gap. BINGO. 8 boxes worked for that wall. I used this method for each wall and I ended up with 3 walls having 19″ boxes, 1 wall having 20″ boxes, and gaps between 4.5 and 5.25″ on all walls. So not all walls have the same dimensions for any of this. But the eye will not notice these small differences, I promise.
The height of the boxes were centered between the chair rail and baseboard. I used 4.5″ spaces between the top and bottom of the boxes (on all walls regardless of gap between boxes). This left each box to have a height of 24.25″, because the distance between the chair rail and the baseboard is 33.25″ (33.25-4.5-4.5=24.25). Since I knew the gaps for this wall were 4.5″ wide, I started from the right side of the wall and measured 4.5″ in and 4.5″ down and made a dot. This would be the starting point for this box, which is also the top right corner of the box.
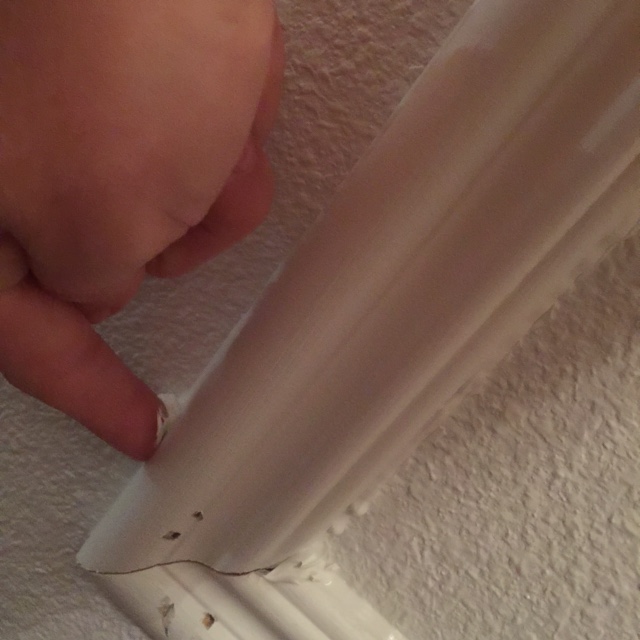
All sides of the box were cut the exact same way. They all have 45 degree cuts on each side as you can see in the photo above. In order to make sure each piece is nailed on straight, I lined up the edge of the molding to that dot I just made, and then held a level on top of the molding until it was exactly straight (while still ensuring it was on my dot). I held in place with one hand and used the nail gun with the other hand, putting one nail in each end.

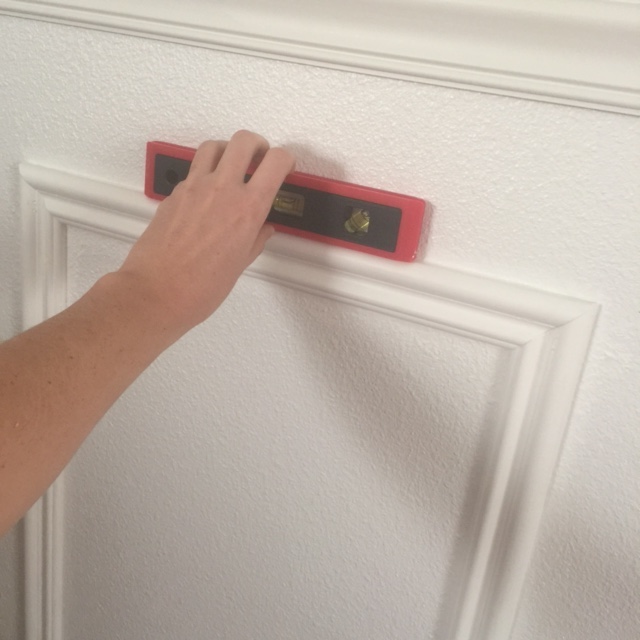
I used that same method of holding the level against each piece of the rest of the box. So ultimately there’s only one measurement, one dot, and the rest is just holding each piece against the last (with the level) using that first piece as a guide. Whew!
The picture below shows how I measured between each box to begin the next. I measured OVER the gap size and DOWN 4.5″ and made another dot. And I repeated the process. Pretty easy stuff, folks.
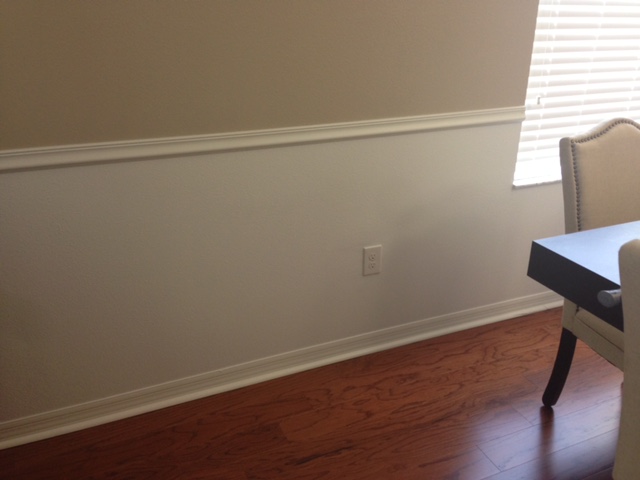
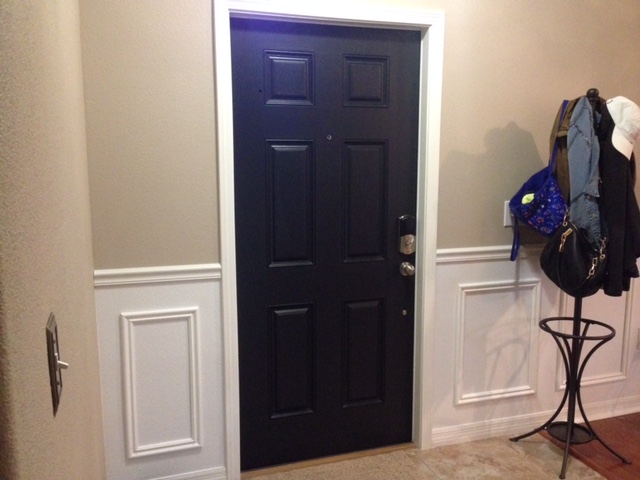
When I got to a situation like the one below, the space on the left side of the door wasn’t factored into my original wall measurements. I calculated the number of boxes on the wall using only the space on the right side of the door. The space on the left side of the door just has a box of it’s own that’s not the same size as the rest of the boxes on that wall. But it’s not a big deal. And I’d rather have a complete box that’s a little smaller than 2 boxes the same size cut in half.
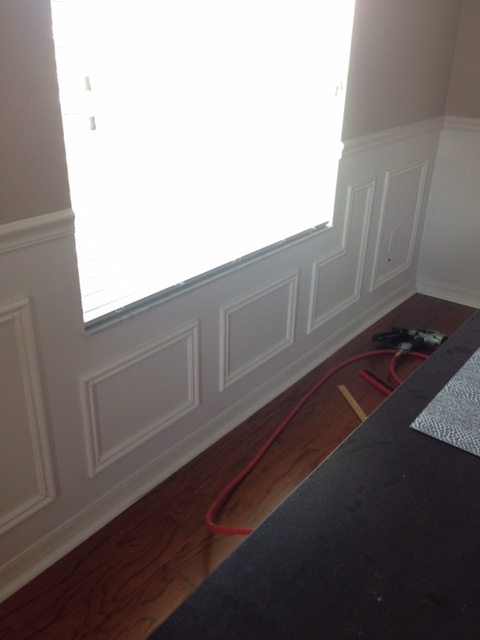
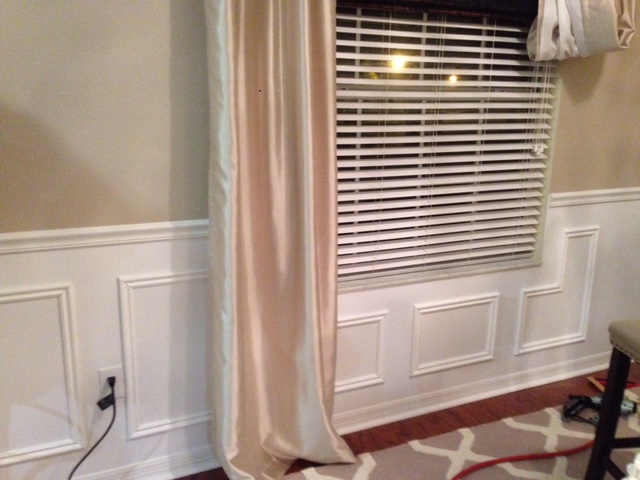
Here’s how I went about going around the windows. The fact that the wall had a window didn’t affect my original box calculations. And then wherever the boxes interfered with the window, I made sure there was 4.5″ between the window and the box (just as the other boxes have 4.5″ between them and the chair rail) and then adjusted the measurements of the sides of the box as necessary. The cool thing is that the curtains cover most of this up anyway so it’s not noticeable at all.
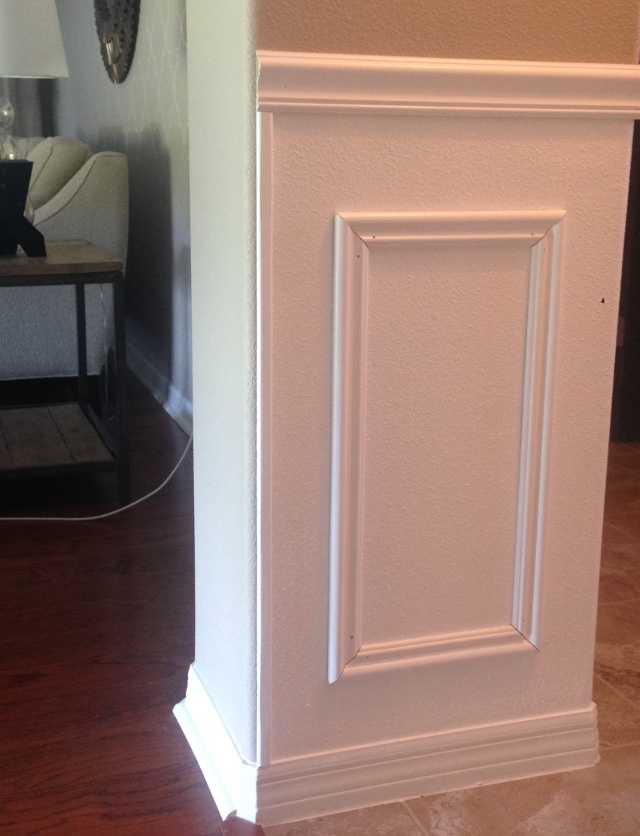
When it came to the end of the walls, or wherever there was a doorway, I used these long skinny pieces of moulding to finish it off (also found at Lowe’s).
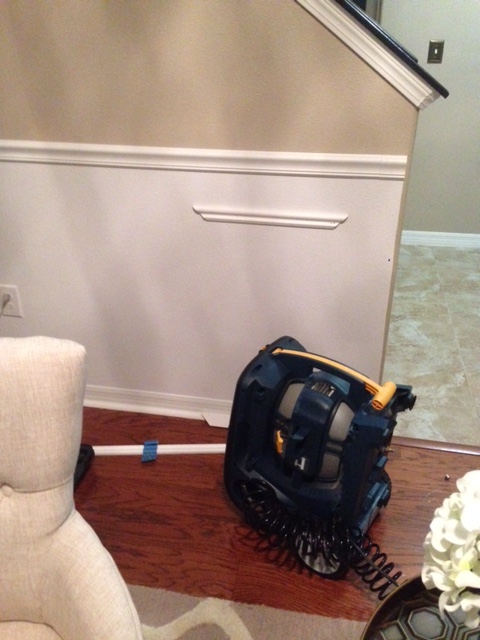
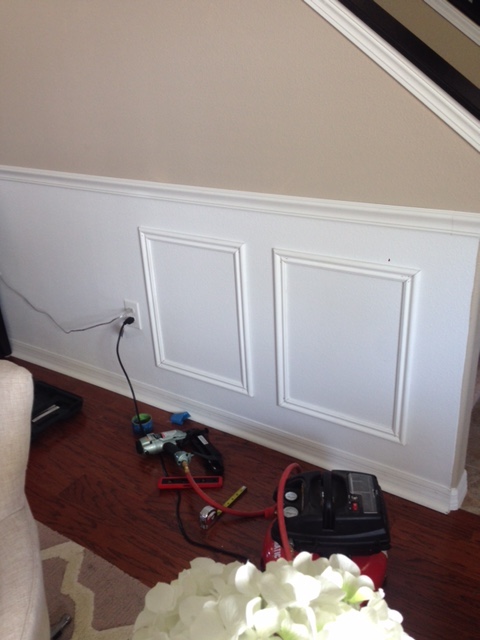
Once I finished all the boxes, it looked like this (before all the caulking).
I’m not going to lie, you get all excited thinking you’re just about done because all you have left to do is caulk, but you’re so far from done. Caulking takes a while with this many seams, and you want to take your time and finish it off right because it seriously makes a huge difference.
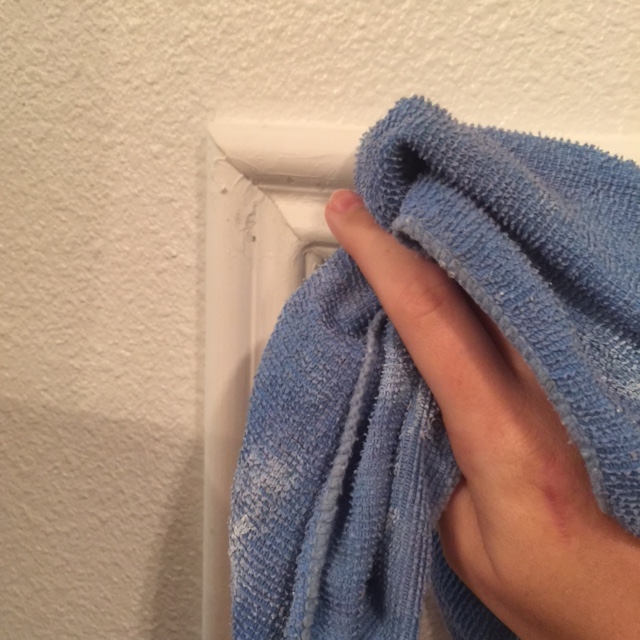
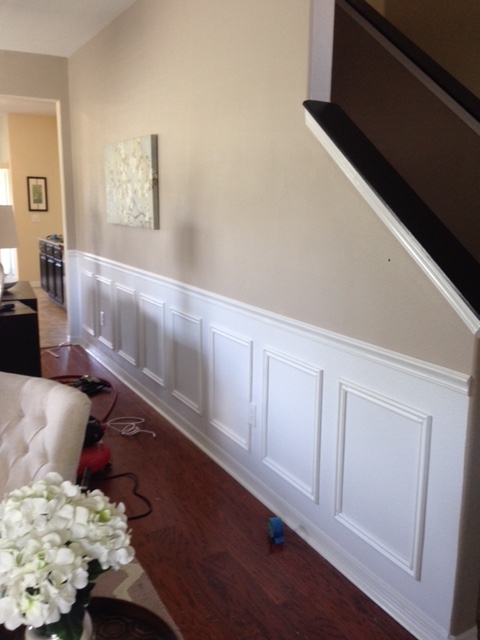
I piped the white caulk on with a caulk gun pretty thin and just used a damp cloth to wipe it off with, making sure all the gaps were covered. And this is how it turned out afterward!

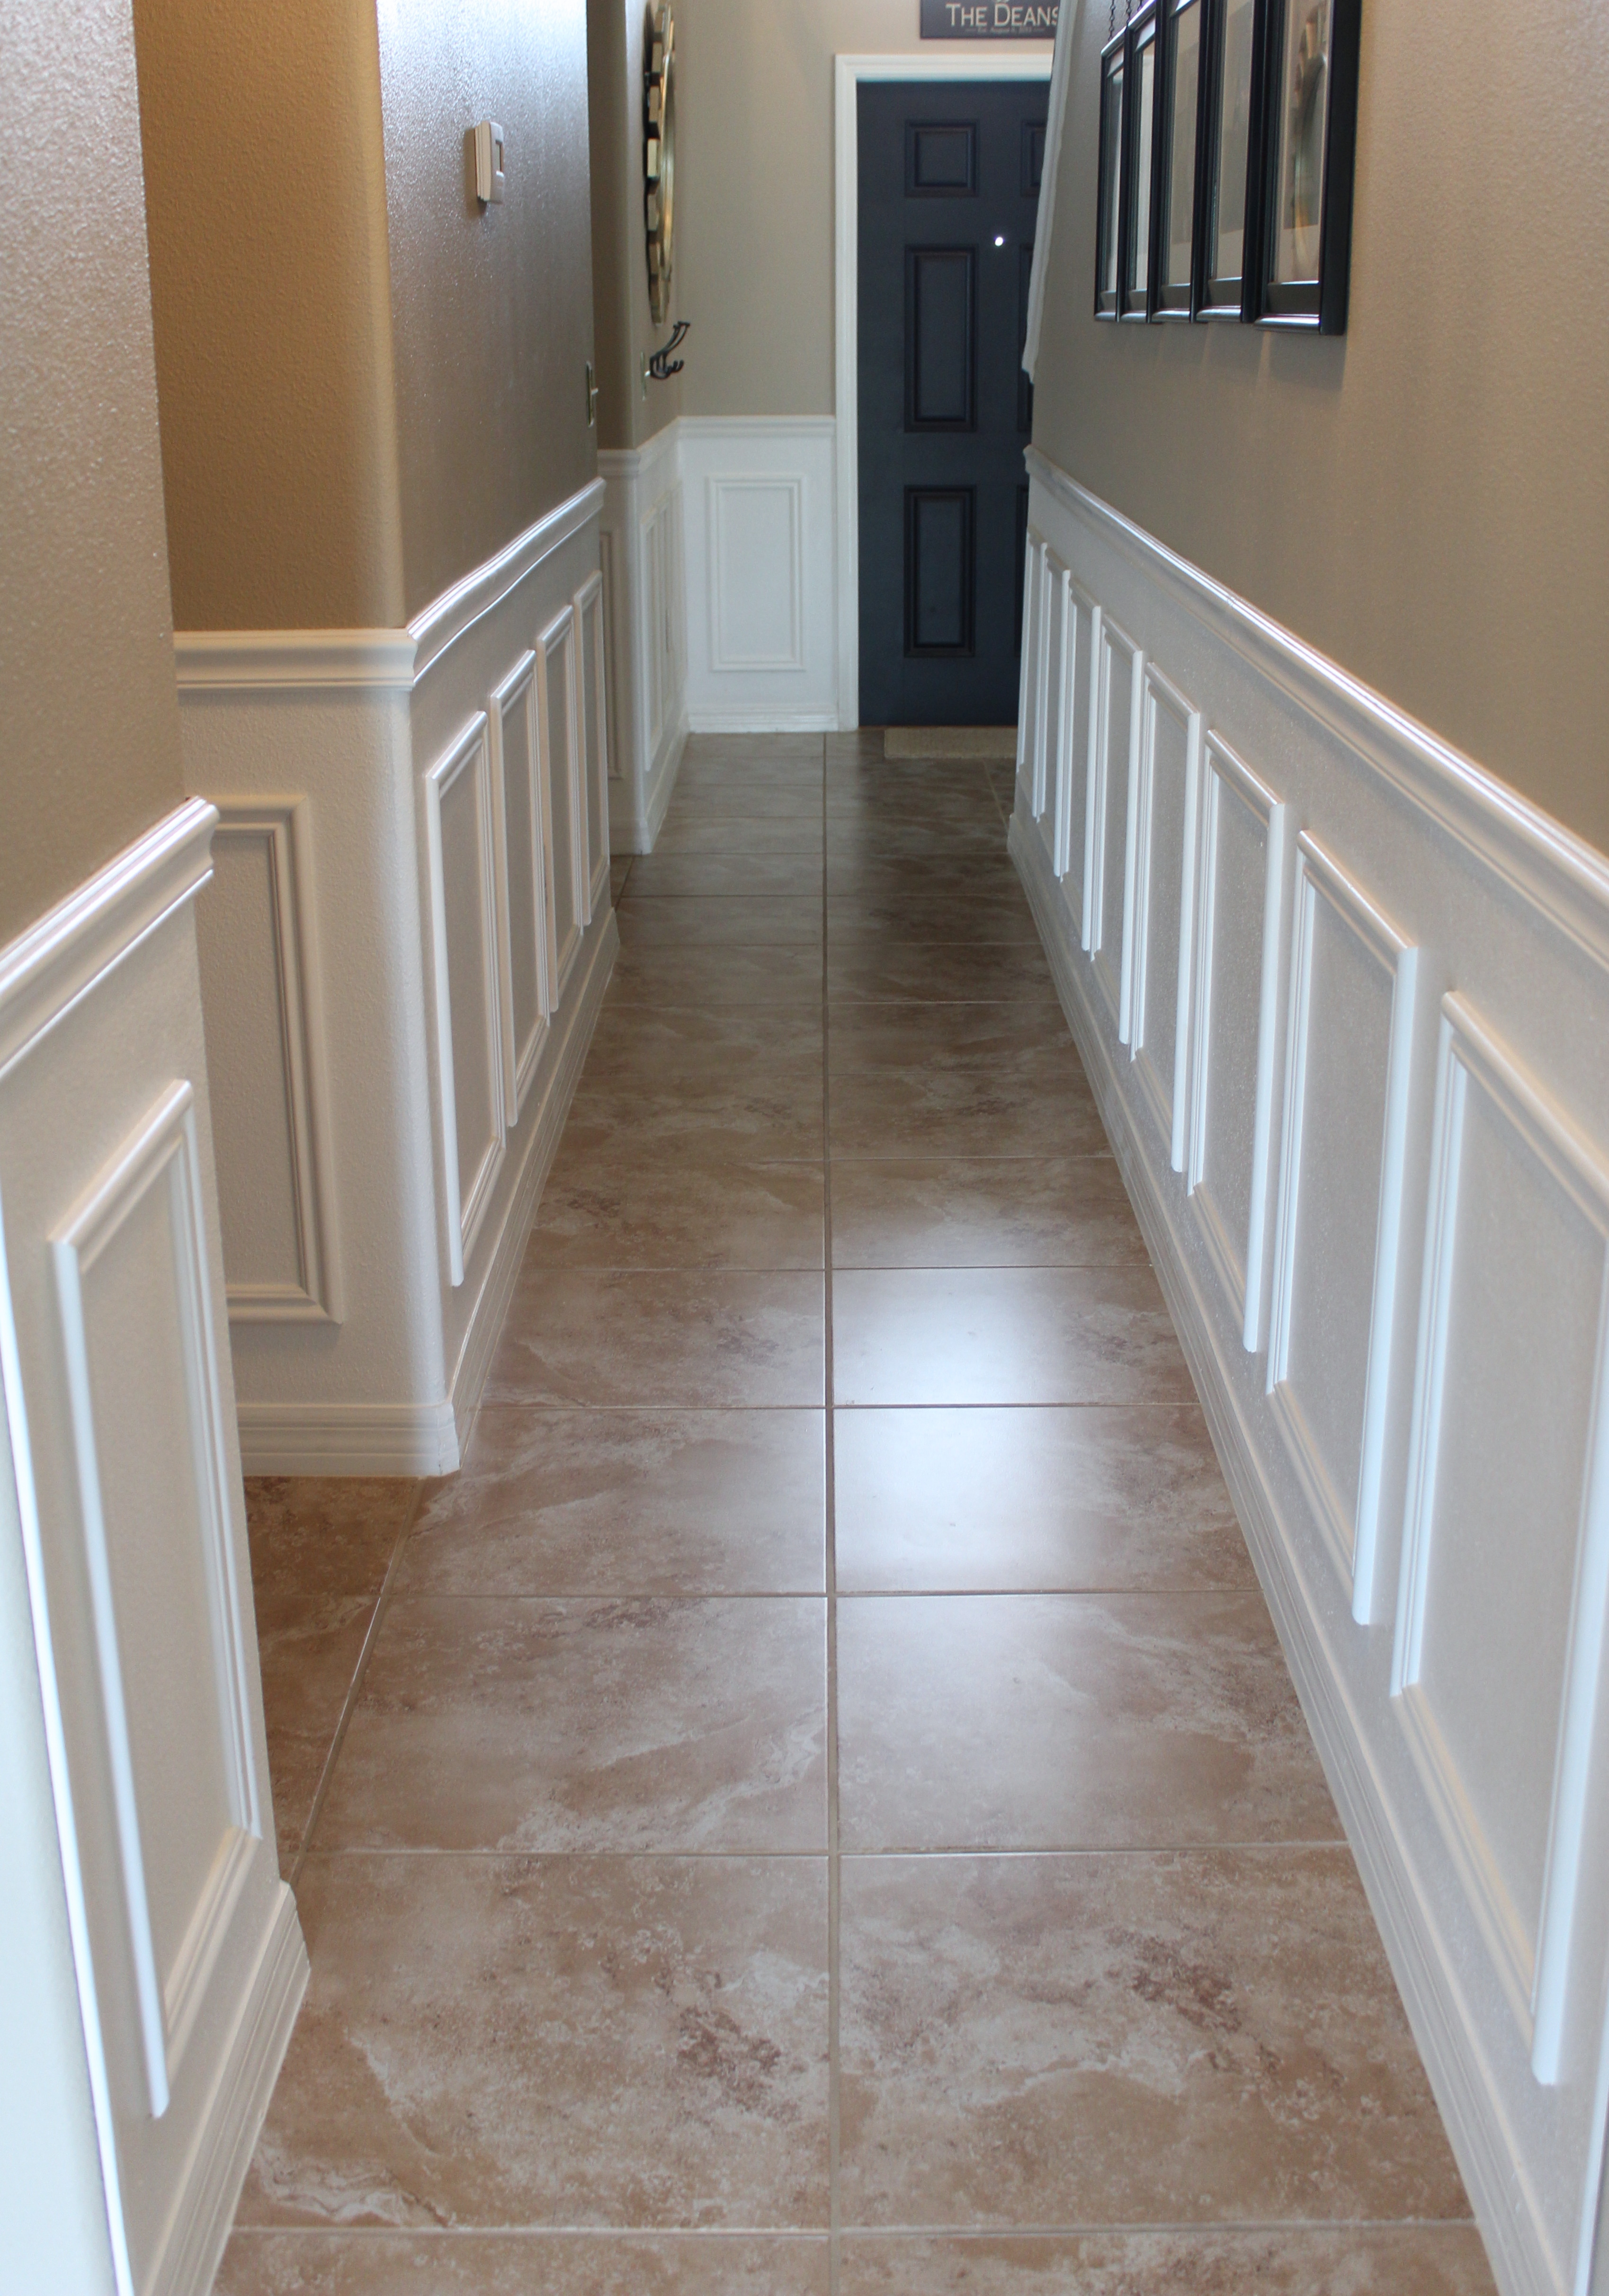
The finished wainscoting!


The wainscoting is continued throughout my dining room, foyer and front hallway.

Do you think wainscoting is something you are willing to tackle in your home? Comment and let me know what you think or if you have any questions on my DIY Wainscoting!


I would LOVE to attempt this but I don’t think I have enough skills to follow it completely through! I may still try this summer in our new home. Wish me luck!
This looks great! I wish you lived close to me lol. I always wanted to do this and crown molding for my new townhouse. I had an estimate last year done to see what it would cost to do for my townhome; I have a great room, a small hallway and small bathroom and if I recall the estimate was something like five to seven thousand dollars from a home remodeling company. You did a really nice job. I always think this makes the house look more expensive. I have looked into some DIY projects, and one of them just used picture frame molding and bought a bunch of picture frames and nailed them to the wall instead of building the squares, lol. Your spacing looks really nice too.
Thank you so much for the sweet comment! I agree, I think it adds a lot of value to my home, and didn’t cost me that much! Good luck with your townhouse!
Seriously, you are my idol. I’m completing this project soon in our new house..thank you SO MUCH for the inspiration. I never thought I could do this before but you laid out each step so perfectly and there’s no way this can go wrong if I follow your directions. My husband initially thought of doing the entire wainscoting board but I was always hesitant because I had no idea how i would cut through it for the outlets and vents…. but your method is so much easier and with the thinner pieces to cut, the outlets and vents will be no problem. Thank you so much!
Ereny, it’s comments like this from sweet people like you who are THE reason I continue sharing my projects and love what I do. Thank you so much for the kind words, you’ll never know how much they mean to me!
I think I messaged you on Instagram a while back when I actually did complete this in our master bedroom, came out amazing!! Now expecting my babygirl in just 4 weeks and I’m doing her room as we speak 🙂 thank you sooooo much!!
Yes, I remember! That’s amazing, Enery, and congrats on the baby girl! 🙂
This is truly a work of art. I’m definitely enthusiastic about doing this in our new home. BTW I’m a gator fan living here in Jacksonville. ..
Thank you so much Mimi! That’s awesome you’re a local Gator fan!! How about that Tennessee game last Saturday!!!!!!!!!!!!!
It looks like you purchased primed molding to create the boxes below the chair rail. Did you ultimately paint the trim? If so, did you paint it the same color and sheen as the wall?
Hi Amy! Yes, I purchased primed molding for the boxes and did not paint the existing baseboards that came with the house. Just painted the wall, the chair rail, and the box molding all the same sheen of white. Semi gloss.
Hi, I just found you on IG and I was wondering if you have any suggestions/advice on someone like myself who has a lot of motivation and inspiration but afraid to try 🙂 I have been wanting to do some woodwork but I’m always afraid I may not be good at it. I’m definitely a math person so I know how to calculate measurements, etc. Anyway, my first question is what’s a good tool to buy as a starter for this kind of project. I see miter saw, any recommendations what kind/brand? You can email me too or just reply here. Thanks in advance! You’re a real inspiration!
Hi Annabelle! Thank you so much for the sweet comment! It means so much to me! My biggest piece of advice is to JUST DO IT! Like Nike 🙂 If you are good at math, and have the basic tools, I promise you it will turn out fine. I can’t explain to you how many imperfections there are in a lot of the projects I’ve completed. You learn as you go and that’s the reality of it. The important part is that YOU completed it, you saved a lot of money, and it’s something you will take pride in forever. Nobody else will notice besides you, and it will only make you better the next project you do! As far as a miter saw, this is honestly the tool I use THE MOST out of my entire collection so it wouldn’t be a bad idea to get a decent one. It doesn’t need to be “compound sliding”, but one that is at least 10 or 12 inches is desirable. DeWalt is a good brand, but most anyone you buy from Home Depot/Lowe’s in the $200 range will be good enough. I hope this helps and thanks again for the comment!
Thank you! I just bought my first power tool from Amazon. You’re right…I should just do it! I’m framing everything in this house! Lol I can’t wait!
how did you always nail into the studs?
Hi Courtney. I actually didn’t always nail into studs. Some of them may have randomly hit studs, but I didn’t make sure they all did. They are super sturdy and not going anywhere after the caulk and paint, even when they don’t hit the studs. So it’s honestly no big deal!
Love your work!! I am going to try this! Do you cut only the corners connecting to another wall at a 45 degree angle or all the corners?
I cut only the corners connecting to another wall at 45 degrees. However! I totally was a novice when I completed this project and left the ends just flat. They’re supposed to have a “return”, which makes a nice finished end where it just stops. Google a wainscoting, or crown molding return to see what I mean. It looks much nicer with the return, I just didn’t do them when I did this project many years ago. I hope that helps! 🙂
Your measurements saved my sanity! Thank you so much for sharing this with the world. Your house looks AMAZING! So beautiful.
I am so glad this helped you Denise!! Thank you so much!
Great job! I love the wall color. Where did you get it? What is the name of the paint color?
Hi! I’m so sorry I’m just now replying. The wall color is called Pavillion Beige by Sherwin Williams!