DIY Ballard Designs Inspired Media Stand
Howdy! It’s been a while since I’ve been able to find time to update the blog! With a 2 year old and a 9 month old now crawling around, it’s been tough to get much of anything done! If you’re new here – welcome! I have lots of tutorials and DIYs around here. And if you’re here to see the media stand I just finished building, I’m so excited to share it with you! It took over 2 months of nap times but it’s finally done! This actually isn’t the first sideboard/media stand I’ve built like this. My first one can be seen here and the second one (which is the TV stand in my current home) can be seen here.
And another fun note – I’ve been building not one, but TWO sideboards simultaneously the last 2 months. My favorite part is that they have the same frame & body, but have different door styles which is giving them 2 TOTALLY different looks. It is seriously so cool to see how the same overall piece of furniture can suit two completely different styles of decor. Maybe I’m the only one geeking out here, haha! Let me show you what I’ve been working on the last few months.
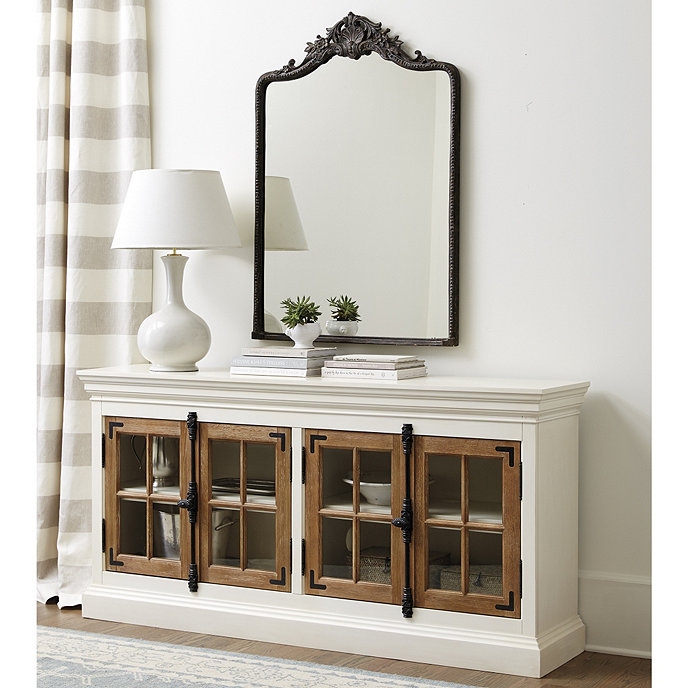
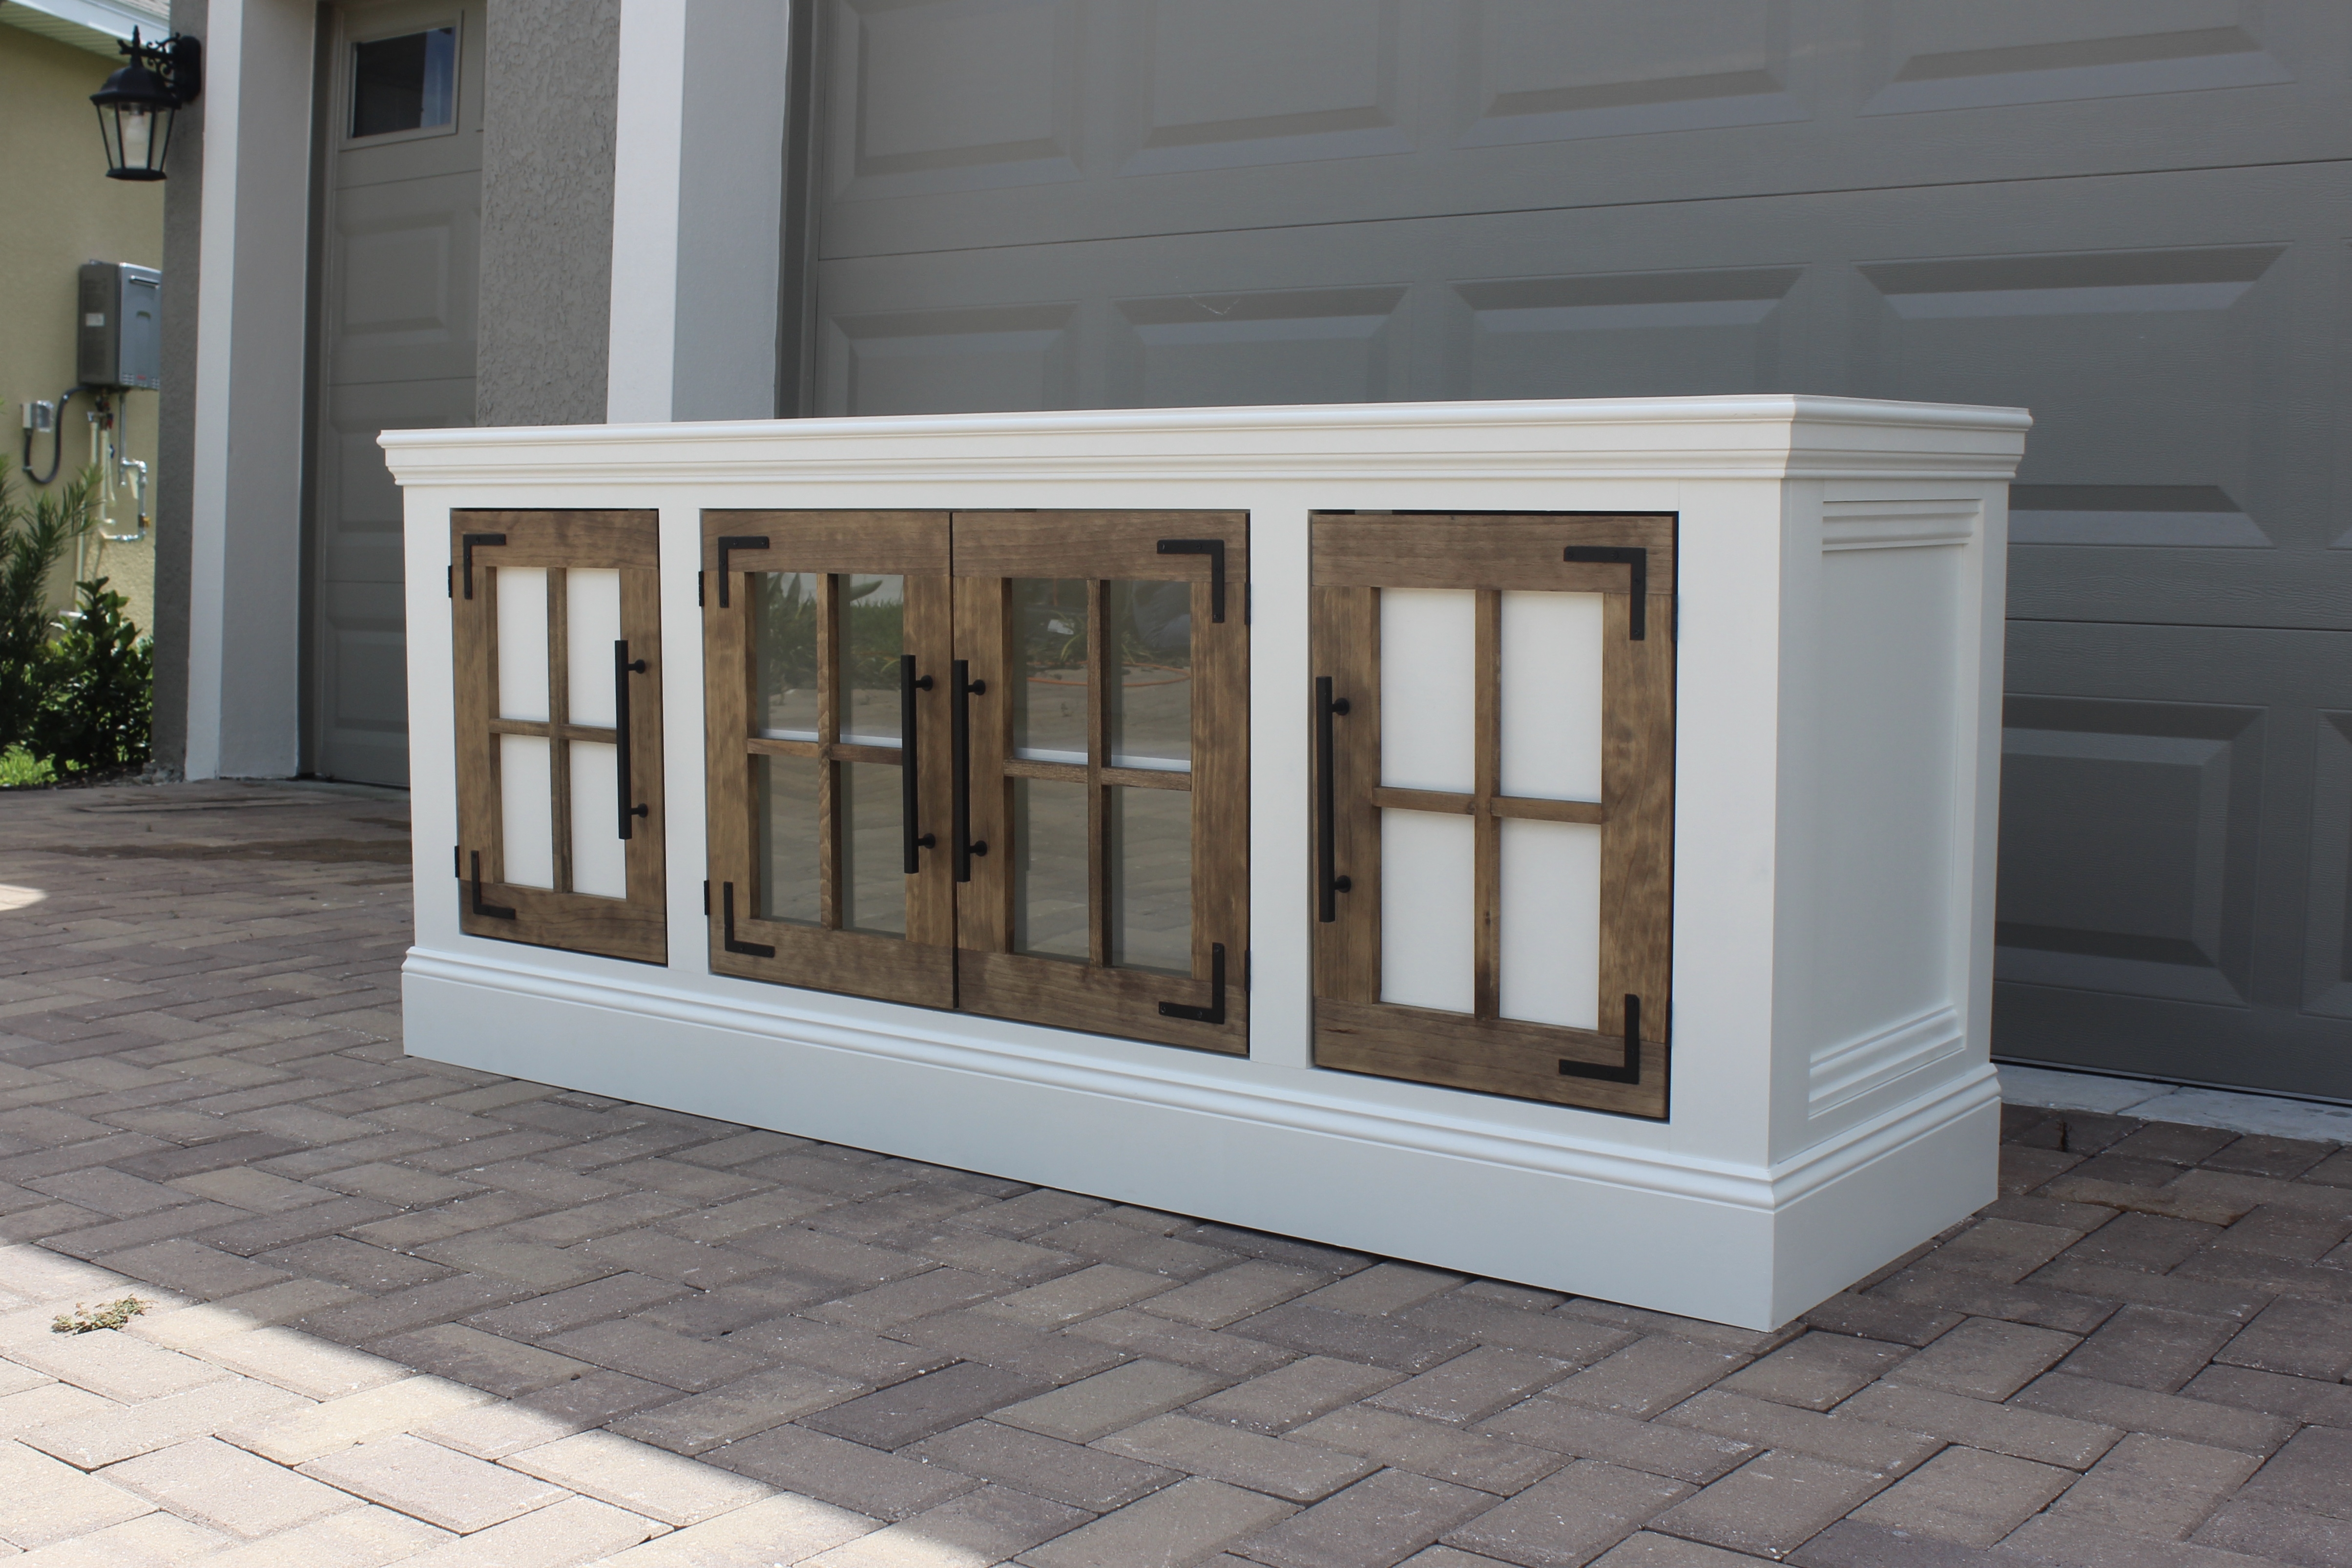
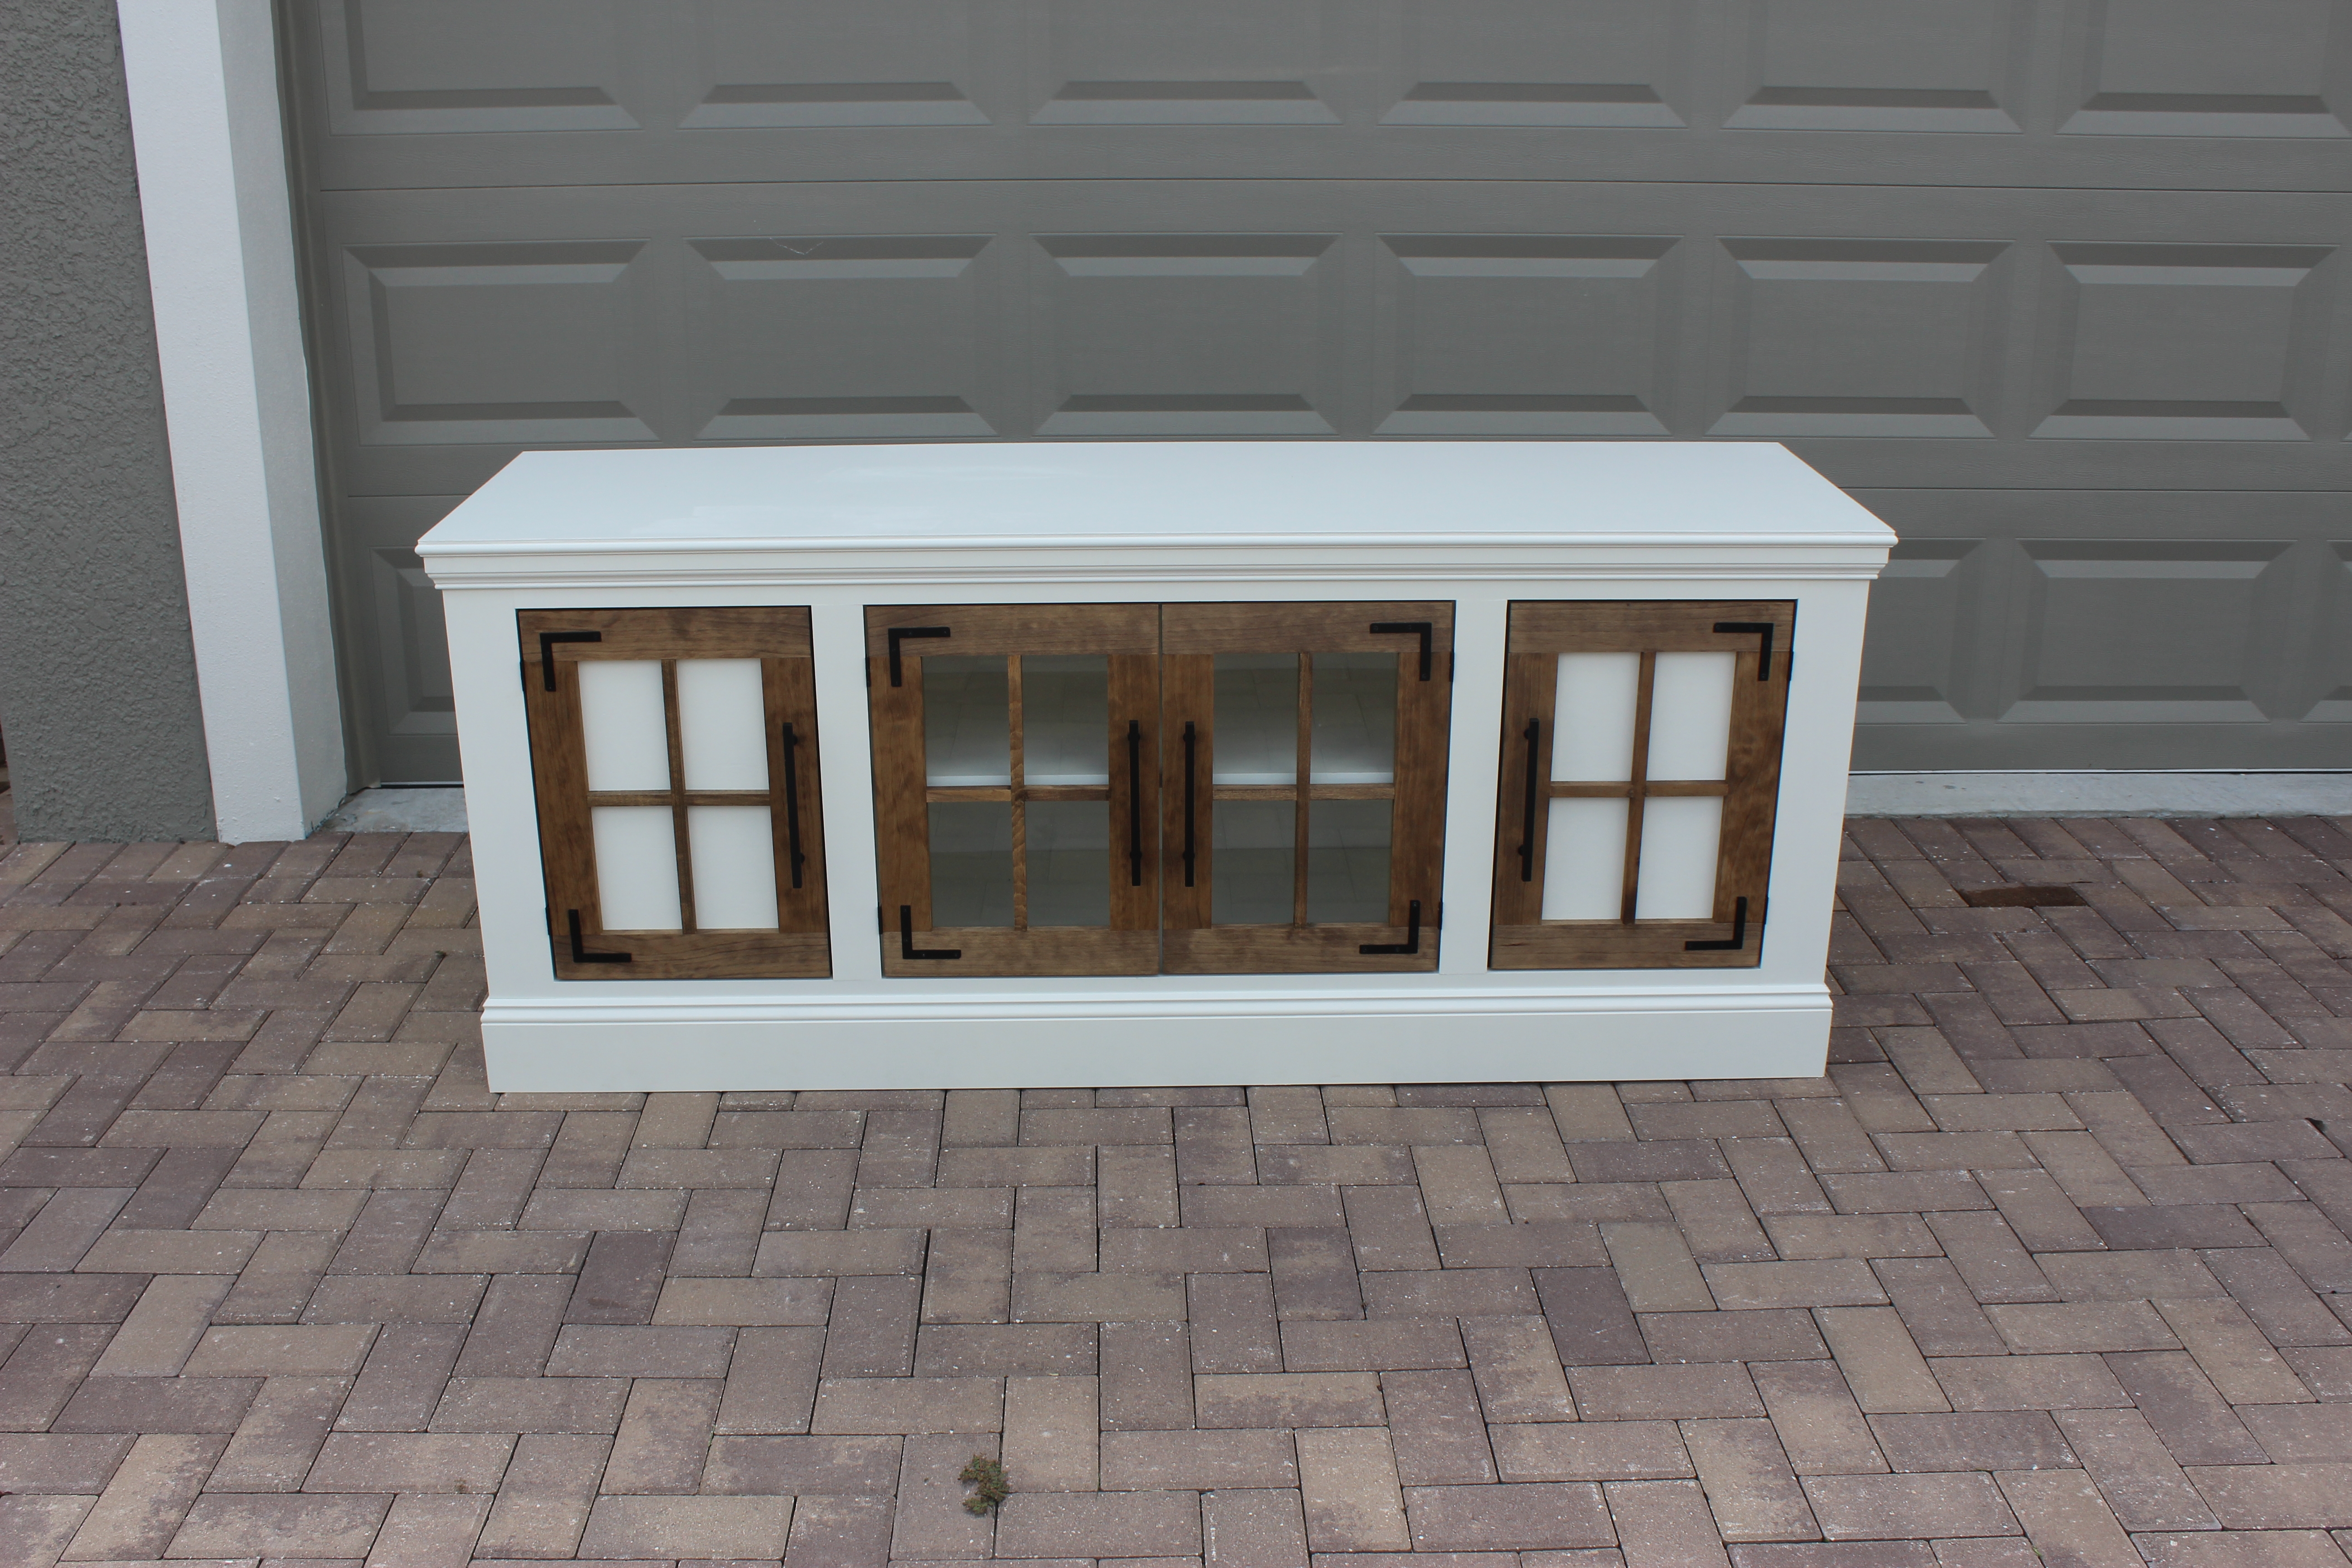
So here is a gorgeous media stand my dear friend Heather wanted to purchase from Ballard Designs. She loved the style, and was about to pull the trigger on it. But when she told me she was about to buy it, I just couldn’t let her do it. The price was too high considering I knew I could build one just like it that suited her needs even better than the one from Ballard. So that’s what I did! I offered to build her this because I was already planning to build the similar one for my mom, and building 2 simultaneously is easier than 2 separately. I’m almost finished building my mom’s and I’ll be sharing that one on the blog soon, too!
I used a combination of 2 tutorials for this build. The Ana White/Shanty2Chic Restoration Hardware Sideboard plans in combination with the Build Something Farmhouse Media Cabinet plans. I used the Ana/Shanty plans for the body/carcass/trim and use the Build Something plans for the doors. If you haven’t built anything before, or anything like this at least, I highly recommend building one of them exactly like the plans to start with. Without altering any of the dimensions. That’s what I did with my first sideboard build to get my bearings. From there I felt much more comfortable and was able to start customizing things to my liking!
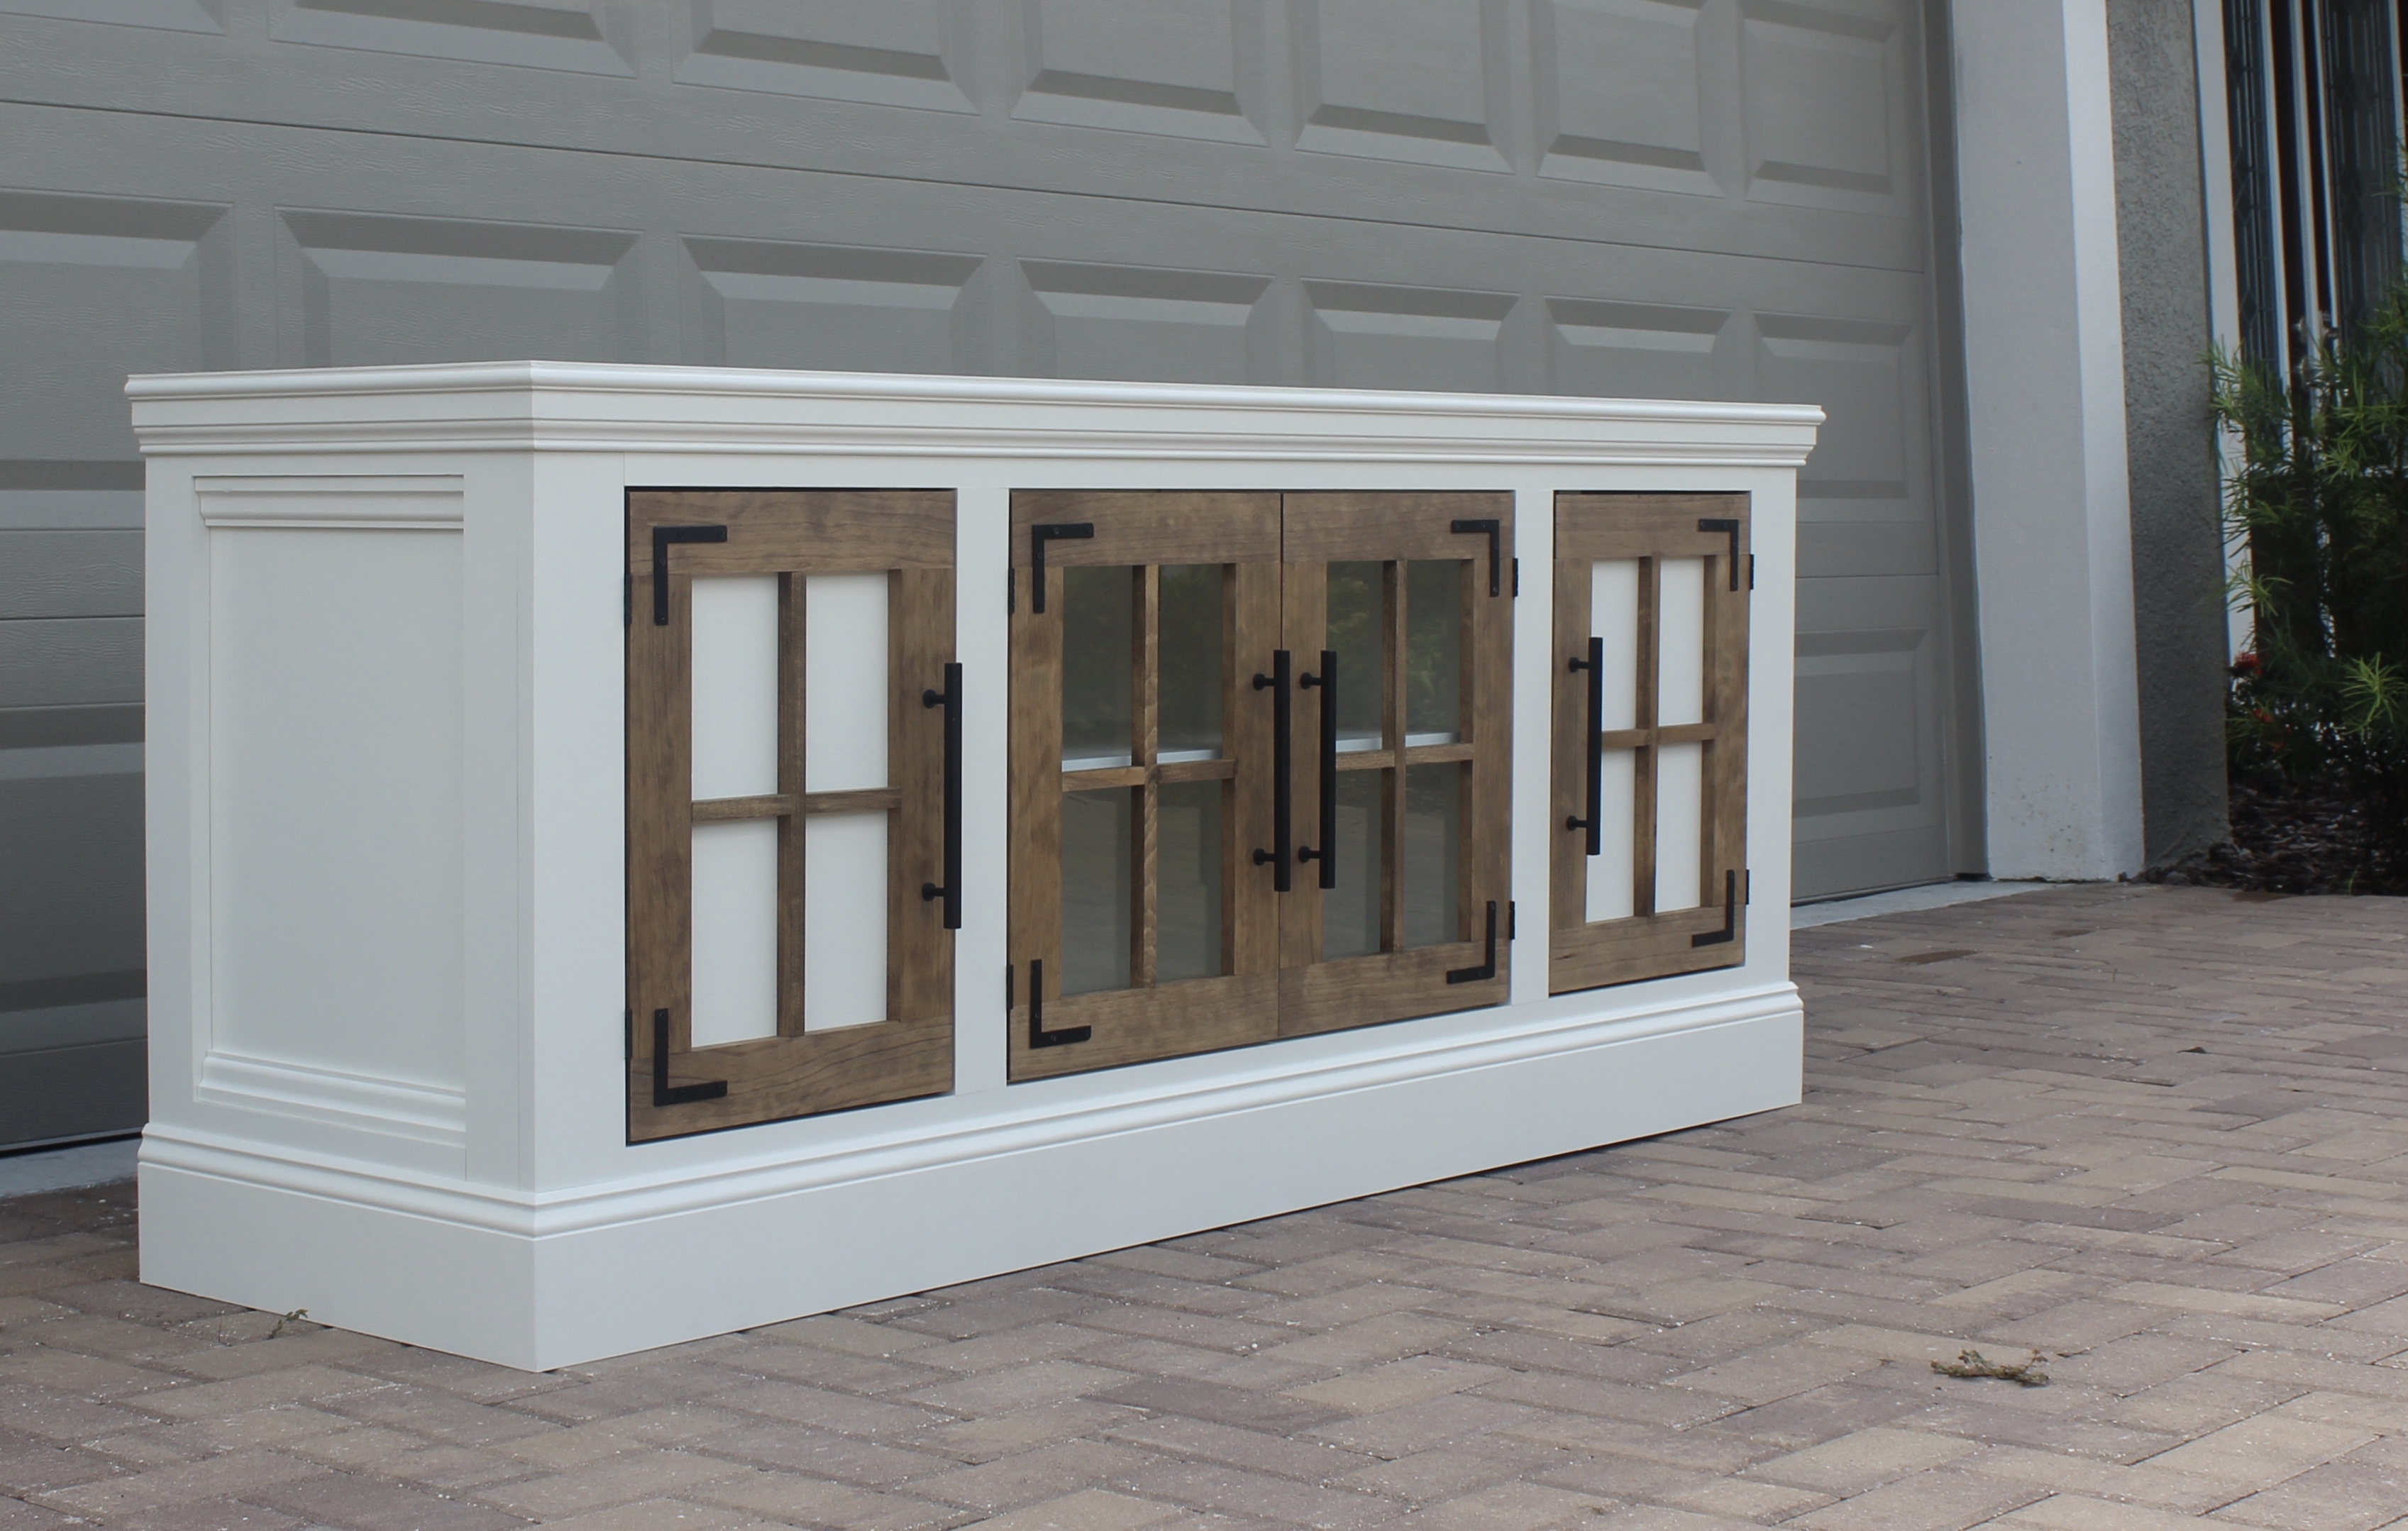
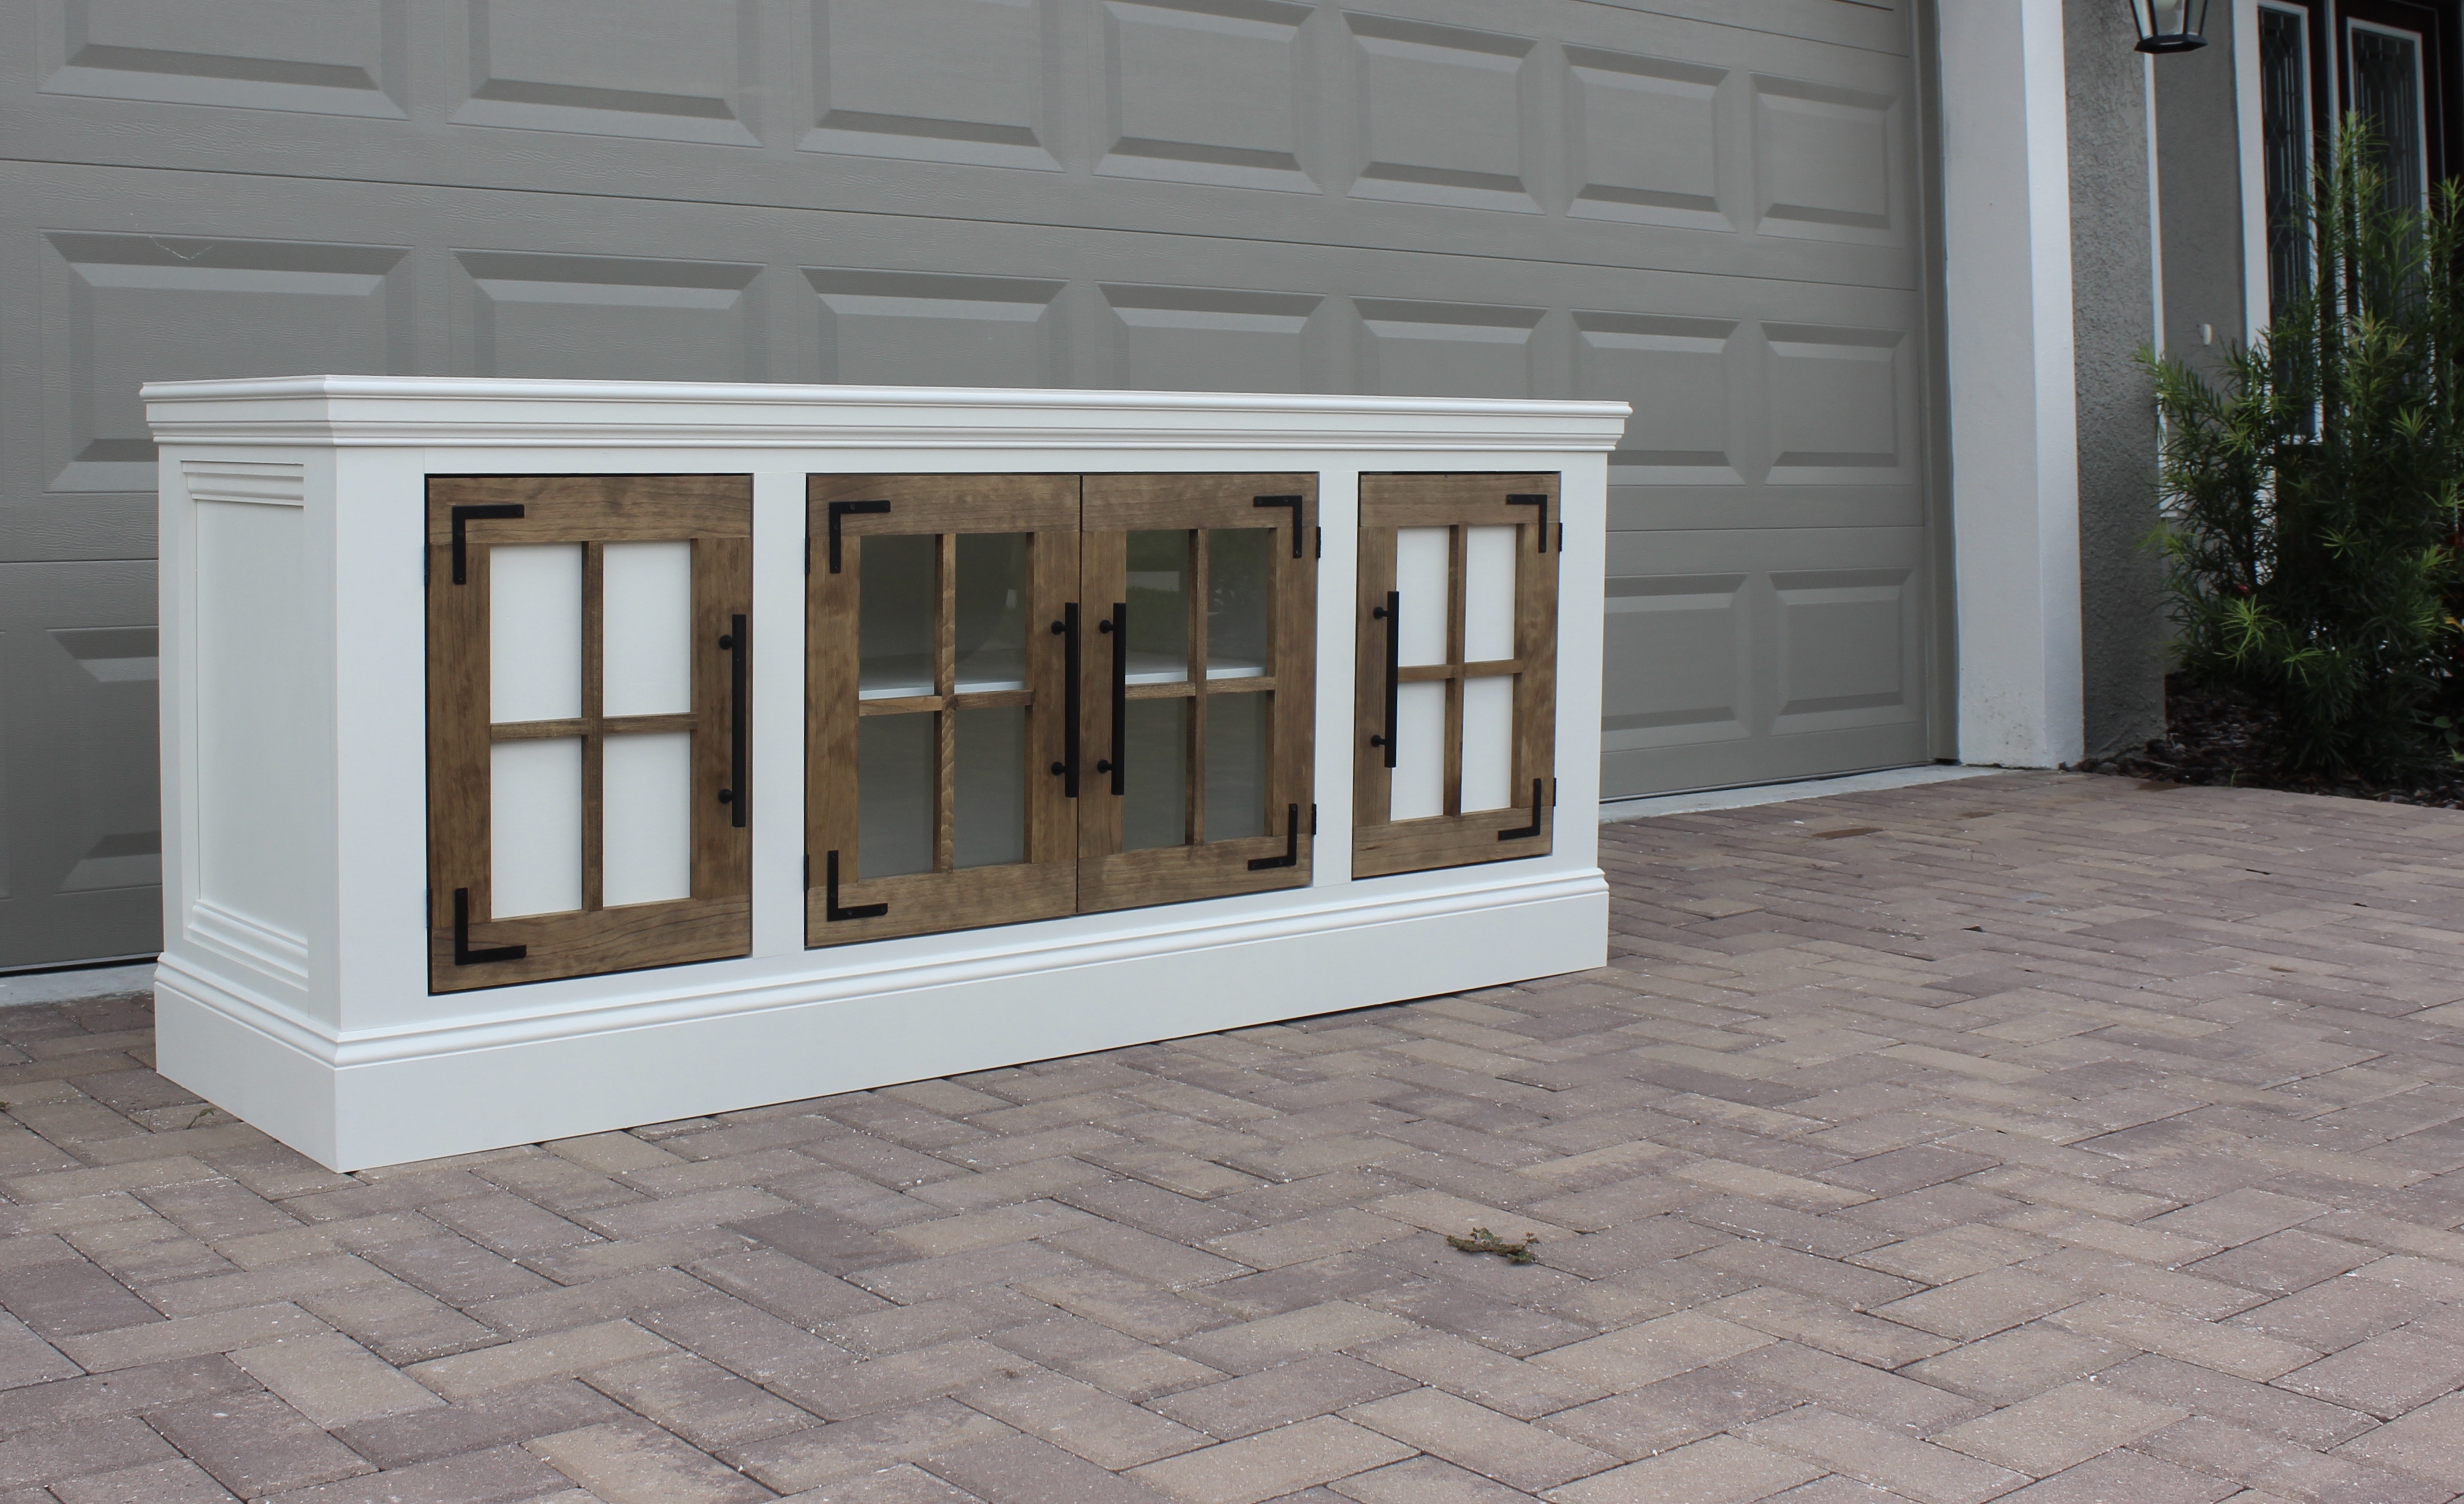
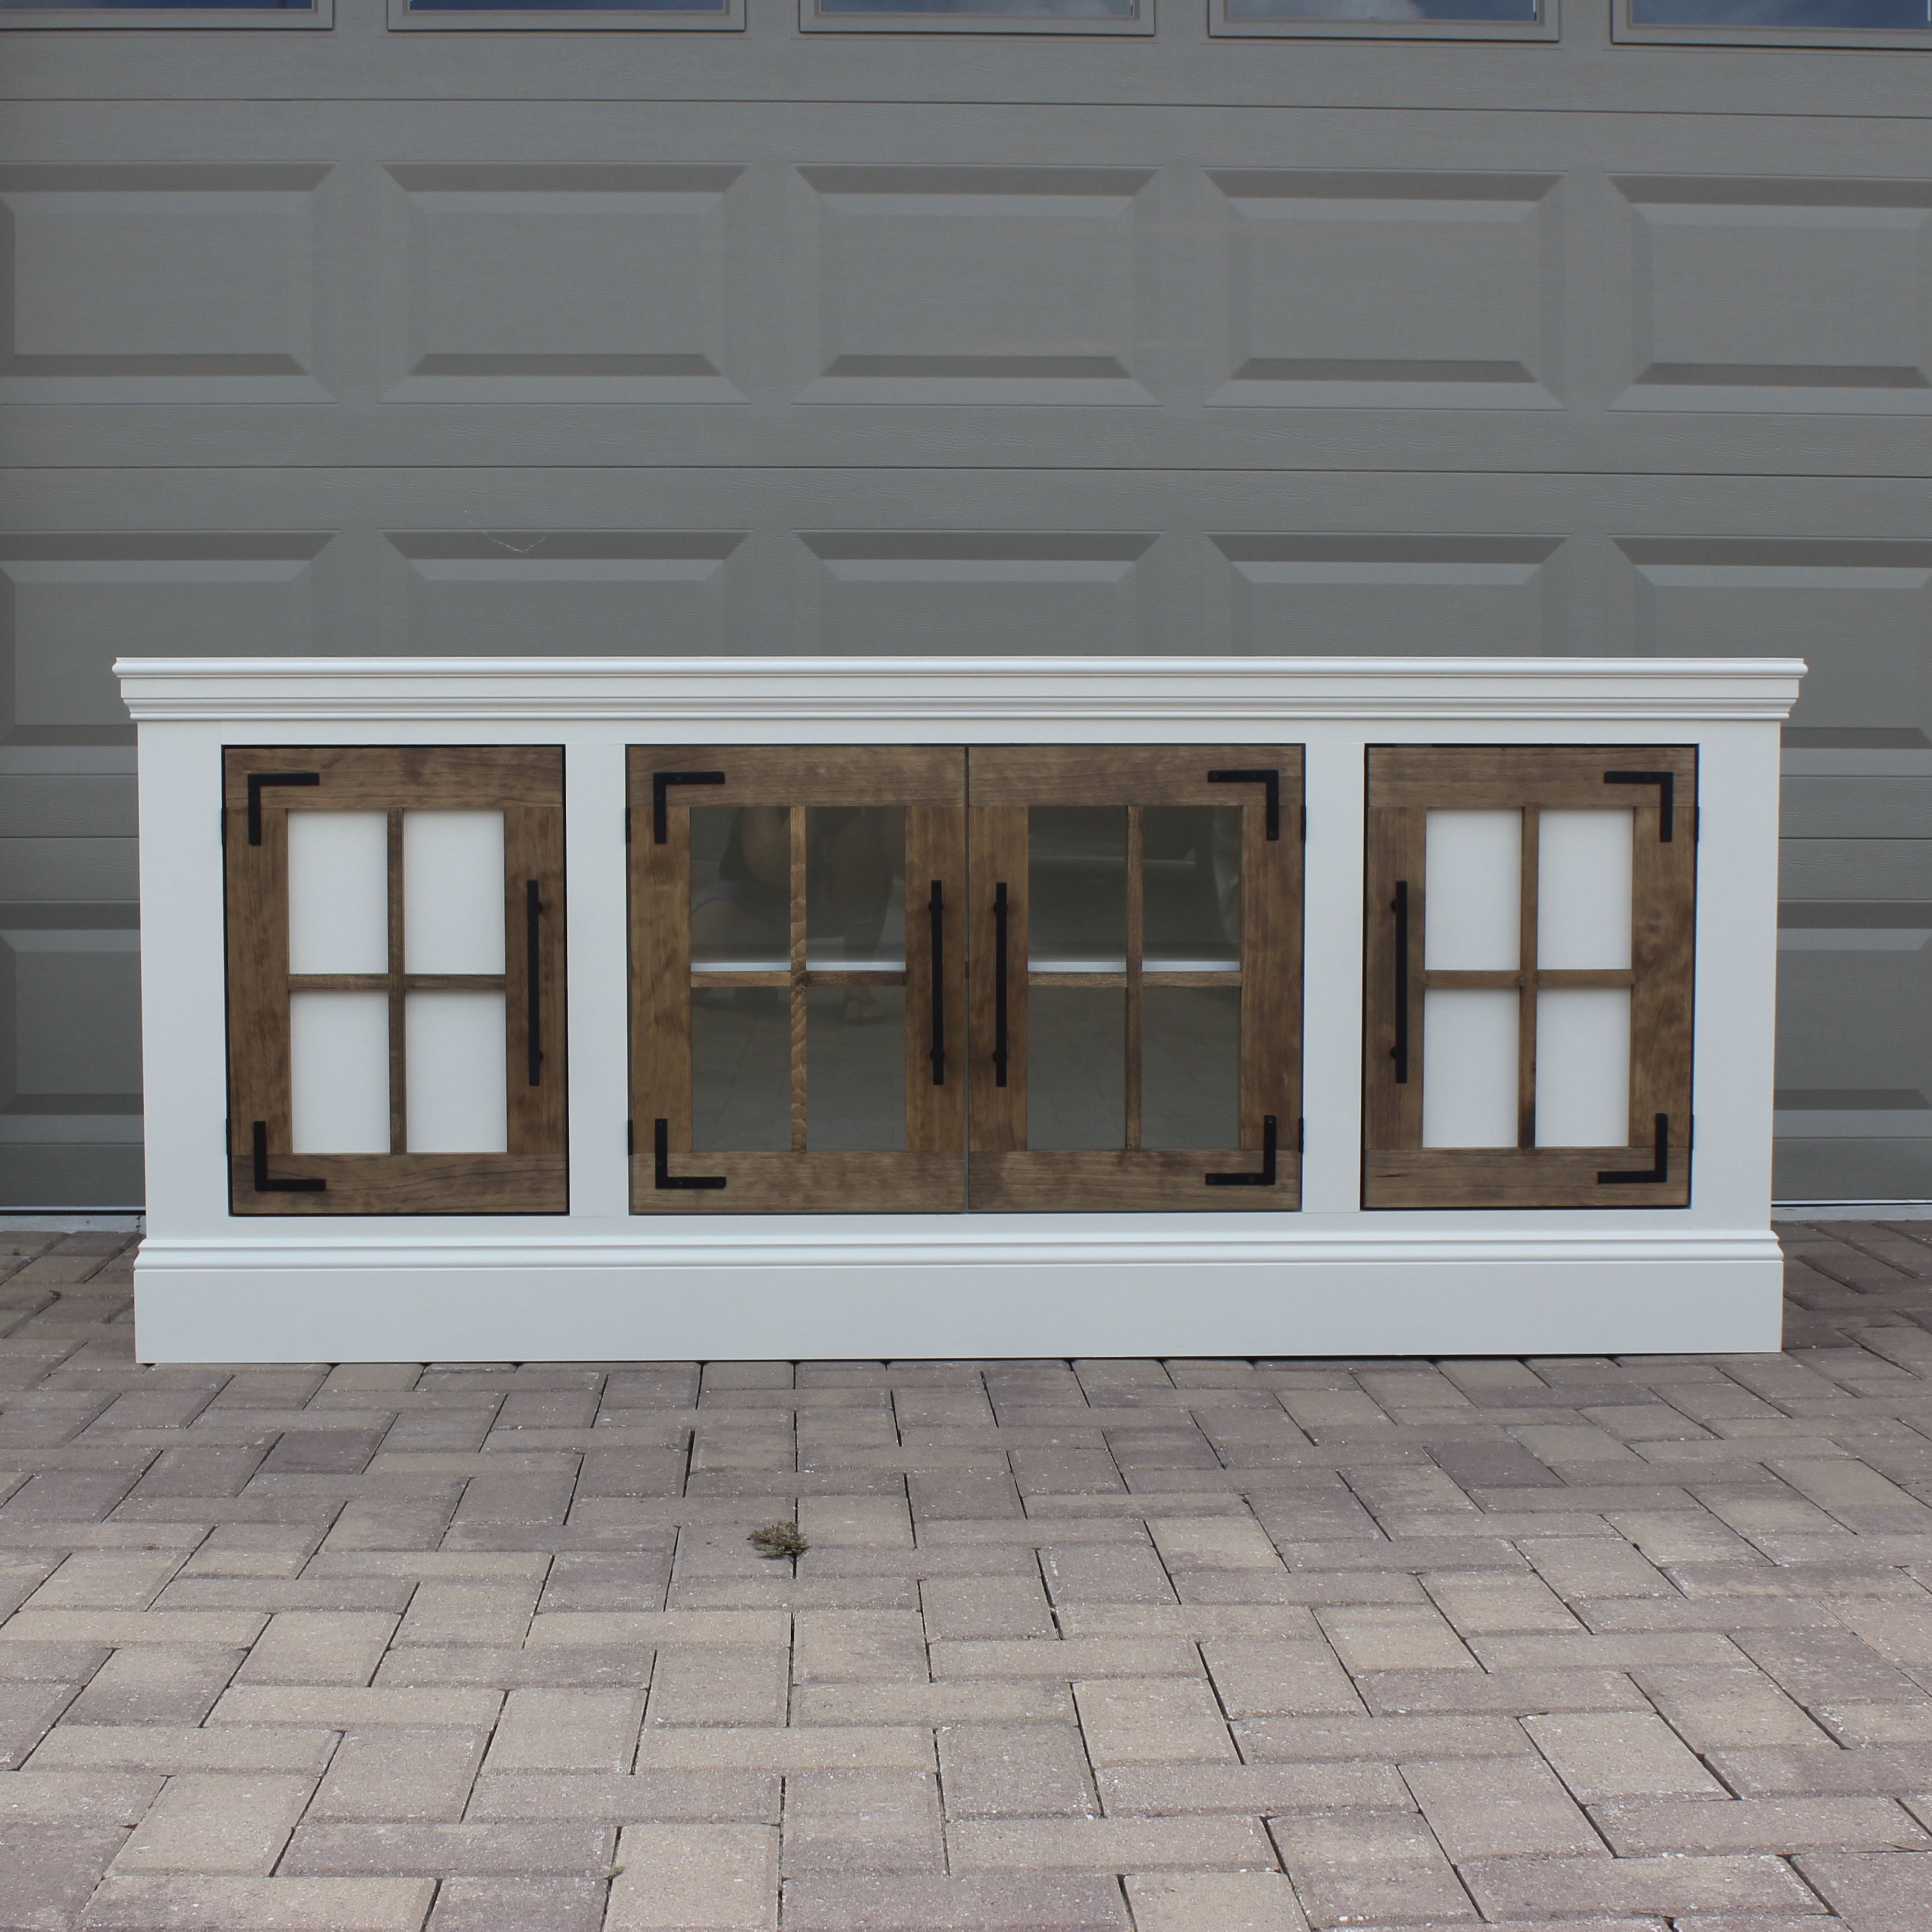
I won’t go over every single step in detail because there are so many steps in building something like this. I’m going to share the major highlights and any little tips/tricks I learned along the way. The detailed plans that I linked above are great to follow for the nitty gritty. I’m just sharing my rendition. And for reference I customized the overall size of this one to be 70″ wide, 30″ tall and 20″ deep.
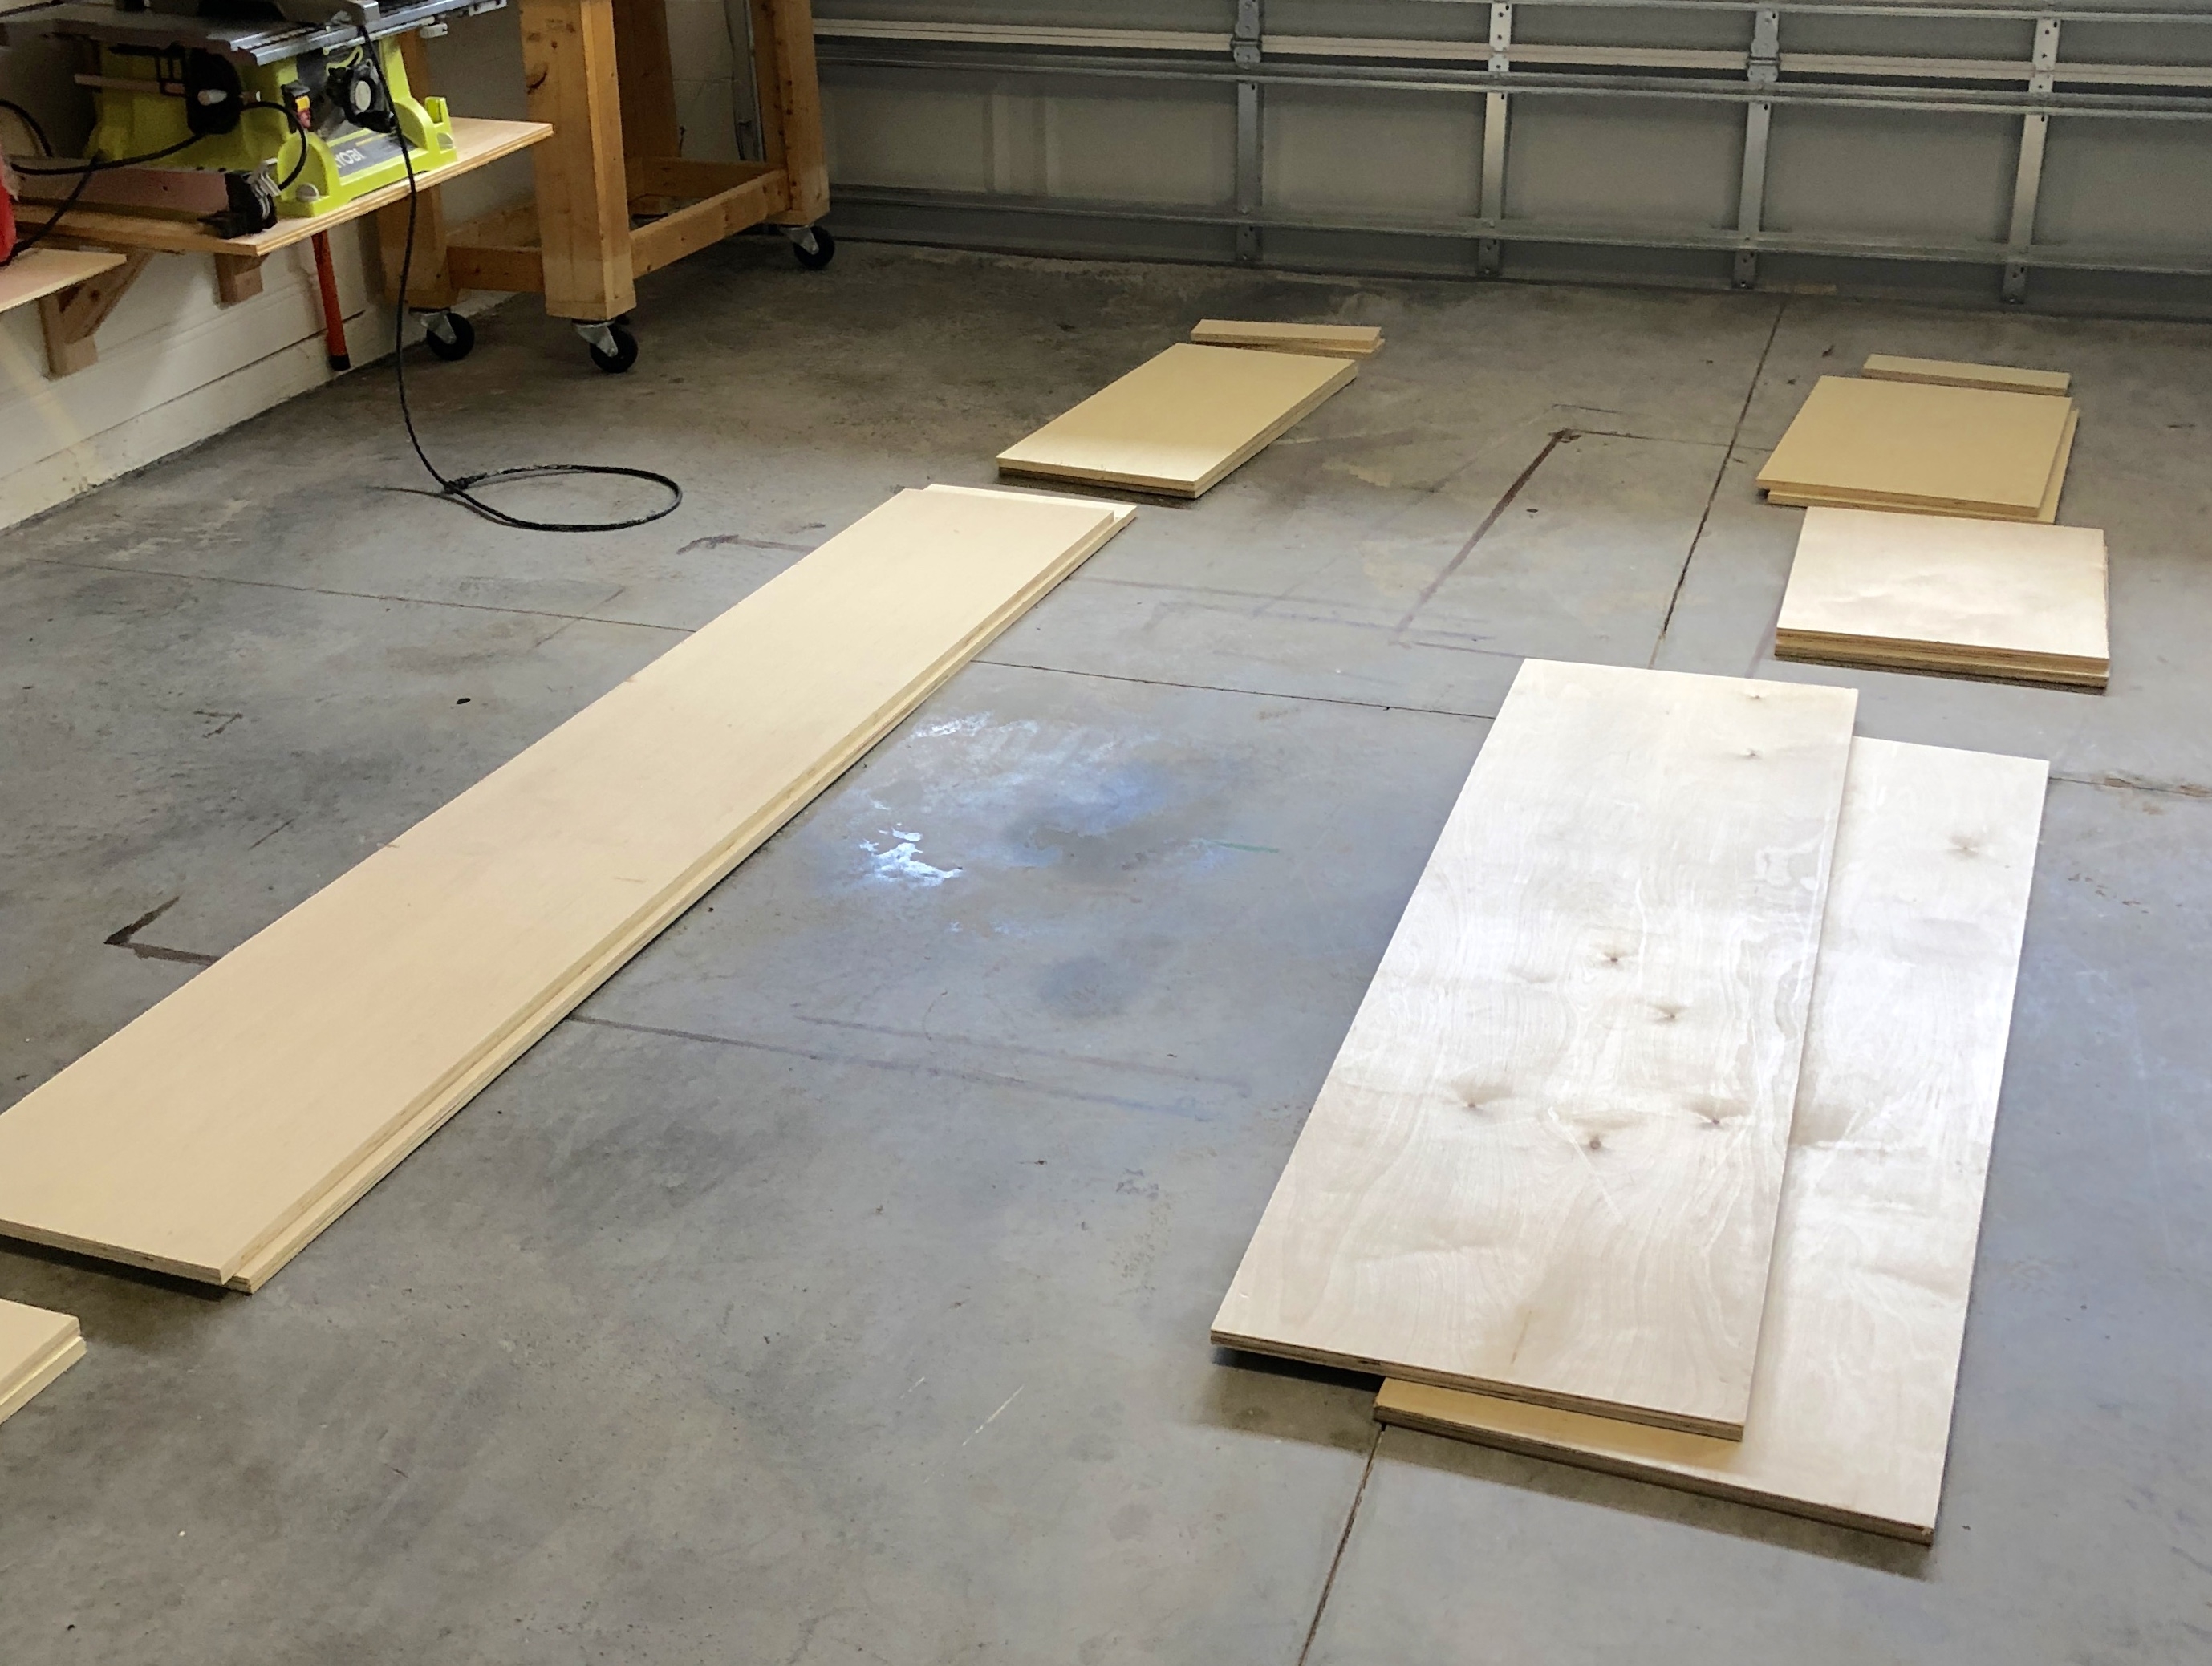
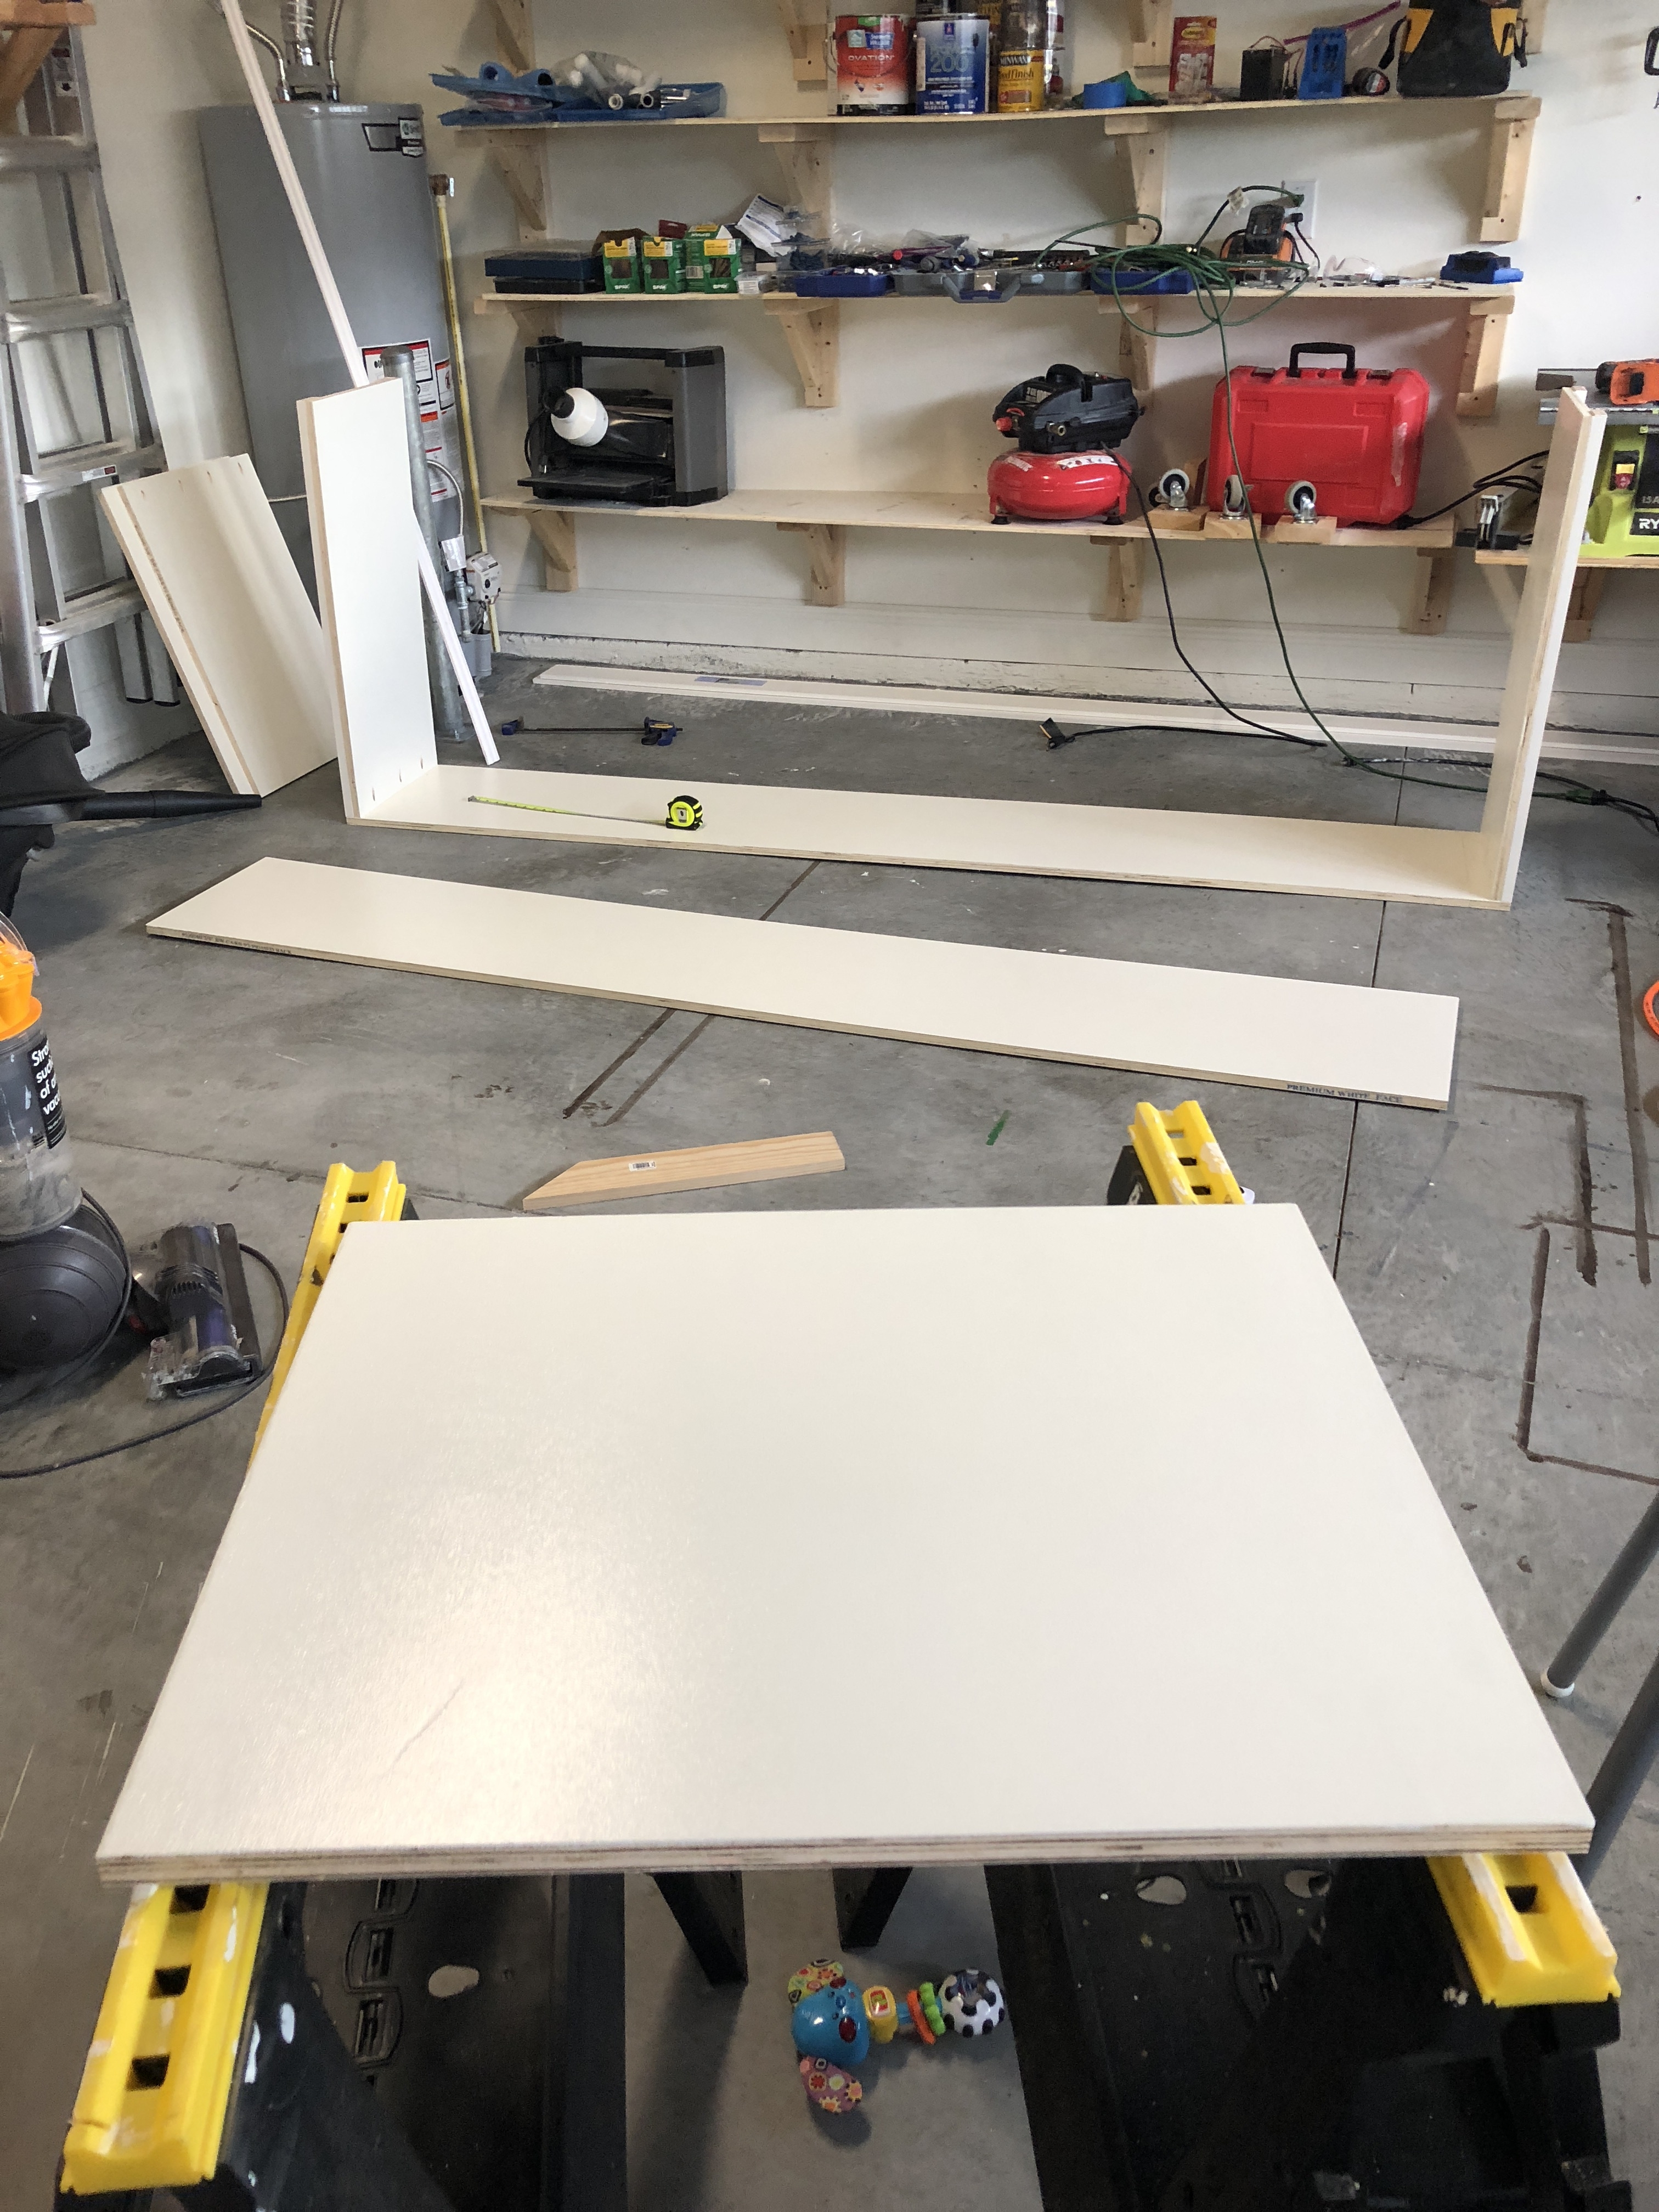
Contrary to either of the plans websites, I like painting all of my wood pieces before assembly. It’s totally personal preference but I just find it easier than trying to paint in all the nooks and crannies at the end. So you’ll see in the pictures above and below, I cut all of the pieces for the carcass and sides, and then I painted them before assembling. For the body I use 3/4″ birchwood plywood from Lowe’s and the trim on the sides are 1×3 select pine also from Lowe’s.
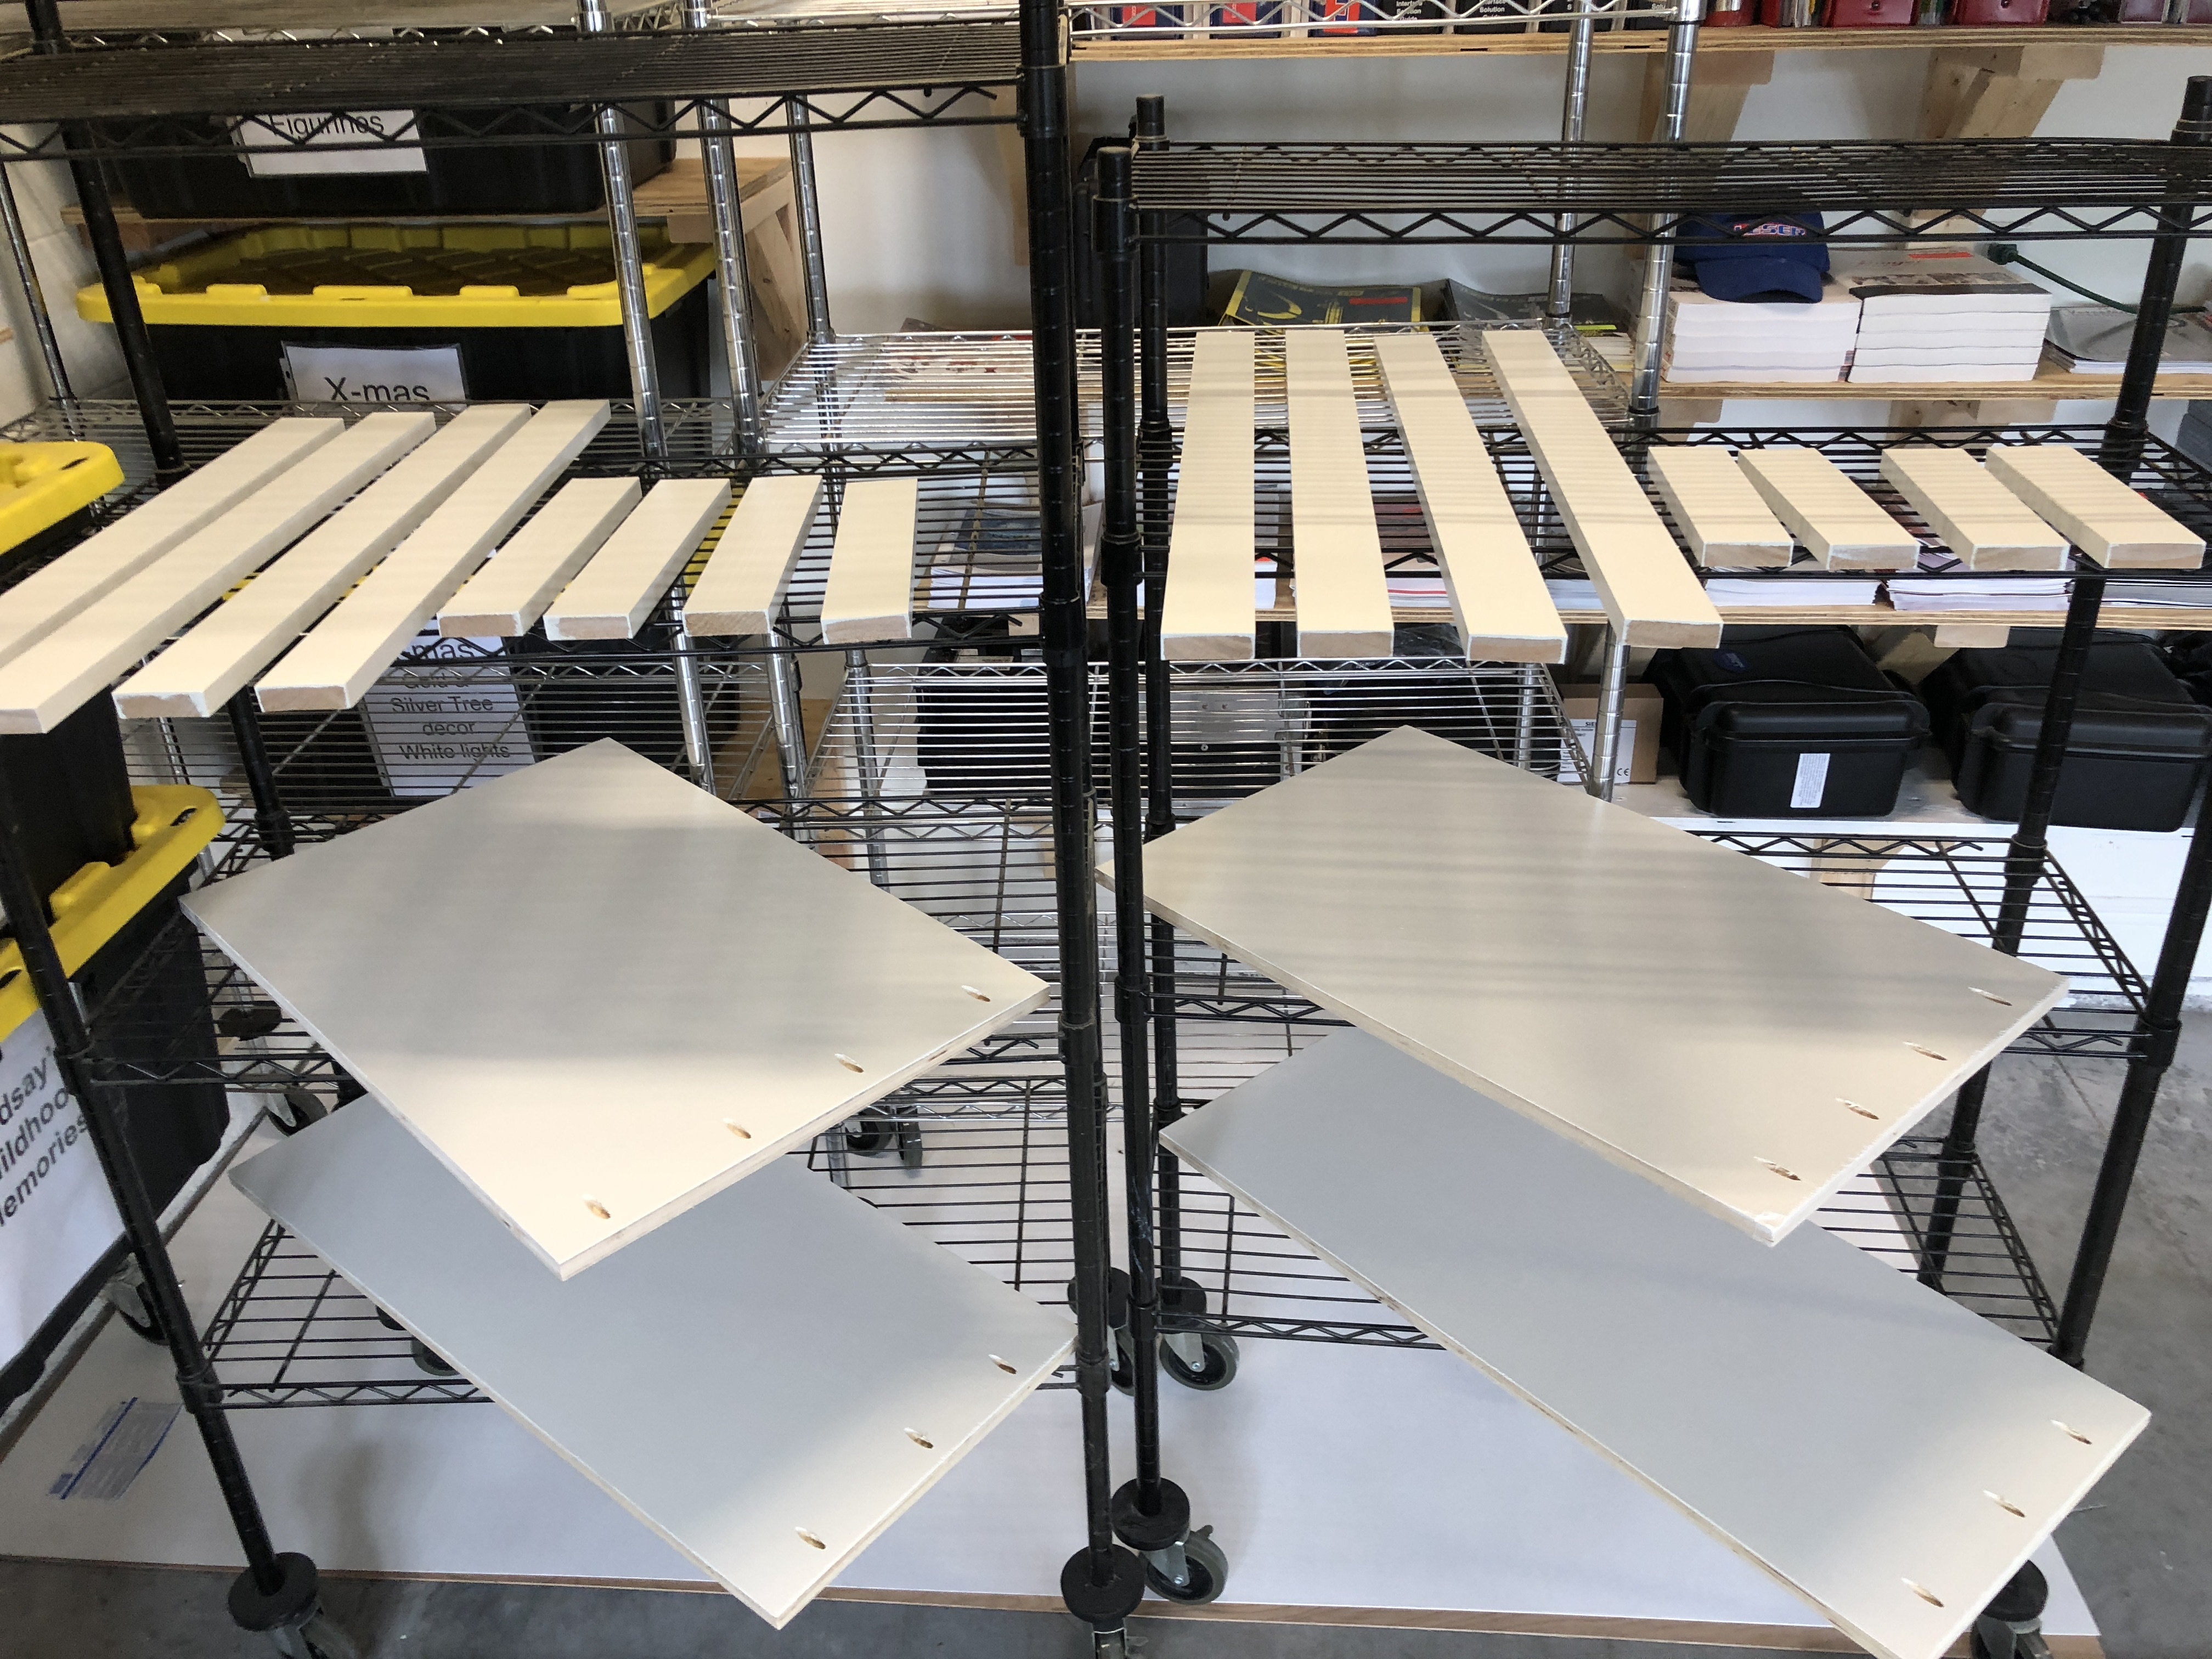
I drilled my pocket holes prior to painting as well, so that I could paint over the holes they made. I use my K5 KregJig for almost every single build and it is hands down one of my favorite tools to have!! Below are the sides of the media stand and the top and bottom.
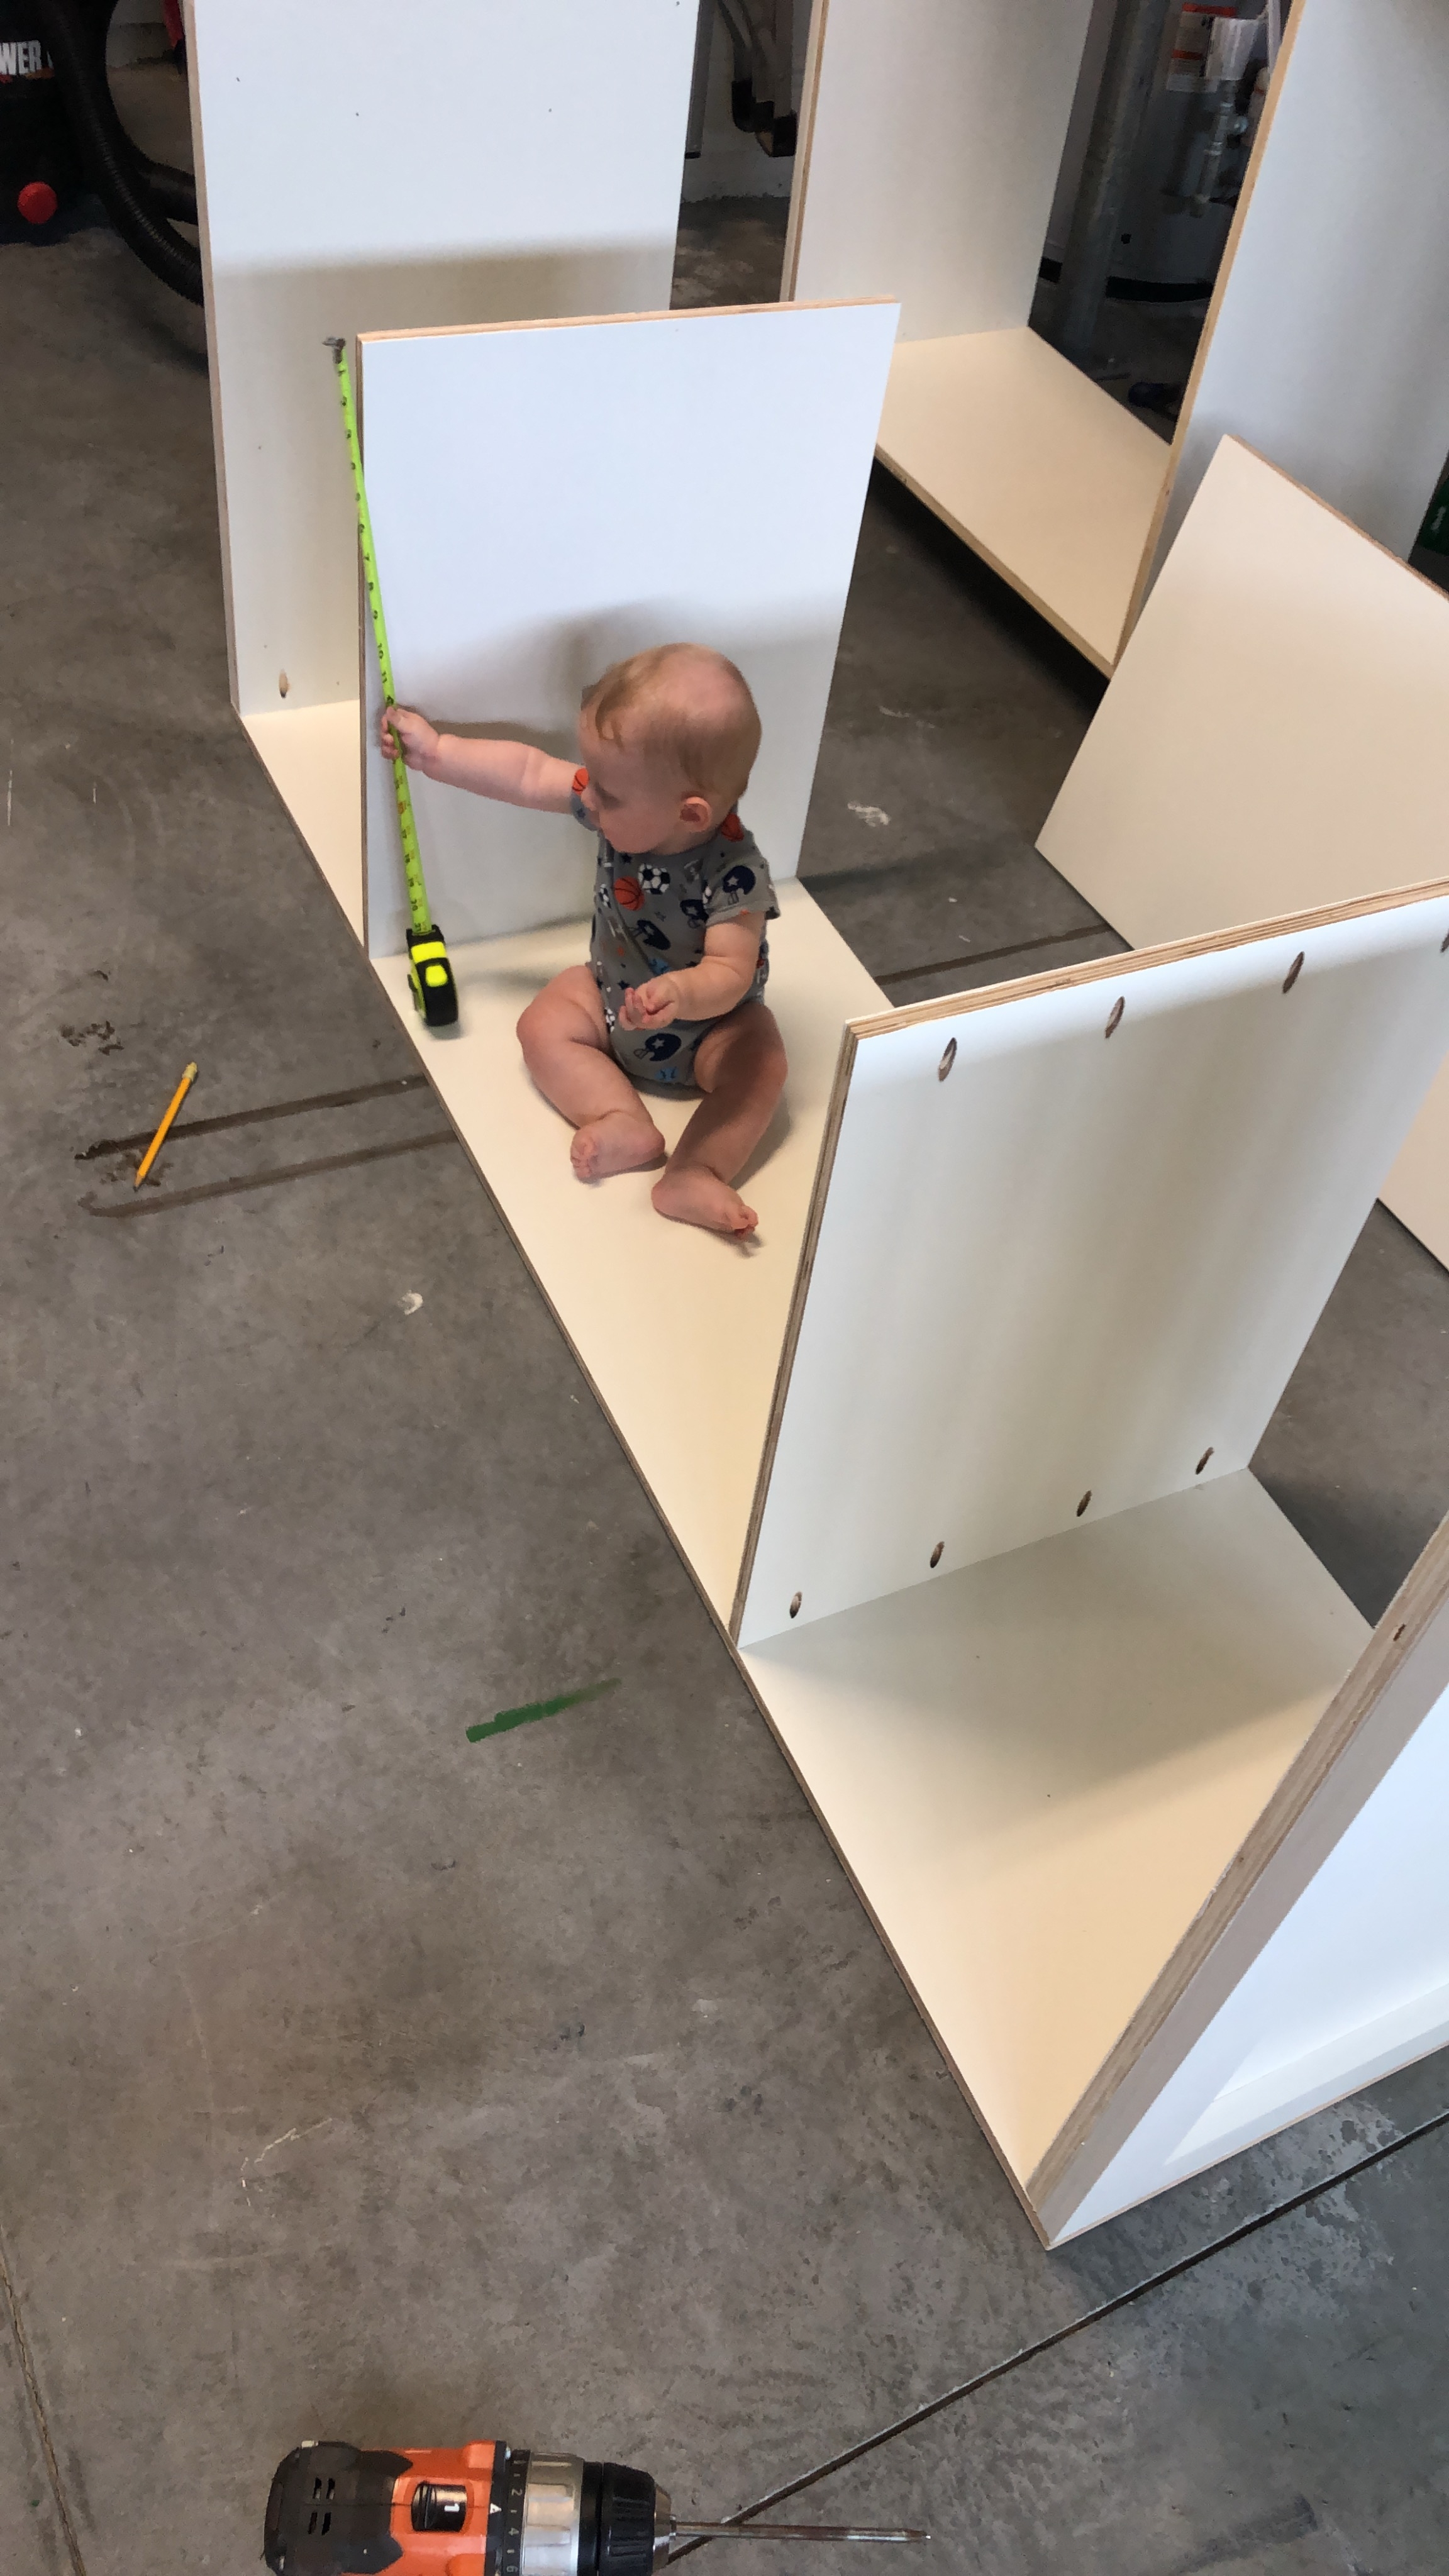
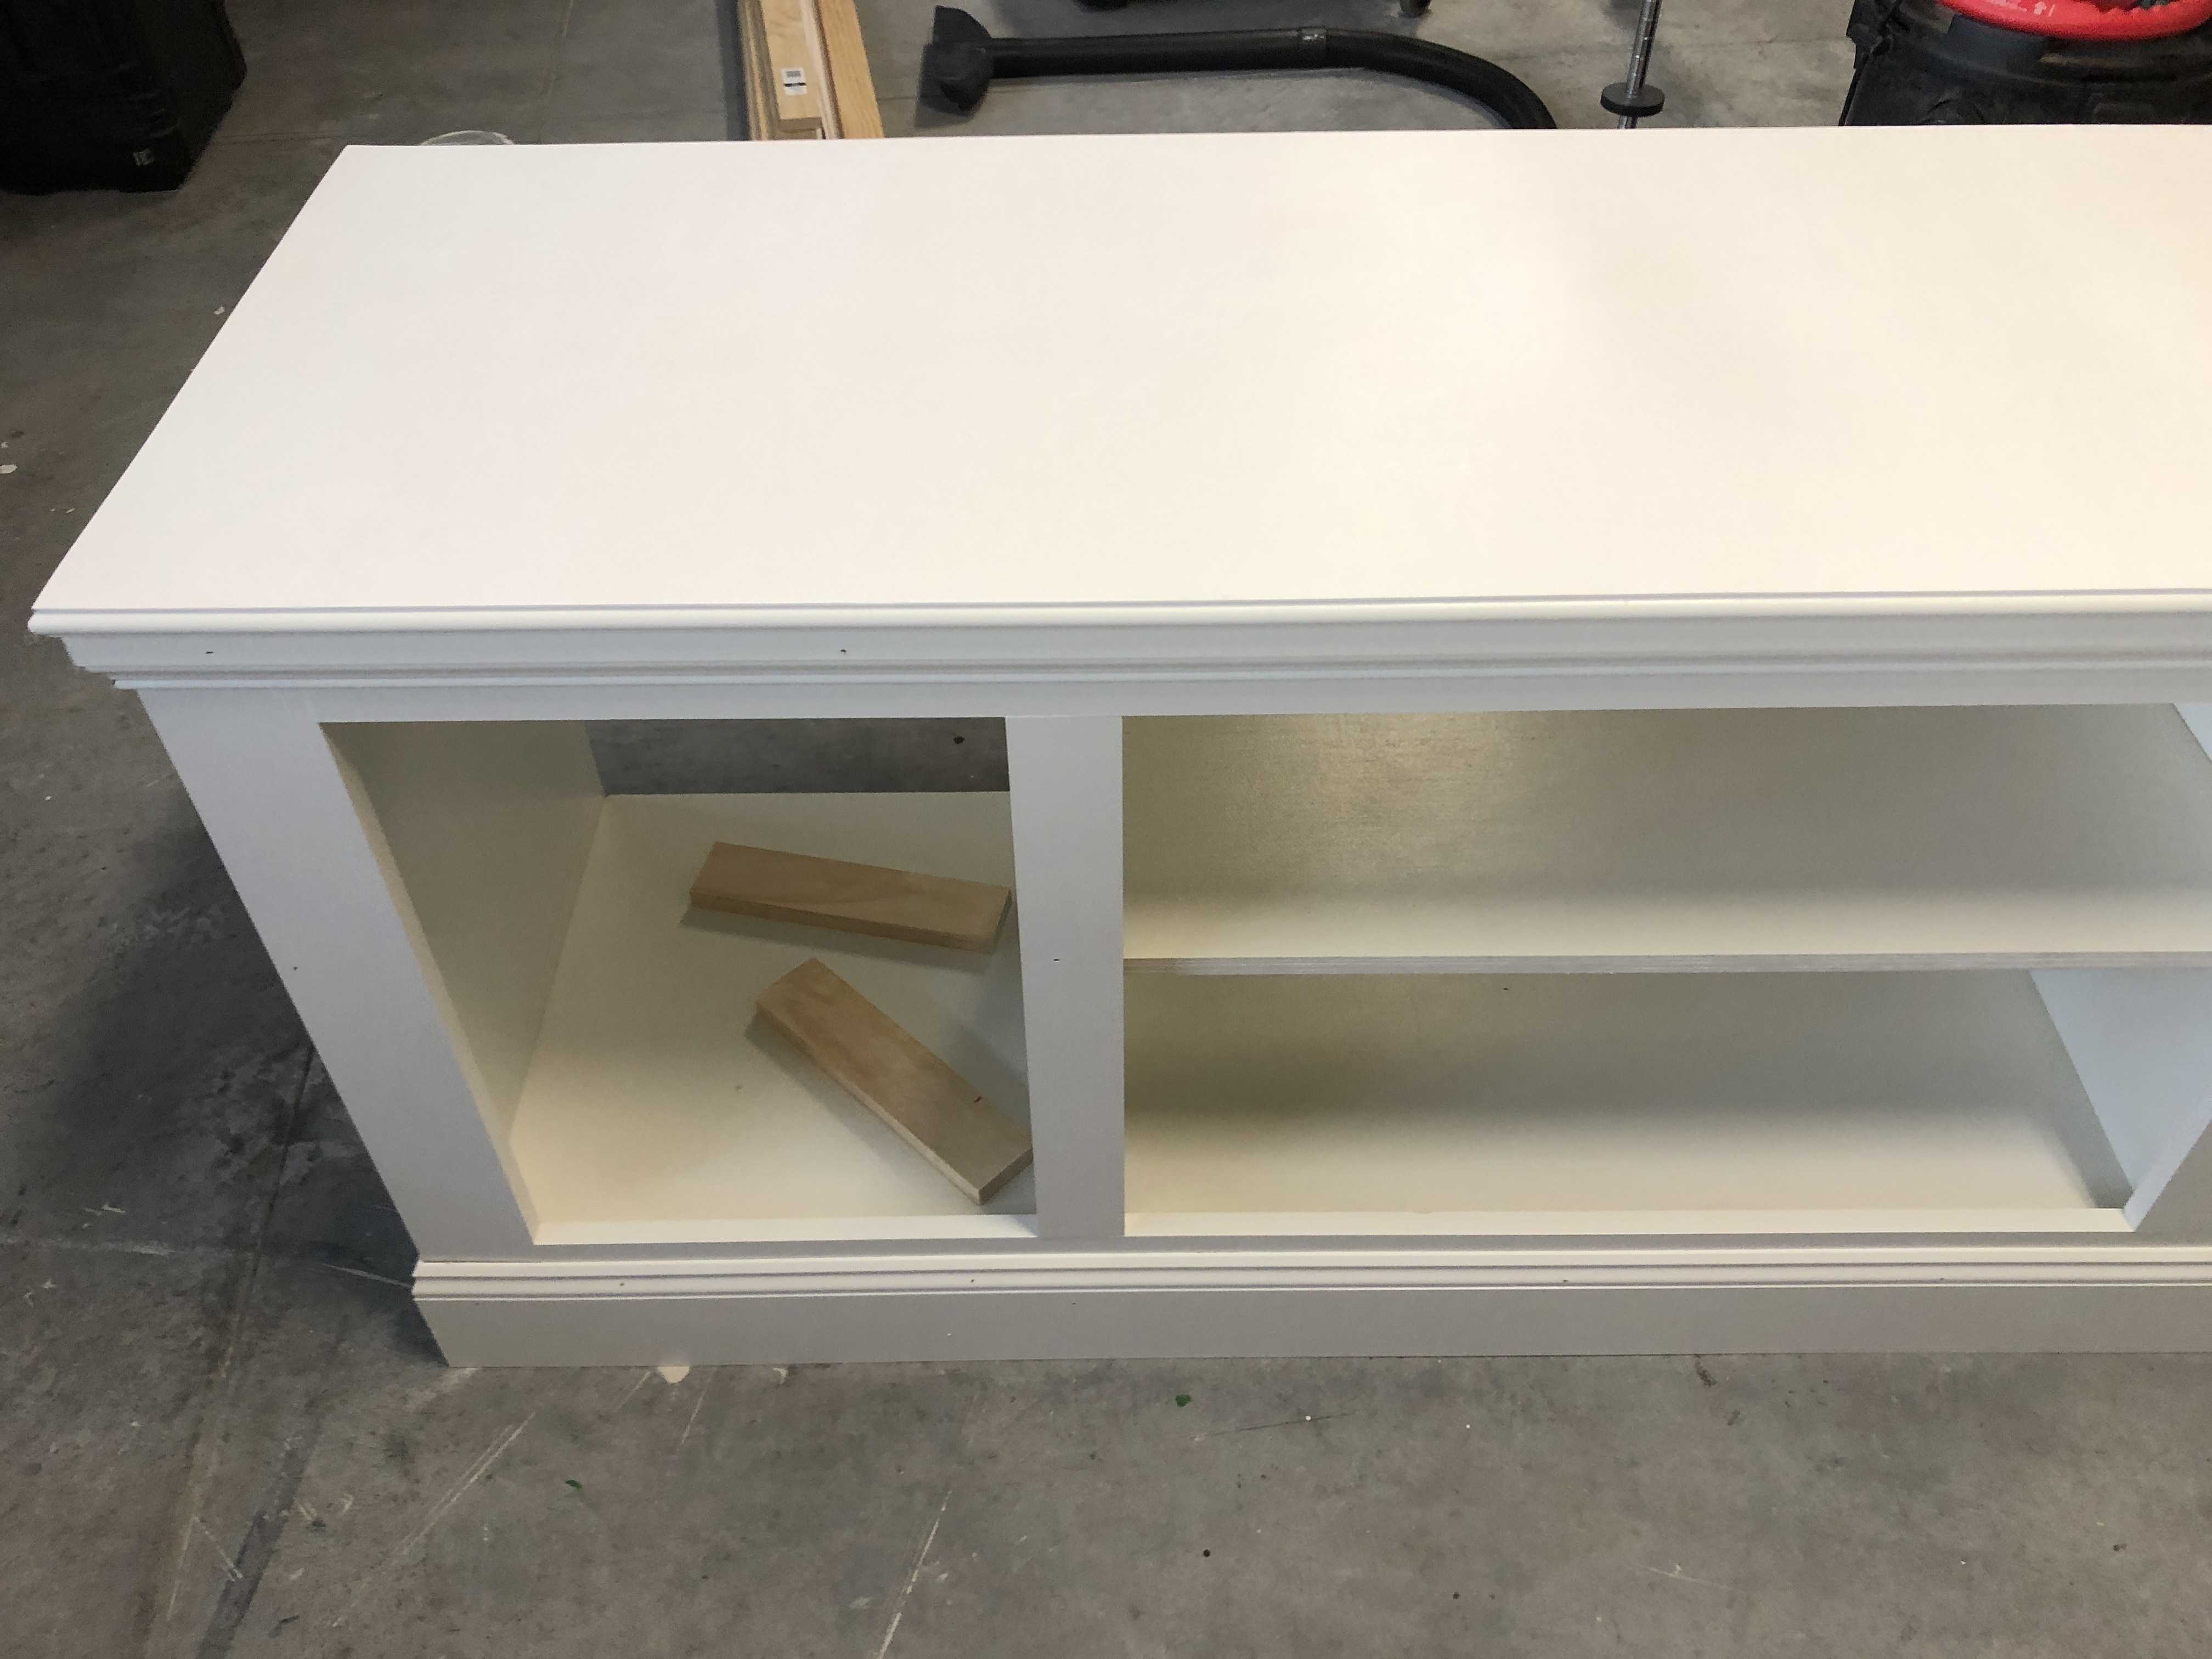
Below is the body assembly, as well as a cute little helper 🙂
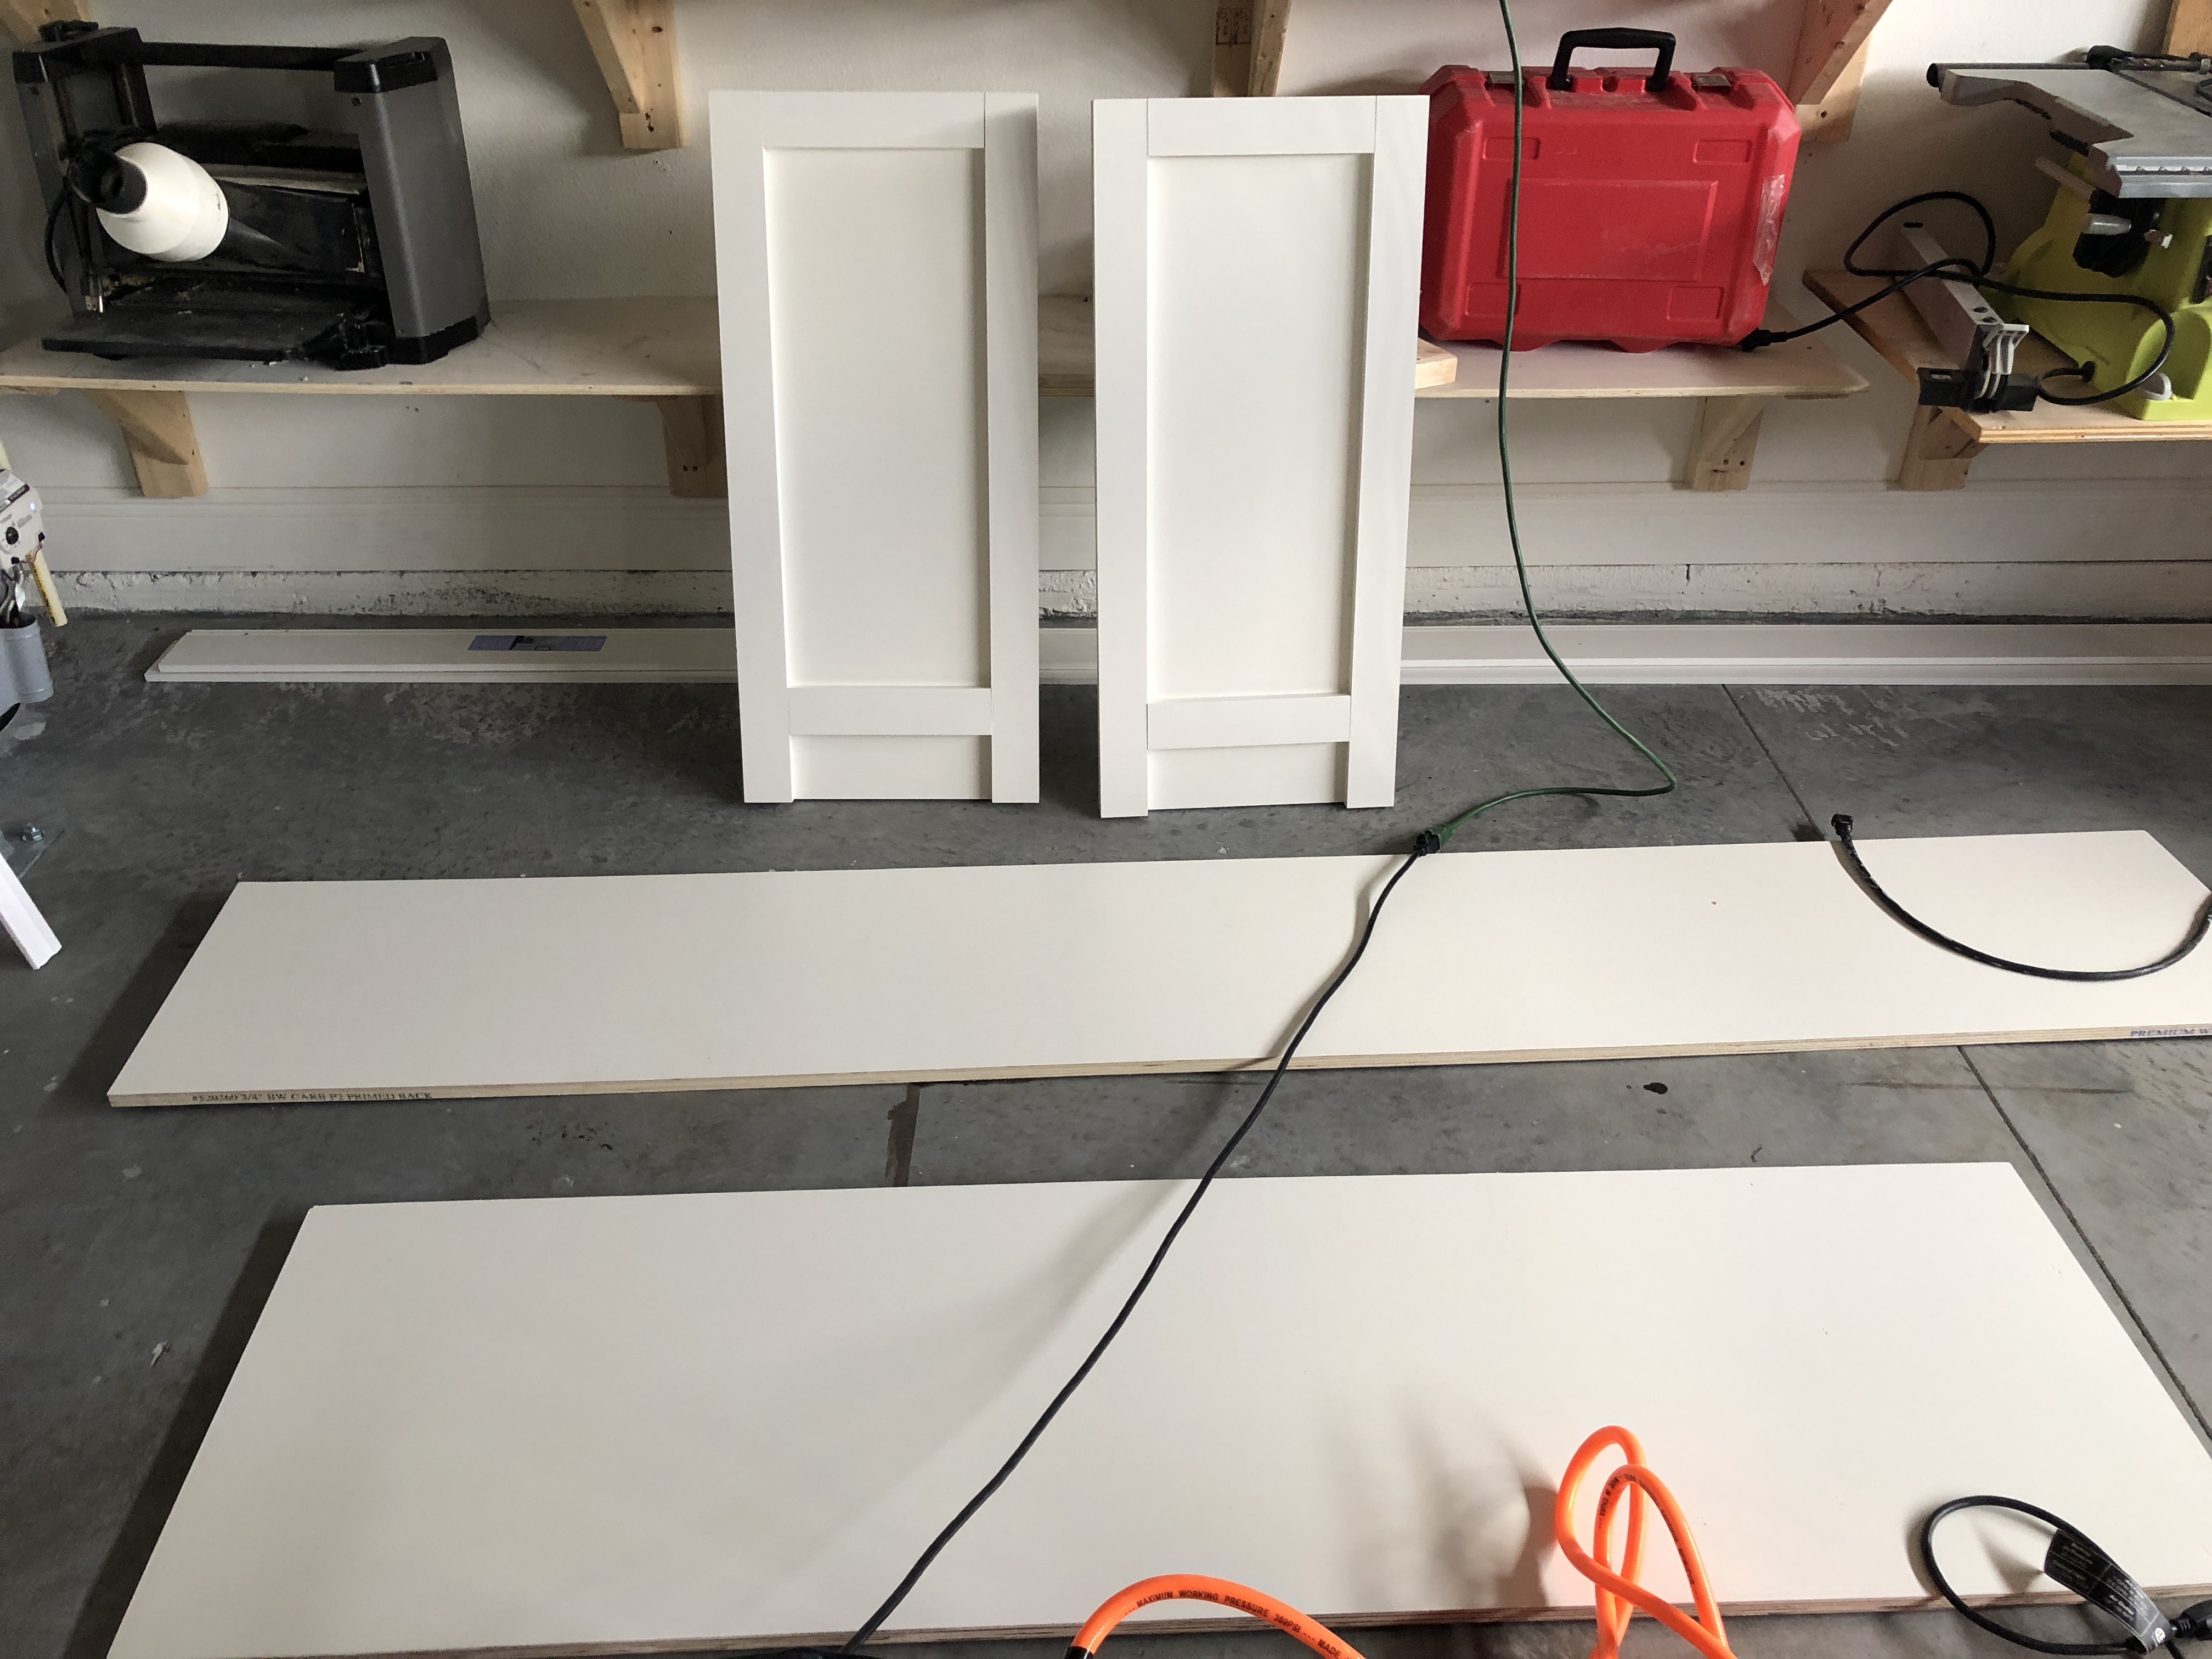
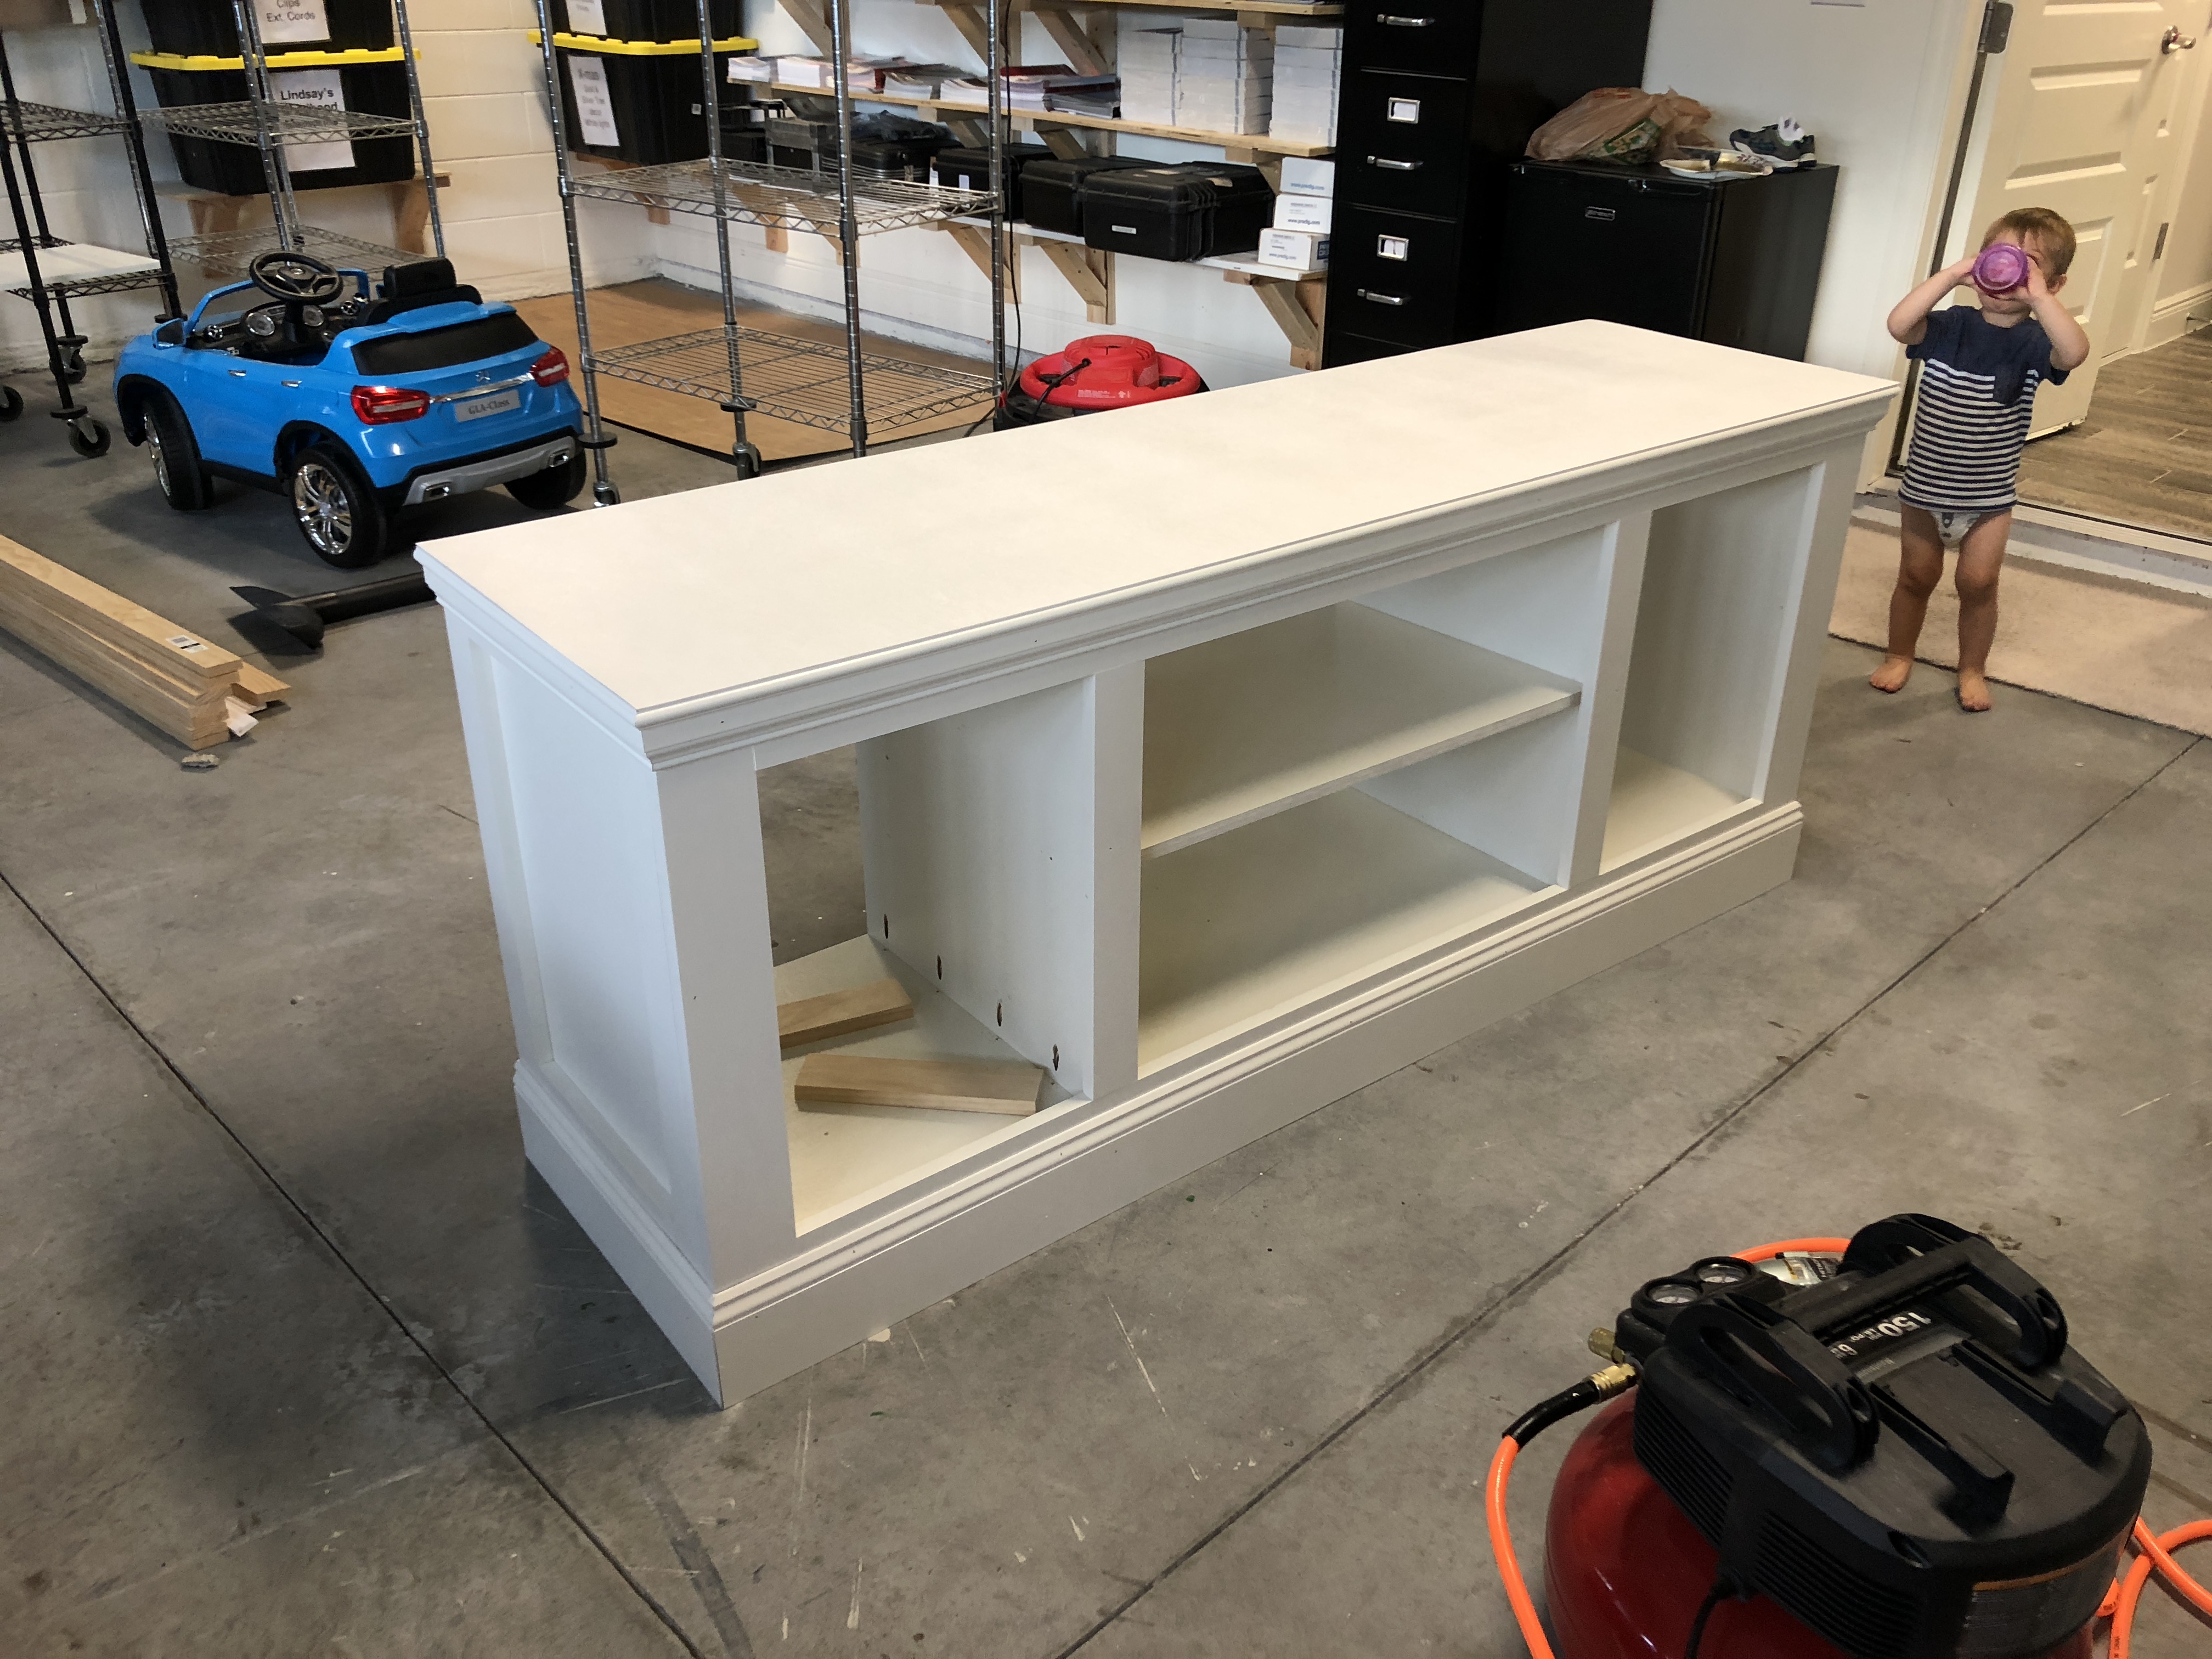
After the body is assembled, I add the face frame. The face frame is made with 1×3 and 1×4 select pine boards and attached together with my kregjig. I then attach it to the body with finishing nails and my nail gun.
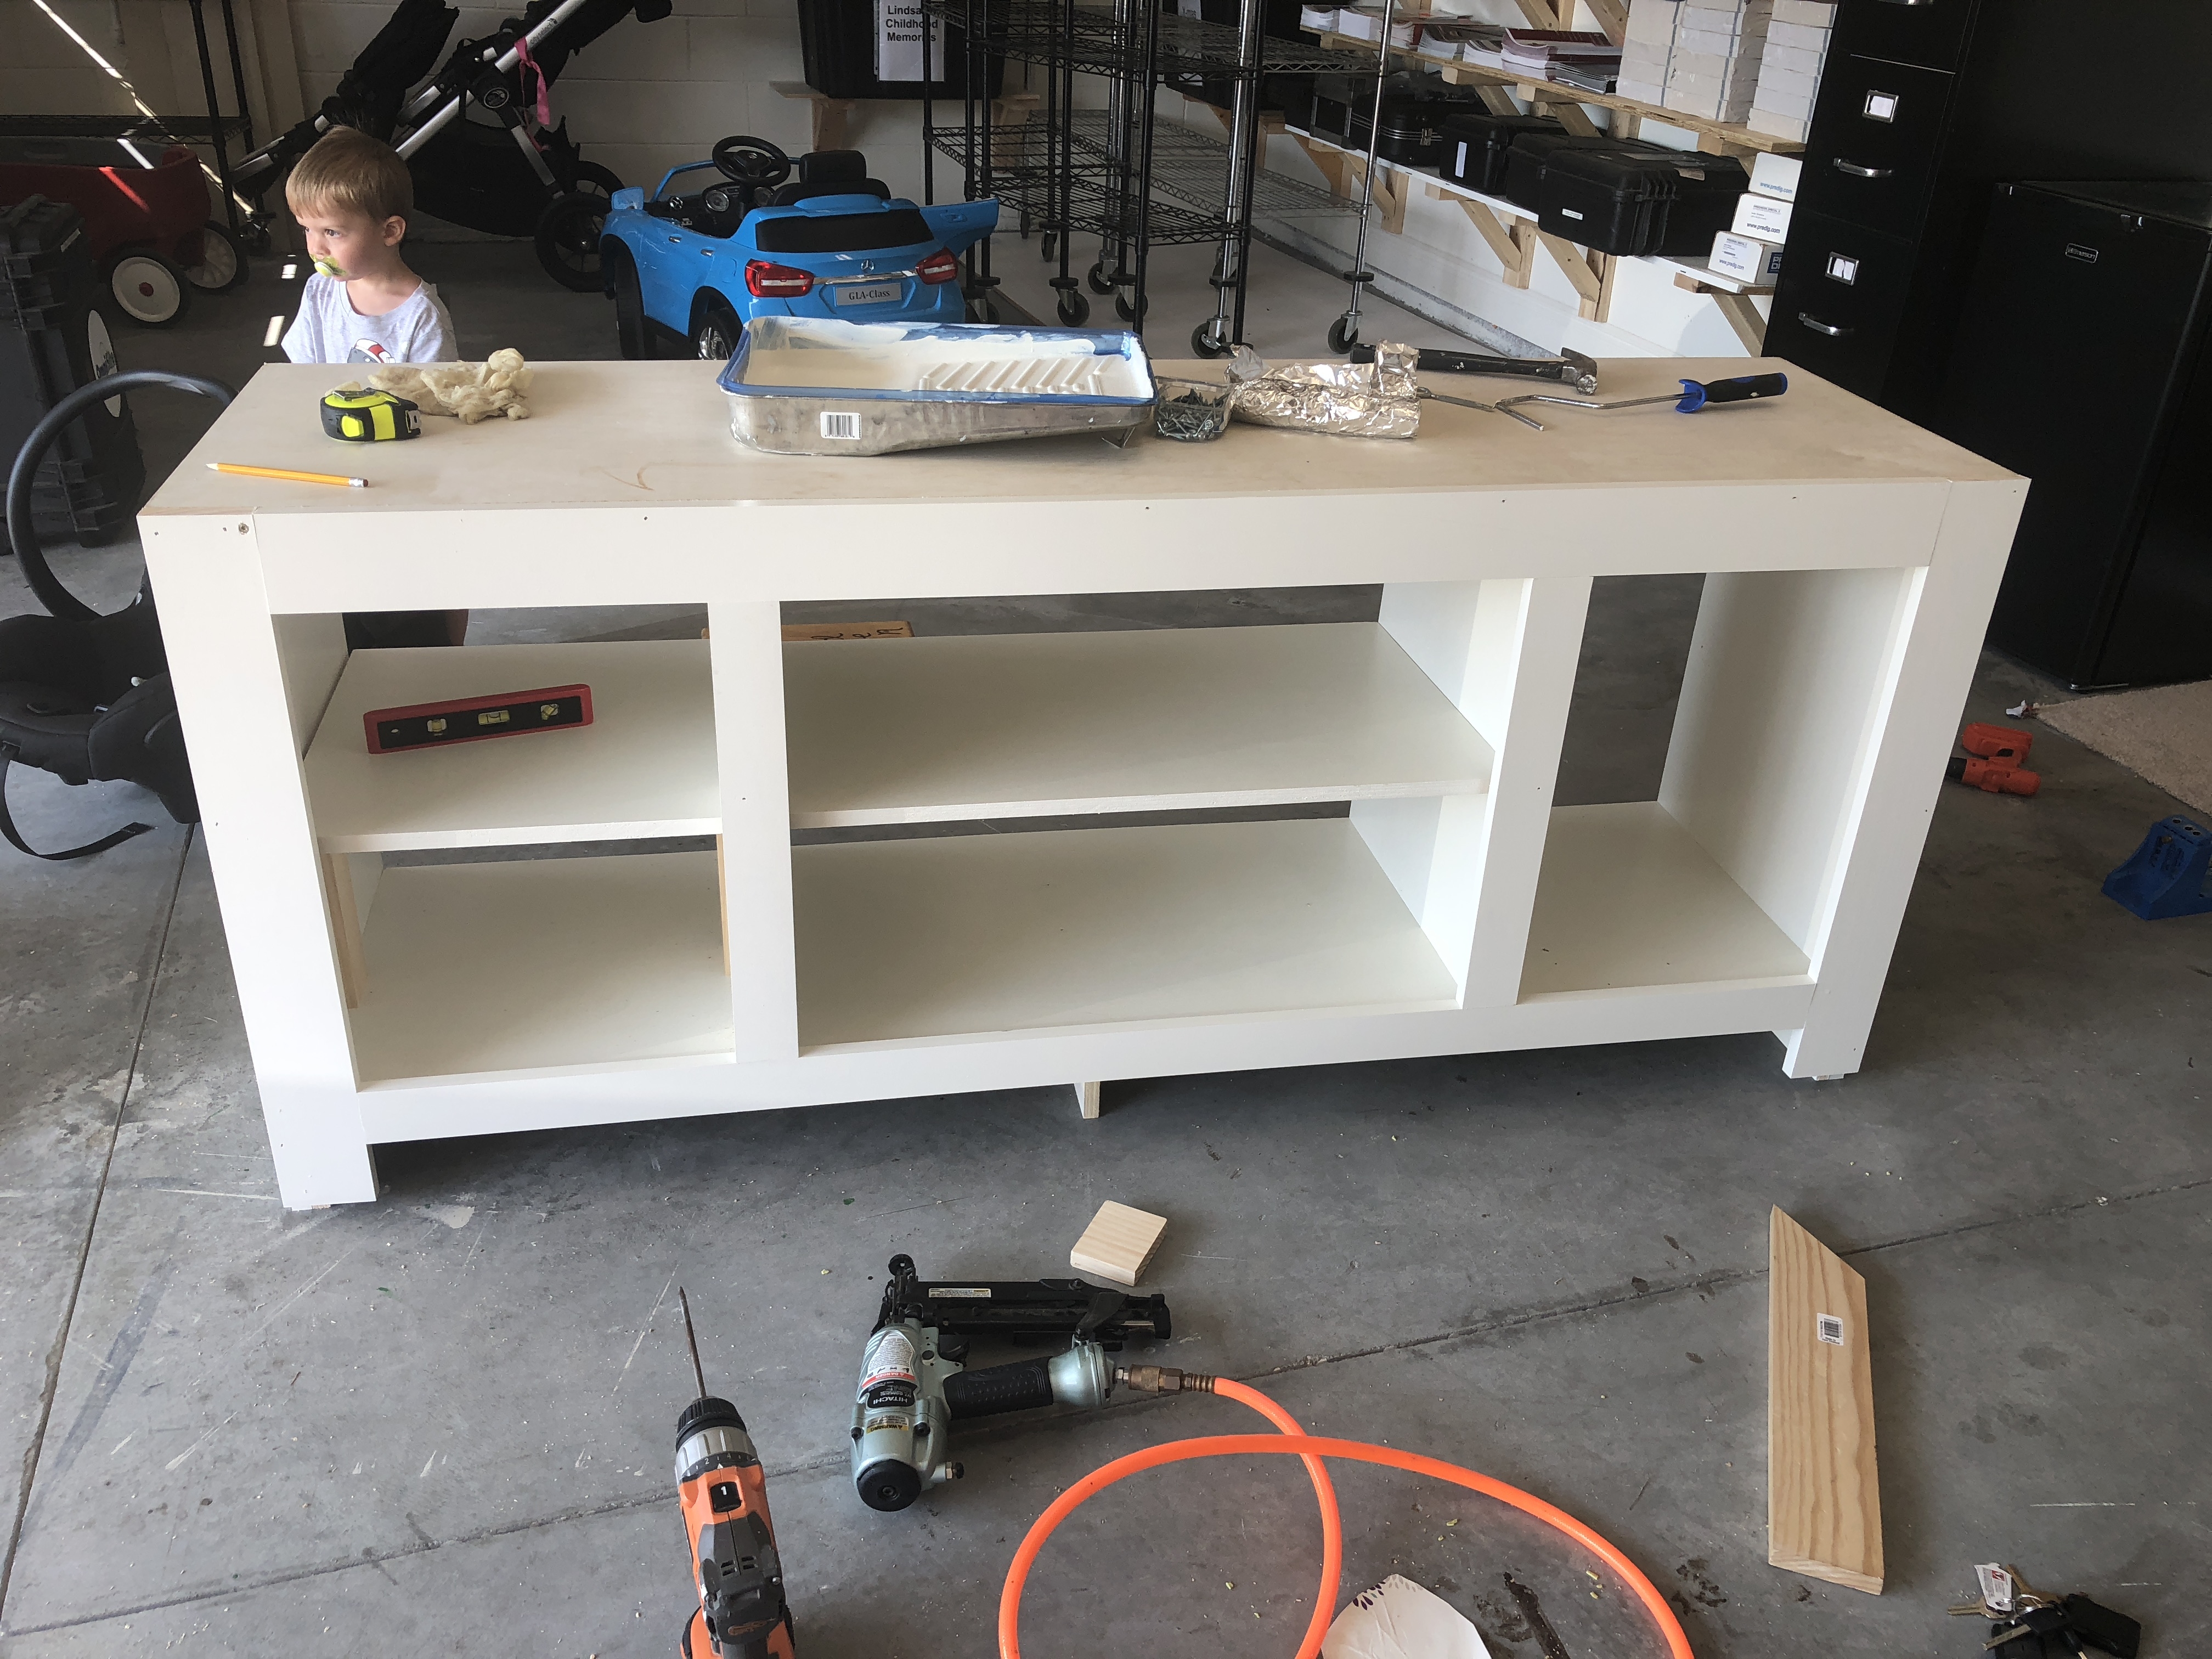
After the face frame is on I add decorative molding to the top and bottom. This is where you can personalize the piece and make it your own. I used the same exact baseboard on the bottom of the sideboard that I have in my house. It’s 5.25″ baseboard molding and the top is this chair rail molding from Lowe’s.
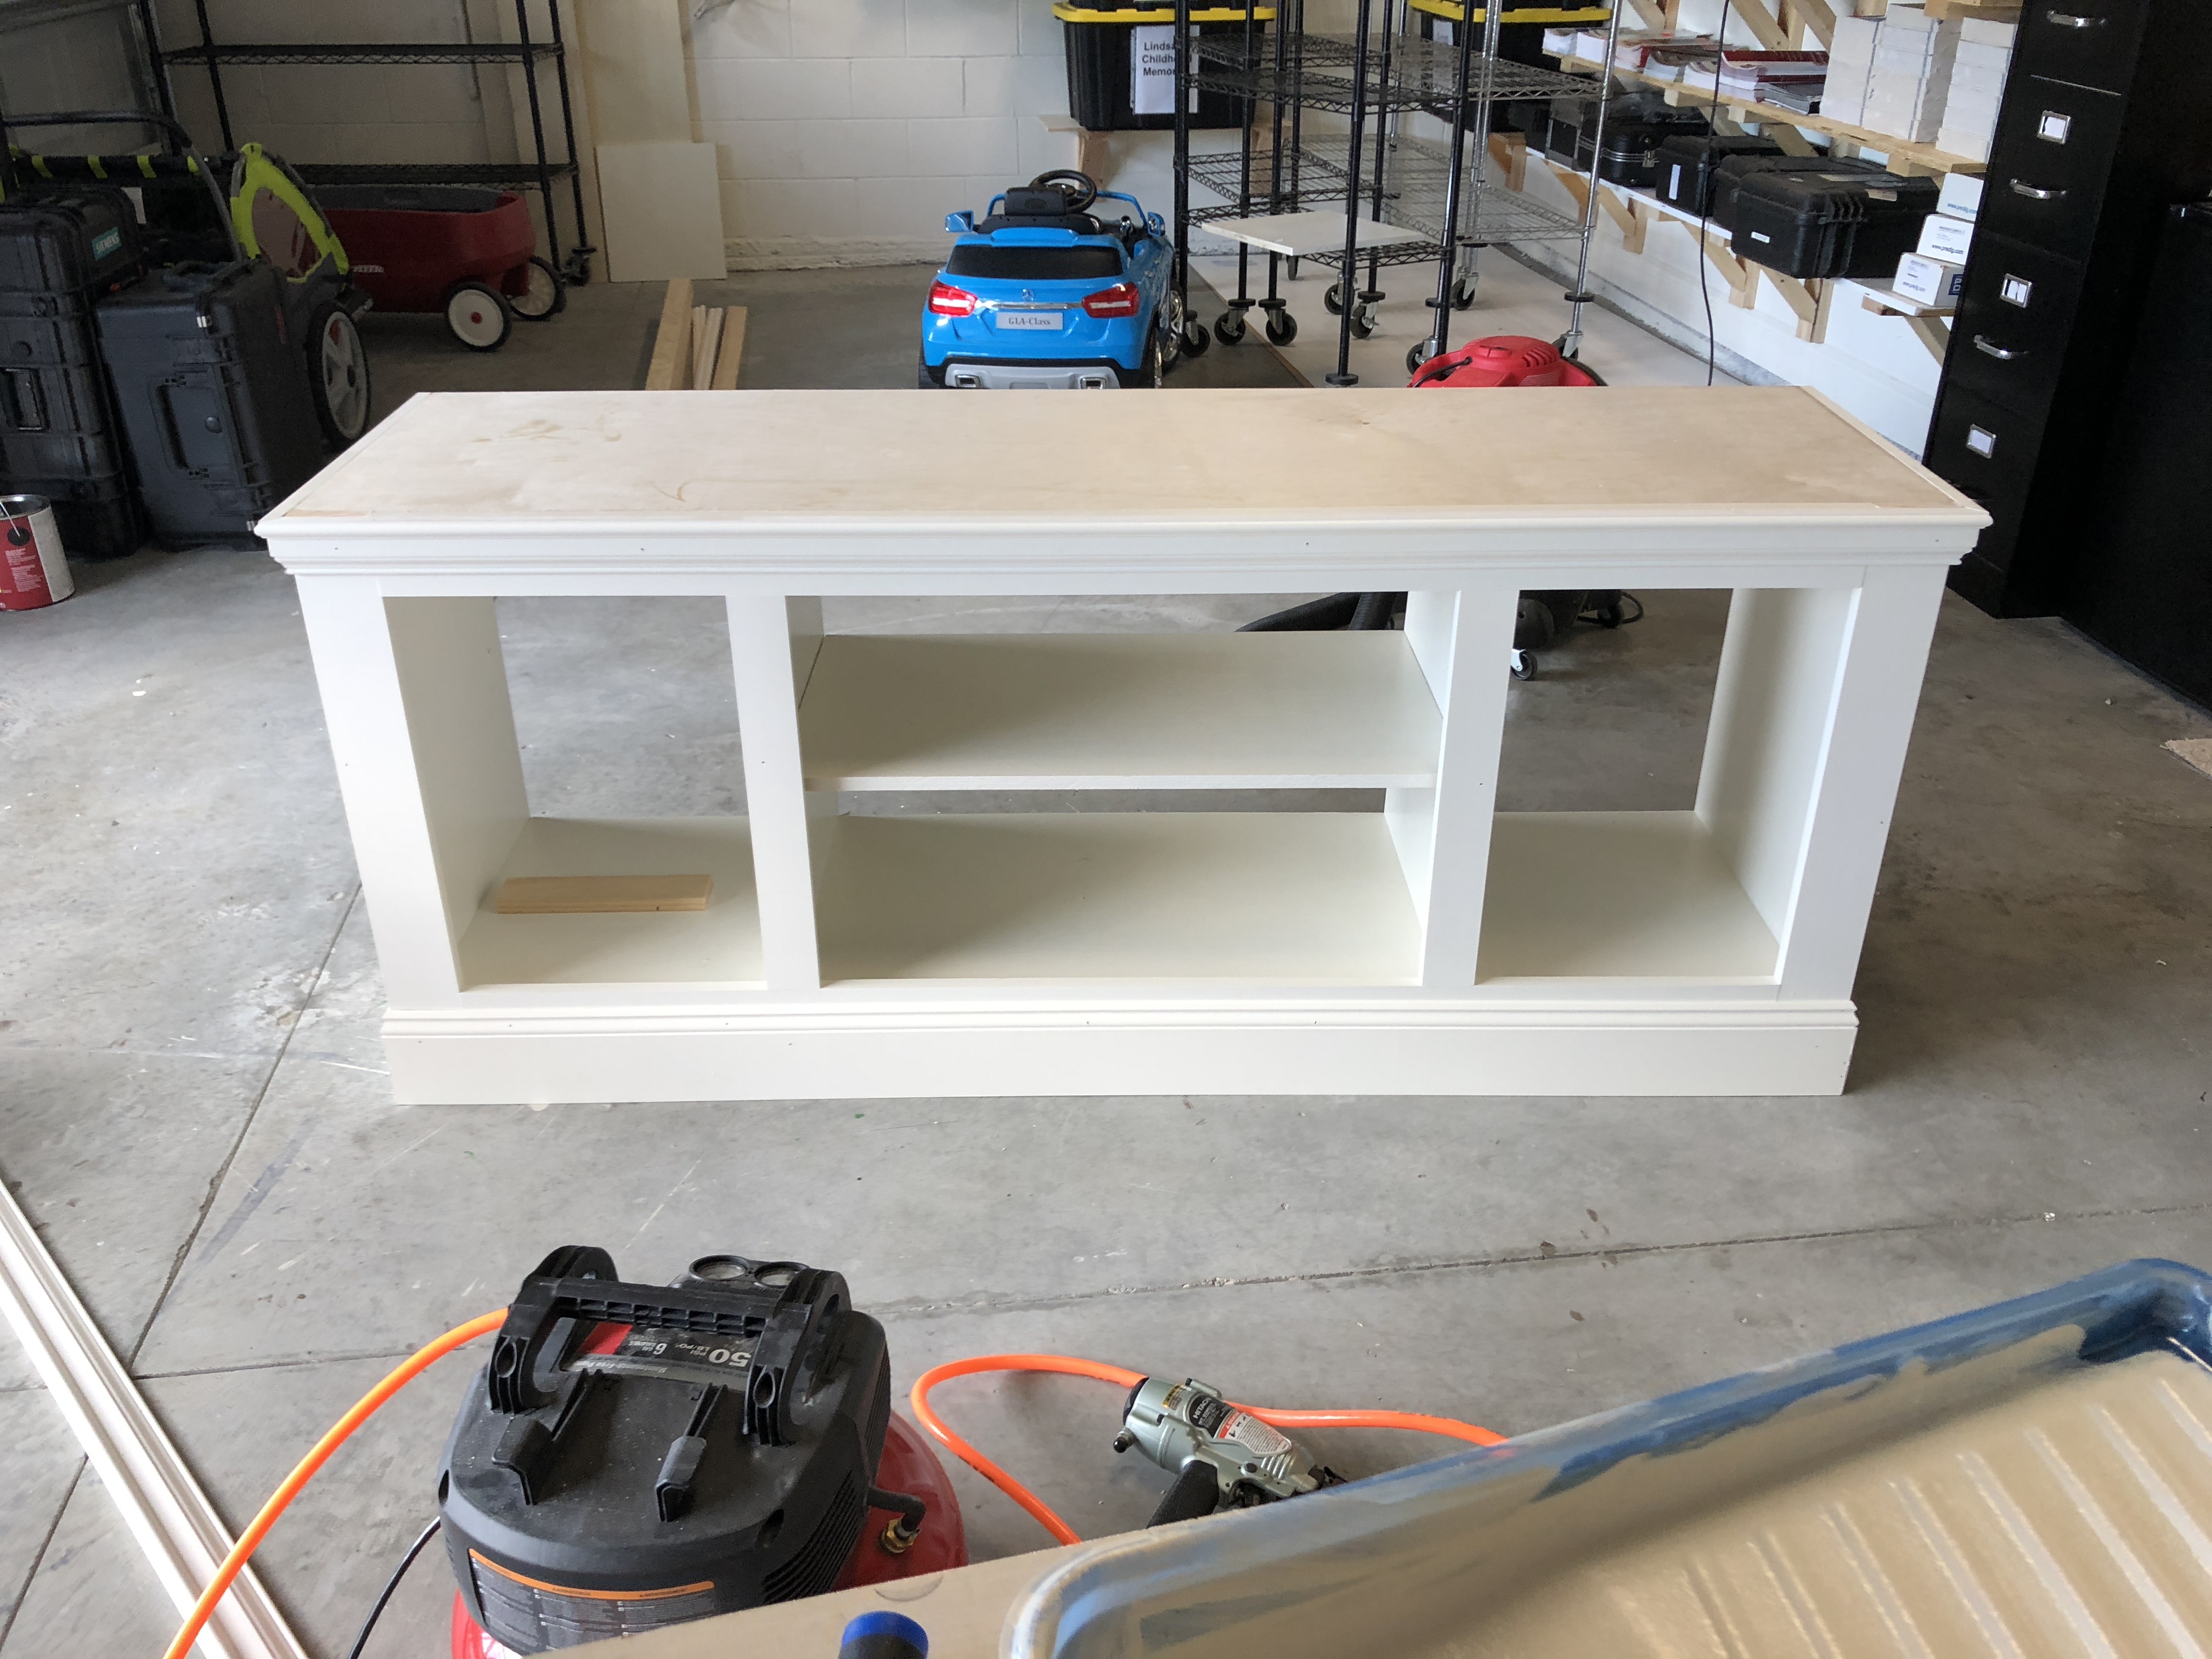
Below is a shot from the top of the media stand looking down. THIS IS REALLY IMPORTANT in my opinion. NONE of the tutorials address this. But you have a culmination of different wood seams meeting up in one area: the body, the face frame, and the trim. And it looks HIDEOUS right?? On my very first attempt at building this piece, I tried to use wood filler, sanding, more wood filler, caulking etc to make it all look flush and it still looked HIDEOUS. So I decided to add a very thin wood top to the entire piece.
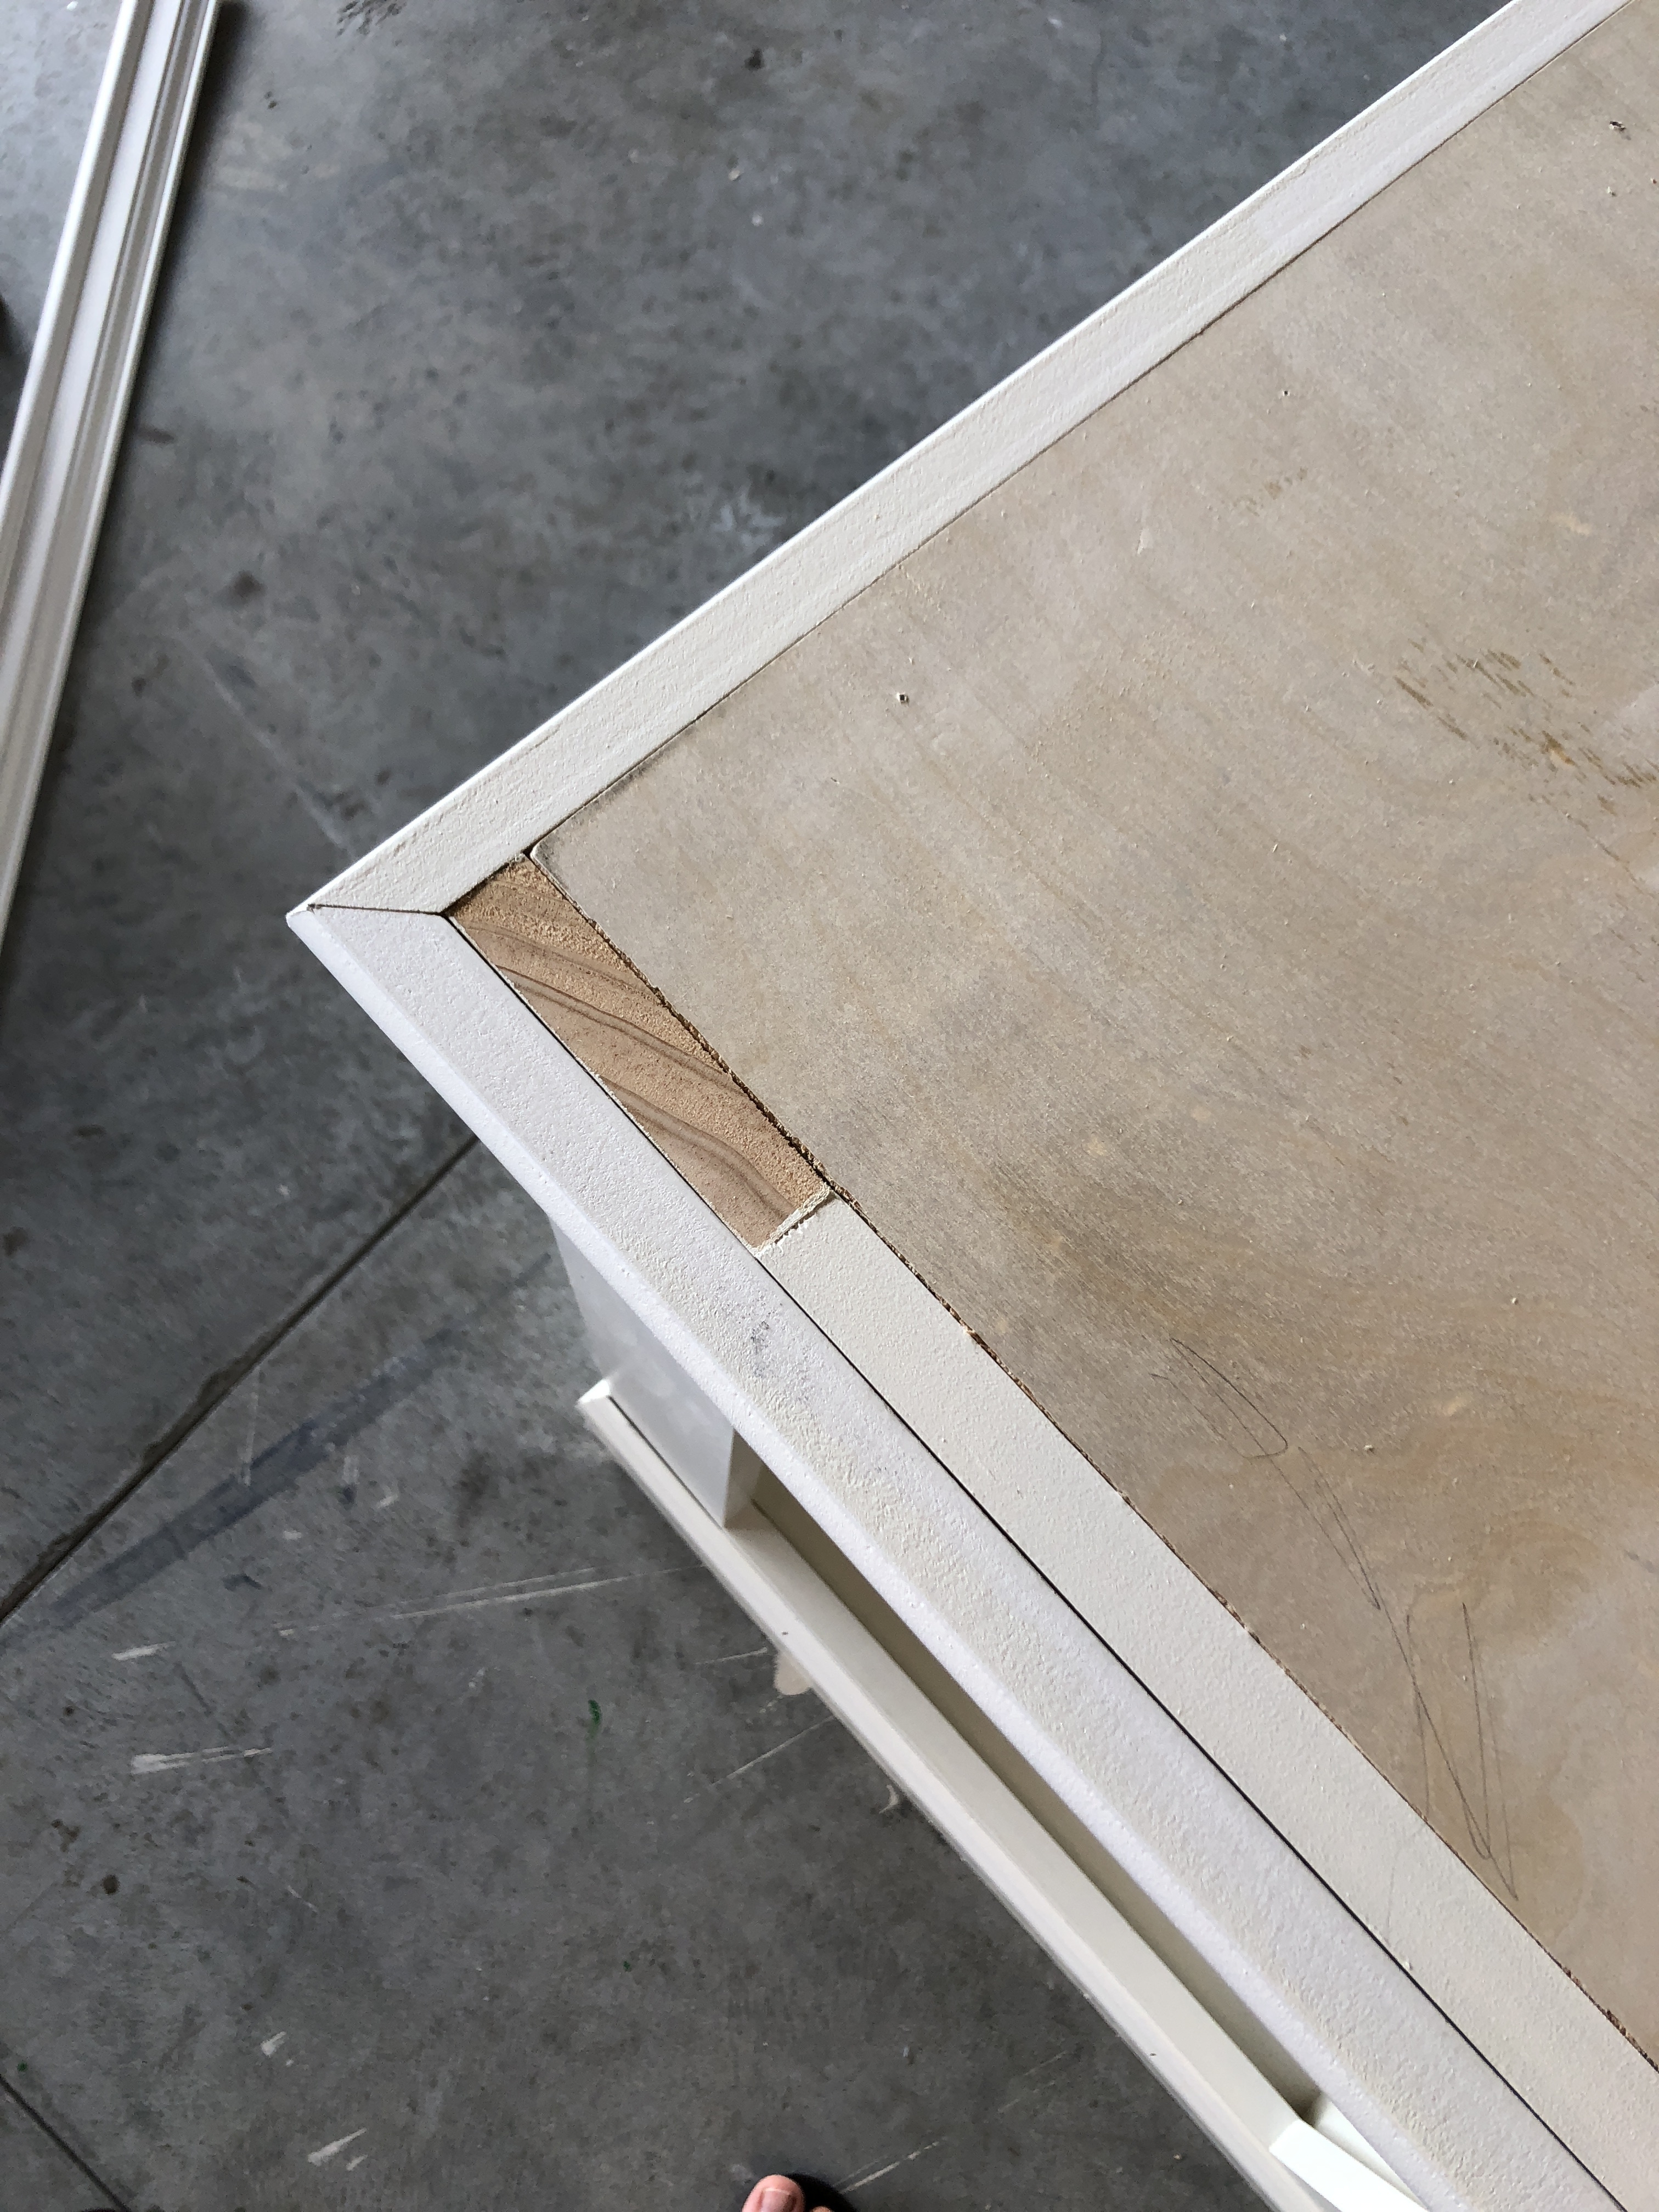
Below is the 1/8″ plywood top I added. I cut it to size using my ryobi table saw and painted it white the same as the sideboard. (By the way – the white I used is Sherwin Williams Dover White in a semi-gloss finish.) This looks MUCH better in my opinion, and it’s thin enough that it looks like it’s part of the top molding and you don’t notice the difference at all.
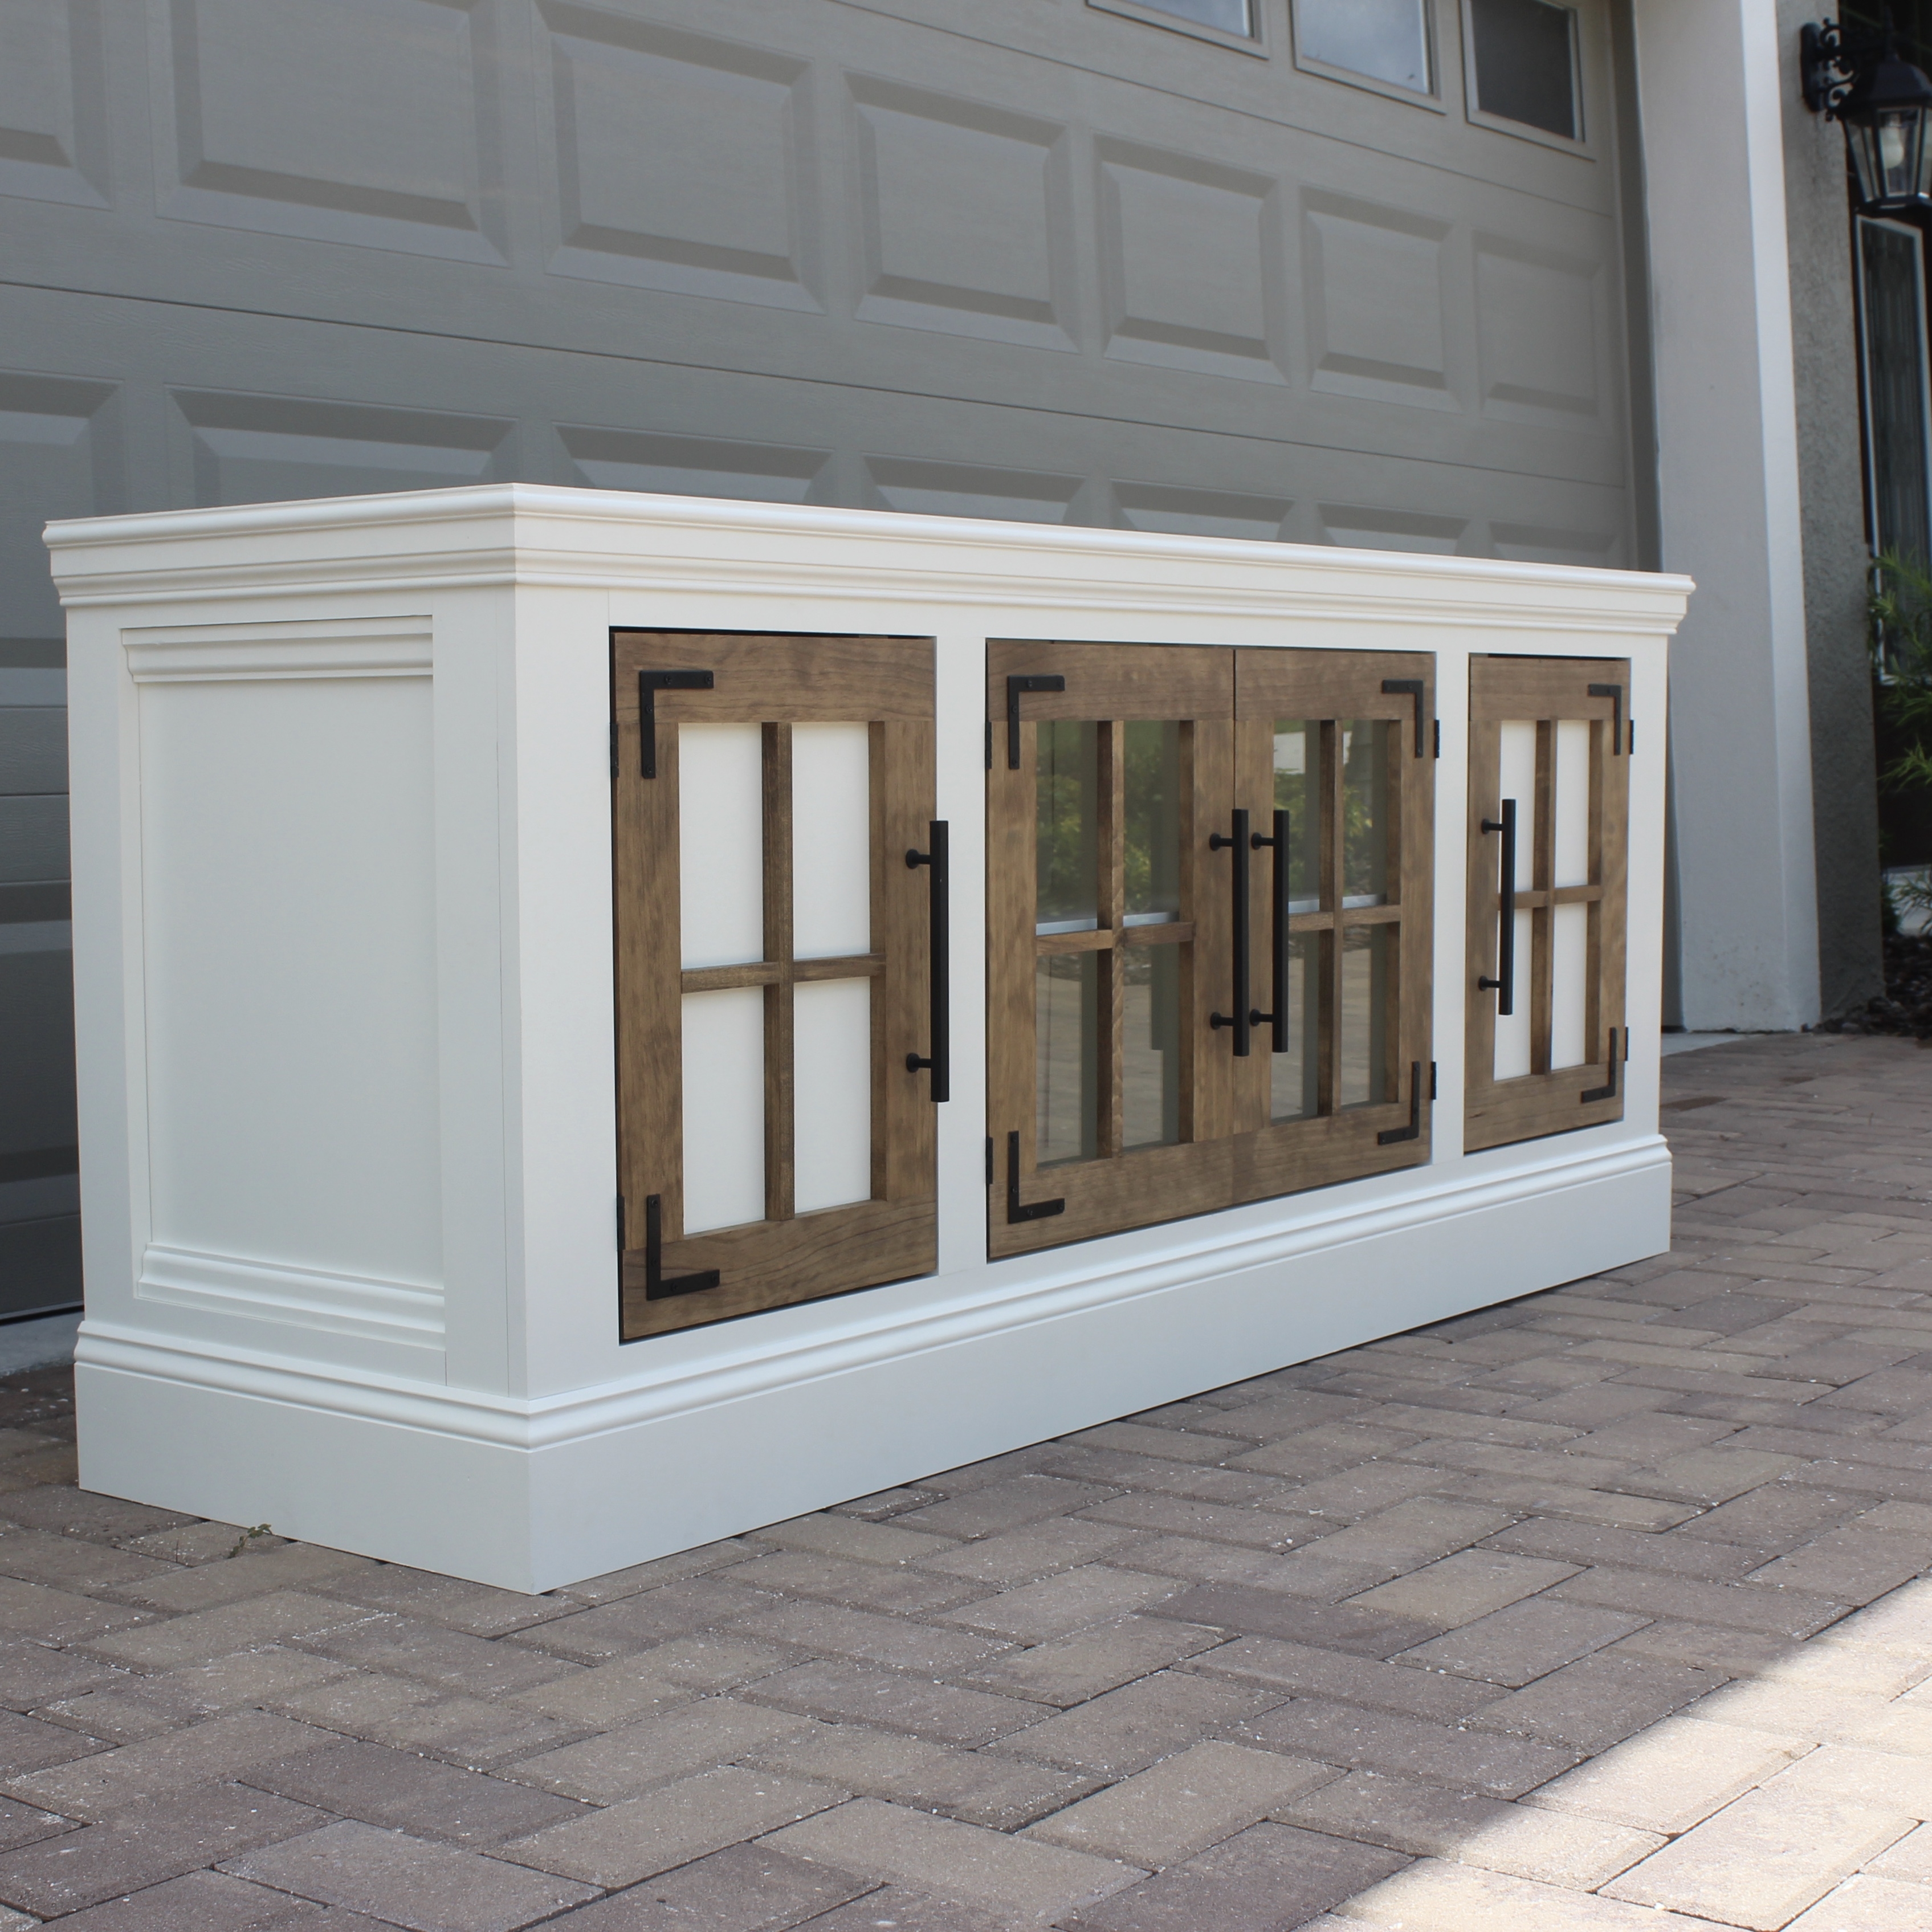
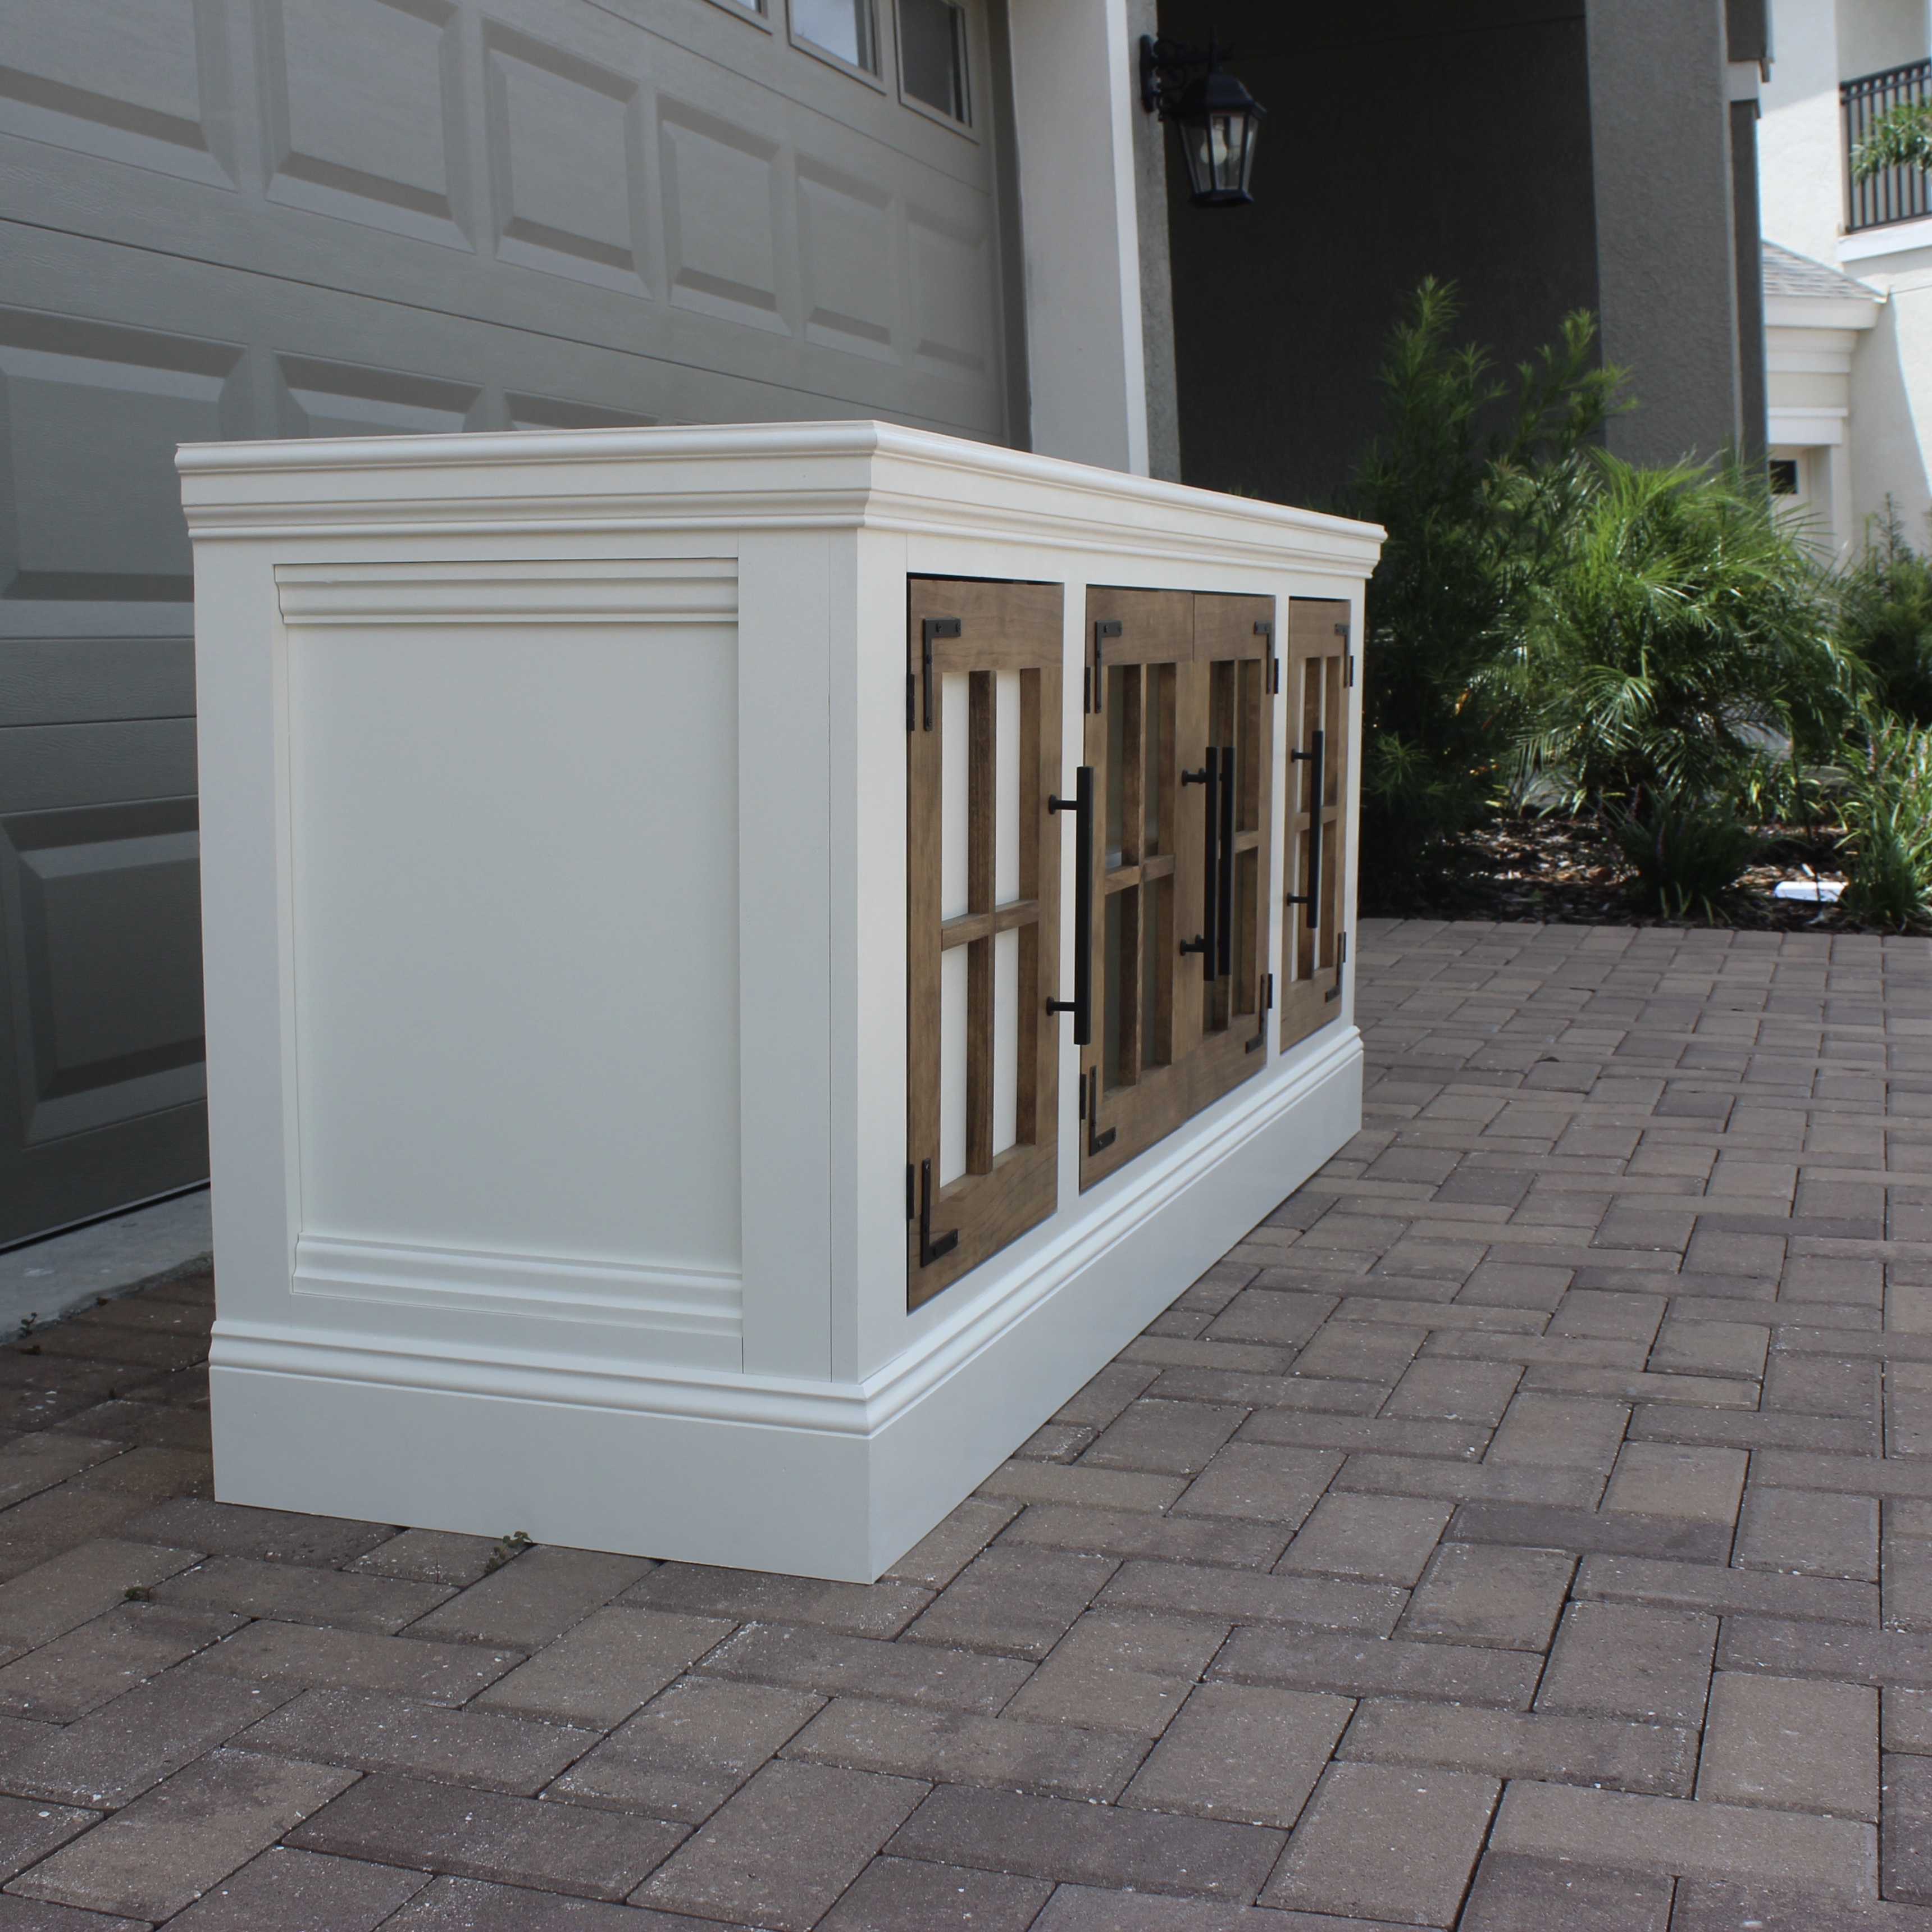
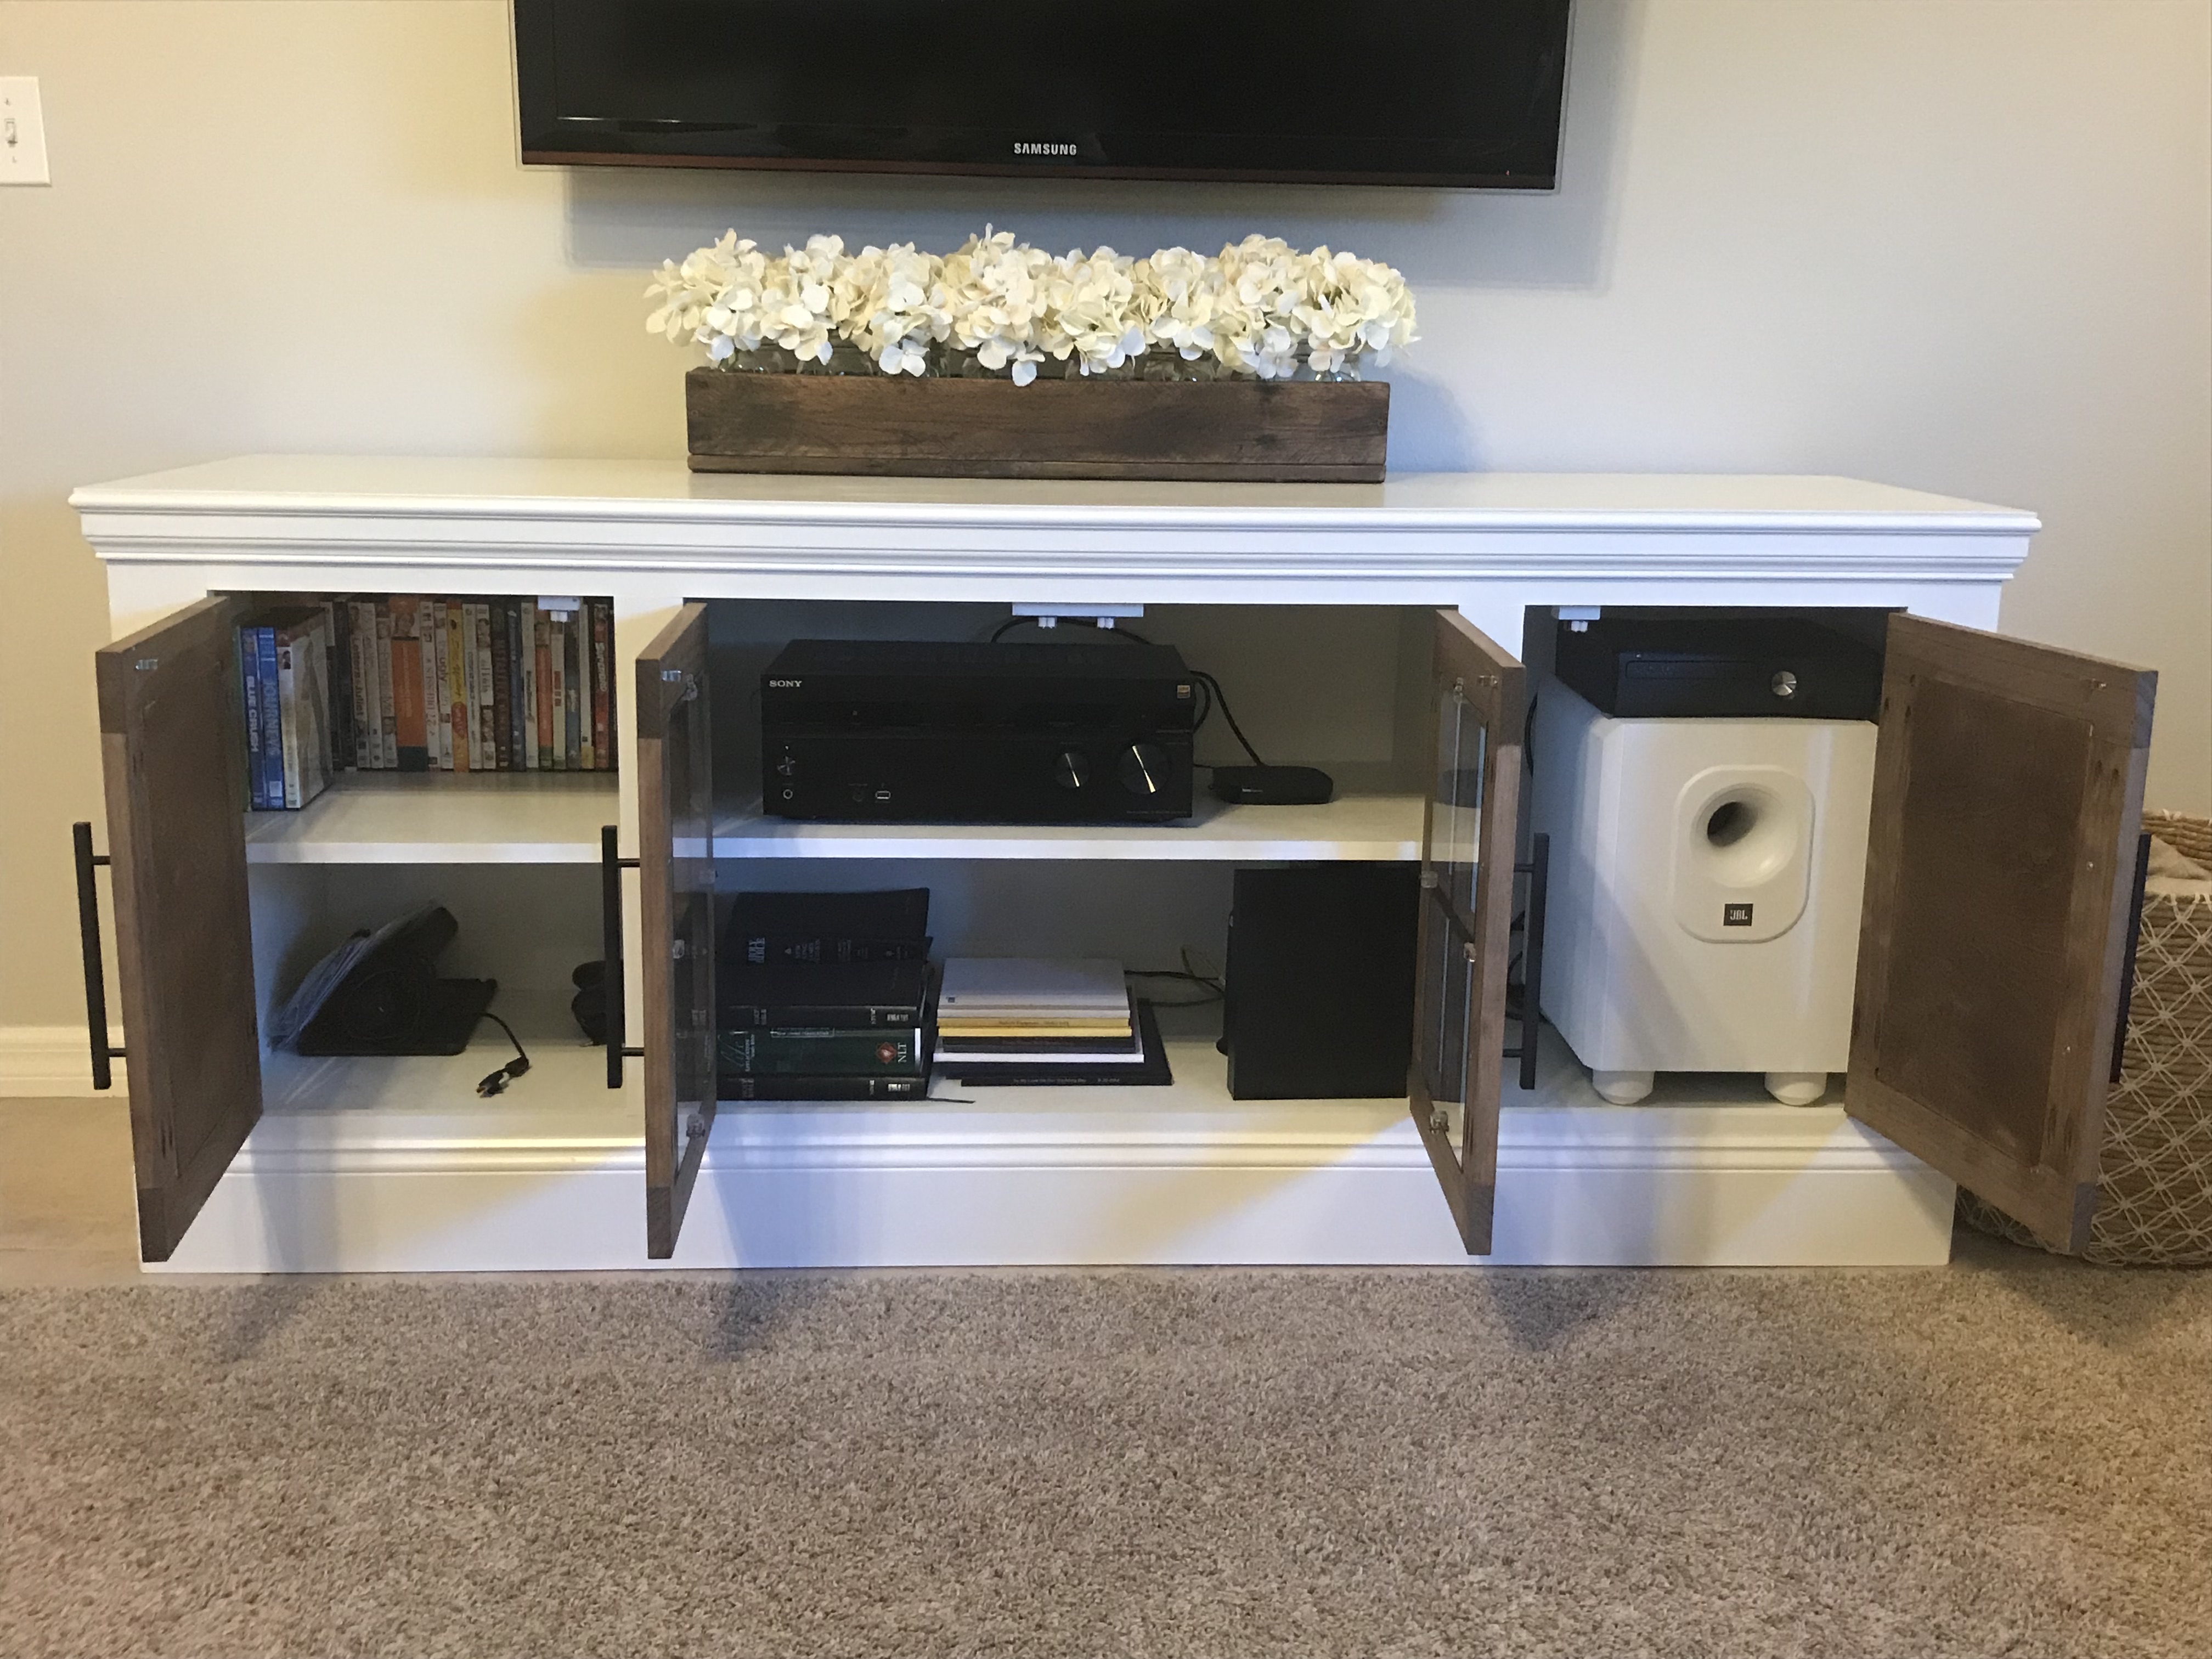
Now on to the doors! I was honestly so excited to make these doors because they were so different than anything I’ve ever done. Heather wanted 2 glass doors in the center for her TV equipment and 2 solid doors on the outside, one to hide toys and things, and the other to hide a big speaker they’ve had sitting on the floor. That’s the beauty of making this custom for her! It would have never been able to fit in the Ballard media stand!
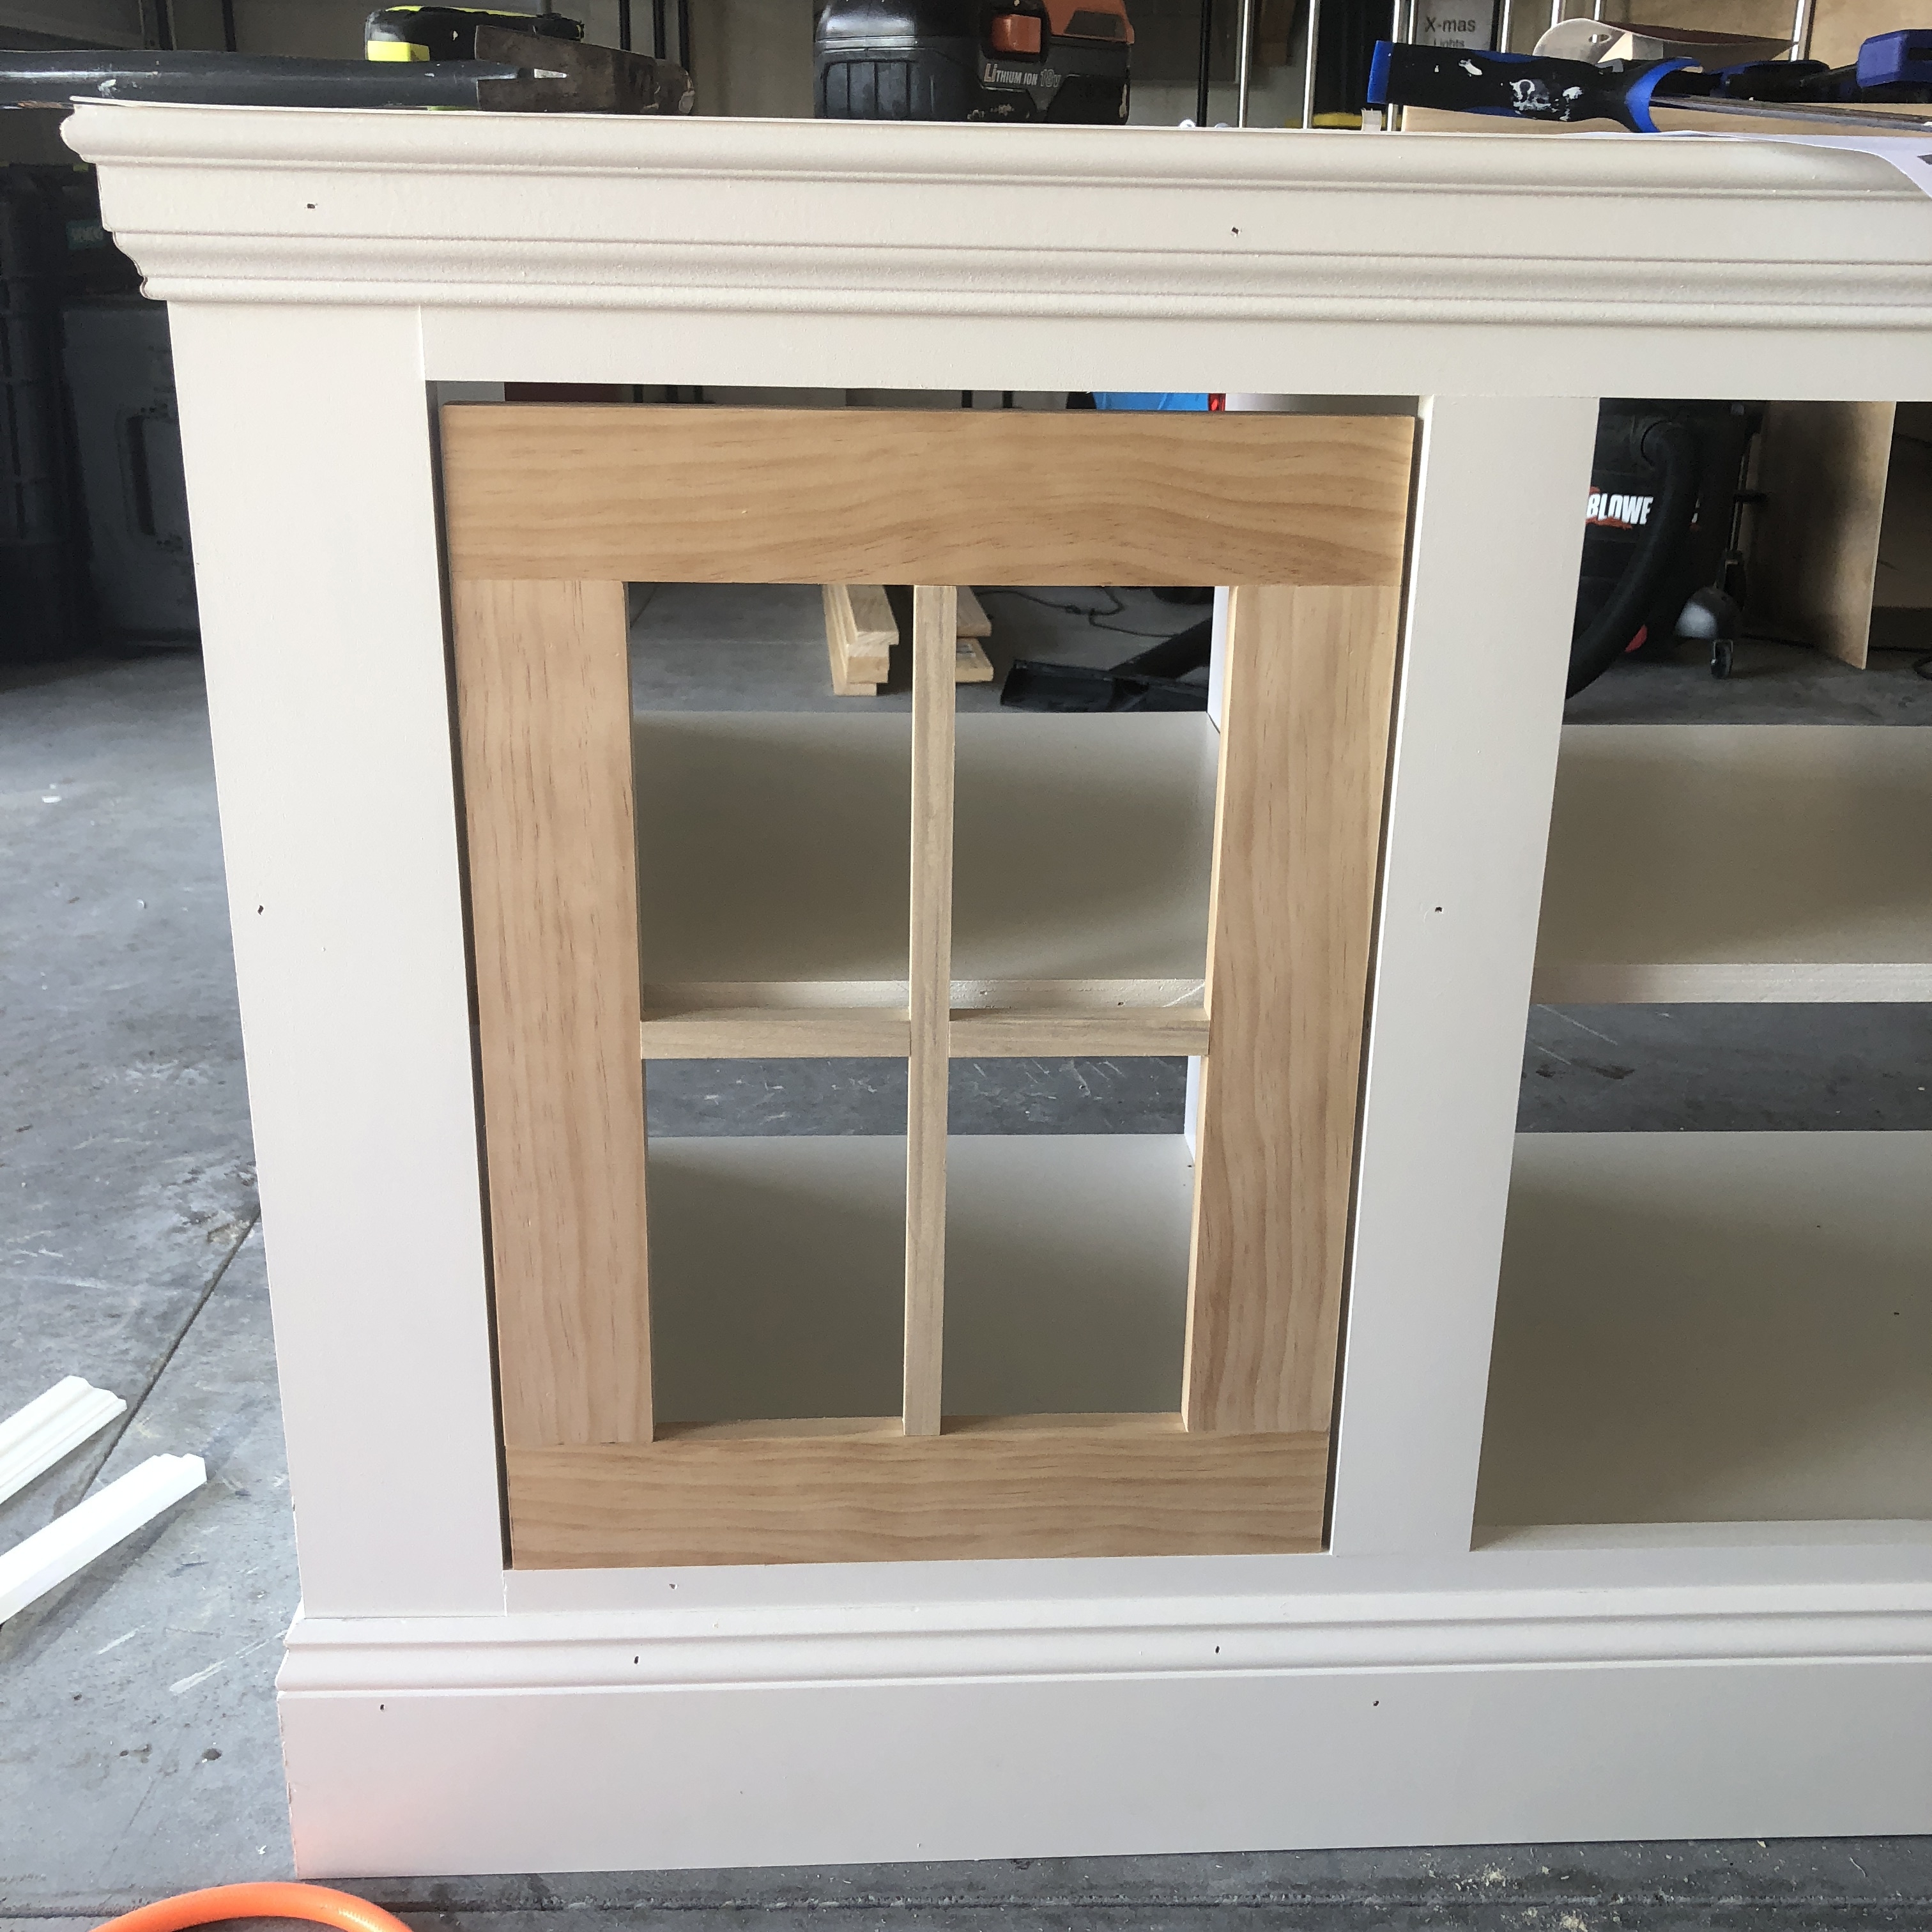
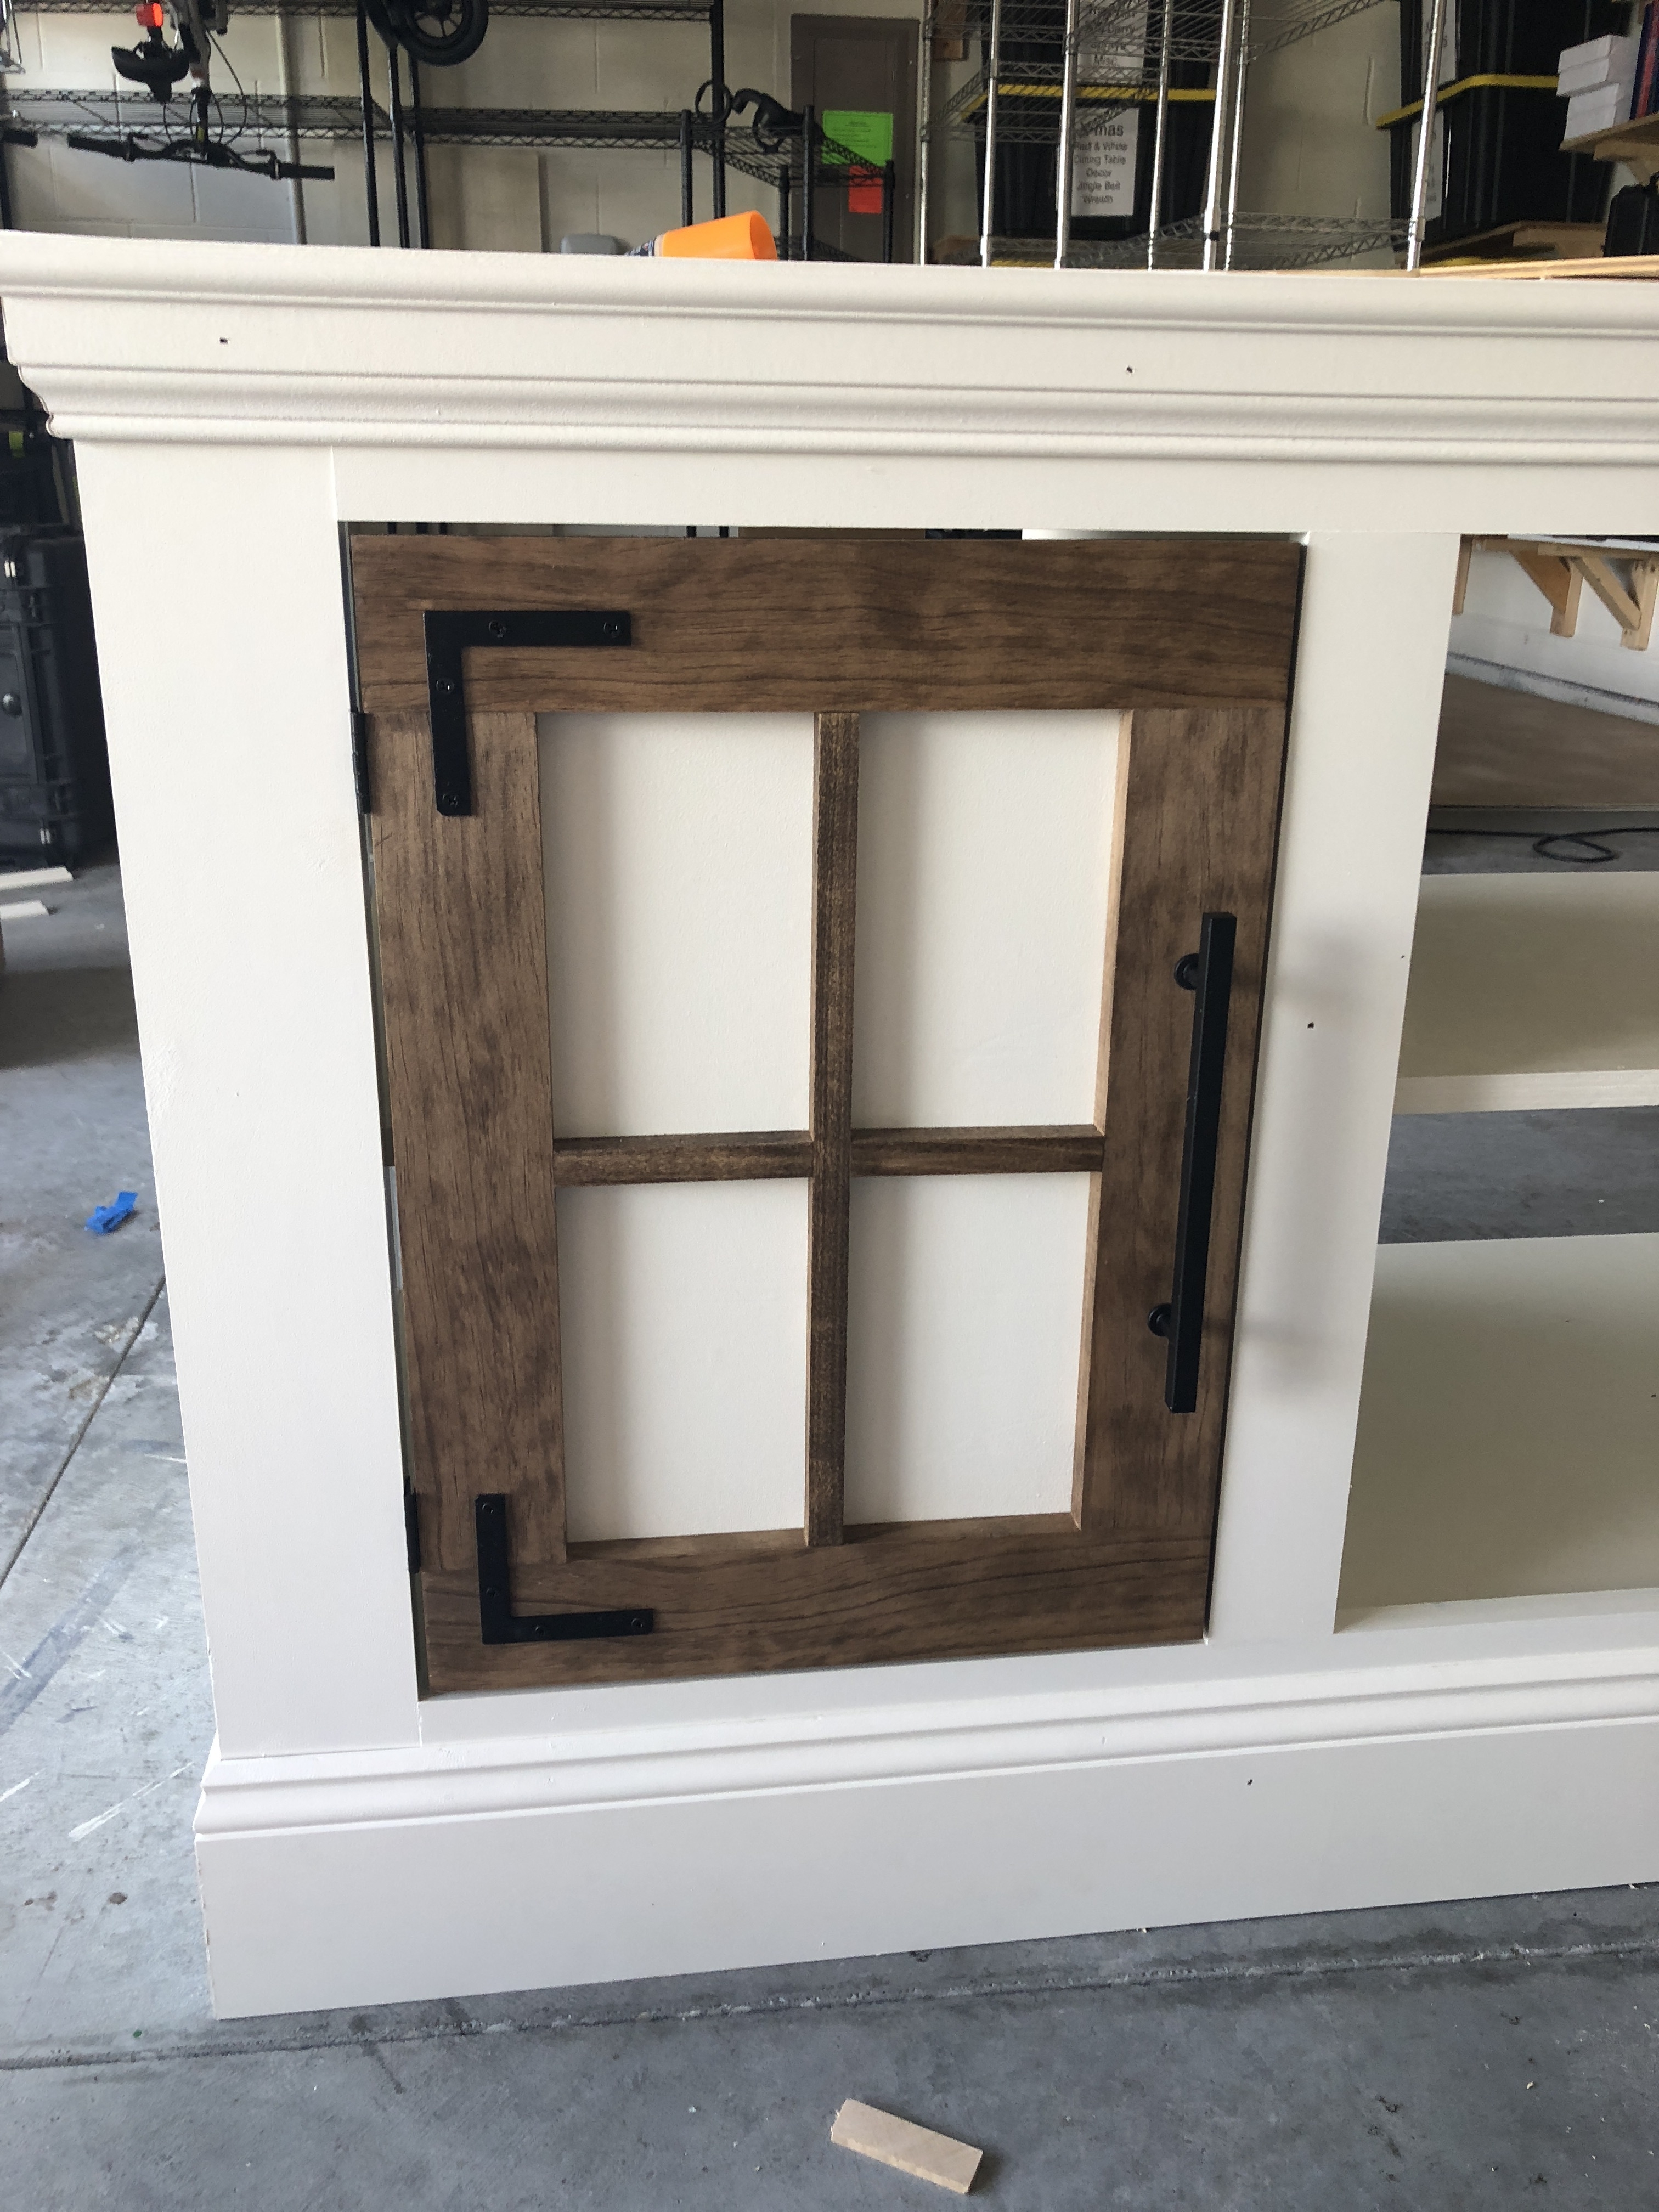
I used 1×3 select pine boards for the frame of the doors and 5/8″ square rods for the cross. The frame is attached together with pocket hole screws and the rods are attached with wood glue and pin nails and staples. I also routed out an 1/8″ deep notch around the back side of the doors which you will see below. I stained the doors in minwax special walnut.
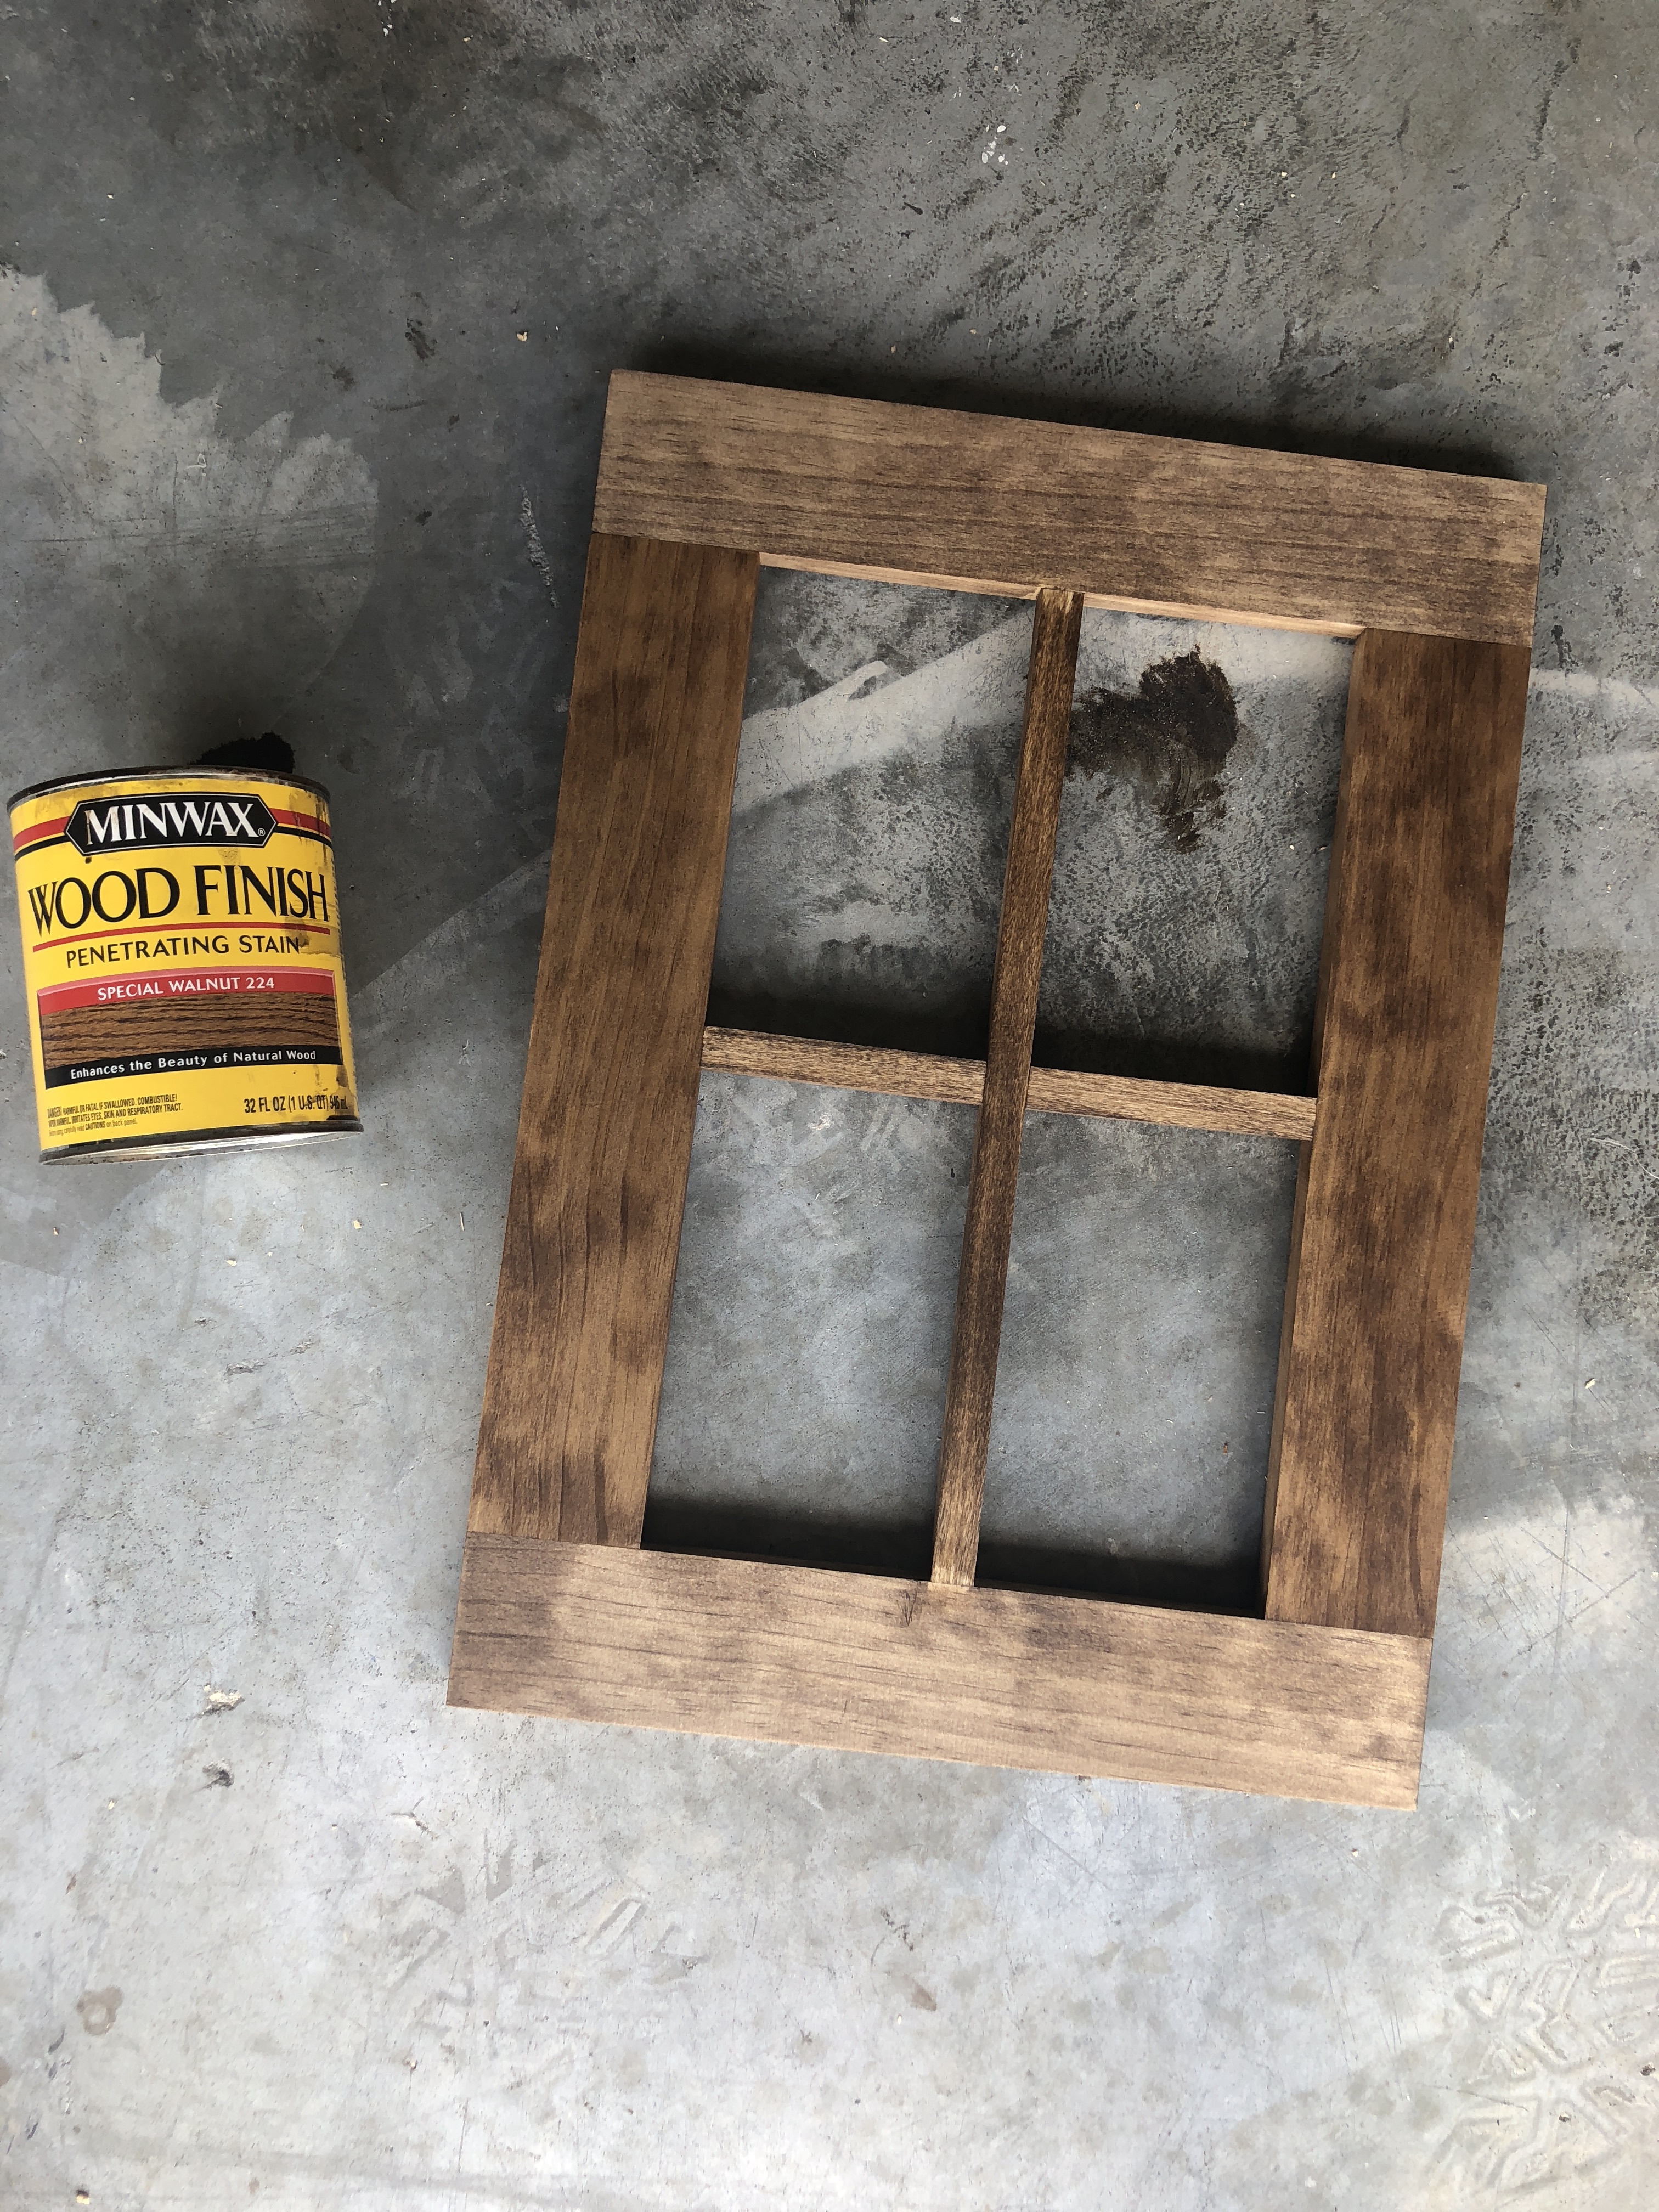
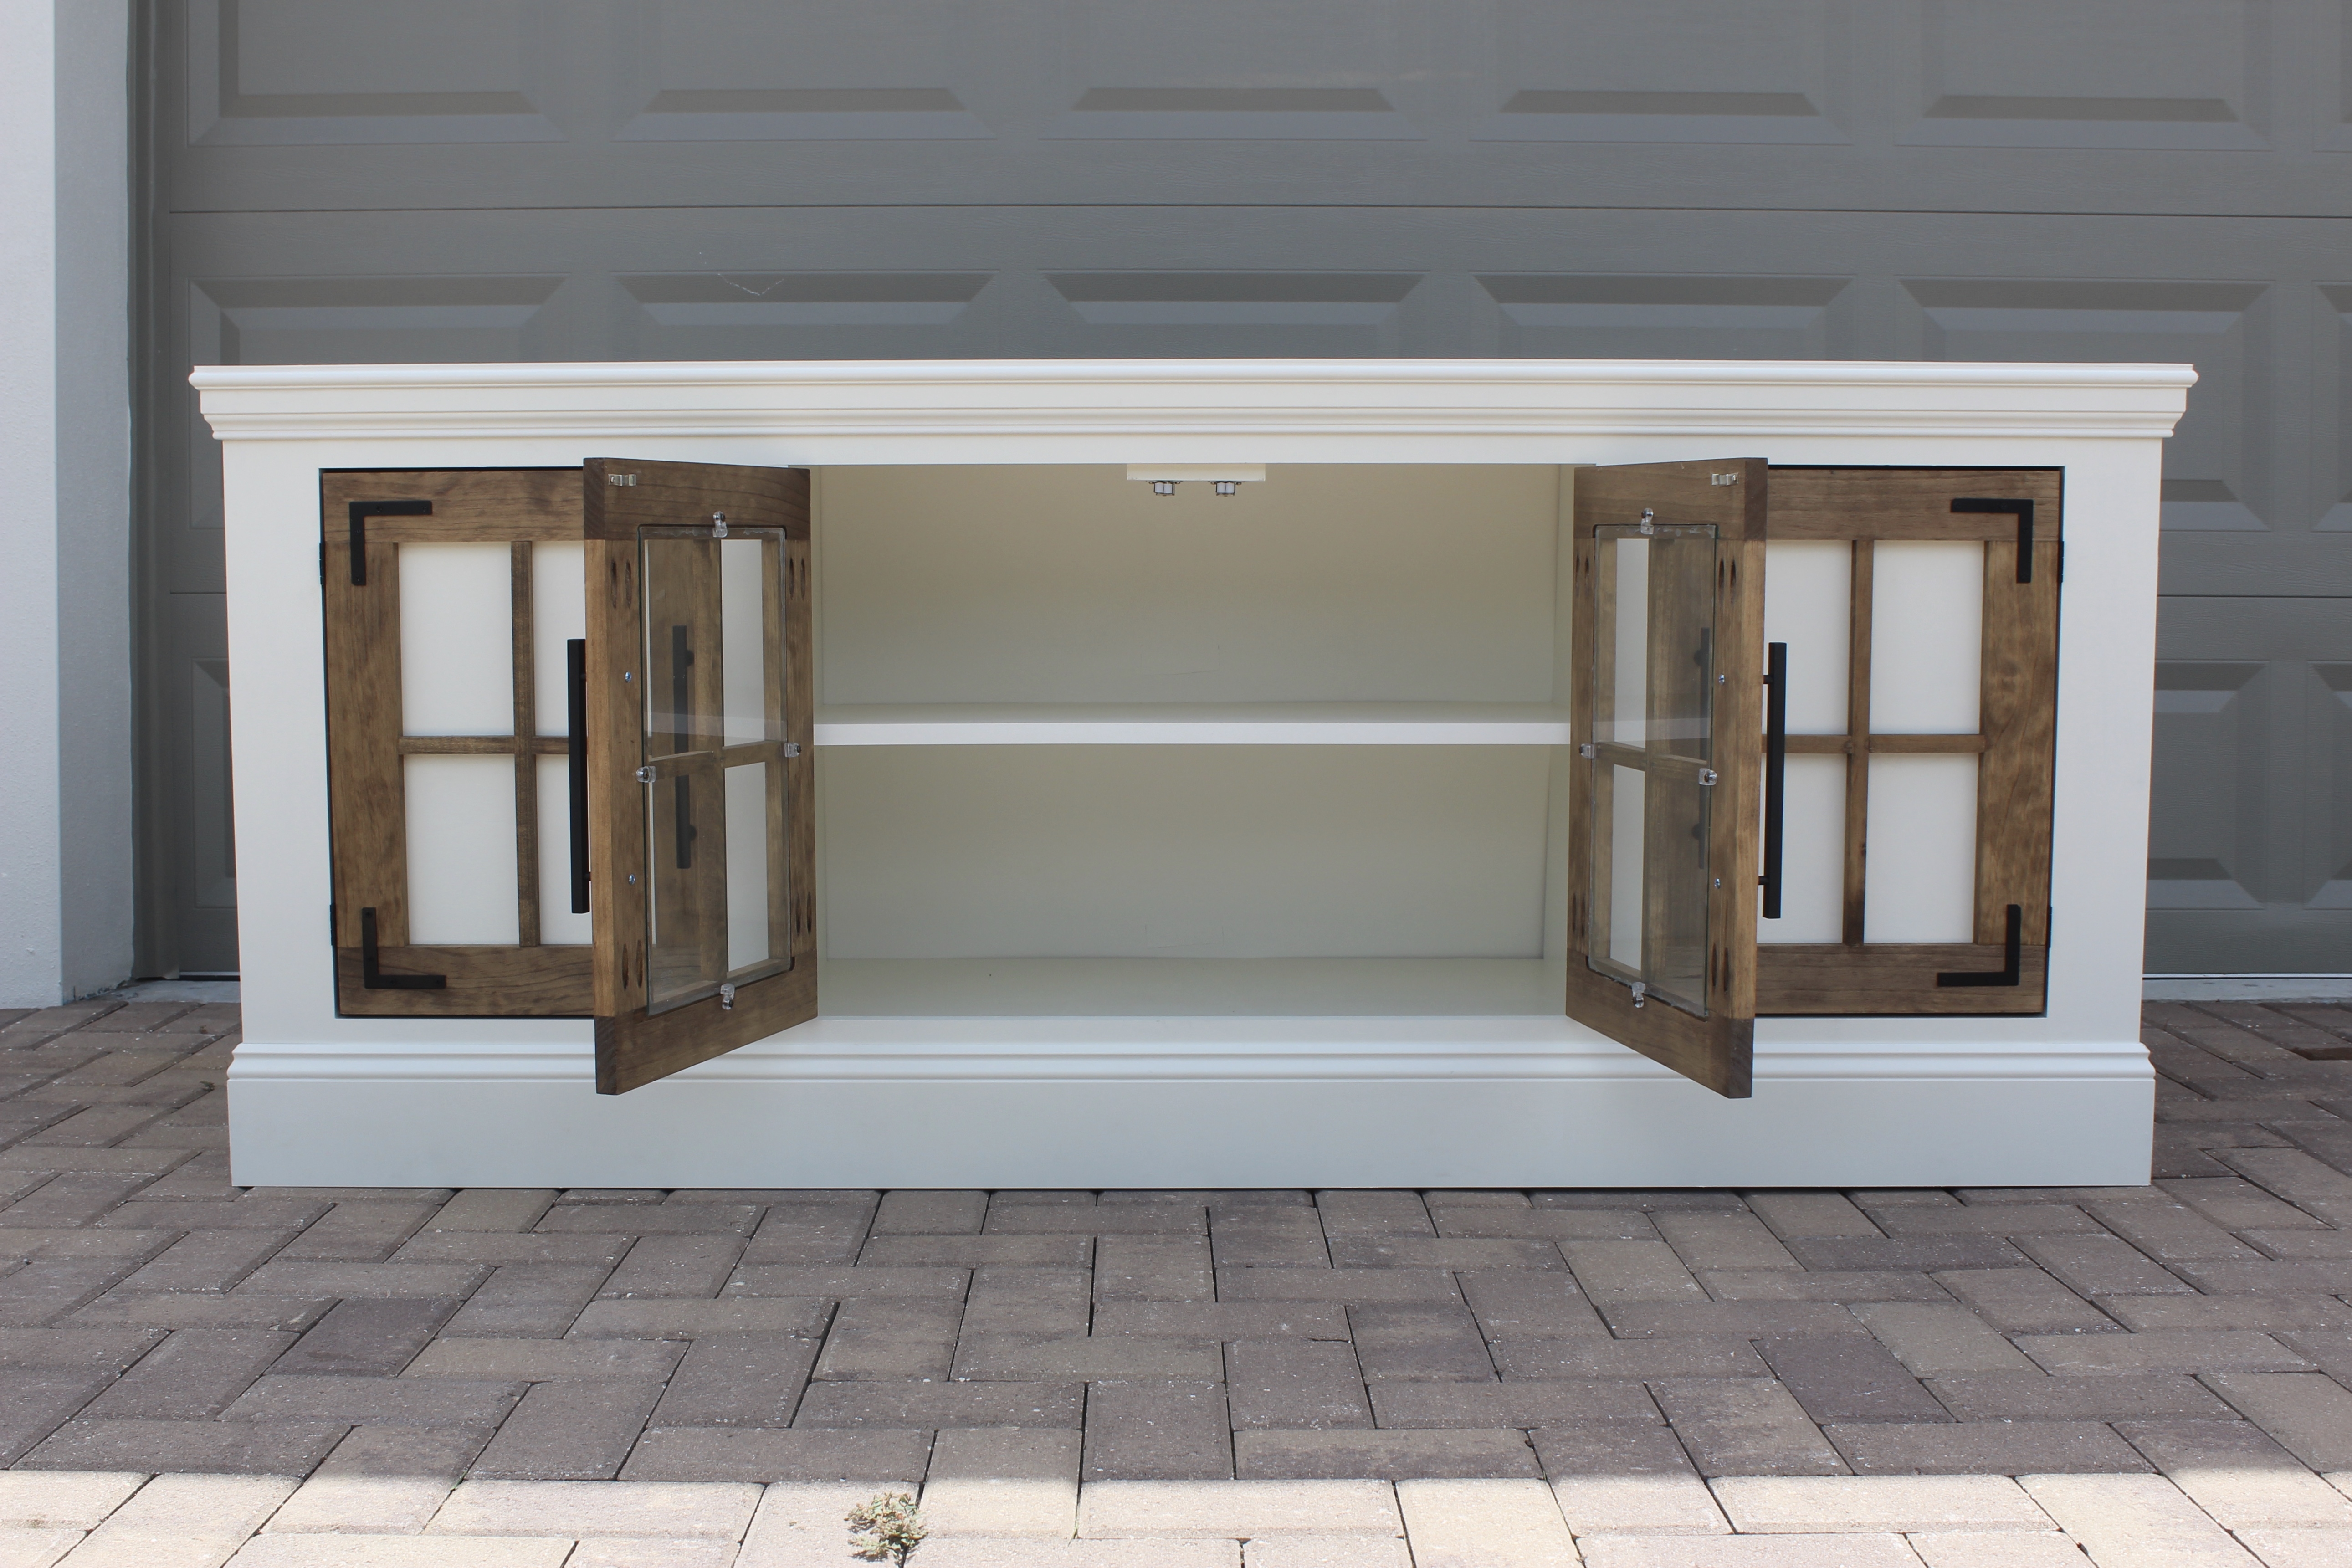
Below you can see the notch I routed out in the back of the doors. This is where the 1/8″ glass sits for the glass doors and it’s where the 1/8″ white plywood sits that I used for the solid white doors. I routed out the notch in the 1×3 pine boards BEFORE I assembled the door frame with pocket hole screws. I used silicone adhesive to attach the glass to the wood, and added these glass door holders for an extra layer of safety.
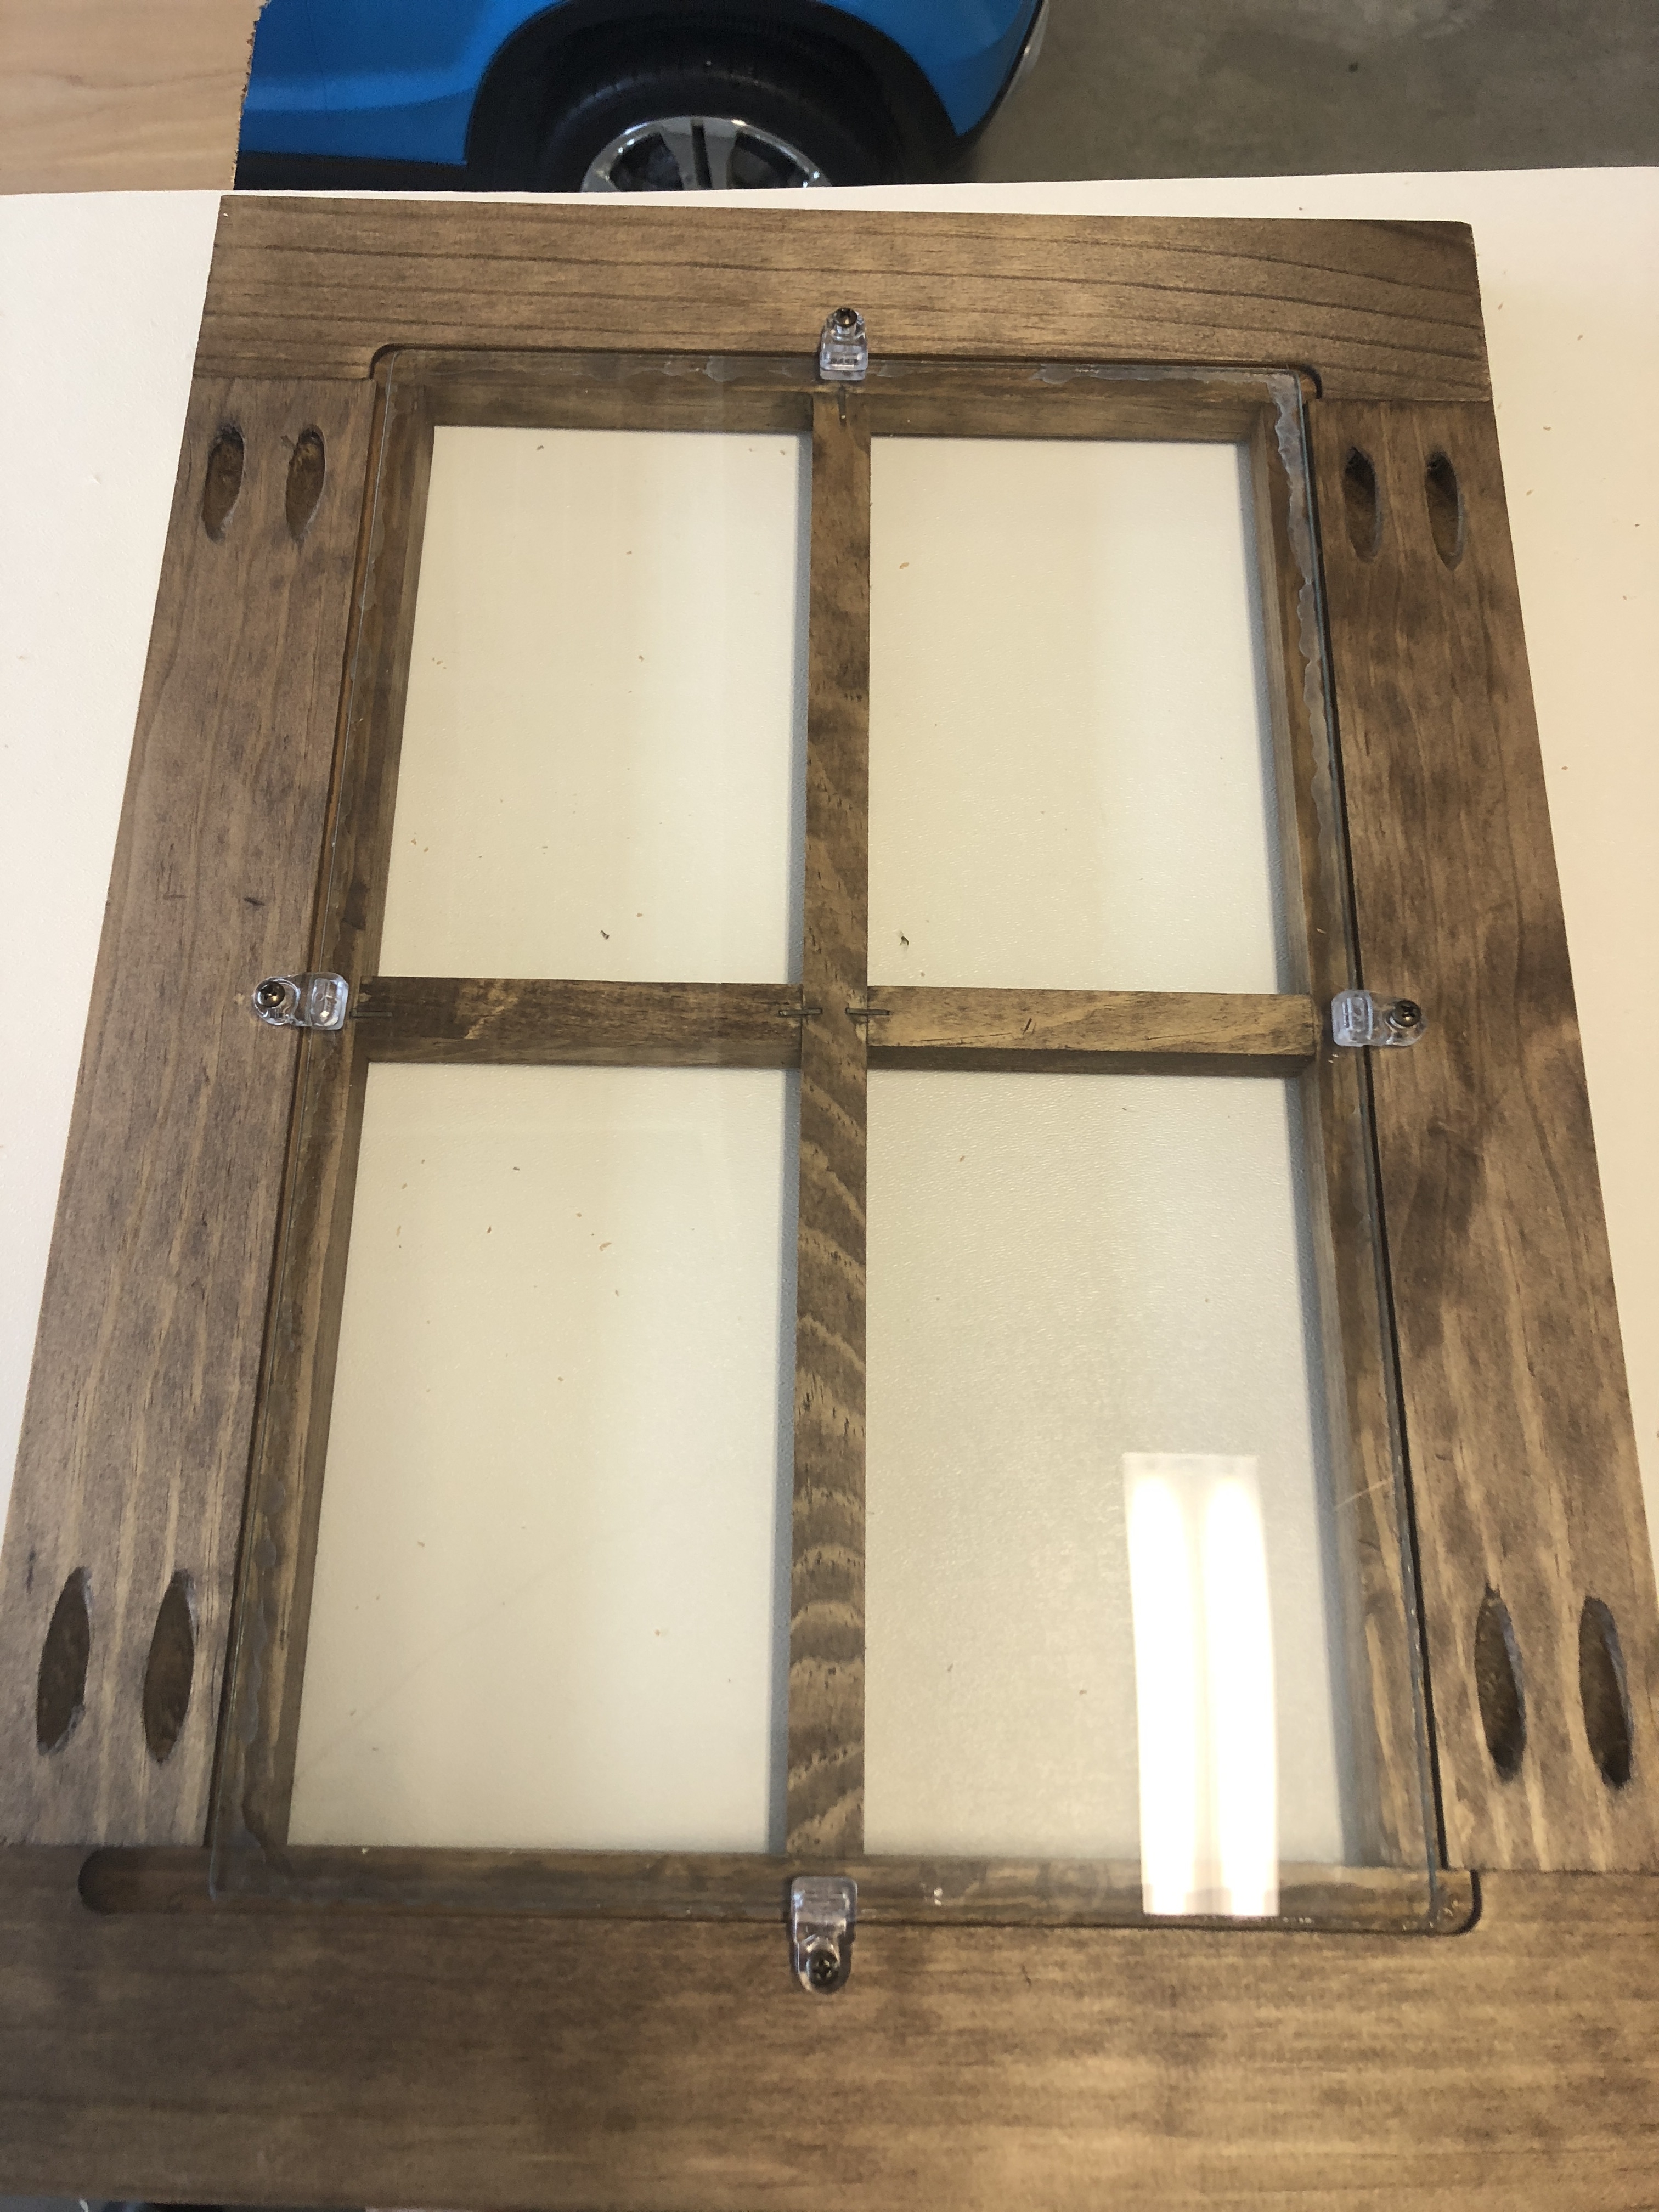
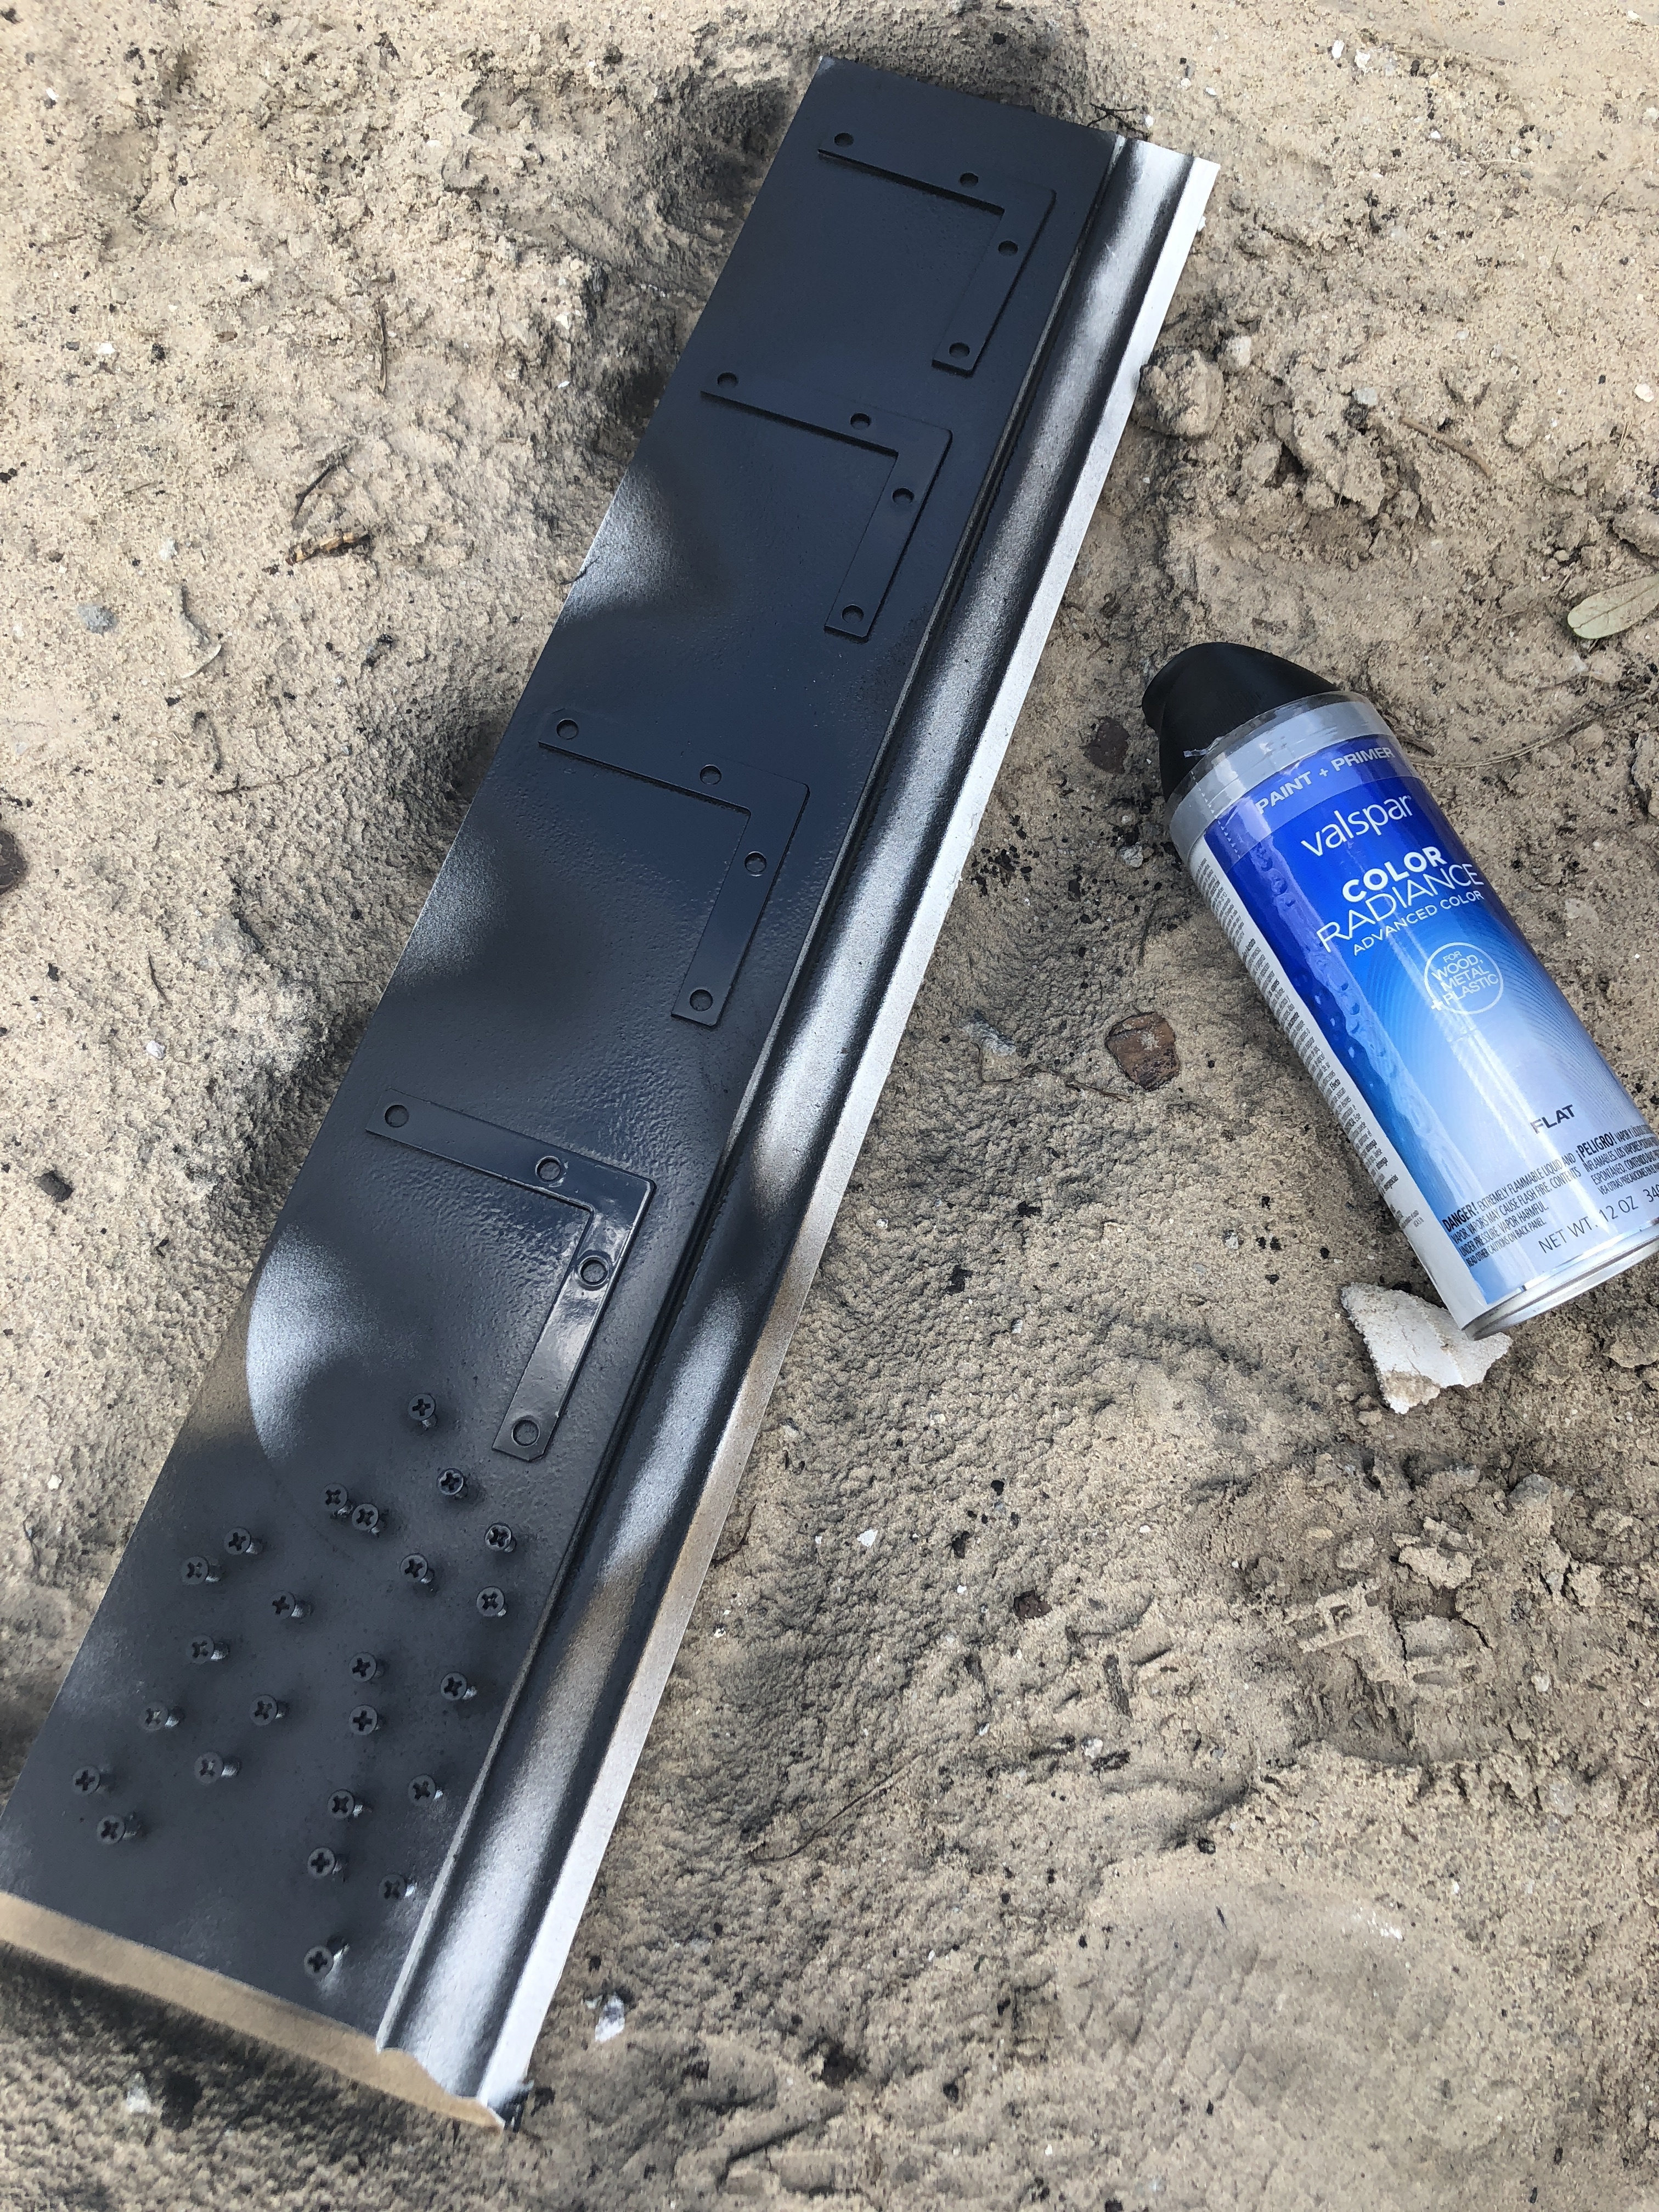
For decoration, I added these corner brackets to the doors, and these long handles, both from Lowe’s. Both of them came in a chrome finish, and we wanted a flat black to achieve the look. I used a flat black spray paint from Lowe’s.
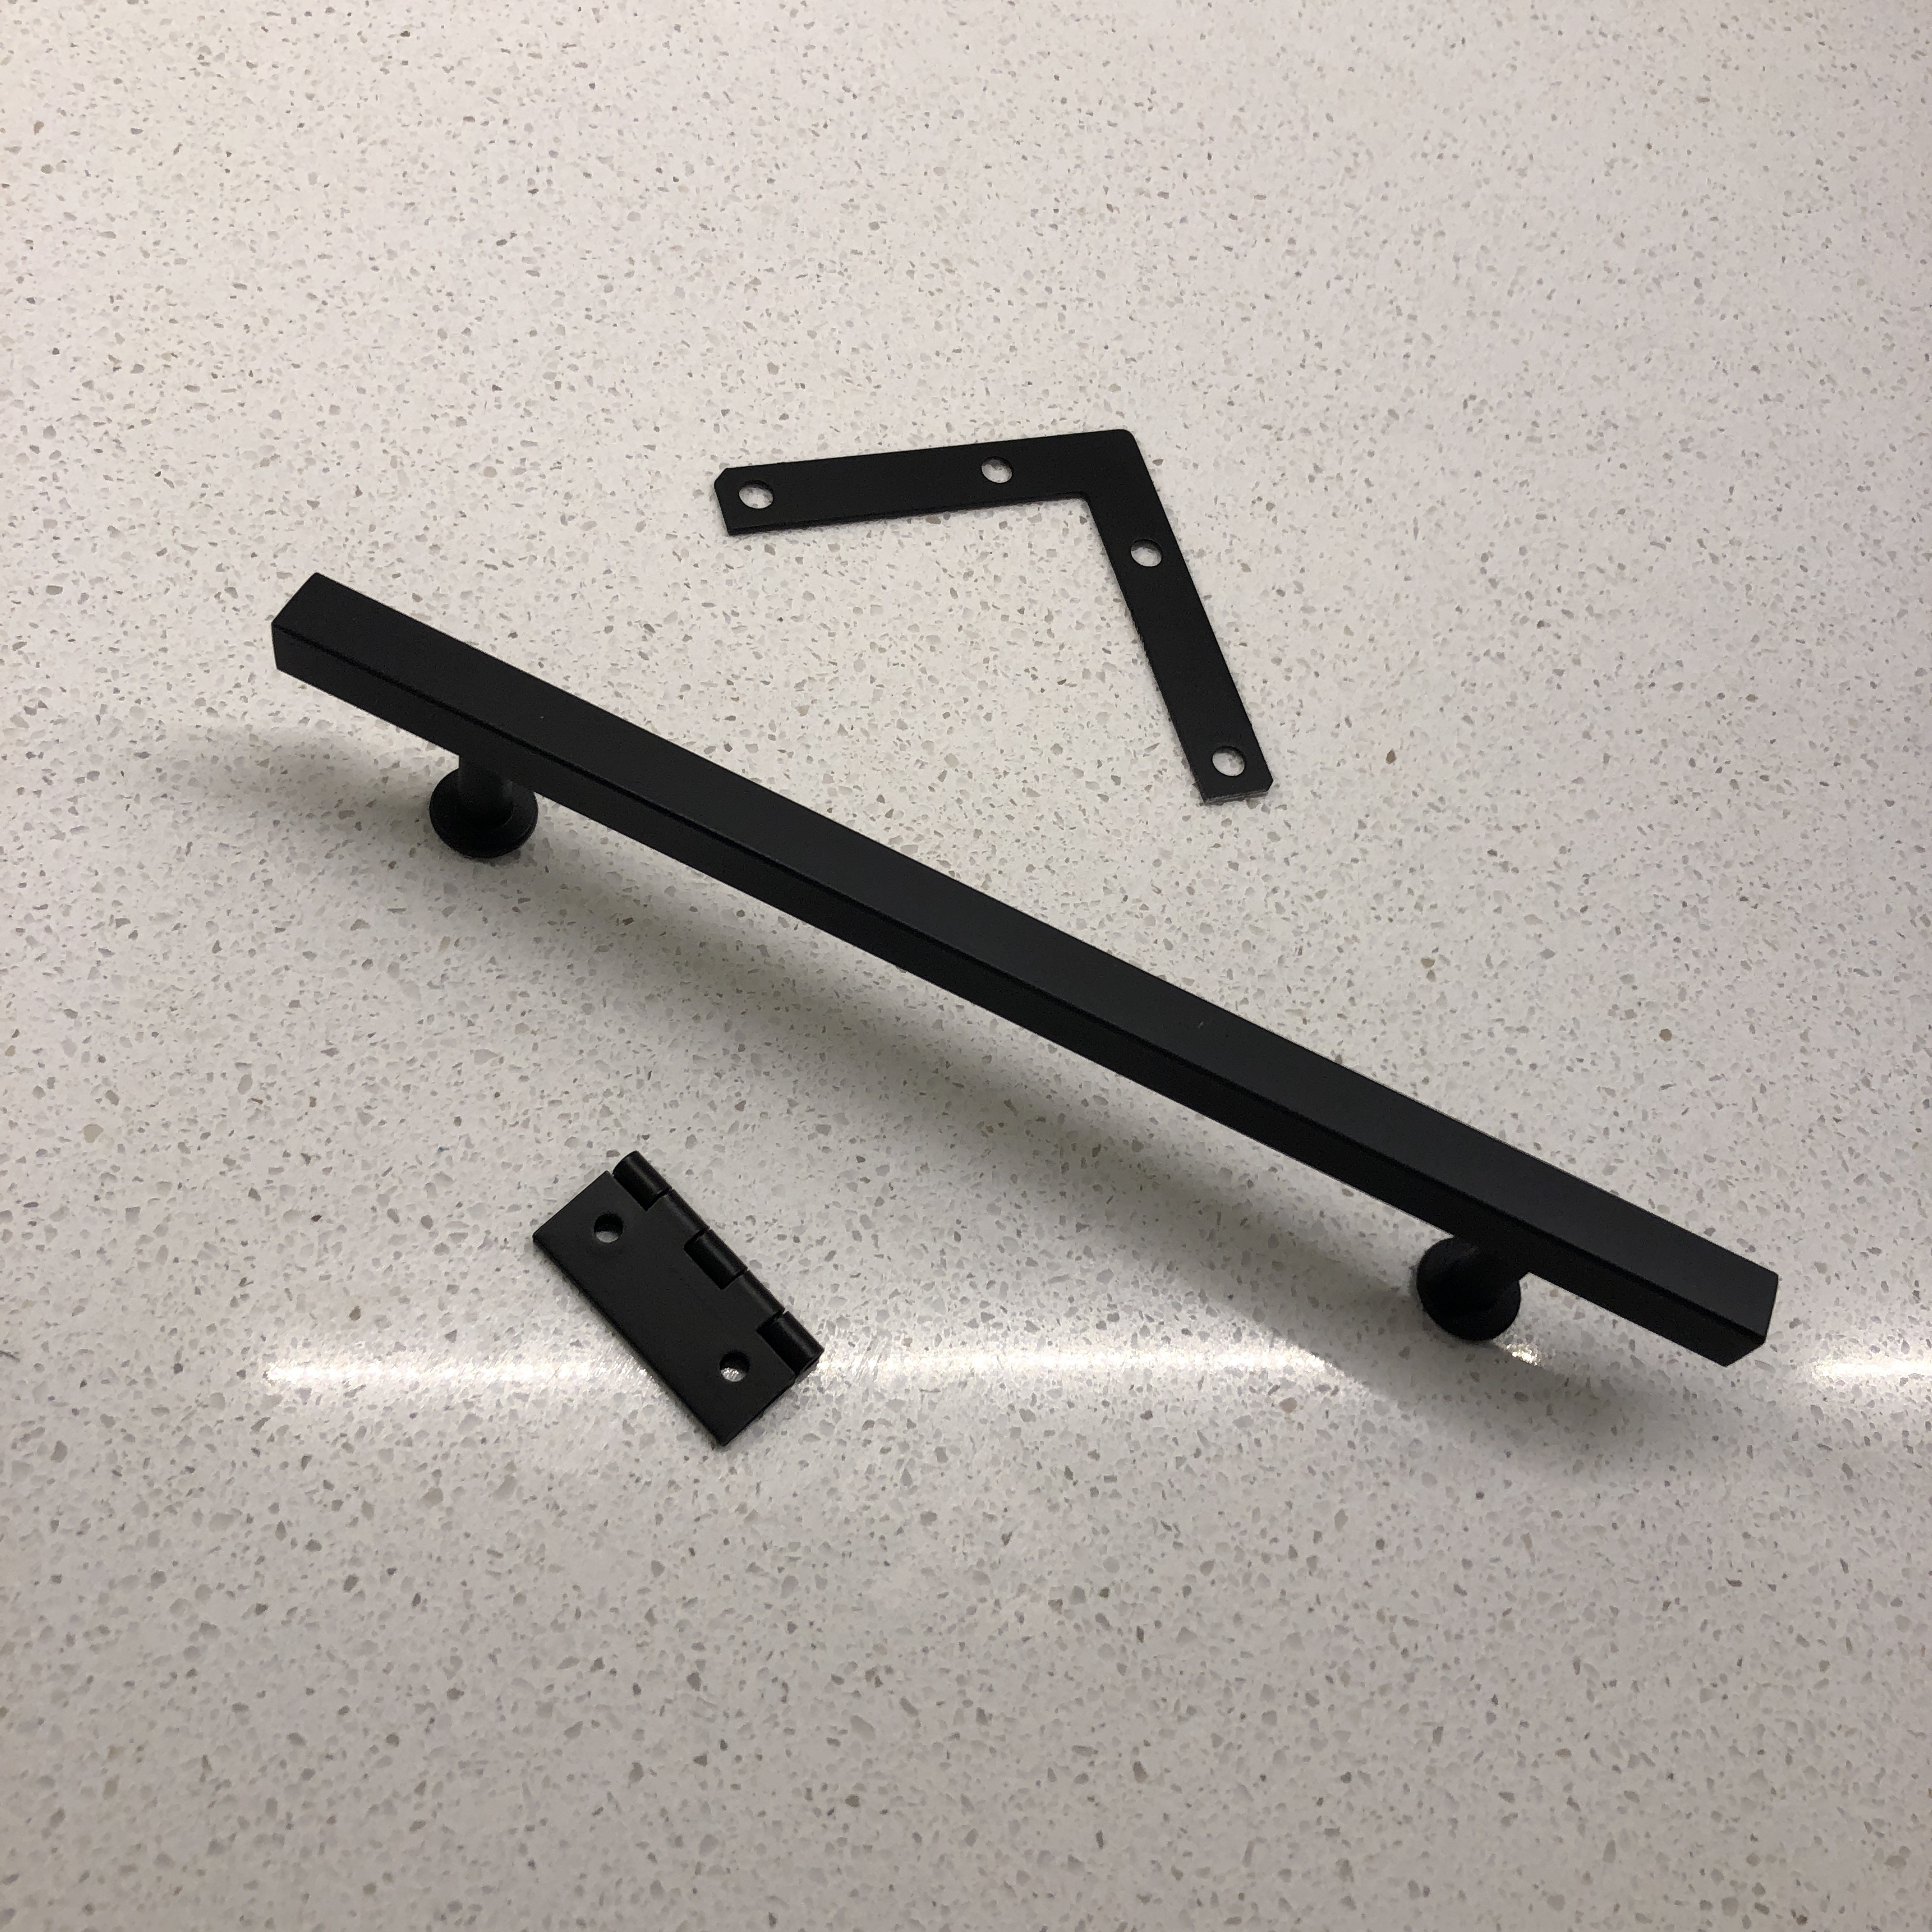
I used small butt hinges from Lowe’s for the doors, but more importantly, I used THIS tutorial for how to install the doors using them. I am SO glad I found this tutorial because it seriously saved me a ton of headache. I attempted to install my own butt hinges on the last 2 sideboards I made, and had to do them completely face out because I could not get them to be concealed while making the door flush.
Below you can see a good progression (from right to left) of how I made the doors. I cut the 1×3’s, drilled pocket holes, routed the edges, assembled frame, attached crosses, stained, added decorative hardware, and attached with hinges.
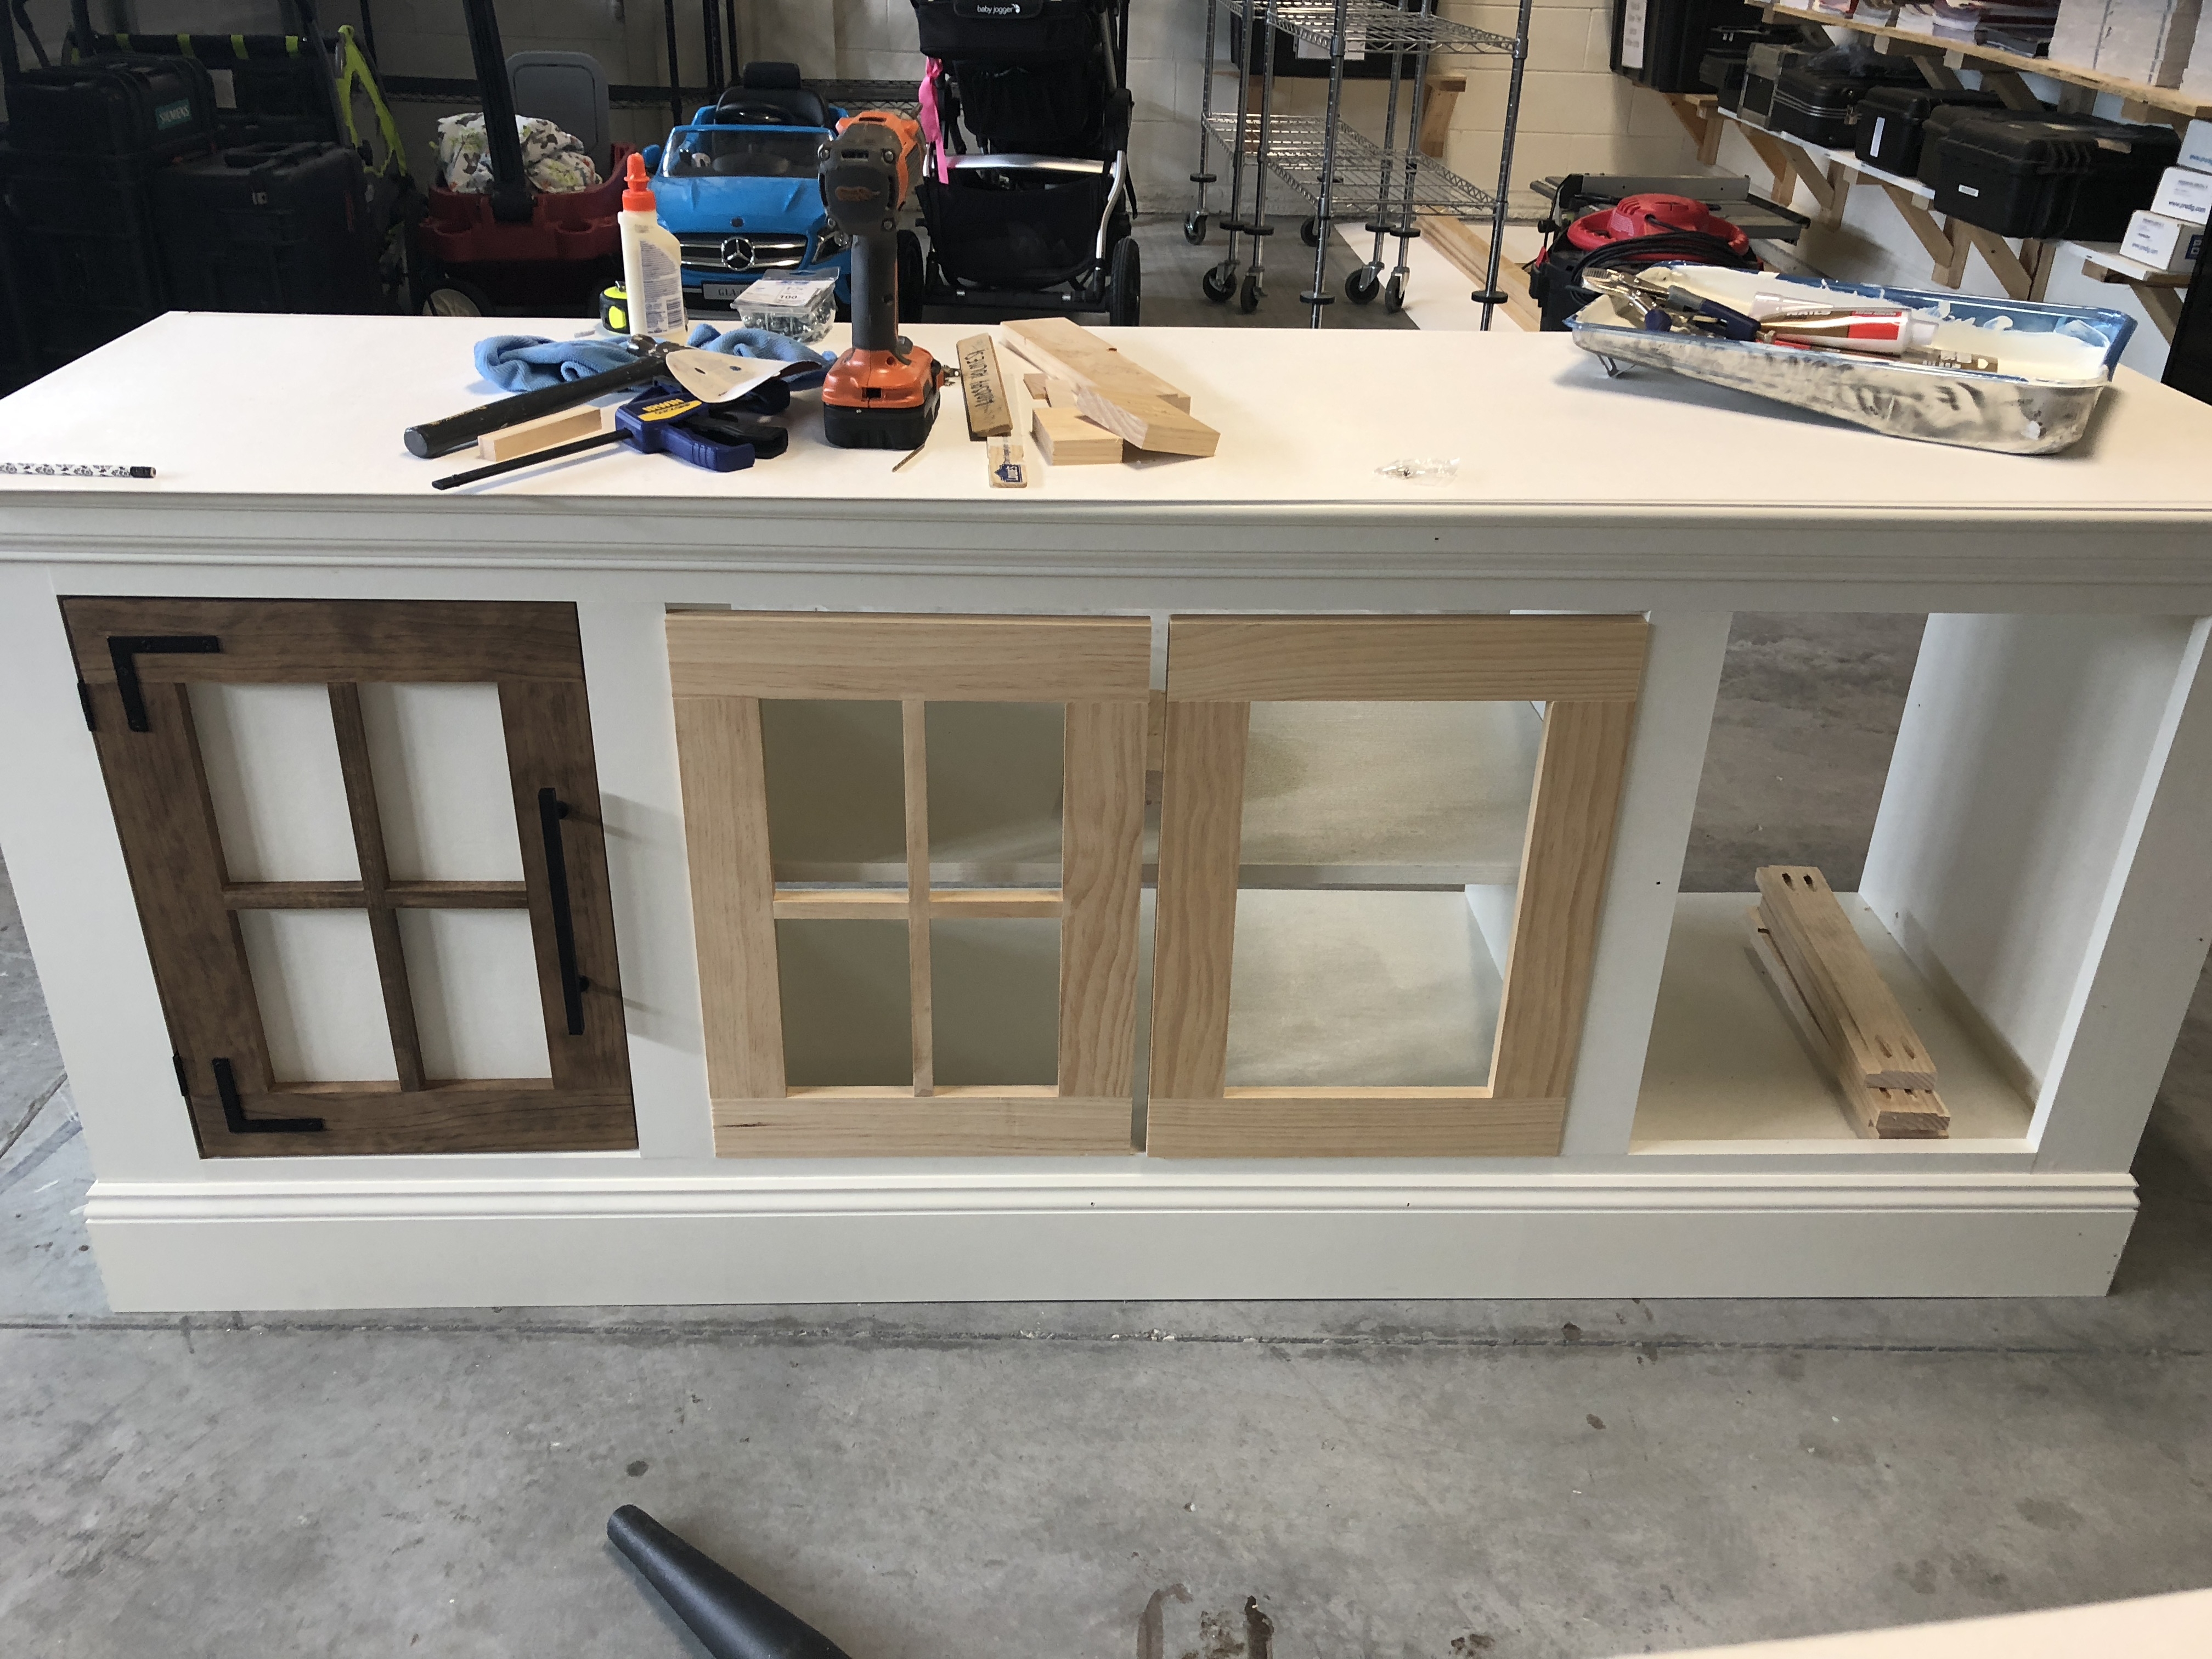
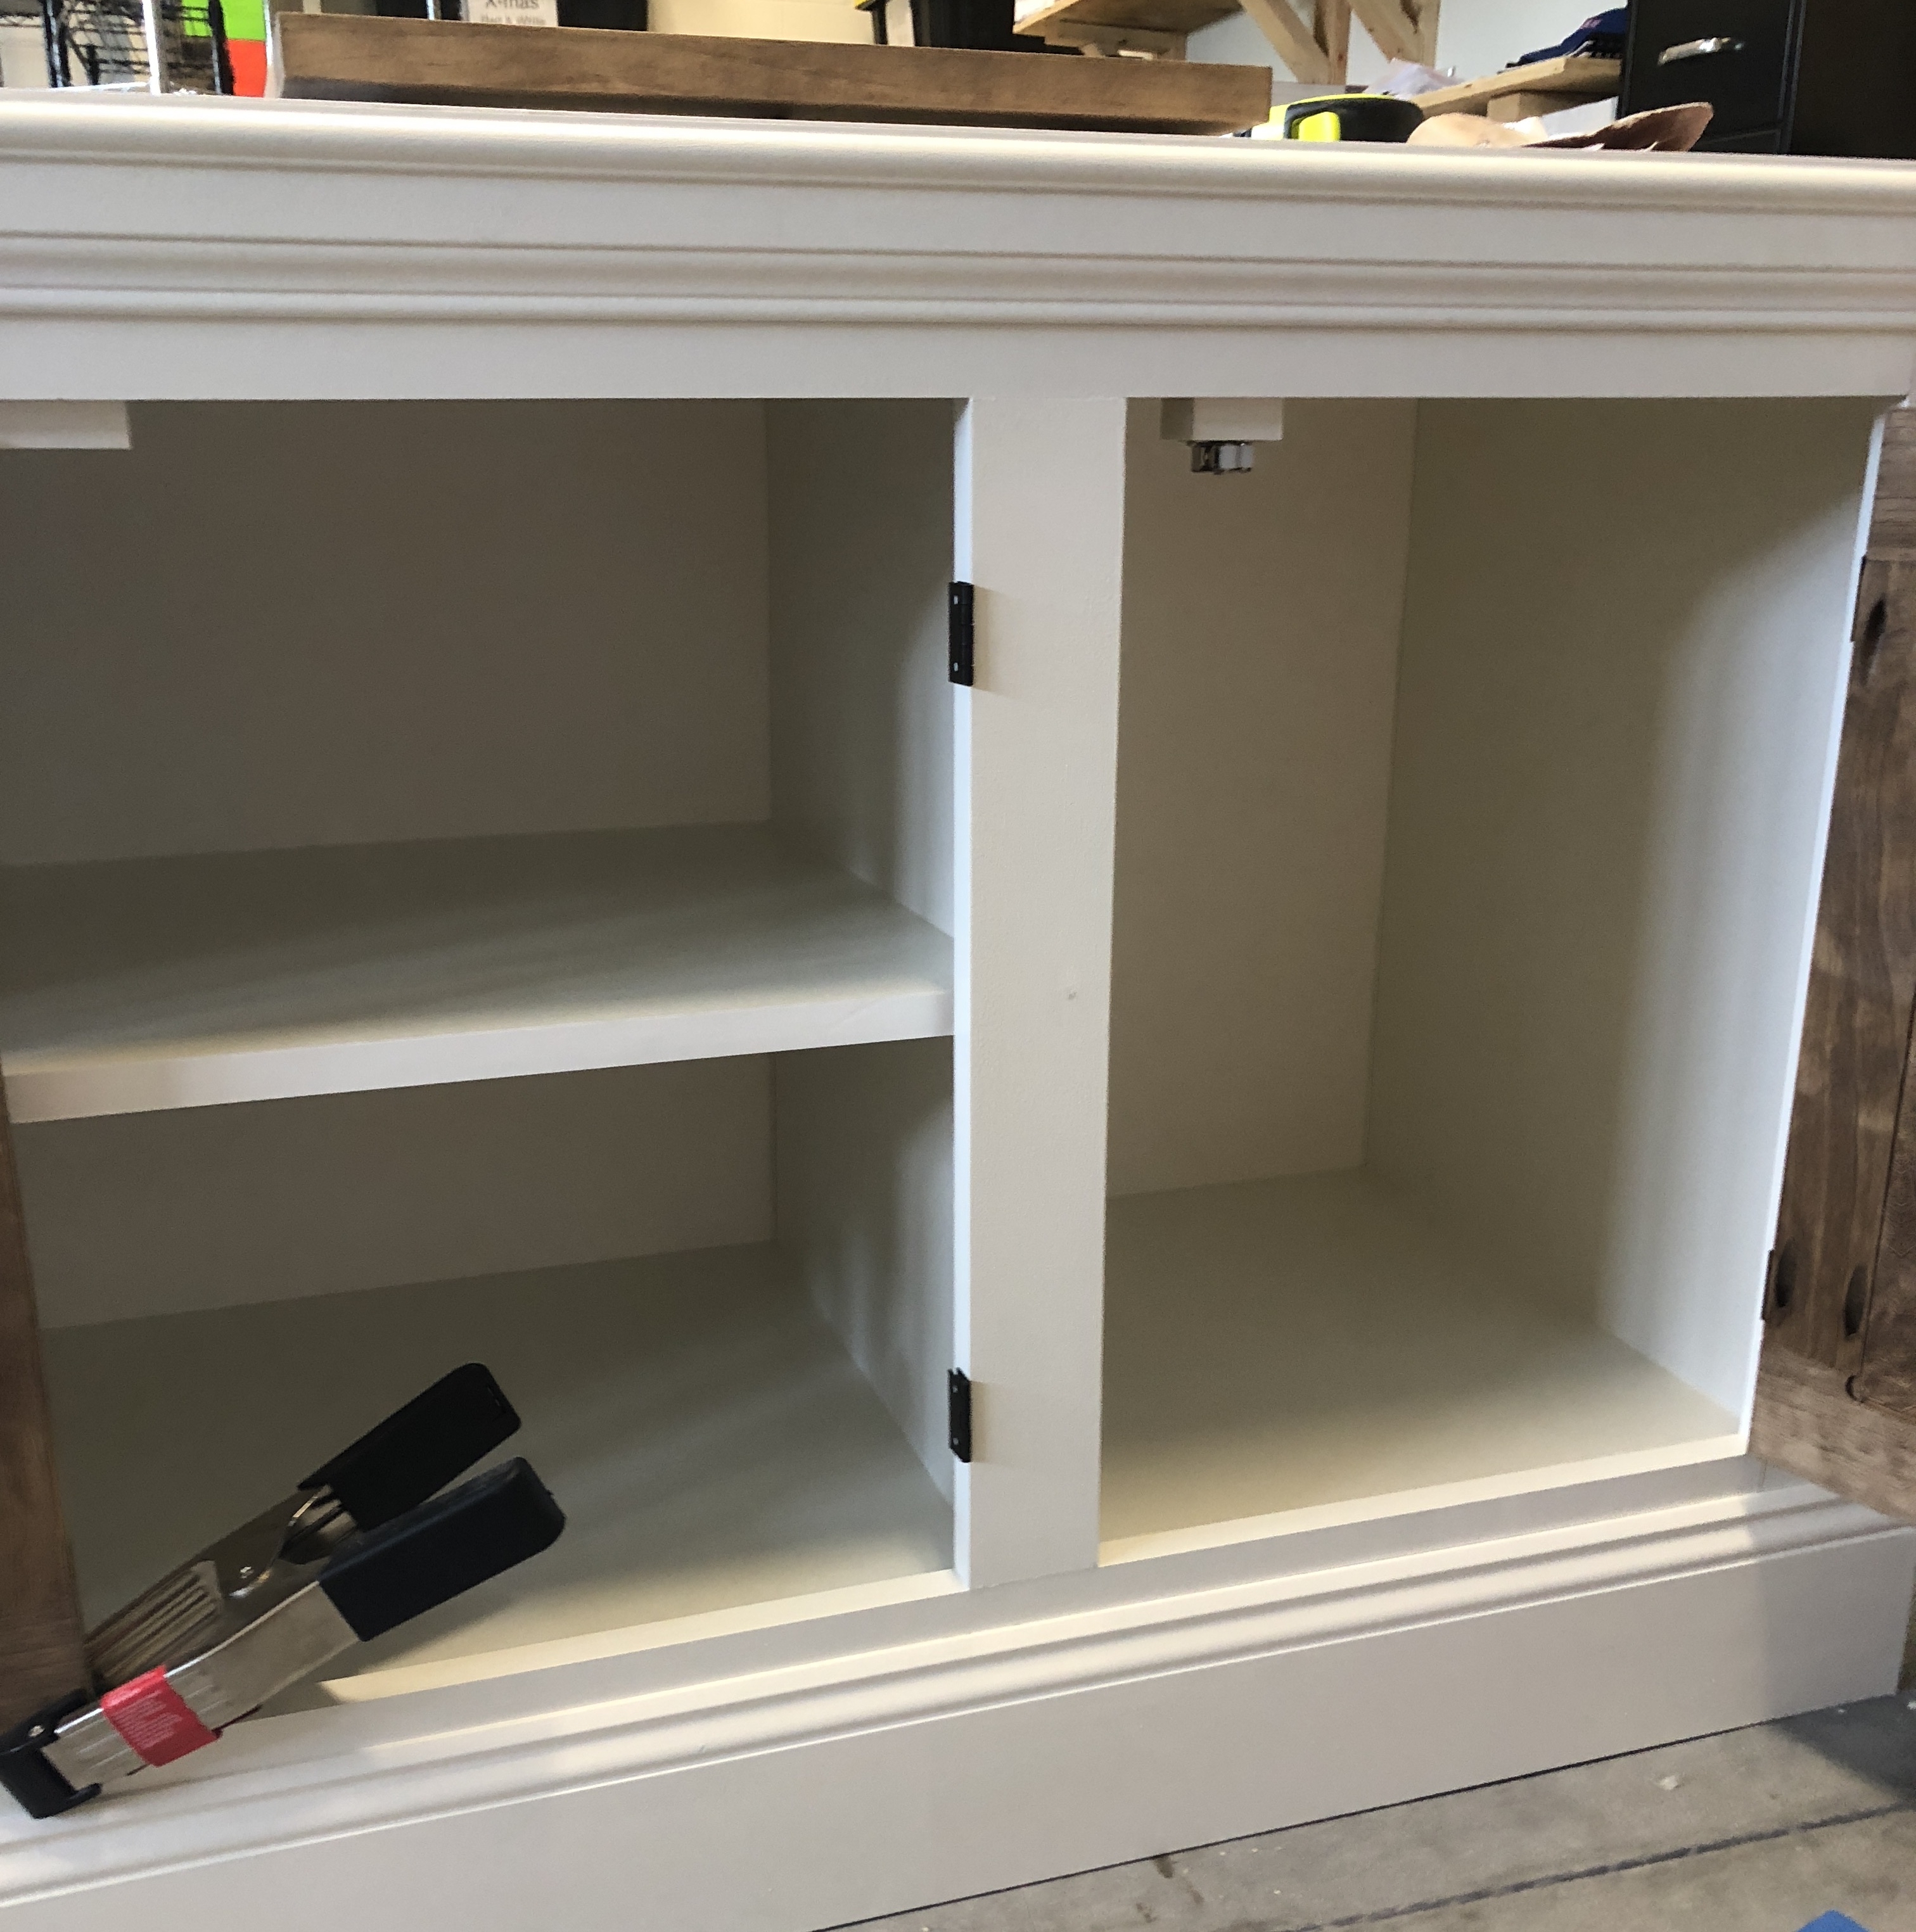
The last part for the doors is to install a closing/locking mechanism. I’m not sure what the “proper” way to do this is, as I kind of made it up on my own. I used these very inexpensive cabinet catches and screwed them into a scrap piece of wood that is attached to the back of the face frame. There’s a better picture below.
And finally, I used a sheet of this white material cut to size with my table saw to attach to the back of the sideboard. I easily cut slits in it for their cords to feed through. Here is the finished media stand!
And here is is all styled in her new home!! Look how perfectly everything fits inside – especially the big speaker on the right which we custom fit!
Comment and let me know your thoughts and questions! I love hearing from you guys! Is this something you would attempt?

![Closet Reno [Part 1]](https://www.frillsanddrills.com/wp-content/uploads/2015/02/closetreno21.jpg)

It is more beautiful than I could ever imagine!!!! Thanks so much! You are so talented!
I’m so glad you love it!! I had so much fun making it!
Wow!! Brian and I are obsessed!!!
Aw thanks guys!!😍
It’s Beautiful !! I want to order one please
Aw thank you! Maybe in the future I will be taking orders 🙂
Gorgeous work !!! Love it 😍😍!!
Thanks so much!!
Wow!! This came out great!
Thanks girl!❤️
Wow!! Looks so amazing girl!
Thanks so much Val!
You are so so so talented…and brave! I won’t even attempt putting nails in the walls to hang something. Love it!
Thanks Nina!!
Aw thank you Nina!! Seriously means a lot to me!
Wow, super impressive!!! Love your stuff!! I have been wanting to get a router, but have never used one. I have lots of questions… is it hard? How did you learn to use it? Any brands you recommend? Any tips? 😊 Thanks in advance!!
Thanks Jessi! Honestly I had never used a router prior to this! It’s my stepdads that I just borrowed. It’s very old. But it’s not hard to use at all. If you’re familiar with power tools at all, it’s simple to learn 🙂
Dope stuff L!
Thanks Seamus!
This is amazing!!
Thanks Cara!
This is amazing! Great job!
Thank you so much Aunt Nancy! Can’t wait to see you soon!!
Beautiful beautiful piece. You rock!!!! What was the total cost in material? A rough estimate?
Thank you Violet! And great question! A rough estimate would be around 400-425$ to build! 🙂
This is AMAZING!! Soooo happy to see a female DIY – truly inspiring!
Thank you so much Lina!
Love this!! I had been looking at the plans for this cabinet and wanted to customize it to fit my space….. you inspired me to go for it.
Thank you for mentioning the top and how you added a piece for a more finished look. I was wondering about that as I read through the plans.
My project will be similar in size to the big one you made. I was wondering how your paint took? By using semi gloss did you get a even finished product? Or does it have a bit of a bumpy texture? Did you water the paint down or use an additive to get it to level out?
Also do you find that Lowes has better quality wood? I have been using HD since it is close but I know this will be a nicer / more expensive piece so I want to get the best wood I can.
Thanks again, I find it so inspiring to see other moms making and building.
Thank you so much for you comment Becky and I’m so sorry I’m just now seeing it and replying! To answer your questions, The finished paint is slightly bumpy, yes. If I had used a sprayer it would eliminate that but I don’t have one. I did not water the paint at all. The bumpy-ness is sooo slight its almost non existent unless you get super close. I don’t think there is a difference in quality at Lowe’s versus HD so use what is closer to you! Good luck!