Dining Room Mirror Wall
I haven’t been this excited about a project in a long, long time y’all. Grab a drink because this post is lengthy, but I promise it’s worth it. You guys know I love feature walls, and this might take the cake for my favorite one ever. I wallpapered the feature wall in our family room at our old house, installed molding all over the place like shiplap in the nursery, panel board in my husbands office and trim to our master bedroom. But this one? It’s my favorite because it combines so many elements in one. It has wallpaper, molding, and even sheets of glass mirror. But maybe the best part is how inexpensive it was to make such a large statement on this 12 foot tall empty wall. I had this project quoted by my builder for $3,750. Almost FOUR THOUSAND dollars. What the what?! My final cost? $374. YUP! I’ll show you how in a minute.
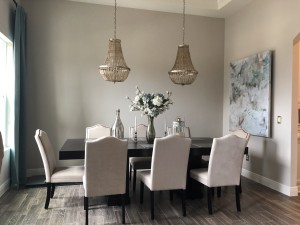
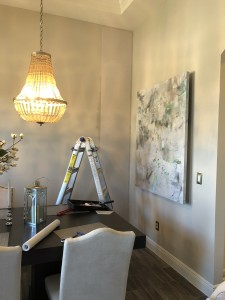
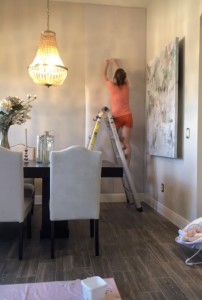
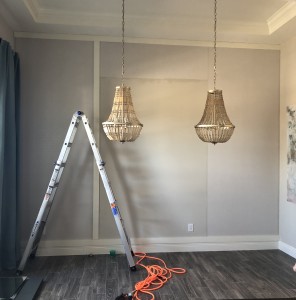
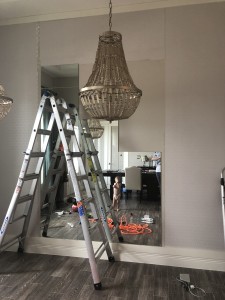
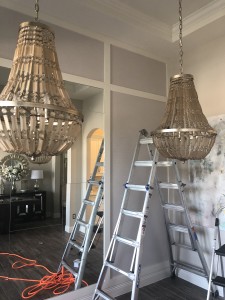
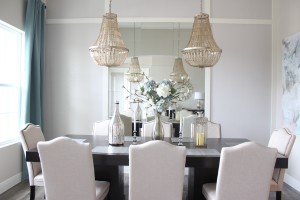
Here is my dining room before. I had the dual chandeliers installed as soon as we moved in, and the artwork and curtains weren’t far behind. You see, I had this entire space planned out long before we moved in to our new home. Building a house for 7 months meant 7 months of dreaming, creating, planning.
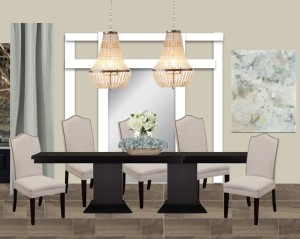
I saw this feature wall done in a model home nearby. So I created the design board above with that feature wall along with my other selections to get an idea of how it would all look together. I couldn’t wait to get started.
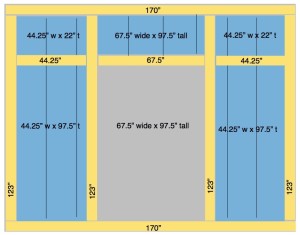
I actually went to the model and measured the wall and figured out dimensions and the amount of material I would need. The 8 foot tall mirror in the center of the wall was one solid glass mirror in the model. So I called a local glass and mirror shop to get a price quote on a mirror this size. $1,800. NOPE. Not happening. So I came up with the idea to use lots of smaller mirrors butted up next to each other to create the same look and design, but for a lot less money. Like this:
The 5 red mirrors are all the same size, then the 2 blue, and 4 green are also the same.
I turned to Facebook marketplace to scout out mirrors. Sure, I could have bought smaller mirrors from the glass shop, but that quote was still around $550. That’s still a big NOPE from my pocketbook. I searched “mirror” in the local for sale pages and turned up quite a few results. When people remodel their bathrooms, they typically ditch the builder grade mirror and go for a more stylish hanging mirror. It’s hard to sell the builder grade mirror for very much money since it’s just a big piece of glass with no frame. I ended up finding 4 quarter inch thick mirrors over the course of about a months time that were large enough to make all 11 of the mirrors I needed. 3 of them were FREE and the largest one cost me $20. TWENTY dollars for ALL of the mirrors you guys.
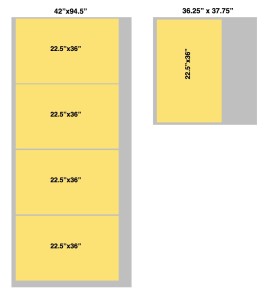
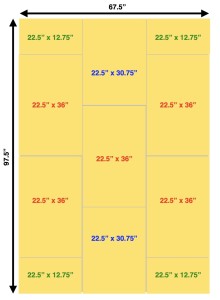
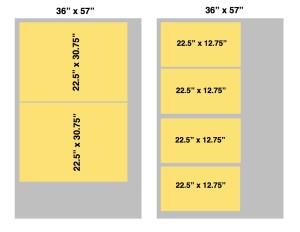
I drew these two diagrams on my computer to give to the glass shop to show them what size mirrors I needed cut and how to get them given the mirrors I had. They were very thankful for these. The gray squares represented the size of the mirror I bought to them and the yellow boxes inside were the mirrors I needed cut from them. $53 is all it cost to get these cut y’all! If you’re keeping track that’s a total of $73 for the mirrors and cuts!
Now that I had my mirrors it was go time. The rest of the materials were quick and easy and are listed below.
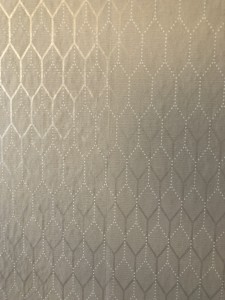
- Wallpaper: $57 (Sherwin Williams Pattern number: TN0055 2 rolls)
- Wallpaper smoothing tool: $1
- Mirrors: $20
- Glass cuts: $53
- Mistake Mirror: $25 (more on this later)
- Moulding: $113 (7 primed 1x4x17’s from a local lumber shop)
- Paint: $20 (Sherwin Williams Dover White)
- Wallpaper paste (3): $17
- Liquid Nails (2): $16
- Caulk: $2
- Double Sided Tape (2): $50
- TOTAL = $374. // Builder Price: $3,750
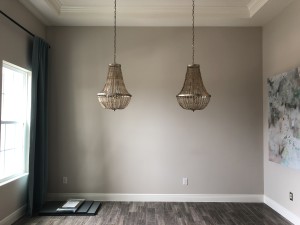
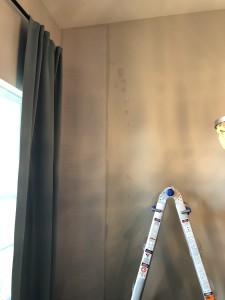
Another shot of the ‘before’ once I moved the furniture out to get started.
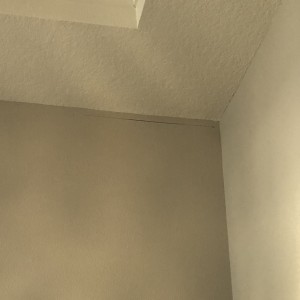
First things first was installing the wallpaper. The best part about this wallpaper job was that the edges didn’t matter because they were all going to be covered by molding later. And the edges are the hardest part! I started in the top right corner of the wall and drew a LEVEL line about an inch below the ceiling as a starting point for the first sheet of wallpaper. I emphasize level because the ceiling isn’t always level and may be a poor guide.
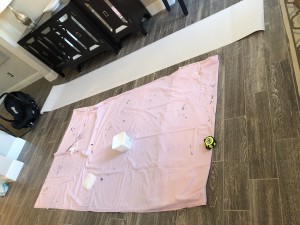
I had an old sheet in the middle of the floor where I laid the wallpaper strips while I rolled the paste on them. I used a small roller brush and applied copious amounts of paste on the back of the entire strip before taking it to the wall to hang and smooth.
I lined up my strip with the line I drew on the wall and then began using my smoothing tool to press and smooth it against the wall working my way down and making sure there are no bubbles or creases.
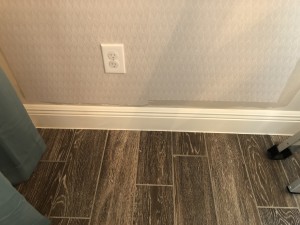
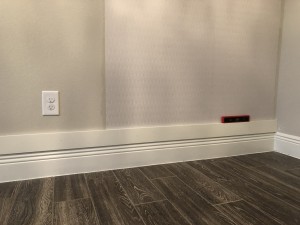
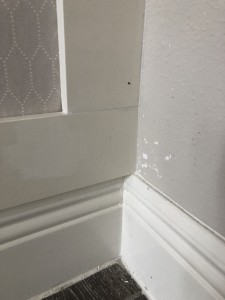
Here’s what I mean about the edges not mattering. My 1×4 trim is 3.5″ wide so I could leave a small gap between the walls/baseboard/ceiling and the wallpaper. I also removed the plastic outlet plate and used a razor knife to cut out the wallpaper around it.
Here I am applying the second strip of wallpaper on the right side and smoothing it out with the smoothing tool. With each subsequent strip, you have to make sure the pattern aligns and get the seem of the two strips as close as possible without overlapping.
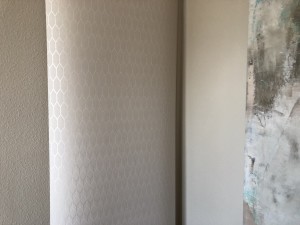
Below is an up close shot of a seem.
After I applied my strips on the right side, I came to the left and did the same.
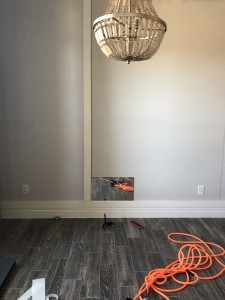
The last section was the top middle section above the mirror. You can see I left gaps here as well since trim would be covering.

Once the wallpaper was done it was time for the molding. My ceilings are 12 feet high and the width of the wall was over 14 feet, so most standard size 8 foot boards would have left seems. I really wanted to avoid seams in the molding and wanted a clean, seamless look. I found a local lumber shop that carried 1x4x17 pre primed boards which worked perfectly for this project. Even though they were pre primed, I gave them one coat of paint before attaching them to the wall. In my opinion, it just makes it much easier than trying to paint them after they’re on the wall. I used Dover White by Sherwin Williams which is the same color as the rest of the trim in our house.

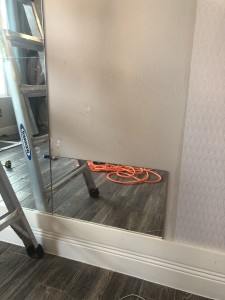
I started out by attaching the board going across the bottom of the entire wall, and making sure it was absolutely as LEVEL as I could make it. Again, just because it’s resting against the baseboards doesn’t mean it will be level. Unfortunately almost nothing in homes are truly level. I found the studs with my stud finder, marked them with pencil and used my nail gun and 2.5″ finish nails to attach the board to the wall. This board is going to be used as the level base for my mirrors, which is why I wanted it attached first.
Next I attached the very top trim board with my nail gun, and the board that runs vertically along the left side of the mirrors. Again, my thought process here was to attach the left side of the mirror trim to use as a guide to fit the mirrors against. This ended up being a poor decision, and I later had to remove it. It worked out better having only the bottom trim on, and then ‘hugging’ the two side trim pieces up against the mirrors AFTER they were secured to the wall. Lesson learned.
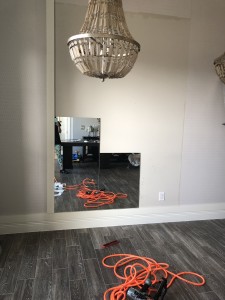
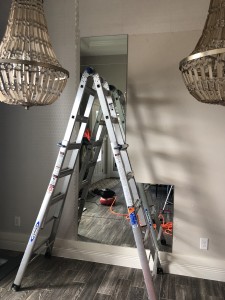
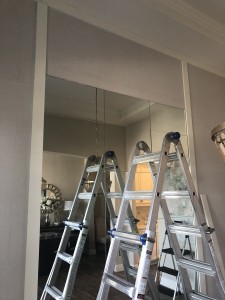
Now for the fun part – hanging the mirrors. With NO hanging or mounting hardware, haha! I started with the bottom left hand corner which happens to be the smallest mirror. There are 3 sizes of mirrors in my design and I wanted to hang a small one first to make sure I felt comfortable with it staying, and then a medium one, and then finally the large ones. I let each one dry and hang overnight before moving to the next size so I could make sure they didn’t come crashing down!

I attached each mirror to the wall the same way. I used this double sided tile mastic tape around the border of the mirror, and lathered the middle with liquid nails. The double sided tape would hold the mirror to the wall while the liquid nails dried, which took roughly 24 hours. The tape is actually a product used to hang tile. It’s the exact stuff I used when I did my backsplash in my old kitchen and I knew it was super thick and strong.
Here are the first 3 mirrors hung, one of each size. The small ones were easy, as I just pressed them in place against the wall. For the medium and large ones, I (usually) had my husband help hold the weight as I guided the edges against the edges of the previous mirrors. This is the tricky part. Glass rubbing against glass is what caused one of my mirrors to chip. And I mean the teeniest, tiniest chip. But it was extremely visible and ruined the mirror. It was one I decided to hang myself and therefore didn’t have help holding the weight which is what caused them to rub together too hard. Again, lesson learned.
While my husband would hold the weight of the mirror, and I had everything lined up, we pressed them against the wall slowly and then applied pressure for just a minute or two. You really only get one go at it. Once they’re stuck, they’re STUCK. You can walk away pretty much immediately. As I continued hanging mirrors up the left side, I realized it was best to remove the vertical molding and rehang it at the end.
On the right column of mirrors was an outlet. I debated for a while whether to go get the mirror cut to put around it, or cover it up. I have FIVE other outlets in my dining room alone, so ultimately I decided to cover it. I spoke with my electrician before doing this to ask him HOW to do it and to make sure it was safe. He explained how to cap the wires off properly and assured me it was safe, as mirror are actually a fire resistant material.
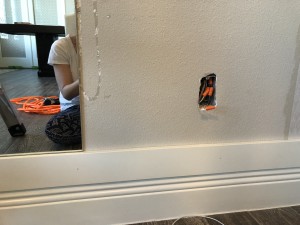
And poof, the outlet was gone.
Worked my way from bottom left to upper right. We didn’t use guides or measurements or any marks on the wall to tell us where to hang them. I literally just used the molding as the bottom guide and just kept stacking them on each other.
After the mirrors were hung I attached both the left and right side trim pieces. They fit much better up against the mirrors this way.
Then I hung the final 3 pieces of trim going along the top horizon of the mirrors.
I caulked around the outside edges (meaning up against the ceiling and against the 2 adjacent walls), and all the seams where the wood trim met another piece. Otherwise, I did NOT caulk where the trim met the wallpaper. I filled the nail holes with caulk and then used a roller to touch up all the trim. I also had to go back and touch up some of the wall paint where the wood trim scratched it as it was being installed. (Caulk I used linked here.)
Once the touch ups were done, it was complete! And I danced a happy dance!

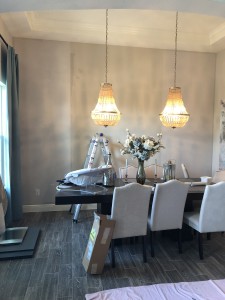
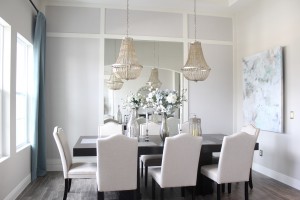
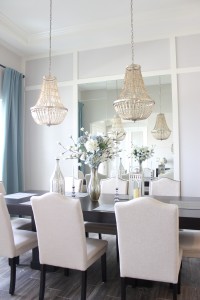
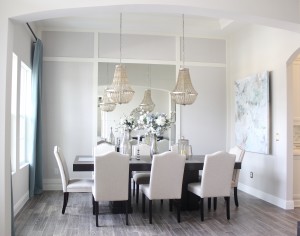
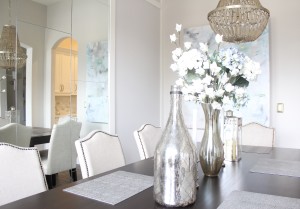
And for those of you that scrolled through all that mess just to see the finished, pretty pictures, here they are! 🙂
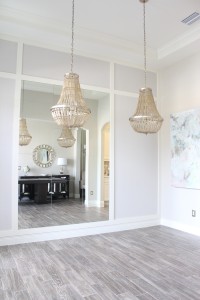
I am so completely in love with every square inch!
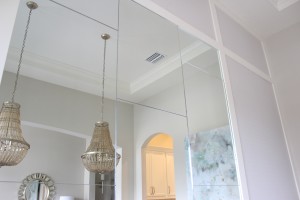


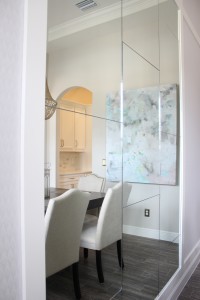
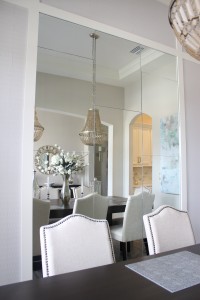
One of my favorite views since you can really see the detail of the mirror lines.
Reminder of the BEFORE:
And AFTER:
Comment and let me know your thoughts, I love hearing from you guys!
![Closet Reno [Part 2]](https://www.frillsanddrills.com/wp-content/uploads/2015/03/closet2.15.jpg)
Love it so much!! Can’t believe you did all of that for less than $375! So cool girl!
Absolutely beautiful!!! You are amazingly talented!!! I can’t wait to see all your transformations that make your home uniquely personal.
I love it! Looks really good and you saved thousands.
Another fantastic accomplishment!!! It certainly brightens and enlarges the look of the room? 💕
Oh my gosh!! Once again, you have nailed it! Well done! It’s beautiful!!
This is AMAZINGLY BEAUTIFUL!!!!!!!!!! WOW!!!!!!!
Wow!!!!! It looks amazing!!! I so wish I had the confidence to do the work myself. Love love it!!!
Beautiful! Very elegant
This looks amazing! When I saw your post on Instagram about it, I had some doubts, but WOW! The final result is beautiful!
This is so beautiful!! You are AMAZING and so inspiring!
Looks fantastic Lindsay! You never cease to amaze!
Wow that is gorgeous. & it makes the room so much brighter. I love it.
Ahhh! Gorgeous! Seriously you’ve got two littles running around yet you manage to conquer the coolest projects! #supermom